Vue插槽的使用解析
1. 什么是插槽
官方文档解释: 一套内容分发的 API,将slot元素作为承载内容分发出口; 换个易懂得说法就是,在父组件中为子组件添加内容需要使用slot既插槽来实现,否则添加的内容将无效,也就是我们需要使用插槽在子组件中先进行一个占位,然后在父组件中写入内容。插槽有三种:匿名插槽,具名插槽,作用域插槽(可数据通信)。
1.以下代码是在父组件中直接为子组件添加内容无效
子组件
<template>
	<div class="container">
		<h4>我是子组件标题</h4>
		<div class="content" style="backgroundColor: #ffeac5;font-size: 20px;">
			我是子组件
		</div>
	</div>
</template>
父组件
<template>
  <div class="home">
     <h2>我是父组件标题</h2>
	 <Child>
		 <div style="color: red;">
			我是在父组件中给子组件添加的内容
		 </div>
	 </Child>
  </div>
</template>
<script>
import Child from '@/components/child.vue'
export default {
  name: 'Home',
  components: {
    Child
  },
  data() {
      return {
      }
  },
  created() {
  }
}
</script>
2.为什么要使用插槽
组件的作用是为了复用,有了插槽就是让组件能有更好的复用,比如现在有n个页面,这些页面大部分内容都是一样的,只有个别地方不一样(这里的不一样不单单指数据还有dom结构),这时插槽就起到了作用,我们提取这n个页面相同的地方写入组件,不同的地方使用插槽进行占位,然后在具体页面写入该页面独有的内容,这样就很好地实现了组件复用。
3. 匿名插槽
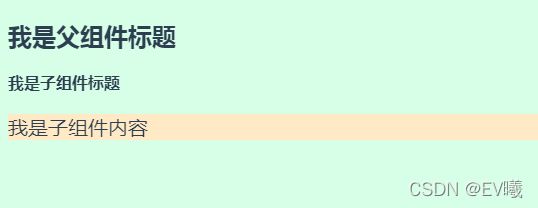
在子组件中使用slot标签进行占位,这就是匿名插槽,这时在父组件中给子组件写入的内容就会显示出来。
子组件
<template>
	<div class="container">
		<h4>我是子组件标题</h4>
		/*使用匿名插槽 */
		<slot></slot>
		<div class="content" style="backgroundColor: #ffeac5;font-size: 20px;">
			我是子组件内容
		</div>
	</div>
</template>
父组件
<template>
  <div class="home">
     <h2>我是父组件标题</h2>
	 <Child>
		 <div style="color: red;">
			我是在父组件中给子组件添加的内容
		 </div>
	 </Child>
  </div>
</template>
<script>
import Child from '@/components/child.vue'
export default {
  name: 'Home',
  components: {
    Child
  },
  data() {
      return {
      }
  },
  created() {
  }
}
4.具名插槽
有时我们需要使用多个插槽在子组件的不同地方进行占位,这时就需要给插槽取名字,slot插槽标签有name属性,就是用来给插槽取名,然后在父组件写入子组件的模板中用v-slot进行绑定插槽名称(v-slot指令需使用在 template 标签中),这样父组件写入子组件的内容就会被传入相应的插槽中。拥有名字的插槽就是具名插槽。
注意: 1. 父组件写入子组件任何没有被包裹在带有 v-slot 的 模板 中的内容都会被视为匿名插槽的内容。(如果子组件没有匿名插槽这些内容将会被舍弃不会显示) ;2. template 中使用 v-slot:default 表示匿名插槽中的内容,因为不带 name 的 slot标签 出口会带有隐含的名字“default”。
子组件
<template>
	<div class="container">
		<h4>我是子组件标题</h4>
		/*使用具名插槽 */
		<slot name="header"></slot>
		<div class="content" style="backgroundColor: #ffeac5;font-size: 20px;">
			我是子组件内容
		</div>
		/*使用具名插槽 */
		<slot name="footer"></slot>
	</div>
</template>
父组件
<template>
  <div class="home">
     <h2>我是父组件标题</h2>
	 <Child>
	 	/* 没有匿名插槽时以下div中的内容将被舍弃*/
		 <div style="color: red;">
			我是在父组件中给子组件添加的内容
		 </div>
		<template v-slot:header>
			<p>具名插槽header中的内容</p>
		</template>
		<template v-slot:footer>
			<p>具名插槽footer中的内容</p>
		</template>
	 </Child>
  </div>
</template>

<script>
import Child from '@/components/child.vue'

export default {
  name: 'Home',
  components: {
    Child
  },
  data() {
      return {
      }
  },
  created() {
  }
}
</script>
5.作用域插槽
在父组件中写入子组件的内容能够访问子组件中才有的数据,这就是作用域插槽
以下代码是在父组件写入子组件的内容中直接访问子组件的数据,将无效。原因:写入的模板内容是在父组件中渲染的,因此无法访问到子组件中的数据
子组件
<template>
	<div class="container">
		<h4>我是子组件标题</h4>
		<div class="content" style="backgroundColor: #ffeac5;font-size: 20px;">
			用户信息
		</div>
		<slot name="userInfo"></slot>
	</div>
</template>
<script>
export default {
  name: 'Child',
  data() {
      return {
  		person:{
			name:"张三",
			gender:"男",
			age:18,
			hieght:1.78,
			hobby:"唱歌,看电影"
		}
      }
  },
  created() {
  }
}
</script>
父组件
<template>
  <div class="home">
     <h2>我是父组件标题</h2>
	 <Child>
		<template v-slot:userInfo>
			<p>姓名:{{person.name}}</p>
			<p>性别:{{person.gender}}</p>
			<p>年龄:{{person.age}}</p>
			<p>爱好:{{person.hobby}}</p>
		</template>
	 </Child>
  </div>
</template>
<script>
import Child from '@/components/child.vue'
export default {
  name: 'Home',
  components: {
    Child
  },
  data() {
      return {
      }
  },
  created() {
  }
}
</script>
无法访问子组件数据效果图

为了让 子组件的数据在父组件的写入的内容中可用,我们可以将数据作为 slot标签的一个 属性 绑定上去,
语法:
<slot name="userInfo" :定义数据绑定名="数据真实名"></slot>
/*例子:*/
<slot name="userInfo" :user="person"></slot>
绑定在 slot标签上的 属性被称为插槽 prop。在父组件中,我们可以使用带值的 v-slot 来定义我们提供的插槽 prop 的名字
语法:
<template v-slot:插槽名="定义prop 名">
	<p>{{定义的prop 名.数据绑定名.数据}}</p>
</template>
/*例子:*/
<Child>
	<template v-slot:userInfo="info">
		<p>姓名:{{info.user.name}}</p>
		<p>性别:{{info.user.gender}}</p>
		<p>年龄:{{info.user.age}}</p>
		<p>爱好:{{info.user.hobby}}</p>
	</template>
 </Child>
子组件
<template>
	<div class="container">
		<h4>我是子组件标题</h4>
		<div class="content" style="backgroundColor: #ffeac5;font-size: 20px;">
			用户信息
		</div>
		<slot name="userInfo" :user="person"></slot>
	</div>
</template>

<script>
export default {
  name: 'Child',
  data() {
      return {
  		person:{
			name:"张三",
			gender:"男",
			age:18,
			hieght:1.78,
			hobby:"唱歌,看电影"
		}
      }
  },
  created() {
  }
}
</script>
父组件
<template>
  <div class="home">
     <h2>我是父组件标题</h2>
	 <Child>
		<template v-slot:userInfo="info">
			<p>姓名:{{info.user.name}}</p>
			<p>性别:{{info.user.gender}}</p>
			<p>年龄:{{info.user.age}}</p>
			<p>爱好:{{info.user.hobby}}</p>
		</template>
	 </Child>
  </div>
</template>

<script>
import Child from '@/components/child.vue'

export default {
  name: 'Home',
  components: {
    Child
  },
  data() {
      return {
      }
  },
  created() {
  }
}
</script>
6.具名插槽的缩写与解构插槽prop
1.具名插槽可以简写v-slot,既 v-slot: 简写为 #
<Child>
	<template #userInfo>
		<p>具名插槽userInfo</p>
	</template>
</Child>
2.插槽prop可以进行解构
<slot name="userInfo" :user="person" :msg="message"></slot>
<Child>
	<template v-slot:userInfo="{ user ,msg}">
		<p>姓名:{{user.name}}</p>
		<p>性别:{{user.gender}}</p>
		<p>年龄:{{user.age}}</p>
		<p>爱好:{{user.hobby}}</p>
		<p>{{msg}}</p>
	</template>
 </Child>
解构也支持重命名
<Child>
	<template v-slot:userInfo="{ user:user1 ,msg:msg1}">
		<p>姓名:{{user1.name}}</p>
		<p>性别:{{user1.gender}}</p>
		<p>年龄:{{user1.age}}</p>
		<p>爱好:{{user1.hobby}}</p>
		<p>{{msg1}}</p>
	</template>
</Child>
可以定义默认内容,用于插槽 prop 是 undefined 的情形
<Child>
/*otherInfo是一个未定义的prop ,即会使用默认内容*/
<template v-slot:userInfo="{ user,otherInfo={address:'北京市朝阳区'} ,msg:msg1}">
	<p>姓名:{{user.name}}</p>
	<p>性别:{{user.gender}}</p>
	<p>年龄:{{user.age}}</p>
	<p>爱好:{{user.hobby}}</p>
	<p>家庭住址:{{otherInfo.address}}</p>
	<p>{{msg1}}</p>
</template>
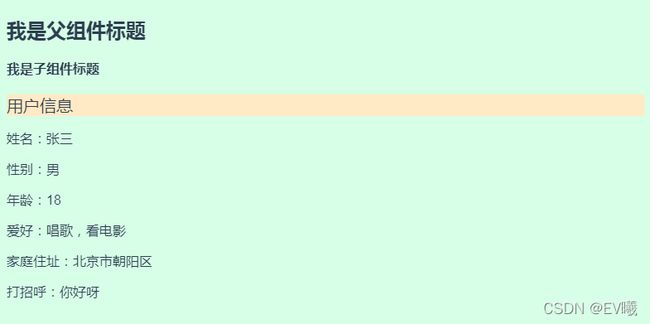
插槽缩写与prop解构代码完整事例
<template>
	<div class="container">
		<h4>我是子组件标题</h4>
		<div class="content" style="backgroundColor: #ffeac5;font-size: 20px;">
			用户信息
		</div>
		<slot name="userInfo" :user="person" :msg="message"></slot>
	</div>
</template>
<script>
export default {
  name: 'Child',
  data() {
      return {
  		person:{
			name:"张三",
			gender:"男",
			age:18,
			hieght:1.78,
			hobby:"唱歌,看电影",
		},
		message:"你好呀"
      }
  },
}
</script>
<template>
  <div class="home">
     <h2>我是父组件标题</h2>
	 <Child>
		<template #userInfo="{ user,otherInfo={address:'北京市朝阳区'} ,msg:msg1}">
			<p>姓名:{{user.name}}</p>
			<p>性别:{{user.gender}}</p>
			<p>年龄:{{user.age}}</p>
			<p>爱好:{{user.hobby}}</p>
			<p>家庭住址:{{otherInfo.address}}</p>
			<p>打招呼:{{msg1}}</p>
		</template>
	 </Child>
  </div>
</template>
<script>
import Child from '@/components/child.vue'
export default {
  name: 'Home',
  components: {
    Child
  },
  data() {
      return {
      }
  },
  created() {
  }
}
</script>


