SpringBoot集成Swagger生成动态接口文档Api
1.Swagger 介绍
不管是开发还是测试或者其他人,相信都曾饱受过接口文档的折磨:往往我们的接口都是会根据需求或实际情况及时变动的,甚至过了很久,需要对某个接口进行调整,但是却无人对接口文档进行维护,这样的后果对于我们真正是苦不堪言啊,这便诞生了Swagger。
我们只需要按照Swagger的规范去定义接口及接口相关的信息,就可以生成接口文档。如果需要调整接口,只需要更新Swagger相关信息,就可以自动生成接口文档,做到代码与接口文档同步更新。
2.spring boot 集成swagger
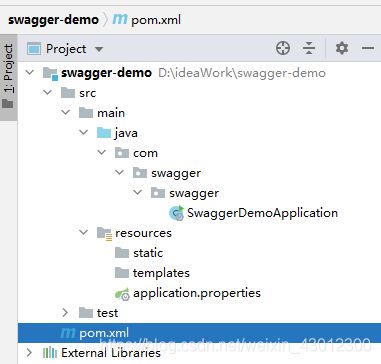
2.1创建一个springboot web项目
2.2导入swagger相关依赖
项目中使用swagger需要引入springfox的两个jar包:swagger2 和swaggerUI
<!-- https://mvnrepository.com/artifact/io.springfox/springfox-swagger2 -->
<dependency>
    <groupId>io.springfox</groupId>
    <artifactId>springfox-swagger2</artifactId>
    <version>2.9.2</version>
</dependency>
<!-- https://mvnrepository.com/artifact/io.springfox/springfox-swagger-ui -->
<dependency>
    <groupId>io.springfox</groupId>
    <artifactId>springfox-swagger-ui</artifactId>
    <version>2.9.2</version>
</dependency>
2.3编写Swagger配置类
package com.swagger.config;

import org.springframework.context.annotation.Configuration;
import springfox.documentation.swagger2.annotations.EnableSwagger2;

@Configuration   //该注解将SwaggerConfig类标注成为spring配置文件
@EnableSwagger2  //该注解表示启动swagger
public class SwaggerConfig {

    //没有任何配置信息表示使用swagger默认配置
}
2.4启动空项目测试swagger
spring boot集成swagger后,启动我们的空项目访问swagger UI页面,由于我们没有进行任何的配置,所以端口为8080。
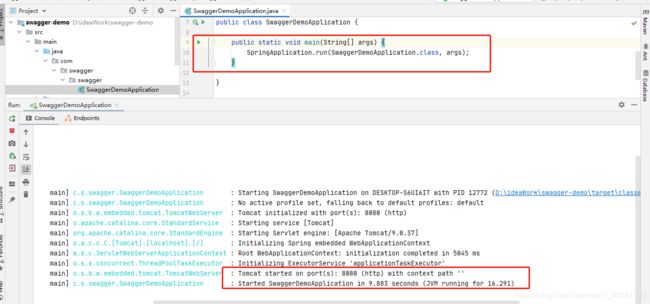
http://127.0.0.1:8080/swagger-ui.html
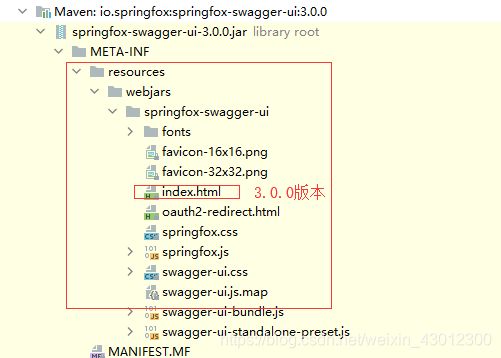
http://127.0.0.1:8080/swagger-ui.html 访问路径是直接请求这个html页面,但是swagger3.0.0由于这个html文件位置发生变动,所有这个请求路径有变化,需要注意!!!
3.Swagger配置类详解
我们需要通过Docket bean对象来自定义swagger配置类,包括swagger页面关于接口信息的描述以及扫描生成哪些接口。
3.1定义Swagger界面基本信息
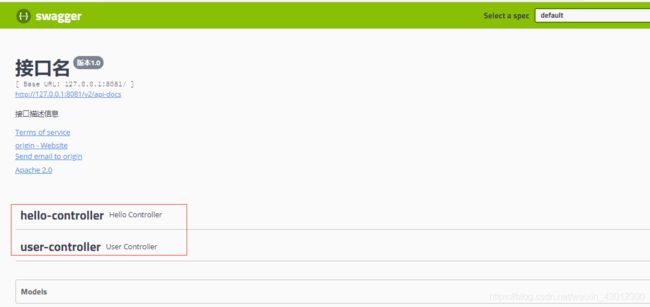
通过 Docket的apiInfo() 方法实现定义swagger界面关于接口的描述:
package com.swagger.config;

import org.springframework.context.annotation.Bean;
import org.springframework.context.annotation.Configuration;
import springfox.documentation.service.ApiInfo;
import springfox.documentation.service.Contact;
import springfox.documentation.spi.DocumentationType;
import springfox.documentation.spring.web.plugins.Docket;
import springfox.documentation.swagger2.annotations.EnableSwagger2;

import java.util.ArrayList;

@Configuration   //该注解将SwaggerConfig类标注成为spring配置文件
@EnableSwagger2  //该注解表示启动swagger2
public class SwaggerConfig {

    //没有任何配置信息表示使用swagger默认配置
    //通过docket 对象来自定义swagger配置
    @Bean
    public Docket docker(){
        return new Docket(DocumentationType.SWAGGER_2)
                .apiInfo(getApiInfo());
    }

    private ApiInfo getApiInfo(){

        //接口作者信息
        Contact contact = new Contact("origin", "https://blog.csdn.net/weixin_43012300", "[email protected]");

        return new ApiInfo(
                "接口名",
                "接口描述信息",
                "版本1.0",
                "https://blog.csdn.net/weixin_43012300",
                 contact,
                "Apache 2.0", "http://www.apache.org/licenses/LICENSE-2.0",
                 new ArrayList());
    }
}
3.2Swagger配置扫描指定接口
通过Docket的select() 方法实现指定Swagger扫描接口:
通过docket的apis() 方法实现扫描生成哪些接口文档;
通过docket的paths() 方法实现扫描不生成哪些接口文档;
package com.swagger.config;

import org.springframework.context.annotation.Bean;
import org.springframework.context.annotation.Configuration;
import org.springframework.core.env.Environment;
import springfox.documentation.builders.PathSelectors;
import springfox.documentation.builders.RequestHandlerSelectors;
import springfox.documentation.service.ApiInfo;
import springfox.documentation.service.Contact;
import springfox.documentation.spi.DocumentationType;
import springfox.documentation.spring.web.plugins.Docket;
import springfox.documentation.swagger2.annotations.EnableSwagger2;

import java.util.ArrayList;

@Configuration   //该注解将SwaggerConfig类标注成为spring配置文件
@EnableSwagger2  //该注解表示启动swagger2
public class SwaggerConfig {

    //没有任何配置信息表示使用swagger默认配置
    //通过docket 对象来自定义swagger配置
    @Bean
    public Docket docker(Environment environment){

        return new Docket(DocumentationType.SWAGGER_2)
                .apiInfo(getApiInfo())
                .select()
                /*
                 * RequestHandlerSelectors.basePackage("com.swagger.controller"):扫描指定路径下的包
                 */
                .apis(RequestHandlerSelectors.basePackage("com.swagger.controller"))
                /**
                 * PathSelectors 过滤路径,与 apis 作用相反:屏蔽 HelloController
                 */
                .paths(PathSelectors.ant("/hello"))
                .build();
    }

    private ApiInfo getApiInfo(){

        //接口作者信息
        Contact contact = new Contact("origin", "https://blog.csdn.net/weixin_43012300", "[email protected]");

        return new ApiInfo(
                "接口名",
                "接口描述信息",
                "版本1.0",
                "https://blog.csdn.net/weixin_43012300",
                 contact,
                "Apache 2.0", "http://www.apache.org/licenses/LICENSE-2.0",
                 new ArrayList());
    }
}
3.3Swagger专属注解
a.model注解
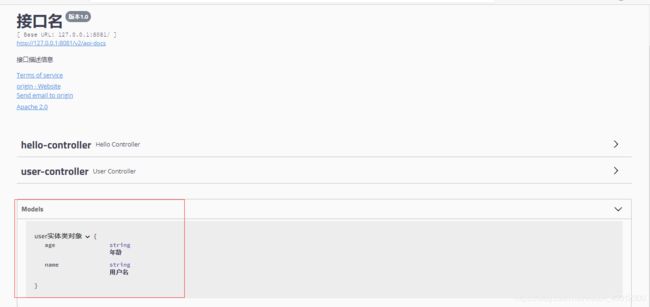
model是接口需要的自定义对象,比如我们demo中的user对象
@ApiModel("user实体类对象") //为对象添加描述
@ApiModelProperty("用户名") //为属性添加描述
package com.swagger.pojo;

import io.swagger.annotations.ApiModel;
import io.swagger.annotations.ApiModelProperty;

/**
 * 实体类对象通过mode注解生成注释描述信息
 */

@ApiModel("user实体类对象")
public class User {

    @ApiModelProperty("用户名")
    private String name;
    @ApiModelProperty("年龄")
    private String age;

    public User(String name, String age) {
        this.name = name;
        this.age = age;
    }

    public String getName() {
        return name;
    }

    public void setName(String name) {
        this.name = name;
    }

    public String getAge() {
        return age;
    }

    public void setAge(String age) {
        this.age = age;
    }

    @Override
    public String toString() {
        return "User{" +
                "name='" + name + '\'' +
                ", age='" + age + '\'' +
                '}';
    }
}
b.接口注解
接口注解顾名思义就是配置在接口中的注解,比如我们demo中的UserController 中的三个接口
//第一个接口queryUser
@ApiOperation("查询所有user") //为接口添加描述信息
//第二个接口putUser
@ApiOperation("保存user")  //为接口添加描述信息
@ApiParam("user值") //为接口入参添加描述信息
//第三个接口queryUserByParams
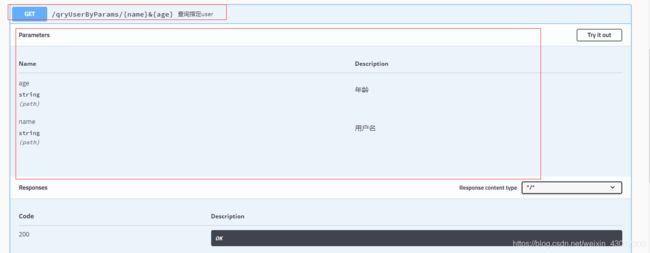
@ApiOperation("查询指定user")  //为接口添加描述信息
@ApiParam("用户名") //为接口入参添加描述信息
@ApiParam("年龄") //为接口入参添加描述信息
package com.swagger.controller;

import com.swagger.pojo.User;
import io.swagger.annotations.ApiOperation;
import io.swagger.annotations.ApiParam;
import org.springframework.web.bind.annotation.*;


@RestController
public class UserController {

    @GetMapping("/getUser")
    @ApiOperation("查询所有user")
    public User queryUser(){
        User user = new User("张三", "24");
        return user;
    }

    //ApiOperation 接口注释描述信息 [一个方法即一个接口],ApiParam 参数注释描述信息
    @ApiOperation("保存user")
    @PostMapping("/putUser")
    public User putUser(@ApiParam("user值") User user){
        System.out.println("保存user信息: " + user);
        return user;
    }

    //ApiOperation 接口注释描述信息 [一个方法即一个接口],ApiParam 参数注释描述信息
    @ApiOperation("查询指定user")
    @GetMapping("/qryUserByParams/{name}&{age}")
    public User queryUserByParams(@ApiParam("用户名")@PathVariable("name") String name ,
                                  @ApiParam("年龄")@PathVariable("age") String age){
        System.out.println(name);
        System.out.println(age);
        User user = new User(name, age);
        return user;
    }
}
4.使用Swagger进行测试
这里我们针对UserController中的三个接口进行测试
4.1queryUser
第一步点击图片的Try it out测试

第二步点击Execute执行

第三步查看接口执行结果

4.2putUser
4.3queryUserByParams
5.总结
使用Swagger我们可以为接口添加注释信息,尤其是一些复杂的接口,还可以实现接口文档的实时更新,最后可以在线测试我们的接口。
