【Unity入门教程】第二章 动画教程【中国大学MOOC游戏引擎原理及应用】
以下均为来自中国大学mooc 游戏引擎原理及应用时的学习笔记,不含商用,仅供学习交流使用,如果侵权请联系作者删除。
前四节什么时候复习的时候再补上吧,老懒狗了
文章目录
-
- 2.1场景动画
- 2.2 骨骼动画
-
- 键盘交互触发动画
- 给动画片段添加响应事件
- 重定向
- 2.3 动画曲线
- 2.4 动画层
-
- 遮罩与动画层间的融合
- 通过鼠标交互实现动画层的权重改变
- 2.5.1 逆向运动学-
-
- 实现头注视着鼠标的位置
- 手足随物体移动而移动
- 2.6 子状态
- 2.7 融合树
- 2.8 目标匹配
2.1场景动画
场景动画实现的原理是关键帧动画,然后在关键帧中进行插值
点击录制按钮

然后选中关键帧,接下来可以调整正方体位置 旋转等参数

注意区分animation和animator的区别

接下来实现动画间的控制与变化:
我们可以新创建一个动画(create new clip)
然后在动画控制器里创建新的状态并增加过渡即可

2.2 骨骼动画
键盘交互触发动画
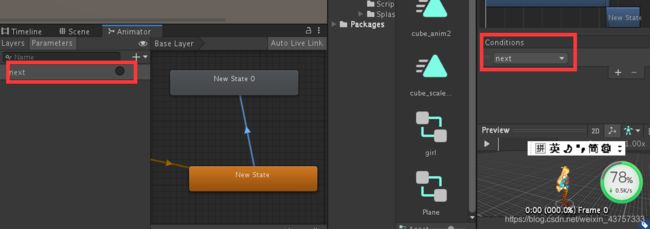
接下来实现一个功能 当用户按下空格键时,人物从等待状态变成跳跃状态:首先设定好animator controller的状态,然后在状态切换的时候添加一个next的触发器
using System.Collections;
using System.Collections.Generic;
using UnityEngine;

public class Space_Jump : MonoBehaviour
{
    private Animator ctrler;

    // Start is called before the first frame update
    void Start()
    {
        ctrler = GetComponent<Animator>();
    }

    // Update is called once per frame
    void Update()
    {
        if (Input.GetKeyDown(KeyCode.Space))
        {
            ctrler.SetTrigger("next");
        }
    }
}
给动画片段添加响应事件
实现当动画播放到某一帧时,可以触发一个函数的方法:
首先找到该动画,为其在特定关键帧内添加一个事件,这个事件会触发一个函数:

然后在人物的控制脚本内编写这样的一个函数
    public void waitFinish()
    {
        Debug.Log("waitFinish");
    }
重定向

骨骼动画还有一个好处就是实现动画数据的重利用
例如人物和一些人型动物,骨骼类似,而骨骼动画最终都是骨架的变化
所以我们可以用一个骨架,对不同的角色进行驱动,这种就是骨骼动画的重定向
在standard assest中有thirdperson controller,我们可以直接将这个控制器拖拽给unity-chan,这样就可以使用该骨骼动画控制器

2.3 动画曲线
例如冬天跑步会呼出白气,白气可以用粒子系统实现,因为呼吸有节奏,所以呼出的气体大小会和跑步的节奏有关系
所以可以把呼气的粒子系统的范围的控制参数关联给这个角色的跑步动画
,这种关联的方式就可以用动画曲线来实现
动画曲线可以简单的理解为随着动画的播放,一个会不断改变的值,我们可以根据动画发生到某个时刻,然后这个时候就会有某个值在不断变化,通过这个来实现上面所需的情况。
然后在动画控制器中添加这个动画,并且在动画控制器中添加一个参数CurveValue(要保持同名)
然后将动画控制器拖拽给人物 其实播放动画:

此时看动画控制器中的参数就会发现curvevalue的值会发生改变了
然后接下来 实现气泡的变化:
using System.Collections;
using System.Collections.Generic;
using UnityEngine;

public class Bubble : MonoBehaviour
{
    public Transform bubble;
    public Vector3 originalScale;
    // Start is called before the first frame update
    void Start()
    {
        originalScale = bubble.localScale;//获取初始值
    }

    // Update is called once per frame
    void Update()
    {
        var curve = GetComponent<Animator>().GetFloat("CurveValue");
        bubble.localScale = new Vector3(originalScale.x + curve, originalScale.y + curve, originalScale.z + curve);
    }
}
然后在人物的头部创建一个小球,并且把小球拖入到开放的bubble中:
接下来播放动画就可以实现:
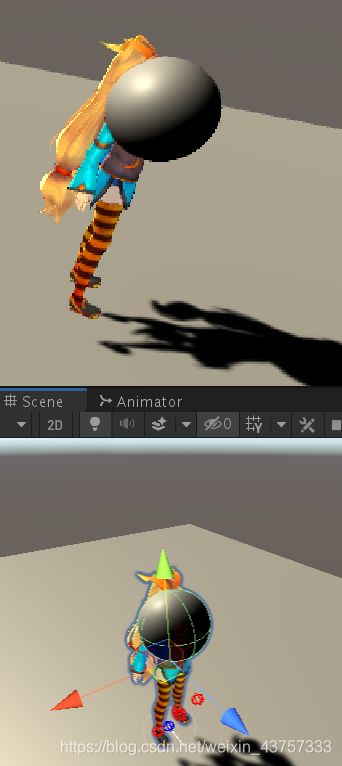

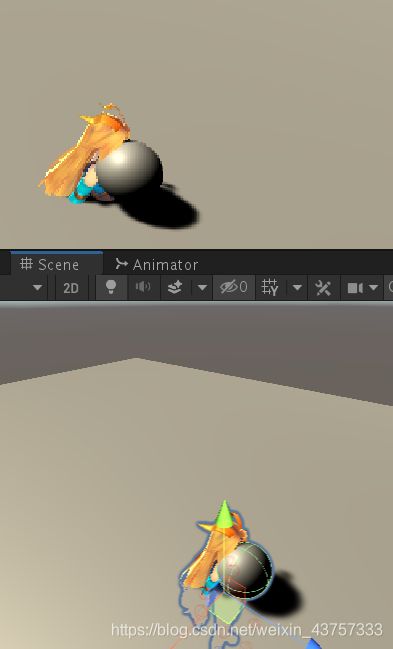
除此之外,要是给人物添加刚体,就会产生这样的效果(球会拖着人物动起来):

2.4 动画层

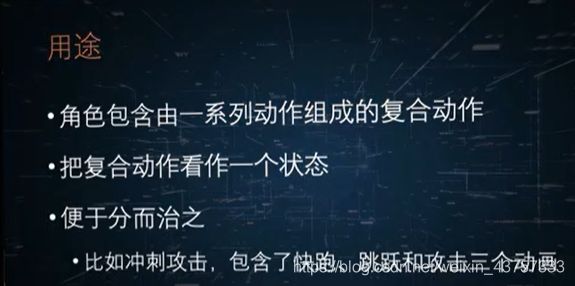
射击状态可能是边走边射击,也可能是跑步射击,也可能是趴着射击,每个动作都射击动作太过繁琐。
我们可以只单独设计走路、跑步、跳跃、射击的动作,然后将它们结合到一起。比如上半身射击,下半身该走路就走路。
遮罩与动画层间的融合
例如受伤状态,该走路还是走路,该跑步还是跑步(因此动画状态机的切换不变),只是走路的时候添加一个受伤的动作。
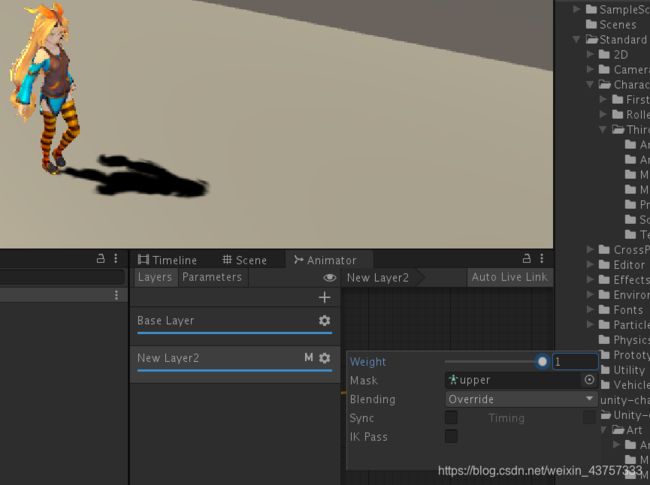
在unity里给人物创建一个动画控制器,有两层,第一层是走路,第二层是等待,然后我们点击第二层的齿轮,可以调整两个动画层的权重,此时可以看到动画会有所改变,变成两种动画层根据权重融合在一起的效果


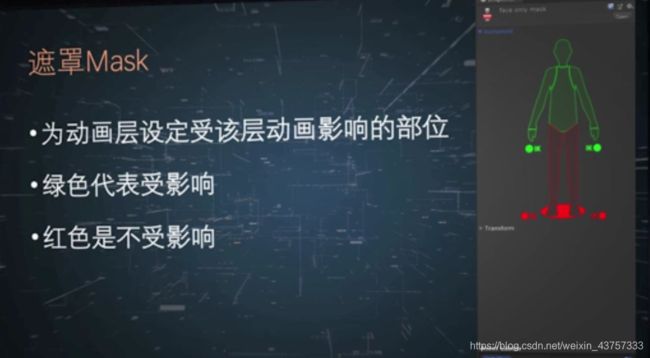
如果我们想让物体在第二层动画权重高的时候,脚不变,脚还是在走路,而上半身不动,此时可以使用遮罩
那么创建一个遮罩,并且,红色部分代表播放动画时不包括这一层

此时即可实现下半身还在走,但是上半身自己动了
通过鼠标交互实现动画层的权重改变
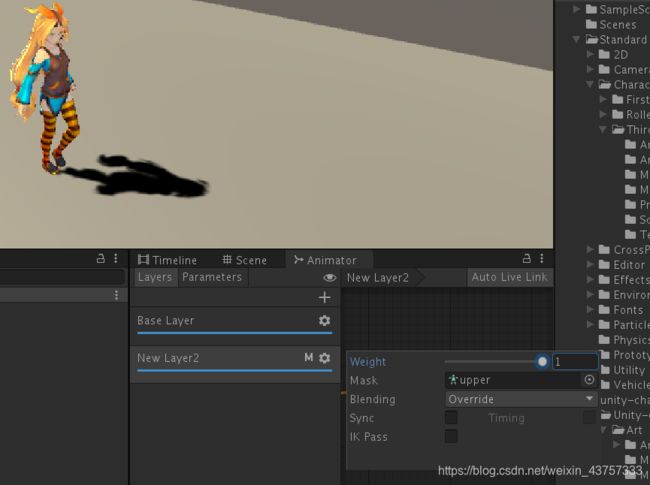

这里实现一个按下鼠标左键则增加第一层的权重,否则减少第一层的权重的代码:
using System.Collections;
using System.Collections.Generic;
using UnityEngine;

public class LayerControl : MonoBehaviour
{
    Animator anima = null;
    public float speed = 1;
    // Start is called before the first frame update
    void Start()
    {
        anima = GetComponent<Animator>();
    }

    // Update is called once per frame
    void Update()
    {
        if (Input.GetMouseButton(0))
        {
            float w = anima.GetLayerWeight(1) > 1 ? 1 : anima.GetLayerWeight(1) + speed * Time.deltaTime;
            anima.SetLayerWeight(1, w);
        }
        else
        {
            float w = anima.GetLayerWeight(1) < 0 ? 0 : anima.GetLayerWeight(1) - speed * Time.deltaTime;
            anima.SetLayerWeight(1, w);
        }
    }
}
2.5.1 逆向运动学-
首先来讲讲什么是逆向运动学,也就是IK。
IK:
IK(反向运动,Inverse
Kinematics)是计算运动关节末端(如机械臂臂爪或人物骨架手臂末端的手掌)相对于关节的起始位置和方向到达所需位置的关节参数的数学过程。
实现头注视着鼠标的位置
首先创建一个动画控制器,并在运动中将motion用standard assest自带的humanoidldle进行导入

然后我们导入unity商店的免费资源Robot Kyle,并将其添加到商店里

(别忘了在rig设定中为其选中人型的设置
然后将动画控制器拖拽到robot中
我们在机器人的动画中把允许IK选上

接下来就是重点了,讲讲怎么让机器人注视着鼠标所在的地方,
以下为代码:
using System.Collections;
using System.Collections.Generic;
using UnityEngine;
[RequireComponent(typeof(Animator))]//使用RequirementComponent属性来要求物体具有某个特定组件,
//若没有则会自动创建
public class LookAt : MonoBehaviour
{
    protected Animator anim;
    // Start is called before the first frame update
    void Start()
    {
        anim = GetComponent<Animator>();//获取该物体上的动画器

    }
    void OnAnimatorIK()//如果前面不加属性默认是private属性
    //官方建议把所有的IK操作放在OnAnimatorIK中进行,当进行IK演算的时候,系统会自动调用这个函数
    {
        Ray ray = Camera.main.ScreenPointToRay(Input.mousePosition);//这个函数详见下面解析
        Plane plane = new Plane(Vector3.forward, transform.position);//创造一个平面,需要两个
        //参数,一个是法线,一个是所在位置
        float enter = 0f;
        if (plane.Raycast(ray,out enter))//Raycast这个函数会检测射线是否穿过这个平面,若穿过则
        //会将射线出发点到平面的距离输出到参数中(这里是enter)
        {
        	//如果射线与平面相交,则我们需要找到相交的位置,并让机器人注视着交点
            Vector3 target = ray.GetPoint(enter);//用这个方法即可获得目标
            anim.SetLookAtPosition(target);//unity自带lookat函数
            anim.SetLookAtWeight(0.5f, 0.3f, 0.7f, 0.4f);//在这里我们可以设置权重,这几个权重
            //依次是什么在unity会有显示

        }
    }

    // Update is called once per frame
    void Update()
    {

    }
}
ScreenPointToRay:
在 Unity 射线检测中,常常会用到 Camera.ScreenPointToRay
方法。这个方法很简单,传入一个屏幕上的像素坐标,返回一条在世界空间下从 Camera 的近裁剪面出发穿过屏幕上的像素坐标点的射线。

设置权重的这个参数会随着我们写的参数的增多而显示其余几个参数分别代表什么意思。
设置完脚本后将脚本拖拽至人物身上

可以看到机器人的视角随着鼠标的移动而移动

手足随物体移动而移动
为了让人物的手和脚随着某个特定的物体动起来,我们写出以下脚本
using System.Collections;
using System.Collections.Generic;
using UnityEngine;
[RequireComponent(typeof(Animator))]
public class HandLeg : MonoBehaviour
{
    private Animator animator;
    public Transform target;//目标物体
    public Transform hint;//肘部的位置
    public bool isHand = true;
    // Start is called before the first frame update
    void Start()
    {
        animator = GetComponent<Animator>();
    }
    private void OnAnimatorIK(int layerIndex)
    {
        AvatarIKGoal g = isHand ? AvatarIKGoal.RightHand : AvatarIKGoal.RightFoot;
        AvatarIKHint h = isHand ? AvatarIKHint.RightElbow : AvatarIKHint.RightKnee;
        animator.SetIKPositionWeight(g, 1f);
        animator.SetIKPosition(g, target.position);//将右手的位置设定为目标的位置
        animator.SetIKRotationWeight(g, 1f);
        animator.SetIKRotation(g, target.rotation);//旋转同理

        animator.SetIKHintPositionWeight(h, 1f);
        animator.SetIKHintPosition(h, hint.position);//肘部的位置
    }
    // Update is called once per frame
    void Update()
    {

    }
}
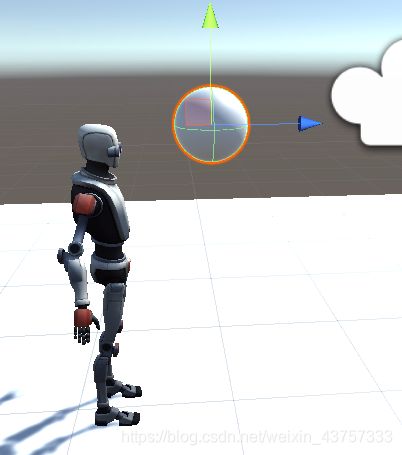
新建一个球体,放在机器人前方,并为其设定一个上下移动的动画
将上面那个脚本命名为HandLeg
并将球体和hint拖入其中


随后我们便可以看到机器人的手随着球的移动而移动

hint代表肘的位置移动 如果我们将hint调至较低 则会出现 如图所示的结果
2.6 子状态
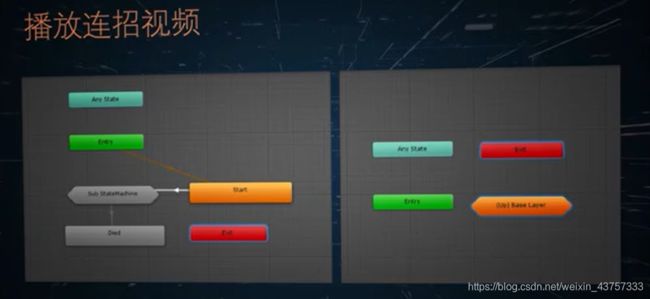
子状态机包含右边这些例子

在创建动画的时候创建一个子动画状态
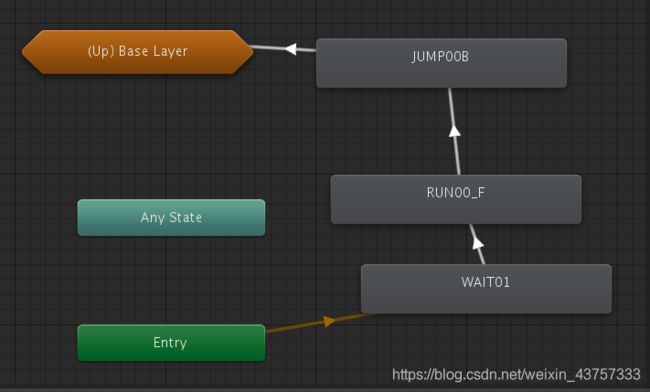
双击即可进入子动画状态
在子动画里面可以设置包含一系列连续的动画 运行完之后可以设置回到base layer(最后一个箭头设置完之后)
比如说我们想通过某种方式来触发进入子状态
我们可以在进入子状态的箭头里设置一个trigger
并把它添加到条件中
然后新建一个脚本
    void Update()
    {
        if (Input.GetKeyDown(KeyCode.Space))
        {
            GetComponent<Animator>().SetTrigger("start");
        }
    }
如果按下space键 则会触发trigger
这样就可以使得当按下space时,人物进入子状态的动作了
2.7 融合树


首先创建一个动画控制器
添加一个blendtree

双击进入动画控制器

双击后进入这个界面,我们便可添加需要融合的运动

但我们需要注意到,以上的融合树都是一维的状态

但是这种调整参数的方法,我们不能直接调节每种运动各占多少比例,我们可以换种融合的方式:
接下来我们讲解另外一种状态:直接

在这里选中直接的状态
然后我们新建三个参数 分别用其控制三个状态所占的权重


在这里选择权重
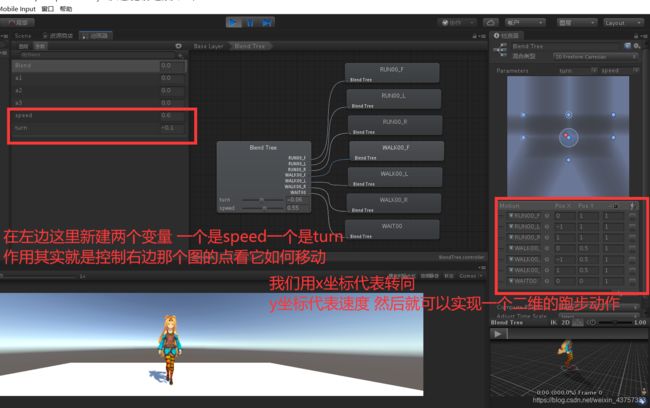
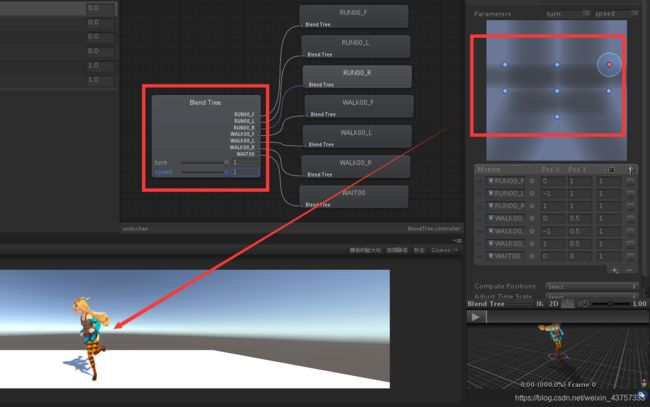
接下来介绍一下二维的动画树的融合
using System.Collections;
using System.Collections.Generic;
using UnityEngine;
using UnityStandardAssets.CrossPlatformInput;//需要用到StandardAssest里面的这个输入的类
public class BlendTree : MonoBehaviour
{
    Animator animator;
    // Start is called before the first frame update
    void Start()
    {
        animator = GetComponent<Animator>();
    }

    // Update is called once per frame
    void Update()
    {
        float h = CrossPlatformInputManager.GetAxis("Horizontal");//获取水平方向的输入
        float v = CrossPlatformInputManager.GetAxis("Vertical");
        Vector3 move = v * Vector3.forward + h * Vector3.right;//一个三位向量用这种方式表示…? 说实话这里也有点不清楚
        if (Input.GetKey(KeyCode.LeftShift))
        {
            move.z *= 0.5f;
        }
        float turn = move.x;
        float forward = move.z;
        animator.SetFloat("speed", forward, 3f, Time.deltaTime);
        animator.SetFloat("turn", turn, 3f, Time.deltaTime);
    }
}
这样过后就可以通过wasd来控制人物的前进及转向
SetFloat函数的用法:
https://blog.csdn.net/qq_39097425/article/details/86554835
animator.SetFloat("speed", forward, 3f, Time.deltaTime);
这里就是,在3秒内,将speed的值慢慢调整为forward的值,每隔deltaTime时间执行一次
2.8 目标匹配


为了在使用跳跃动画的时候,人物能成功跳到目标的位置处,我们使用目标匹配,以下为代码
using System.Collections;
using System.Collections.Generic;
using UnityEngine;

public class MatchTarget : MonoBehaviour
{
    Animator animator;
    public Transform rightFoot;
    AnimatorStateInfo animState;//动画状态
    public float matchStart;
    public float matchEnd;
    // Start is called before the first frame update
    void Start()
    {
        animator = GetComponent<Animator>();
    }

    // Update is called once per frame
    void Update()
    {
        if (animator != null)
        {
            animState = animator.GetCurrentAnimatorStateInfo(0);
            if (Input.GetButton("Fire1")) animator.SetTrigger("jump");
            if (animState.IsName("JUMP00"))//如果处于jump00这个动画状态中
            {
                animator.SetTrigger("jump");
                animator.MatchTarget(rightFoot.position, rightFoot.rotation, AvatarTarget.RightFoot,/*将右脚的位置和转向全部设置成目标的位置和转向*/
                    new MatchTargetWeightMask(Vector3.one, 1), matchStart, matchEnd);
            }
        }
    }
}
MatchStart和MatchEnd代表进行目标匹配开始和结束的时间
区间范围是0到1,这里的0到1是代表整个动画片段的0到1
如果直接设置为0到1,那么可能会出现滑步的情况,可以通过调整目标匹配的时间来使得跳跃变得自然
在这里 vector3.zero可以理解为new vector3(0,0,0),vector3.one理解为new
vector3(1,1,1),只是vector3.one的用法一般不用于方向,通常用于坐标或者scale。
![]()
MatchTargetWeightMask:匹配目标权重蒙皮


