threejs官方demo学习(3):几何体
webgl_geometries
这个案例还是比较简单的,主要介绍了一些创建物体的创建。
知识点
PointLight
PointLight 点光源,从一个点向各个方向发出光线的光源,比如灯泡。
BoxGeometry
BoxGeometry 立方缓冲几何体

SphereGeometry
SphereGeometry 球缓冲几何体
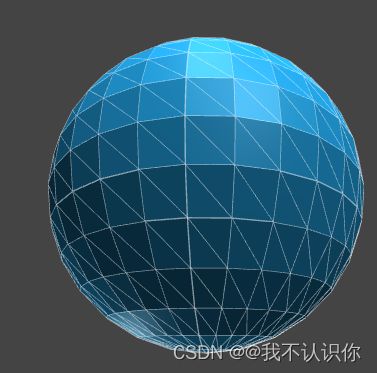
IcosahedronGeometry
IcosahedronGeometry 20面缓冲几何体,该构造函数有一个参数detail 顶点数,默认为0,当是大于0的整数时将会变成一个球体

OctahedronGeometry
OctahedronGeometry 8面缓冲几何体,与20面缓冲几何体基本相似。
TetrahedronGeometry
TetrahedronGeometry 4面缓冲几何体,同上。
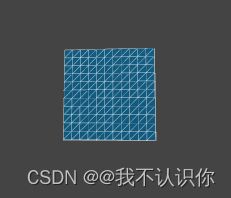
PlaneGeometry
PlaneGeometry 平面缓冲几何体
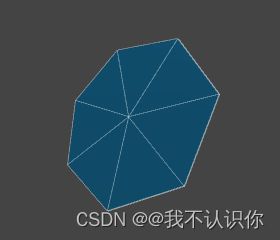
CircleGeometry
CircleGeometry 圆形缓冲几何体,分段数越大越圆,最小是3是一个三角形
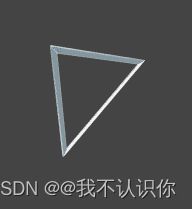
RingGeometry
RingGeometry 圆环缓冲几何体,与圆形缓冲几何体类似,是一个圆环。
CylinderGeometry
CylinderGeometry圆柱缓冲几何体

LatheGeometry
LatheGeometry车削缓冲几何体,创建具有轴对称性的网格,比如花瓶。车削绕着Y轴来进行旋转。
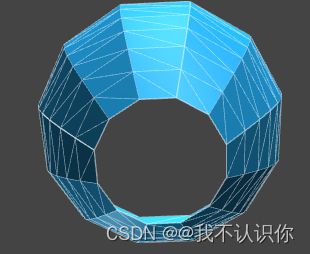
TorusGeometry
TorusGeometry圆环缓冲几何体

TorusKnotGeometry
TorusKnotGeometry 圆环缓冲扭结几何体

webgl_geometry_colors
效果图
应该是页面的尺寸和位置设置的有点问题,与官方例子的效果有很大差别,不过该例子中可以学习的知识挺多的。
知识点
canvas纹理
材质的颜色贴图用的最多的是图片,在这个例子中,使用了canvas创建了一个渐变的纹理
let canvas = document.createElement('canvas');
// 设置画布大小
canvas.width = 128;
canvas.height = 128;
let context = canvas.getContext('2d');
// 设置渐变
const gradient = context.createRadialGradient(canvas.width / 2, canvas.height / 2, 0, canvas.width / 2, canvas.height / 2, canvas.width / 2);
gradient.addColorStop(0.1, 'rgba(210,210,210,1)');
gradient.addColorStop(1, 'rgba(255,255,255,1)');
// 创建矩形
context.fillStyle = gradient;
context.fillRect(0, 0, canvas.width, canvas.height);
// 获取纹理
let shadowTexture = new THREE.CanvasTexture(canvas);

// 创建基础网格材质
let shadowMaterial = new THREE.MeshBasicMaterial({ map: shadowTexture });
设置顶点颜色
// 半径
let radius = 100;
// 创建20面缓冲几何体
let geometry1 = new THREE.IcosahedronGeometry(radius, 1);
// 获取顶点数
let count = geometry1.attributes.position.count;
// 设置顶点x、y、z三维向量的颜色属性
geometry1.setAttribute('color', new THREE.BufferAttribute(new Float32Array(count * 3), 3));

// 创建颜色对象
const color = new THREE.Color();
// 获取物体的位置属性和颜色属性
const positions1 = geometry1.attributes.position;
const colors1 = geometry1.attributes.color;

for (let i = 0; i < count; i++) {
    // 设置随机颜色,当点的位置发生改变后,颜色随之改变
    color.setHSL((positions1.getY(i) / radius + 1) / 2, 1.0, 0.5);
    colors1.setXYZ(i, color.r, color.g, color.b)
}
要想适用顶点颜色,必须要对材质进行相应的设置
let material = new THREE.MeshPhongMaterial({
    color: 0xffffff, // 颜色
    flatShading: true, // 是否使用平面着色器渲染
    vertexColors: true, // 是否使用顶点颜色
    shininess: 0 // 高亮程度,值越大越亮
});
向物体中添加另一个物体
案例中存在,创建了一个线框物体和一个实体物体。将线框物体添加到了实体物体里面。
鼠标控制镜头方向
注意是通过添加一个鼠标事件,当鼠标移动后改变相机的位置和朝向
camera.position.x += (mouseX - camera.position.x) * 0.05;
camera.position.y += (-mouseY - camera.position.y) * 0.05;
camera.lookAt(scene.position);
renderer.render(scene, camera);
webgl_geometry_convex
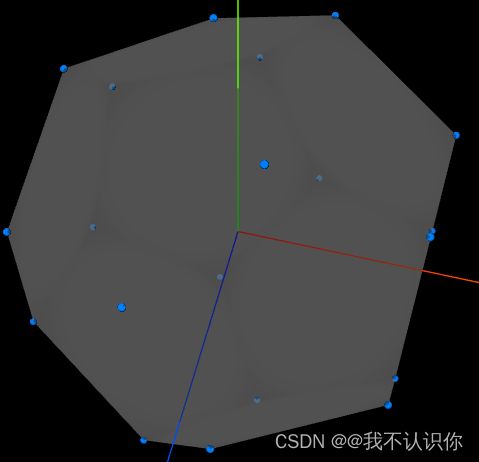
不知道啥情况,明明是一样的代码,官方例子是这样的
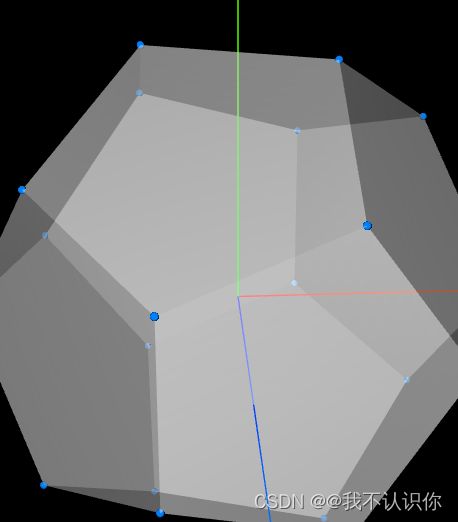
自己的是这样的
知识点
把官方例子看完,基本上是创建了一些点,给这个点添加了一个颜色贴图。然后创建了两个凸包几何体,一个是外层一个是内层。这样旋转时可以看见变化。
这里的点和凸包几何体全都是添加在组里,这样形成一个整体,旋转时可以一块旋转。
设置轨道的最小距离、最大距离、最大旋转角度
// 添加轨道控制器
 const control = new OrbitControls(camera, renderer.domElement);
 // 设置控制器的最小距离、最大距离、最大旋转角度
 control.minDistance = 20;
 control.maxDistance = 50;
 control.maxPolarAngle = Math.PI / 2;
添加坐标辅助对象
// 添加坐标轴辅助对象
 scene.add(new THREE.AxesHelper(20));
创建点
创建点的过程分为获取点的坐标、创建点。
- 获取点。先创建了一个12面缓冲几何体,然后删除法线和uv属性。官方解释是:如果不删除,
mergeVertics函数无法合并具有不同法线/uv数据的缩进顶点
// 创建半径为10的12面缓冲几何体
 let dodecahedronGeometry = new THREE.DodecahedronGeometry(10);
 // 删除属性
 // 如果未删除法线和uv属性,mergeVertics将无法合并具有不同法线/uv数据的缩进顶点
 dodecahedronGeometry.deleteAttribute('normal');
 dodecahedronGeometry.deleteAttribute('uv');
 // 合并顶点
 dodecahedronGeometry = BufferGeometryUtils.mergeVertices(dodecahedronGeometry);
- 获取点
// 顶点数组
const vertices = [];
// 获取12面缓冲体的位置属性
const positionAttribute = dodecahedronGeometry.getAttribute('position');
// 获取顶点的位置
for (let i = 0; i < positionAttribute.count; i++) {
    const vertex = new THREE.Vector3();
    // 设置向量的xyz值,(来源属性,索引)
    vertex.fromBufferAttribute(positionAttribute, i);
    vertices.push(vertex);
}
- 创建点
// 创建点
 const pointsMaterial = new THREE.PointsMaterial({
     color: 0x0080ff,
     map: texture, // 颜色贴图
     size: 1,
     alphaTest: 0.5 // 颜色贴图的alpha通道
 });
 // 通过向量生产12个点
 const pointsGeometry = new THREE.BufferGeometry().setFromPoints(vertices);
 const points = new THREE.Points(pointsGeometry, pointsMaterial);
 // 将点添加到组里
 group.add(points);
凸包几何体
const meshMaterial = new THREE.MeshLambertMaterial({
     color: 0xffffff,
     opacity: 0.5,
     transparent: true // 设置透明度要设置transparent为true
 });

 // 通过一组点生成凸包几何体,这个是后面
 const meshGeometry = new ConvexGeometry(vertices);
 const mesh1 = new THREE.Mesh(meshGeometry, meshMaterial);
 mesh1.material.side = THREE.BackSide;
 mesh1.renderOrder = 0; // 渲染顺序
 group.add(mesh1);
webgl_geometry_cube
这个案例还是比较简单的,创建了一个立方体,给立方体添加一个纹理贴图,让立方体不断旋转
代码
<template>
    <div id="container"></div>
</template>

<script setup lang="ts">
import { onMounted } from 'vue';
import * as THREE from 'three';

onMounted(() => {
    // 相机、场景、渲染器、物体
    // 类型是ts自动推断出来的
    let camera: THREE.PerspectiveCamera,
        scene: THREE.Scene, renderer: THREE.WebGLRenderer,
        mesh: THREE.Object3D<THREE.Event> | THREE.Mesh<THREE.BoxGeometry, THREE.MeshBasicMaterial>;

    // 创建相机
    camera = new THREE.PerspectiveCamera(79, window.innerWidth / window.innerHeight, 100, 1000);
    camera.position.z = 400;

    // 创建场景
    scene = new THREE.Scene();

    // 加载纹理
    let texture = new THREE.TextureLoader().load('../../../../public/crate.gif');

    // 创建立方体
    mesh = new THREE.Mesh(
        new THREE.BoxGeometry(100, 100, 100),
        new THREE.MeshBasicMaterial({
            map: texture
        })
    );

    // 将立方体添加到场景中
    scene.add(mesh);

    // 创建渲染器
    renderer = new THREE.WebGLRenderer({
        antialias: true // 抗锯齿
    });
    // 设置像素比、渲染大小
    renderer.setPixelRatio(window.devicePixelRatio);
    renderer.setSize(window.innerWidth, window.innerHeight);

    // 将渲染的元素添加到容器中
    document.getElementById('container')?.appendChild(renderer.domElement);

    // 执行动画
    function animate() {
        // 调用动画帧渲染
        requestAnimationFrame(animate);
        // 让立方体旋转
        mesh.rotation.x += 0.005;
        mesh.rotation.y += 0.01;

        renderer.render(scene, camera);
    }

    animate();
});
</script>
效果图
