【Spring-boot框架】内嵌Tomcat,启动项目
spring boot真的好好用哦,在单位试了这个,不行,今天回来直接就好了,开心~
一、启动项目
第一步:pom.xml文件中加入以下依赖
     org.springframework.boot
     spring-boot-starter-web
第二步:创建一个启动类Start,使用@SpringBootApplication注解,运行main方法,即可启动spring boot
import org.springframework.boot.SpringApplication;
import org.springframework.boot.autoconfigure.SpringBootApplication;

@SpringBootApplication
public class start {
    public static void main(String[] args){
        SpringApplication.run(start.class,args);
    }
}
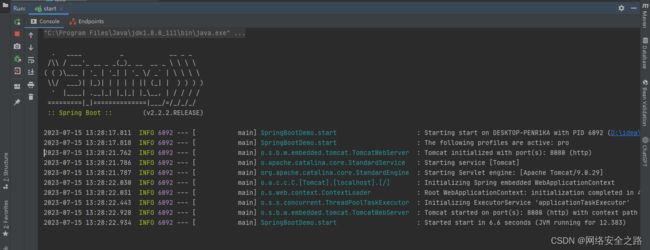
启动一下
第三步:写一个接口,/start/springboot
@RestController注解返回json格式数据
import org.springframework.web.bind.annotation.RequestMapping;
import org.springframework.web.bind.annotation.RestController;

@RestController
@RequestMapping("/start")
public class StartController {

    @RequestMapping("/springboot")
    public String startSpringBoot(){
        return "welcome to spring boot";
    }

}
第四步:在浏览器输入:localhost:8080/start/springboot
出现如下图及说明项目启动成功!
二、Spring Boot返回Json数据及数据封装
接口与接口间、前后端间传输用json
Spring Boot中,Controller 中使用@RestController注解即可返回 Json 格式的数据
常用的数据结构:类对象/List对象/Map对象
2.1、不同数据类型返回json数据
第一步创建user实体类
public class User {
    private Long id;
    private String username;
    private String passwd;

    public User(int id, String username, String passwd) {
    }

    public Long getId() {
        return id;
    }

    public void setId(Long id) {
        this.id = id;
    }

    public String getUsername() {
        return username;
    }

    public void setUsername(String username) {
        this.username = username;
    }

    public String getPasswd() {
        return passwd;
    }

    public void setPasswd(String passwd) {
        this.passwd = passwd;
    }
}
第二步创建Controller类
分别返回 User对象、List 和 Map
import SpringBootDemo.Entity.User;
import org.springframework.web.bind.annotation.RequestMapping;
import org.springframework.web.bind.annotation.RestController;
import java.util.ArrayList;
import java.util.HashMap;
import java.util.List;
import java.util.Map;

@RequestMapping("/json")
@RestController
public class JsonController {

    @RequestMapping("/user")
    public User getUser(){
        return new User(1,"小白","123456");
    }

    @RequestMapping("/list")
    public List getUserList(){
        List userList = new ArrayList<>();
        User user1 = new User(2,"小红","121212");
        User user2 = new User(3,"小黑","1111111");
        userList.add(user1);
        userList.add(user2);
        return userList;
    }

    @RequestMapping("/map")
    public Map getUserMap(){
        Map map = new HashMap<>(3);
        User user = new User(4,"小绿","123123");
        map.put("作者信息",user);
        map.put("家庭地址","中国xxx市");
        return map;
    }

}
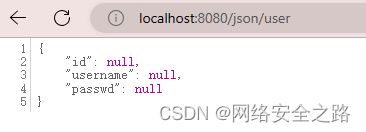
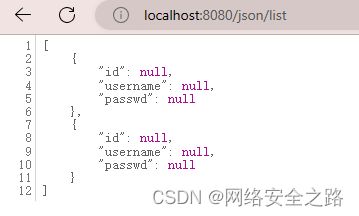
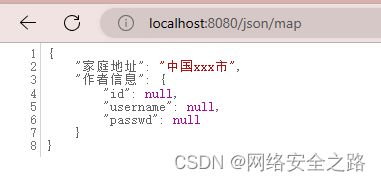
在页面验证,这里返回的json是Null,不知道啥情况,有知道的师傅麻烦告诉我哦!
2.2、Jackson对null的处理
由于spring boot底层是用Jackson来展现json数据的
希望null变为" ",则需要以下jackson配置类
import com.fasterxml.jackson.core.JsonGenerator;
import com.fasterxml.jackson.databind.JsonSerializer;
import com.fasterxml.jackson.databind.ObjectMapper;
import com.fasterxml.jackson.databind.SerializerProvider;
import org.springframework.boot.autoconfigure.condition.ConditionalOnMissingBean;
import org.springframework.context.annotation.Bean;
import org.springframework.context.annotation.Configuration;
import org.springframework.context.annotation.Primary;
import org.springframework.http.converter.json.Jackson2ObjectMapperBuilder;
import java.io.IOException;
@Configuration
public class JacksonConfig {
@Bean
@Primary
@ConditionalOnMissingBean(ObjectMapper.class)
public ObjectMapper jacksonObjectMapper(Jackson2ObjectMapperBuilder builder){
ObjectMapper objectMapper = builder.createXmlMapper(false).build();
objectMapper.getSerializerProvider().setNullValueSerializer(new JsonSerializer此时已经将null变为“”了
2.3、 fastJson对null的处理
            com.alibaba
            fastjson
            1.2.83
需要继承 WebMvcConfigurationSupport 类,然后覆盖 configureMessageConverters 方法
在方法中,我们可以选择对要实现 null 转换的场景,配置好即可
package SpringBootDemo.Config;

import com.alibaba.fastjson.serializer.SerializerFeature;
import com.alibaba.fastjson.support.config.FastJsonConfig;
import com.alibaba.fastjson.support.spring.FastJsonHttpMessageConverter;
import org.springframework.context.annotation.Configuration;
import org.springframework.http.MediaType;
import org.springframework.http.converter.HttpMessageConverter;
import org.springframework.web.servlet.config.annotation.WebMvcConfigurationSupport;

import java.nio.charset.Charset;
import java.util.ArrayList;
import java.util.List;

@Configuration
public class fastjsonConfig extends WebMvcConfigurationSupport {


    /**
     * 使用阿里 FastJson 作为JSON MessageConverter
     * @param converters
     */

    @Override
    protected void configureMessageConverters(List> converters) {
        //创建fastjson消息转换器
        FastJsonHttpMessageConverter converter = new FastJsonHttpMessageConverter();

        //创建fastjson配置对象
        FastJsonConfig fastJsonConfig = new FastJsonConfig();

        //配置fastjson配置对象,处理Null值
        //将序列化特性SerializerFeature.WriteMapNullValue配置到FastJsonConfig中
        fastJsonConfig.setSerializerFeatures(
                SerializerFeature.WriteMapNullValue,  // 保留map空的字段
                SerializerFeature.WriteNullStringAsEmpty,  // 将String类型的null转成""
                SerializerFeature.WriteNullNumberAsZero,   // 将Number类型的null转成0
                SerializerFeature.WriteNullListAsEmpty,   // 将List类型的null转成[]
                SerializerFeature.WriteNullBooleanAsFalse,   // 将Boolean类型的null转成false
                SerializerFeature.DisableCircularReferenceDetect);   // 避免循环引用


        //设置fastjson,配置到fastjson消息转换器
        converter.setFastJsonConfig(fastJsonConfig);//将FastJsonConfig设置到 FastJsonHttpMessageConverter中

        converter.setDefaultCharset(Charset.forName("UTF-8"));
        List mediaTypeList = new ArrayList<>();

        //解决中文乱码问题,相当于在Controller上的@RequestMapping中加了个属性produces = "application/json"
        mediaTypeList.add(MediaType.APPLICATION_JSON);
        converter.setSupportedMediaTypes(mediaTypeList);

        //将fastjson消息转换器添加到转换器列表
        converters.add(converter); //将FastJsonHttpMessageConverter实例添加到转换器列表中
    }
}
2.4、 封装统一返回的数据结构
除了要封装数据之外,需要在返回的 json 中添加一些其他信息,如返回状态码 code ,返回msg 给调用者,调用者可根据 code/msg 做一些逻辑判断。
实际项目中,需要封装一个统一的 json 返回结构存储返回信息:数据、状态码、提示信息
封装的 json 数据的类型不确定,在定义统一的 json 结构时,需用到泛型。
构造方法可根据实际业务需求做相应的添加,一般有默认的返回结构、用户指定的返回结构。
package SpringBootDemo.Result;

public class JsonResult {

    private T data;
    private String code;
    private String msg;

    /**
     * 若没有数据返回,默认状态码为0,提示信息为:操作成功!
     */
    public JsonResult(){
        this.code = "0";
        this.msg = "操作成功!";
    }

    /**
     * 若没有数据返回,可以人为指定状态码和提示信息
     * @param code
     * @param msg
     */
    public JsonResult(String code, String msg){
        this.code = code;
        this.msg = msg;
    }


    /**
     * 有数据返回时,状态码为0,默认提示信息为:操作成功!
     * @param data
     */
    public JsonResult(T data) {
        this.data = data;
        this.code = "0";
        this.msg = "操作成功!";
    }

    /**
     * 有数据返回,状态码为0,人为指定提示信息
     * @param data
     * @param msg
     */
    public JsonResult(T data, String msg) {
        this.data = data;
        this.code = "0";
        this.msg = msg;
    }

    public T getData() {
        return data;
    }

    public void setData(T data) {
        this.data = data;
    }

    public String getCode() {
        return code;
    }

    public void setCode(String code) {
        this.code = code;
    }

    public String getMsg() {
        return msg;
    }

    public void setMsg(String msg) {
        this.msg = msg;
    }
}
2.5、修改 Controller 中的返回值类型及测试
JsonResult 使用了泛型,所有返回值类型都可使用该统一结构,在具体的场景将泛型替换成具体的数据类型即可。
在实际项目中,还可继续封装,如状态码和提示信息可定义一个枚举类型,后续只需维护这个枚举类型中的数据即可。
改写一下 Controller,如下:
package SpringBootDemo.Controller;
import SpringBootDemo.Entity.User;
import SpringBootDemo.Result.JsonResult;
import org.springframework.web.bind.annotation.RequestMapping;
import org.springframework.web.bind.annotation.RestController;
import java.util.ArrayList;
import java.util.HashMap;
import java.util.List;
import java.util.Map;
@RequestMapping("/jsonResult")
@RestController
public class JsonFastjsonController {
@RequestMapping("/user")
public JsonResult getUser(){
User user = new User(1,"小白","123456");
return new JsonResult<>(user);
}
@RequestMapping("/list")
public JsonResult getUserList(){
List userList = new ArrayList<>();
User user1 = new User(2,"小红","121212");
User user2 = new User(3,"小黑","1111111");
userList.add(user1);
userList.add(user2);
return new JsonResult<>(userList,"获取用户列表成功!");
}
@RequestMapping("/map")
public JsonResult
通过封装,不但将数据通过 json 传给前端或者其他接口,还带上了状态码和提示信息
代码这里报错,待解决
idea中快捷键
第一种 单行注释(ctrl+/ ) //
第二种,多行注释(ctrl+shift+/) /**/
第三种,方法或者类说明注释,自动带参数和返回值
在需要注释的位置,输入/**,然后按一下enter即可实现,自动根据参数和返回值生成注释
二、配置文件
1、application.yml 中对日志的配置
(目录:D:\idea\code\0402bm\src\main\resources\application.yaml )
logging:
  #logging.config指定项目启动时候,读取哪个配置文件,这里是根路径下的logback.xml(关于日志相关妹纸,都在logback.xml下)
  config: logback.xml
  #logging.level指定具体的mapper中日志的输出级别
  #配置表示:com.itcodai.course03.dao包下的所有mapper中日志级别输出级别为trace
  #trace:将数据库的SQL打印出来,开发时设置成trace方便单位问题
  #在生产环境上,将日志级别设置成error;日志级别高到低:error、warn、info、debug
  level:
    SpringBootDemo:trace
2、logback.xml 配置文件解析
            ${LOG_PATTERN}


            ${FILE_PATH}

            15


                10MB


            ${LOG_PATTERN}
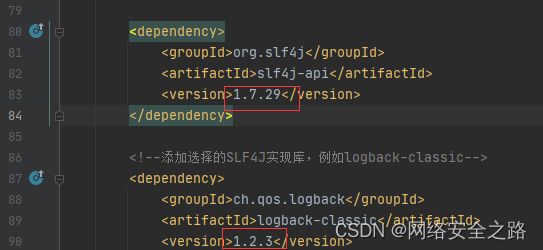
这里需要引入pom.xml依赖
            ch.qos.logback
            logback-classic
            1.2.3
3、Spring Boot中项目属性配置
3.1 配置少量情况
application.yaml:
server:
  port:8001


# 配置单个微服务的地址,配置被调的服务
url:
  # 订单微服务的地址
  orderUrl: http://localhost:8002
import org.slf4j.Logger;
import org.slf4j.LoggerFactory;
import org.springframework.beans.factory.annotation.Value;
import org.springframework.context.annotation.PropertySource;
import org.springframework.web.bind.annotation.RequestMapping;
import org.springframework.web.bind.annotation.RestController;
@RestController
@RequestMapping("/test")
@PropertySource("classpath:application.yaml")
public class ConfigController {
private static final Logger LOGGER = LoggerFactory.getLogger(ConfigController.class);
//@Value 注解上通过 ${key} 即可获取配置文件中和 key 对应的 value 值
@Value("${url.orderUrl}")
private String orderUrl;
@RequestMapping("/config")
public String testConfig(){
//我们启动一下项目,在浏览器中输入 localhost:8080/test/config 请求服务后,可以看到控制台会打印出订单服务的地址---但是我这不行
LOGGER.info("=====获取服务订单地址:{}",orderUrl);
return "Success";
}
}3.2、配置大量情况
spring:
  profiles:
    active:
      - pro
## 配置微服务的地址
url:
  # 订单微服务的地址
  orderUrl: http://localhost:8002
  # 用户微服务的地址
  userUrl: http://localhost:8003
  # 购物车微服务的地址
  shoppingUrl: http://localhost:8004
import org.springframework.boot.context.properties.ConfigurationProperties;
import org.springframework.stereotype.Component;
//把该类作为组件放到Spring容器中,让 Spring 去管理,我们使用的时候直接注入即可
@Component
//@ConfigurationProperties 注解并且使用 prefix 来指定一个前缀,然后该类中的属性名就是配置中去掉前缀后的名字
//即:前缀名 + 属性名就是配置文件中定义的 key
@ConfigurationProperties(prefix = "url")
public class MicroServiceUrl {
private String orderUrl;
private String userUrl;
private String shoppingUrl;
public String getOrderUrl() {
return orderUrl;
}
public void setOrderUrl(String orderUrl) {
this.orderUrl = orderUrl;
}
public String getUserUrl() {
return userUrl;
}
public void setUserUrl(String userUrl) {
this.userUrl = userUrl;
}
public String getShoppingUrl() {
return shoppingUrl;
}
public void setShoppingUrl(String shoppingUrl) {
this.shoppingUrl = shoppingUrl;
}
}import SpringBootDemo.MicroServiceUrl;
import org.slf4j.Logger;
import org.slf4j.LoggerFactory;
import org.springframework.web.bind.annotation.RequestMapping;
import org.springframework.web.bind.annotation.RestController;
import javax.annotation.Resource;
@RestController
@RequestMapping("/test1")
public class TestController {
private static final Logger LOGGER = LoggerFactory.getLogger(TestController.class);
//不需要在代码中一个个引入这些微服务的 url 了,直接通过 @Resource 注解将刚刚写好配置类注入进来即可使用了
@Resource
private MicroServiceUrl microServiceUrl;
@RequestMapping("/config")
public String testConfig(){
LOGGER.info("==========获取订单地址为:{}",microServiceUrl.getOrderUrl());
LOGGER.info("==========获取购物地址为:{}",microServiceUrl.getShoppingUrl());
LOGGER.info("==========获取用户地址为:{}",microServiceUrl.getUserUrl());
return "Success";
}
}
            org.springframework.boot
            spring-boot-configuration-processor
            true
注:
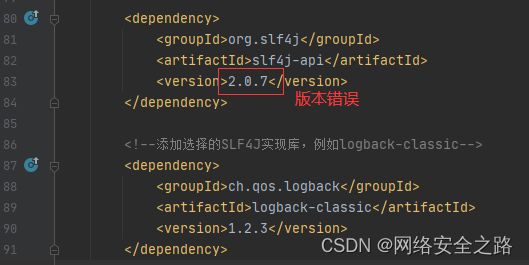
过程中遇到了slf4j报错
SLF4J: No SLF4J providers were found.
SLF4J: Defaulting to no-operation (NOP) logger implementation
SLF4J: See https://www.slf4j.org/codes.html#noProviders for further details.
SLF4J: Class path contains SLF4J bindings targeting slf4j-api versions 1.7.x or earlier.
SLF4J: Ignoring binding found at [jar:file:/D:/localrepository/ch/qos/logback/logback-classic/1.2.3/logback-classic-1.2.3.jar!/org/slf4j/impl/StaticLoggerBinder.class]
SLF4J: See https://www.slf4j.org/codes.html#ignoredBindings for an explanation.
最终找到问题所在,由于slf4j-api和 logback-classic需要配套
slf4j-api 和 logback-classic 的版本配套关系如下:
- slf4j-api 版本 1.7.x 可与 logback-classic 版本 1.2.x 配套使用。
- slf4j-api 版本 1.6.x 可与 logback-classic 版本 1.1.x 配套使用。
- slf4j-api 版本 1.5.x 可与 logback-classic 版本 0.9.x 配套使用。
改为以下版本,项目可以启动,slf4j日志正常在控制台打印
三、Spring Boot返回Json数据及数据封装
接口与接口间、前后端间传输用json
Spring Boot中,Controller 中使用@RestController注解即可返回 Json 格式的数据
对json的处理
常用的数据结构:类对象/List对象/Map对象
第一步创建user实体类
第二步创建Controller类
引入pom依赖
            com.fasterxml.jackson.core
            jackson-databind
            2.15.2
            compile


            com.fasterxml.jackson.datatype
            jackson-datatype-jdk8
            2.15.2
            compile


            com.fasterxml.jackson.datatype
            jackson-datatype-jsr310
            2.15.2
            compile


            com.fasterxml.jackson.module
            jackson-module-parameter-names
            2.15.2
            compile
四、Spring Boot中的MVC支持
常用注解
4.1、@RestController
@RestController 可以看作是 @Controller 和 @ResponseBody 的结合体,偷懒
由于 @RestController 中集成了 @ResponseBody 所以对返回 json 的注解不再赘述
package org.springframework.web.bind.annotation;

import java.lang.annotation.Documented;
import java.lang.annotation.ElementType;
import java.lang.annotation.Retention;
import java.lang.annotation.RetentionPolicy;
import java.lang.annotation.Target;
import org.springframework.core.annotation.AliasFor;
import org.springframework.stereotype.Controller;

@Target({ElementType.TYPE})
@Retention(RetentionPolicy.RUNTIME)
@Documented
@Controller
@ResponseBody   //将返回的数据结构转换为json格式
public @interface RestController {
    @AliasFor(
        annotation = Controller.class
    )
    String value() default "";
}
注意:
前后端分离,不用模板渲染,如Thymeleaf ,使用@RestController将数据以json传给前端,前端拿到后解析
不是前后端分离,使用模板渲染,@Controller中返回具体的页面,不能用@RestController了,如:
public String getUser() { return "user"; }
需要返回到user.html 页面的,若使用@RestController,会将user作为字符串返回,故需要使用@Controller
4.2、@RequestMapping
用于处理请求地址映射的注解,可用于类、方法上
类:将特定请求/请求模式映射到控制器上,表所有请求方法都将该类地址作为父路径
方法:进一步指定到处理方法的映射关系
有6个属性,常见:
value:请求的实际地址,可省略
method:指定请求的类型,post/get/put/delete/,默认get
produces:指定返回内容类型,如 produces = “application/json; charset=UTF-8”
import SpringBootDemo.MicroServiceUrl;
import org.slf4j.Logger;
import org.slf4j.LoggerFactory;
import org.springframework.web.bind.annotation.RequestMapping;
import org.springframework.web.bind.annotation.RequestMethod;
import org.springframework.web.bind.annotation.RestController;

import javax.annotation.Resource;

@RestController
@RequestMapping(value = "/test1",produces = "application/json; charset=UTF-8")
public class TestController {

    @RequestMapping(value = "/get",method = RequestMethod.GET)
    public String getConfig(){

        return "getSuccess";
    }

}
注解也可使用:
@GetMapping("/get")
@GetMapping("/put")
@GetMapping("/post")
@GetMapping("/delete")
4.3、@PathVariable --获取请求参数
用来获取url参数,Spring Boot支持restfull风格,如:get请求携带一个参数id过来,将id作为参数接收,可使用@PathVariable注解
    @GetMapping("/user/{idd}")
    public String testPathVariable(@PathVariable(value = "idd") Integer id) {
        System.out.println("获取到的id为:" + id);
        return "success";
    }
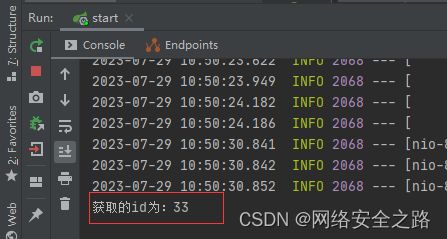
运行项目,在浏览器中请求 localhost:8080/test1/user/3
可以看到控制台输出如下信息:id为3
支持多个参数的接收。如果 url 中的参数和方法中的参数名称不同的话,也需要使用 value 属性来绑定两个参数。
4.4、@RequestParam ---获取请求参数
获取请求参数的
@@PathValiable 从url模板中获取参数值,即: http://localhost:8080/user/{id}
@RequestParam 从request里面获取参数值,即: http://localhost:8080/user?id=1
属性:
required:true该参数必须要传,否则报404;false:可有可无
defaultValue:默认值,表示如果请求中没有同名参数时的默认值
4.4.1 用于GET请求
@GetMapping("get1")
    public String testRequestParam(@RequestParam(value = "idd", required = false) Integer id){
        System.out.println("获取的id为:" + id);
        return "success requestparam";
    }
4.4.2 用于 POST 请求
接收前端表单提交的参数,假如前端通过表单提交 user 和 pwd 两个参数,那我们可以使用 @RequestParam 来接收
url 上面的参数和方法的参数需要一致,如果不一致,也需要使用 value 属性来说明
    @RequestMapping("/post1")
    public String postRequest(@RequestParam(value = "user",required = false) String username,@RequestParam(value = "pwd",required = false) String pass){
        System.out.println("username:" + username);
        System.out.println("passwd:" + pass);
        return "success";
    }
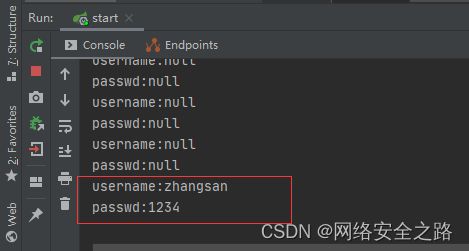
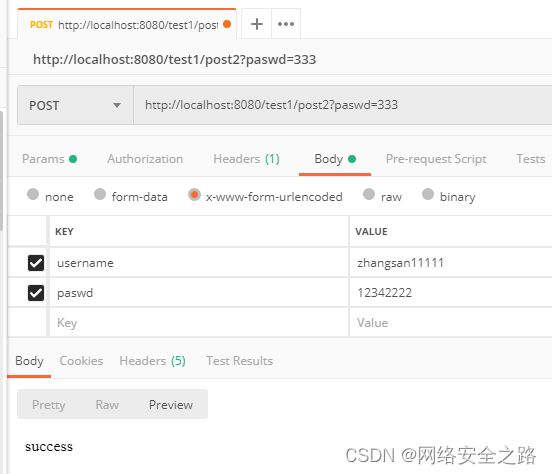
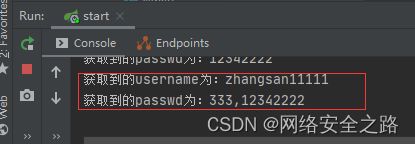
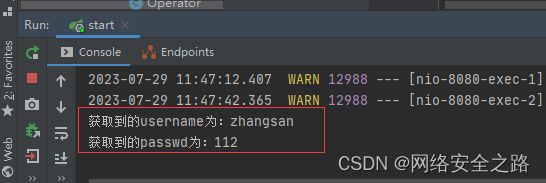
模拟前端表单提交
可看到日志打印出来了
4.4.3 封装实体类接收参数
若表单数据多,封装一个实体类来接收这些参数,实体中的属性名和表单中的参数名一致即可
封装实体类接收参数
public class User1 {
    private String username;
    private String paswd;

    public String getUsername() {
        return username;
    }

    public void setUsername(String username) {
        this.username = username;
    }

    public String getPaswd() {
        return paswd;
    }

    public void setPaswd(String paswd) {
        this.paswd = paswd;
    }

}
@RequestMapping("post2")
public String postRequest2(User1 user){
System.out.println("获取到的username为:" + user.getUsername());
System.out.println("获取到的passwd为:" + user.getPaswd());
return "success";
}4.5、@RequestBody
用于接收前端传来的实体,接收参数也是对应的实体
比如前端通过 json 提交传来两个参数 username 和 password,此时需要在后端封装一个实体来接收。
在传递的参数多的情况下,使用 @RequestBody 接收会非常方便。例如:
    @PostMapping("post3")
    public String postRequest3(@RequestBody User1 user){
        System.out.println("获取到的username为:" + user.getUsername());
        System.out.println("获取到的passwd为:" + user.getPaswd());
        return "success";
    }
五、Spring Boot集成 Swagger2 展现在线接口文档
现状前后端分离,唯一联系:为API接口
Swagger:在线API接口文档,开发、调用接口的人员可在线测试接口数据
这里可以查看组件的版本,查看到2.9.2使用的最多Maven Repository: io.springfox » springfox-swagger-ui (mvnrepository.com)![]() https://mvnrepository.com/artifact/io.springfox/springfox-swagger-ui
https://mvnrepository.com/artifact/io.springfox/springfox-swagger-ui
            io.springfox
            springfox-swagger2
            2.9.2


            io.springfox
            springfox-swagger-ui
            2.9.2
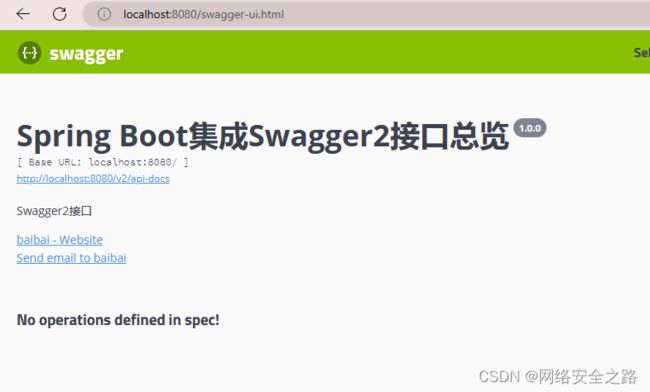
启动项目,在浏览器中输入 localhost:8080/swagger-ui.html,即可看到 swagger2 的接口页面
5.1 实体类注解
@ApiModel :用于实体类,表示对类进行说明,参数用实体类接收@ApiModelProperty :用于类中属性,表示对 model 属性的说明或者数据操作更改
package SpringBootDemo.Entity;

import io.swagger.annotations.ApiModel;
import io.swagger.annotations.ApiModelProperty;

@ApiModel(value = "用户实体类")
public class UserSwaggerTest {

    @ApiModelProperty(value = "用户唯一标识")
    private Long id;

    @ApiModelProperty(value = "用户姓名")
    private String username;

    @ApiModelProperty(value = "用户密码")
    private String password;

    public Long getId() {
        return id;
    }

    public void setId(Long id) {
        this.id = id;
    }

    public String getUsername() {
        return username;
    }

    public void setUsername(String username) {
        this.username = username;
    }

    public String getPassword() {
        return password;
    }

    public void setPassword(String password) {
        this.password = password;
    }

}
5.2 Controller类中相关注解
我参考这个笔记:
(184条消息) SpringBoot2.0经典学习笔记_魅Lemon的博客-CSDN博客


