JavaWeb
JavaWeb
基于idea、狂神
目录
- JavaWeb
- 一、JavaWeb
-
- 4. 一个网站访问的过程:
- 二、Maven
-
- idea技巧之Ctrl+Shift+/快速添加注释
- 三、Servlet
-
- idea技巧之alt+fn+prt sc或alt+Ins在web.xml中快速插入和功能块
- idea技巧之快捷键alt+enter:先输入一个返回变量的方法名,或new一个类的对象,然后按快捷键可以补充该对象的声明语句
- 四、ServletContext
-
- 重要技巧之.properties文件
- classpath
- 五、HttpServletResponse(extends ServletResponse)
-
- 重定向和转发的区别
- 六、HttpServletRequest
- 七、会话
-
- 1. Cookie
- 2. Session
- idea技巧之 packege分包与取消分包的方式:
- idea技巧之快速自动生成getter、setter等方法,或在xml中快速生成servlet等 代码块:alt+insert
- 八、JSP
-
- 1. 基本原理
- 2. 基础语法
- 3. JSP指令
- 4. 九大内置对象
- 5. JSP标签、JSTL标签、EL表达式
- 九、JavaBean
-
- 重要技巧之Lombok
- 十、MVC三层架构
-
- 架构思想:
- 十一、Filter(重点)
-
- idea技巧之快速添加web框架支持:
- 十二、监听器
- 十三、过滤器、监听器常见应用
-
- 重要技巧之静态static变量的使用:
- 十四、回顾JDBC
-
- idea技巧之快速键入main()方法的声明
- idea技巧之快速键入“System.out.println()”
- 重要技巧之junit单元测试可以对某个方法单独运行而无需main()方法:
- 十五、Ajax
- 十六、项目搭建实战(超市订单管理系统SMBMS)
-
- 1、准备工作
- 功能实现阶段——先画出功能的MVC三层架构,再从底向上逐层实现功能:
- 2、登录功能实现
-
- View层
- Modle层
-
- DAO层
- idea技巧之快速键入某个参数的非空判断语句和@NotNull插件
-
-
- service层
-
- 重要技巧之方便地对底层属性和方法进行调用
-
- Controller/Servlet层
- 3. 登录功能优化
- 4. 密码修改功能实现
-
- View层
- Model层
-
- DAO层
- Service层
- Controller/Servlet层
- 重要技巧之Servlet复用
- 5. 密码修改功能优化(Ajax)
- 6. 用户管理功能实现
-
- View层
- Modle层
-
- DAO层
- Service层
- Controller/Servlet层
- 十七、文件上传
- 十八、邮件发送原理和实现
一、JavaWeb
-
静态web
页面无法更新,所有用户看到的都是同一个页面。
静态资源:html、css等
客户端给服务器发送请求,web server接受请求,将静态资源发送给客户端作为响应。
-
动态web
页面动态展示,web的页面因人而异。
技术栈:JSP/Servlet(B/S架构(浏览器和服务器)、基于Java语言(大多数公司的组件都是Java))、ASP、PHP
客户端给服务器发送请求,web server plugin接受请求,将file system中的静态资源和JSP或Servlet中的动态资源通过web server作为响应发还。 -
web服务器(web server)Tomcat
最适合的一种:Tomcat(基于Java)
安装Tomcat:

启动Tomcat:

访问测试:浏览器访问路径“localhost:8080”
配置Tomcat:


默认端口号:Tomcat——8080;http——80;https——443

默认主机名称:localhost(127.0.0.1)
默认网站应用存放位置:webapps
4. 一个网站访问的过程:
-
发布一个web网站
将网站源代码放到服务器(tomcat)中指定的web应用的文件夹(webapps)下,就可以访问了:

访问域名:localhost:8080/y_study -
在IDEA中配置Tomcat
下一章介绍
二、Maven
- 下载Maven
1.Maven官网,点击左边download
2.下载所需版本的bin.zip并解压
注意:所选maven版本的发布日期最好早于idea的

3.配置环境变量:
系统变量 新建M2_HOME

新建MAVEN_HOME

编辑Path变量,增加如下:

在cmd中输入mvn -version可查看配置情况
4.修改配置文件
搜索maven镜像,得到配置内容:

编辑apache-maven-3.8.3\conf中的settings.xml,将这段镜像内容粘贴进去,具体位置:

5.建立本地仓库
在apache-maven-3.8.3中新建一个maven-repo文件夹,得到该文件夹的地址,并在settings.xml中增加这一行内容:
<localRepository>F:\IJ IDEA\maven\apache-maven-3.8.3-bin\apache-maven-3.8.3\maven-repolocalRepository>

- 在IDEA(以下皆需专业版)中创建一个Maven项目
1.启动idea,创建一个maven项目。可以勾选create from archetype,在下方选择Maven模板,这里选择maven的webapp,可创建一个webapp模板

或者,不创建模板

之后,

2.配置maven的家路径、setting.xml路径和本地仓库(maven-repo文件夹)路径,新建项目时可以配置,也可以在Settings中配置。在等待包数据下载好以后可在本地仓库中看到下载的包

注意,此时的配置只能对这一项目生效,换一个项目就需要重新配置,如需全局配置,则需关闭project后在初始页面配置,如下:

- 认识maven
一个干净的(普通的)maven项目,即没有创建模板:

有webapp的maven项目:


- 将maven的结构构建完整
在main文件夹下创建一个java文件夹(directory)和一个resources文件夹,创建时会有快捷创建提示。若没有,则创建好后右键点击java文件夹,点击Mark Directory as,选择文件夹类型

或者在Fire中的项目结构中进行配置

5. 在IDEA中配置Tomcat
1.


warning出现原因:访问一个网站时,必须指定一个文件夹的名字
解决办法:添加一个项目文件夹

创建一个war包,下面的是war导出包

应用上下文决定默认访问地址,若为“/”,则默认访问路径为localhost:8080
若为“/y”,则默认访问路径为localhost:8080/y/

配置完成,运行该Tomcat(点击运行键),等待之后弹出以下网站,“Hello World!”是默认的webapp目录中index.jsp中的内容,这是因为index.jsp是默认的访问对象

-
将maven中的webapp版本替换为与tomcat中的一致
将maven项目中src\main\webapps\ROOT\WEB-INF\web.xml中的内容替换为
apache-tomcat-9.0.54-windows-x64\apache-tomcat-9.0.54\webapps\ROOT\WEB-INF\web.xml的内容 -
分析pom文件
<project xsi:schemaLocation="http://maven.apache.org/POM/4.0.0 http://maven.apache.org/xsd/maven-4.0.0.xsd" xmlns:xsi="http://www.w3.org/2001/XMLSchema-instance" xmlns="http://maven.apache.org/POM/4.0.0">

	<modelVersion>4.0.0modelVersion>


	<groupId>com.ygroupId>
	<artifactId>javaweb03-mavenartifactId>
	<version>1.0-SNAPSHOTversion>


	<packaging>warpackaging>

	<name>javaweb03-maven Maven Webappname>


	<url>http://www.example.comurl>


	-<properties>


		<project.build.sourceEncoding>UTF-8project.build.sourceEncoding>


		<maven.compiler.source>1.7maven.compiler.source>
		<maven.compiler.target>1.7maven.compiler.target>

	properties>


	<dependencies>


		<dependency>
			<groupId>junitgroupId>
			<artifactId>junitartifactId>
			<version>4.11version>
			<scope>testscope>
		dependency>


		<dependency>
			<groupId>javax.servletgroupId>
			<artifactId>javax.servlet-apiartifactId>
			<version>4.0.1version>
		dependency>


		<dependency>
			<groupId>javax.servlet.jspgroupId>
			<artifactId>javax.servlet.jsp-apiartifactId>
			<version>2.3.3version>
		dependency>

	dependencies>


	<build>
		<finalName>javaweb03-mavenfinalName>
		<pluginManagement>

			<plugins>
				<plugin>
					<artifactId>maven-clean-pluginartifactId>
					<version>3.1.0version>
				plugin>

				<plugin>
					<artifactId>maven-resources-pluginartifactId>
					<version>3.0.2version>
				plugin>
				<plugin>
					<artifactId>maven-compiler-pluginartifactId>
					<version>3.8.0version>
				plugin>
				<plugin>
					<artifactId>maven-surefire-pluginartifactId>
					<version>2.22.1version>
				plugin>
				<plugin>
					<artifactId>maven-war-pluginartifactId>
					<version>3.2.2version>
				plugin>
				<plugin>
					<artifactId>maven-install-pluginartifactId>
					<version>2.5.2version>
				plugin>
				<plugin>
					<artifactId>maven-deploy-pluginartifactId>
					<version>2.8.2version>
				plugin>
			plugins>
		pluginManagement>
	build>
project>
<project xmlns="http://maven.apache.org/POM/4.0.0"
         xmlns:xsi="http://www.w3.org/2001/XMLSchema-instance"
         xsi:schemaLocation="http://maven.apache.org/POM/4.0.0 http://maven.apache.org/xsd/maven-4.0.0.xsd">
    <modelVersion>4.0.0modelVersion>
    <groupId>com.ygroupId>
    <artifactId>javaweb01.mavenartifactId>
    <version>1.0-SNAPSHOTversion>

    <properties...>

    <dependencies>
        <dependency>
            <groupId>junitgroupId>
            <artifactId>junitartifactId>
            <version>4.11version>
            <scope>testscope>
        dependency>


        <dependency>
            <groupId>org.springframeworkgroupId>
            <artifactId>spring-webmvcartifactId>
            <version>5.3.10version>
        dependency>
    dependencies>


    <build>
        <resources>
            <resource>
                <directory>src/main/resourcesdirectory>
                <includes>
                    <include>**/*.propertiesinclude>
                    <include>**/*.xmlinclude>
                includes>
                <filtering>falsefiltering>
            resource>
            <resource>
                <directory>src/main/javadirectory>
                <includes>
                    <include>**/*.propertiesinclude>
                    <include>**/*.xmlinclude>
                includes>
                <filtering>falsefiltering>
            resource>
        resources>
    build>
project>
idea技巧之Ctrl+Shift+/快速添加注释
- 查看IDEA项目中的jar包与其中的联系

三、Servlet
-
Servlet原理步骤
-
浏览器给web浏览器发送http请求
-
Web浏览器把请求req/request交给HttpServlet类中的
service(ServletRequest req, ServletResponse res) -
该方法通过调用我们编写的实现类中覆盖的方法,如
doGet(HttpServletRequest req, HttpServletResponse resp)等,给出响应res/resp/response信息 -
web服务器将这些信息相应给客户端浏览器
-
学习模板
启动Tomcat(见一、3.web服务器(web server)Tomcat)后,在浏览器中访问http://localhost:8080/examples/,进入Servlets examples,点击Code就可以查看各Servlet源代码。 -
写Servlet(以模仿HelloWorld Example为例)
1.创建一个maven项目(见maven笔记),并进行Maven环境优化
1.1.将web.xml修改成最新版:
<web-app xmlns="http://xmlns.jcp.org/xml/ns/javaee"
         xmlns:xsi="http://www.w3.org/2001/XMLSchema-instance"
         xsi:schemaLocation="http://xmlns.jcp.org/xml/ns/javaee
                         http://xmlns.jcp.org/xml/ns/javaee/web-app_4_0.xsd"
         version="4.0"
         metadata-complete="true">
web-app>
1.2.将maven的结构构建完整(见二、4.)
2.在maven项目的src\main\java中新建一个package,包名为你想要的web域名,然后在这个package中新建class,或者直接在java中新建一个class
3.Maven仓库的使用:下载jar包(方法一:在mvn官网中搜索寻找所需要的包):


模板:
<dependency>
    <groupId>javax.servletgroupId>
    <artifactId>javax.servlet-apiartifactId>
    <version>4.0.1version>
    <scope>providedscope>
dependency>
<dependency>
    <groupId>javax.servlet.jspgroupId>
    <artifactId>javax.servlet.jsp-apiartifactId>
    <version>2.3.3version>
    <scope>providedscope>
dependency>
依然复制到pom.xml中,刷新
删除作用域,则在所有情况下都能使用

方法二:点击mvn网站中所需包的“jar”按钮直接下载jar包,然后拷贝到maven仓库中javax文件夹的相应文件夹中)
4.编写一个servlet的java程序
直接继承HttpServlet ,并import导入包:

查看HttpServlet源码(快捷键Ctrl+鼠标左键点击一个对象(类、方法、变量等)可查看其源码),发现servlet的各接口/抽象类之间的关系为

注意,servlet在sun公司有两个默认的实现类:HttpServlet、GenericServlet
5.覆盖HttpServlet类中的doGet和doPost方法(快捷键Ctrl+O可以选择要定义或覆盖的父类方法)

可以直接将HelloWorld Example中的doGet的方法体复制过来:

如果要在页面中显示中文,则加上编码方式:

doGet方法中:
指定响应类型为html:resp.setContentType(“text/html”)。注意,一个页面的相应类型可以通过以下方式查看:右键点击页面–>检查–>

必须定义一个响应流:PrintWriter writer = resp.getWriter()
在页面中显示内容:writer.print(“hello,servlet”)。注意,这里的writer是前面定义的响应流对象
doPost方法中:
由于get或post只是请求实现的不同方式,业务逻辑都一样,因此可以相互调用:doGet(req, resp);也可以直接继承父类的。
6.注册servlet:由于浏览器访问的是web服务器,因此我们写的servlet需要在web服务器中注册,并且因为web.xml是web配置的核心应用,所以注册的方式就是改写这个文件,包括添加servlet的映射,映射中包含有其访问路径。
具体方法及注释:
idea技巧之alt+fn+prt sc或alt+Ins在web.xml中快速插入和功能块
DOCTYPE web-app PUBLIC
 "-//Sun Microsystems, Inc.//DTD Web Application 2.3//EN"
 "http://java.sun.com/dtd/web-app_2_3.dtd" >

<web-app>
  <display-name>Archetype Created Web Applicationdisplay-name>


  <servlet>

    <servlet-name>helloServletservlet-name>

    <servlet-class>com.y.servlet.HelloServletservlet-class>
  servlet>


  <servlet-mapping>
    <servlet-name>helloServletservlet-name>

    <url-pattern>/yurl-pattern>
  servlet-mapping>


  <servlet-mapping>
    <servlet-name>helloServletservlet-name>
    <url-pattern>/y1url-pattern>
  servlet-mapping>
web-app>
其中的访问路径还可以通过使用通配符“* ”来指定通用路径:
方法一:

访问路径为:默认路径+/hello/+任意
方法二:通用路径直接设为“/* ”,只是默认访问对象不再是index.jsp,而是指定的servlet对象
方法三:自定义后缀,但* 前不能加任何路径。例如:“*.ycr“, 默认访问对象仍然是index.jsp,访问路径为任何“默认路径+任意+.ycr”都可以访问servlet,并且默认访问对象仍然是index.jsp;“/hello/ *.ycr“,错误。
通用路径的优先级问题:指定了固有的映射路径优先级最高,找不到才会走通用路径
7.编写完成后,配置tomcat(见maven笔记),主要配置项目发布的路径即可
8.访问:直接运行,或启动tomcat(见tomcat笔记)。使用“默认地址+为该servlet注册时其name对应映射的请求路径”。以上面这个servlet为例:

-
在servlet中新建一个静态web
1.编写:在webapp中新建一个HTML文件,即可编写页面内容。例如:

-
浏览:在默认访问地址后添加“该HTML文件名.html”即可访问。例如:

-
总结与技巧
1.写一个Servlet程序只需要两个步骤:
1.1.编写一个类,实现Servlet接口;
1.2.把开发好的java类部署到web服务器中
2.学习可以在一个项目(比如javaweb04-servlet)里面建立module(比如servlet-01),而这个空的项目就是maven主工程:新建maven项目时,删掉src目录,在该项目中创建一个module,这里与创建一个带有webapp的maven项目的步骤相同。该module与maven主工程是maven父子工程,此时父项目中的pom.xml会有:
    <modules>
        <module>servlet-01module>
    modules>
子项目中的会有(没有就手写):
  <parent>
    <artifactId>javaweb04-servletartifactId>
    <groupId>com.ygroupId>
    <version>1.0-SNAPSHOTversion>
  parent>
注意:module中的pom若没有上面这一段指出父项目,则无法继承其资源,比如无法导入其jar包
子项目可以extends父项目,好处是子项目不需要再手动导入父项目中已经导入的资源
idea技巧之快捷键alt+enter:先输入一个返回变量的方法名,或new一个类的对象,然后按快捷键可以补充该对象的声明语句
四、ServletContext
Web容器在启动的时候,它会为每个web程序创建一个对应的ServletContext对象,它代表了当前的web应用。
功能:
- 共享不同servlet的数据。这样在一个服务器中放入数据后在另一个服务器中也可以使用。
ServletContext的初始化和调用、context.setAttribute和context.getAttribute:
public class helloservlet extends HttpServlet {
    @Override
    protected void doGet(HttpServletRequest req, HttpServletResponse resp) throws ServletException, IOException {
        //this.getServletConfig(); Servlet配置
        ServletContext context = this.getServletContext();//初始化一个Servlet上下文
        String username="应";//数据
        context.setAttribute("username",username);
        //将一个数据保存在了ServletContext中,名字为username(前者),值为username“后者”

        System.out.println("hello");
    }
}
public class getServlet extends HttpServlet {
    @Override
    protected void doGet(HttpServletRequest req, HttpServletResponse resp) throws ServletException, IOException {
        ServletContext context = this.getServletContext();//获取servlet上下文
        String username=(String)context.getAttribute("username");
        //取到context中的名为username(后者)的数据,帮将它赋值给username(前者)。getAttribute()方法返回的是object对象,可以强转成String
        resp.setContentType("text/html");
        resp.setCharacterEncoding("utf-8");
        resp.getWriter().print("名字"+username);
    }
}
servlet注册略
测试方法:先启动helloservlet,再启动getServlet
测试结果:后台显示“hello”,getServlet显示“应”
- 获取初始化参数
context.getInitParameter(“url”):
web.xml:
  <context-param>
    <param-name>urlparam-name>
    <param-value>jdbc:mysql://localhost:3306/mybatisparam-value>
  context-param>
public class servletdemo03 extends HttpServlet {
    @Override
    protected void doGet(HttpServletRequest req, HttpServletResponse resp) throws ServletException, IOException {
        ServletContext context = this.getServletContext();
        String url = context.getInitParameter("url");//获取初始化参数
        resp.getWriter().print(url);
    }
测试结果:servletdemo03显示“jdbc:mysql://localhost:3306/mybatis”
- 请求转发(在一个servlet上运行另一个servlet)
context.getRequestDispatcher(“”).forward(req,resp):
在servletdemo03的基础上(/gp为servletdemo03的url地址),
public class servletdemo04 extends HttpServlet {
    protected void doGet(HttpServletRequest req, HttpServletResponse resp) throws ServletException, IOException {
        ServletContext context = this.getServletContext();
        RequestDispatcher requestDispatcher = context.getRequestDispatcher("/gp");//转发的请求路径
        requestDispatcher.forward(req,resp);//调用forward实现请求转发
        //或者直接:context.getRequestDispatcher("/gp").forward(req,resp);

        System.out.println("进入了s4");
    }
测试结果:servletdemo04显示“jdbc:mysql://localhost:3306/mybatis”
- 读取资源文件(.properties文件)
properties文件、context.getServletContext().getResourceAsStream()、properties.load()和properties.getProperty()
第一步:在java目录下或者在resources目录下新建properties文件
第二步:可以编写properties文件内容为:
username=root
password=123456
第三步:
protected void doGet(HttpServletRequest req, HttpServletResponse resp) throws ServletException, IOException {
        InputStream is= this.getServletContext().getResourceAsStream("/WEB-INF/classes/db.properties");
        //获取context中的资源流
        Properties prop= new Properties();//初始化一个properties对象
        prop.load(is);//将获取的资源流加载到该properties对象中
        String user= prop.getProperty("username");
        String pwd= prop.getProperty("password");//获取properties中的名为“username”和“password”的资源内容
        resp.getWriter().print(user+":"+pwd);
    }
重要技巧之.properties文件
classpath
如果要获取的properties文件在resources目录下,则无需修改pom文件;
如果要获取的properties文件在java目录下,则需在pom中的build中配置resources,来防止我们资源导出失败的问题,配置内容见本文 二、Maven 7.分析pom文件 的第二块代码。此时获取资源流时寻找properties导出文件的路径变为了"/WEB-INF/classes/com/y/db.properties",这里/com/y指代的是target中properties所在的packet。换句话说,两个所在位置不同的properties都被打包到了同一个路径下,即target中的classes,我们俗称这个路径为classpath。
五、HttpServletResponse(extends ServletResponse)
web服务器接收到客户端的http请求,针对这个请求,分别创建一个代表请求的HttpServletRequest对象,代表响应的一个HttpServletResponse。如果要获取客户端请求过来的参数,找HttpServletRequest;如果要给客户端响应一些信息,找HttpServletResponse
- 分类
负责向浏览器发送数据的方法:
ServletOutputStream getOutputStream() throws IOException;
PrintWriter getWriter() throws IOException;
负责向浏览器发送响应头的方法
    void setCharacterEncoding(String var1);

    void setContentLength(int var1);

    void setContentLengthLong(long var1);

    void setContentType(String var1);

    void setDateHeader(String var1, long var2);

    void addDateHeader(String var1, long var2);

    void setHeader(String var1, String var2);

    void addHeader(String var1, String var2);

    void setIntHeader(String var1, int var2);

    void addIntHeader(String var1, int var2);
响应状态码
    int SC_CONTINUE = 100;
    int SC_SWITCHING_PROTOCOLS = 101;
    int SC_OK = 200;
    int SC_CREATED = 201;
    int SC_ACCEPTED = 202;
    int SC_NON_AUTHORITATIVE_INFORMATION = 203;
    int SC_NO_CONTENT = 204;
    int SC_RESET_CONTENT = 205;
    int SC_PARTIAL_CONTENT = 206;
    int SC_MULTIPLE_CHOICES = 300;
    int SC_MOVED_PERMANENTLY = 301;
    int SC_MOVED_TEMPORARILY = 302;
    int SC_FOUND = 302;
    int SC_SEE_OTHER = 303;
    int SC_NOT_MODIFIED = 304;
    int SC_USE_PROXY = 305;
    int SC_TEMPORARY_REDIRECT = 307;
    int SC_BAD_REQUEST = 400;
    int SC_UNAUTHORIZED = 401;
    int SC_PAYMENT_REQUIRED = 402;
    int SC_FORBIDDEN = 403;
    int SC_NOT_FOUND = 404;
    int SC_METHOD_NOT_ALLOWED = 405;
    int SC_NOT_ACCEPTABLE = 406;
    int SC_PROXY_AUTHENTICATION_REQUIRED = 407;
    int SC_REQUEST_TIMEOUT = 408;
    int SC_CONFLICT = 409;
    int SC_GONE = 410;
    int SC_LENGTH_REQUIRED = 411;
    int SC_PRECONDITION_FAILED = 412;
    int SC_REQUEST_ENTITY_TOO_LARGE = 413;
    int SC_REQUEST_URI_TOO_LONG = 414;
    int SC_UNSUPPORTED_MEDIA_TYPE = 415;
    int SC_REQUESTED_RANGE_NOT_SATISFIABLE = 416;
    int SC_EXPECTATION_FAILED = 417;
    int SC_INTERNAL_SERVER_ERROR = 500;
    int SC_NOT_IMPLEMENTED = 501;
    int SC_BAD_GATEWAY = 502;
    int SC_SERVICE_UNAVAILABLE = 503;
    int SC_GATEWAY_TIMEOUT = 504;
    int SC_HTTP_VERSION_NOT_SUPPORTED = 505;
- 常见应用
- 向浏览器输出消息(前述)
- 下载文件
protected void doGet(HttpServletRequest req, HttpServletResponse resp) throws ServletException, IOException {
//        下载文件
//        1.获取文件路径(确保文件在resources中,可以直接复制粘贴进去),这里的路径最好给绝对路径,指代明确
        String realPath ="F:\\IJ IDEA\\Projects\\javaweb04-servlet\\response\\target\\classes\\1.jpg";
        System.out.println("下载文件的路径:"+realPath);
//        2.获取下载的文件名
        String filename = realPath.substring(realPath.lastIndexOf("\\") + 1);
//        3.设置消息头,让浏览器能支持该文件的下载(Content-Disposition)
        resp.setHeader("Content-Disposition","attachment;filename="+filename);
        //若文件名有中文,则需加上编码方式
        // resp.setHeader("Content-Disposition","attachment;filename="+URLEncoder.encode(filename,"UTF-8"));
//        4.获取文件的输入流
        FileInputStream in = new FileInputStream(realPath);
//        5.创建缓冲区
        int len=0;
        byte[] buffer = new byte[1024];
//        6.获取OutputStream对象
        ServletOutputStream out = resp.getOutputStream();
//        7.将FileOutputStream流写入到buffer缓冲区
        while ((len=in.read(buffer))>0){
            out.write(buffer,0,len);
        }
        in.close();
        out.close();
//        8.使用OutputStream将缓冲区中的数据输出到客户端
    }
- 验证码功能
· 前端实现
· 后端实现,需要用到java的图片类
protected void doGet(HttpServletRequest req, HttpServletResponse resp) throws ServletException, IOException {
        //让浏览器3秒自动刷新一次
        resp.setHeader("refresh","3");
        //1.在内存中创建一个图片
        BufferedImage image = new BufferedImage(80,20,BufferedImage.TYPE_INT_RGB);
        //2.画图
        Graphics2D g= (Graphics2D)image.getGraphics();//笔
        //设置图片的背景图片
        g.setColor(Color.white);
        g.fillRect(0,0,80,20);
        //给图片写数据
        g.setColor(Color.BLUE);
        g.setFont(new Font(null,Font.BOLD,20));
        g.drawString(makenumber(),0,20);
        //3.告诉浏览器,这个请求以图片的方式打开
        resp.setContentType("image/jpg");
        //4.网站存在缓存,不让浏览器缓存
        resp.setDateHeader("expires",-1);
        resp.setHeader("Cache-Control","no-cache");
        resp.setHeader("Pragma","no-cache");
        //5.把图片写给浏览器
        ImageIO.write(image,"jpg", resp.getOutputStream());

    }
- 实现重定向
客户端A请求一个web资源B后,B会通知A去访问另一个web资源C,该过程叫重定向。
protected void doGet(HttpServletRequest req, HttpServletResponse resp) throws ServletException, IOException {
        resp.sendRedirect("/resp/img");//重定向(/img为上一个的url-pattern)
        /*相当于:
         *resp.setHeader("Location","/resp/img");
         *resp.setStatus(302);
         */
    }
重定向和转发的区别
相同点:页面都会实现跳转
不同点:
- 请求转发的url不会发生变化,响应状态码为302
- 重定向的url会发生变化,响应状态码为307

六、HttpServletRequest
HttpServletRequest代表客户端的请求,用户通过http协议访问服务器,HTTP请求中的所有信息会被封装到HttpServletRequest,通过这个HttpServletRequest方法获得客户端的所有信息。

获取前端传递的参数,并请求转发

以登录系统为例:
第一步,写登陆界面
删除重建index.jsp:
<%@ page contentType="text/html;charset=UTF-8" language="java" %>
<html>
<head>
    <title>登录title>
head>
<body>
<h1>登录h1>
<div style="text-align: center">
    <%--这里表单的意思是:以post方法提交表单,提交到servlet中的请求HttpServletRequest--%>
    <form action="${pageContext.request.contextPath}/login" method="post"><%--创建一个表单,并:获取服务器的请求路径为“/login”,该路径就是要调用的servlet的url;调用方法为“post”--%>
        用户名:<input type="text" name="username"><br><%--创建一个text文本框,变量名为username;<br>是换行操作--%>
        密码:<input type="password" name="password"><br><%--创建一个password密码框,变量名为password--%>
        爱好:
        <input type="checkbox" name="hobbies" value="女人">女人<%--创建checkbox多选框,以该选项框为例,变量名为hobby,其值为女人(前一个),在前端显示为“女人”(后一个)--%>
        <input type="checkbox" name="hobbies" value="足球">足球
        <input type="checkbox" name="hobbies" value="音乐">音乐
        <br>
        <input type="submit"><%--创建一个submit提交框--%>
    form>
div>
body>
html>
第二步,写登陆后的界面:
在webapp下新建success.jsp:
<body>
<h1>登录成功h1>
body>
第三步,获取前端传递的参数,并打印到后台,然后请求转发success.jsp:
    protected void doGet(HttpServletRequest req, HttpServletResponse resp) throws ServletException, IOException {
        req.setCharacterEncoding("utf-8");
        resp.setCharacterEncoding("utf-8");

        String username = req.getParameter("username");//获取名为"username"的参数
        String password = req.getParameter("password");
        String[] hobbies = req.getParameterValues("hobbies");
        System.out.println("==================");
        System.out.println(username);
        System.out.println(password);
        System.out.println(Arrays.toString(hobbies));//打印数组
        System.out.println("==================");

        /*通过请求转发*/
        req.getRequestDispatcher("/success.jsp").forward(req,resp);//"/success.jsp"中的/就代表当前的web应用,因此也可以写为:
        //req.getRequestDispatcher(req.getContextPath()+"success.jsp").forward(req,resp);
    }

    @Override
    protected void doPost(HttpServletRequest req, HttpServletResponse resp) throws ServletException, IOException {
        doGet(req, resp);
    }
七、会话
举例:用户打开一个浏览器,点击了很多链接,访问多个web资源,关闭浏览器,这个过程可以称之为会话
两种有状态会话:
服务端给客户端一个信件,客户端下次访问服务端带上信件就可以访问了(cookie)
服务端给客户端登记,下次客户端访问时进行匹配(session)
保存会话的两种技术:
cookie
- 客户端技术(响应、请求)
session
- 服务器技术,可以保存用户的会话信息。我们可以把用户数据放进session中
- 常见场景:自动登录
1. Cookie
服务器从客户端的请求中获取Cookie、服务器新建cookie并把它响应给客户端:
protected void doGet(HttpServletRequest req, HttpServletResponse resp) throws ServletException, IOException {
    //过程描述:服务器告诉客户端访问的时间,把这个时间封装成一个信件,客户端再次访问时服务器就可以识别信件了

    //中文编码
    req.setCharacterEncoding("UTF-8");
    resp.setContentType("text/html;charset=UTF-8");

    PrintWriter out = resp.getWriter();

    //服务器从客户端的请求中获取Cookie
    Cookie[] cookies = req.getCookies();//一个客户端可以有多个Cookie,因此用数组
    if (cookies!=null){//判断cookie是否存在
        out.write("你上一次访问的时间是:");
        for (int i = 0; i < cookies.length; i++){
            Cookie cookie = cookies[i];
            if (cookie.getName().equals("lastLoginTime")){//cookie.getName():获得cookie中的name(name-value)
                long lastLoginTime = Long.parseLong(cookie.getValue());//Long.parseLong:将String解析转化成long;cookie.getValue():获得cookie中的value(name-value)
                Date date = new Date(lastLoginTime);//Date是用来表示时间的类
                out.write(date.toLocaleString());//本地时间格式化的方法
            }
        }
    }else {
        out.write("这是您第一次访问本站");
    }

    //服务器新建cookie并把它响应给客户端
    Cookie cookie = new Cookie("lastLoginTime", System.currentTimeMillis()+"");//“System.currentTimeMillis()+""”可以将System.currentTimeMillis()返回值变成字符串,或者用String.valuesOf()
    cookie.setMaxAge(24*60*60);//设置cookie的有效期,此处为一天
    resp.addCookie(cookie); //服务器把cookie响应给客户端
}
Cookie基本原理:
- 客户端的cookie一般会保存在本地的用户目录下的appdata中
- 一个cookie只能保存一个信息
- 一个web站点可以给浏览器发送多个cookie,最多存放20个cookie
- cookie大小有限制4kb
- 浏览器最多有300个cookie
删除cookie的两种途径:
- 不设置有效期,关闭浏览器自动失效
- 超过有效期
    protected void doGet(HttpServletRequest req, HttpServletResponse resp) throws ServletException, IOException {
        //删除name为lastLoginTime的cookie
        Cookie cookie = new Cookie("lastLoginTime", System.currentTimeMillis()+"");//创建一个cookie,名字必须要和要删除的名字一致
        cookie.setMaxAge(0);//立马过期

        resp.addCookie(cookie);
    }
String的中文编解码函数:
URLEncoder.encode("中文","utf-8")//返回一个编码后的String s
URLDecoder.decode(s,"utf-8")//返回中文String
2. Session
- 服务器会给每一个用户(浏览器)创建一个session对象
- 一个session独占一个浏览器,只要浏览器没有关闭,这个session就存在
- 用户登录后,整个网站都可以访问–>保存用户信息的功能
HttpSession方法一览:

idea技巧之 packege分包与取消分包的方式:


idea技巧之快速自动生成getter、setter等方法,或在xml中快速生成servlet等 代码块:alt+insert


session和cookie的区别:
- Cookie是把服务器用户的数据写给用户的浏览器,浏览器保存(可以保存多个)
- Session把服务器用户的数据写到用户独占Session中,服务器保存(保存重要的信息,减少服务器资源的浪费)
- Session对象由服务器创建
应用场景:
- 保存一个登录用户的信息
- 购物车信息
- 在整个网站中经常会使用的数据,我们将它保存在session中
Session相关操作:
    protected void doGet(HttpServletRequest req, HttpServletResponse resp) throws ServletException, IOException {
        //中文编码
        req.setCharacterEncoding("UTF-8");
        resp.setCharacterEncoding("UTF-8");
        resp.setContentType("text/html");

        //得到session
        HttpSession session = req.getSession();

        //在session中存东西
        session.setAttribute("name", new Person("超", 1));

        //获取session的ID
        String sessionId = session.getId();

        //判断session是不是新创建的
        if (session.isNew()) {
            resp.getWriter().write("session 创建成功,ID=" + sessionId);
        }else{
            resp.getWriter().write("session已经在服务器中存在了,ID=" + sessionId);
        }

        /*//session创建的过程相当于:
        Cookie cookie = new Cookie("JSESSIONID",sessionId);
        resp.addCookie(cookie);*/

    }
会话过期:
方法一:
    protected void doGet(HttpServletRequest req, HttpServletResponse resp) throws ServletException, IOException {
        HttpSession session = req.getSession();
        //仅删除session中的信息
        session.removeAttribute("name");
        //手动注销session
        session.invalidate();
    }
方法二:
    <session-config>

        <session-timeout>1session-timeout>
    session-config>
八、JSP
1. 基本原理
JSP,Java Sever Pages,Java服务器页面。和servlet一样,用于动态web技术
和HTML的区别:
- HTML只给用户提供静态的数据
- JSP页面可以嵌入JAVA代码,为用户提供动态数据
注意:
- 不管浏览器向服务器访问什么资源,都是在访问servlet,因此JSP最终会被转化成Java类,其本质上就是一个servlet
- JSP编辑页面中的Java代码会被原封不动地输出到其Java类中,HTML代码(…)在Java类中会被转化为out.write(“…”)并最终输出到前端
原理:一个JSP底层包括判断请求、内置了一些对象(session、ServletContext、ServletConfig、HttpServletRequest、HttpServletResponse等)、输出页面前的代码
2. 基础语法
pom.xml:
        <dependency>
            <groupId>javax.servletgroupId>
            <artifactId>servlet-apiartifactId>
            <version>2.5version>
        dependency>

        <dependency>
            <groupId>javax.servlet.jspgroupId>
            <artifactId>javax.servlet.jsp-apiartifactId>
            <version>2.3.3version>
        dependency>

        <dependency>
            <groupId>javax.servlet.jsp.jstlgroupId>
            <artifactId>jstlartifactId>
            <version>1.2version>
        dependency>

        <dependency>
            <groupId>taglibsgroupId>
            <artifactId>standardartifactId>
            <version>1.1.2version>
        dependency>
JSP作为Java技术的一种应用,它拥有一些自己的扩充语法。

JSP表达式:
  <body>
  <%--JSP表达式
  作用:用来将程序的输出,打印到客户端浏览器
  <%= 变量或者表达式%>
  --%>
  <%= new java.util.Date()%>
  body>
JSP脚本片段
  <hr><%--打印分割线--%>

  <%--JSP脚本片段--%>
  <%
    int sum = 0;
    for (int i = 1; i <= 100; i++){
      sum+=i;
    }
    out.println("<h1>Sum="+sum +"<h1>");/*out.println可以自动将括号内的语句作为HTML语言输出到前端HTML中*/
  %>
脚本片段的再实现
  <%--在代码中嵌入HTML元素--%>
  <%
    for (int i=0;i<5;i++){
  %>
  <h1>Hello, World! <%= i%> h1>
  <%
    }
  %>
整体打印效果:

JSP声明:<%! … %>,会被直接编译到JSP生成的java类中,作用域高于普通的<% … %>中的Java代码(生成到了类当中的jspService方法中)
  <%!
    static {
      System.out.println("Loading Servlet!");
    }

    private int globalVar = 0;

    public void ycr(){
      System.out.println("进入了方法ycr");
    }
  %>
<%–JSP的注释,不会在客户端的HTML源代码中显示–%>
3. JSP指令
设置文档编码方式、出现错误时跳转到某个页面。。。:
<%@ page ... %>
页面显示为一个图片:
先在web目录中新建一个resource目录(img),再在里面放入图片
<img src="/img/消息结构示例.jpg" alt="500error">
出现指定错误类型就转到某个jsp的页面:
web.xml中,
    <error-page>
        <error-code>404error-code>
        <location>/error/404.jsplocation>
    error-page>
	<%--@include将页面的代码拼接一起--%>
    <%@include file="/common/header.jsp"%>
    <h1>网页主体h1>
    <%@include file="/common/footer.jsp"%>

    <hr>

    <%--JSP标签
    jsp:include直接将页面拼接起来,本质还是不同页面
    --%>
    <jsp:include page="common/header.jsp"/>
    <h1>网页主体h1>
    <jsp:include page="common/footer.jsp"/>

4. 九大内置对象
- pageContext ——存东西
- request ——存东西
- response
- session ——存东西
- application(即ServletContext) ——存东西
- config(即ServletConfig)
- out
- page ——不用
- exception
<%--内置对象--%>
<%
pageContext.setAttribute("name1","ycr1");//只在一个页面中有效
request.setAttribute("name2","ycr2");//只在一次请求中有效,请求转发会携带这个数据
session.setAttribute("name3","ycr3");//只在一次会话中有效,从打开浏览器到关闭
application.setAttribute("name4","ycr4");//只在服务器中有效,从打开服务器到关闭
%>

<%
    /*通过寻找的方式取出我们在pageContext中保存的值*/
    /*从作用域的底层到高层寻找,即pageContext-->request-->session-->application*/
    Object name1 = pageContext.findAttribute("name1");
    Object name2 = pageContext.findAttribute("name2");
    Object name3 = pageContext.findAttribute("name3");
    Object name4 = pageContext.findAttribute("name4");
    Object name5 = pageContext.findAttribute("name5");
%>

<%--使用EL表达式${}输出--%>
<h1>取出的值为:h1>
<h2>${name1}h2>
<h3>${name2}h3>
<h4>${name3}h4>
<h5>${name4}h5>
<h6>${name5}h6>
<%--<h6><%=name5%>h6>--%>
<%
/*请求转发*/
pageContext.forward("/index.jsp");
//request.getRequestDispatcher("/index.jsp").forward(request,response);
%>
request:客户端向服务器发送请求产生的数据,用户关闭网页后就看不到了,例如新闻
session:客户端向服务器发送请求产生的数据,用户关闭网页后服务器仍然保存,例如购物车
application:客户端向服务器发送请求产生的数据,一个用户关闭网页后,其他用户能看见,例如聊天数据
5. JSP标签、JSTL标签、EL表达式
EL表达式:获取数据、执行运算、获取web开发的常用对象
注意导入javax.servlet.jsp.jstl、taglibs的dependency,并找到他俩所在的文件夹,将这两个的jar包复制粘贴到tomcat的lib目录中
JSP标签:
<jsp:forward page="jsptag2.jsp">
    <jsp:param name="name" value="应"/>
    <jsp:param name="age" value="18"/>
jsp:forward>
JSTL标签:
JSTL标签库的使用就是为了弥补HTML标签的不足,它自定义许多标签,可以供我们使用,标签的功能和Java代码一样。包括核心标签、格式化标签、SQL标签、XML标签。
JSTL核心标签库的使用:
<%--要使用JSTL核心标签库,先引入--%>
<%@ taglib prefix="c" uri="http://java.sun.com/jsp/jstl/core" %>
if实例:
<h4>if测试h4>

<hr>

<form action="coreif.jsp" method="get"><%--coreif.jsp就是当前jsp文件, 这句话作用是将username的值提交到这个请求中,并在下面JSTL标签语句块中做判断--%>
    <%--EL表达式获取表单中的数据:${param.参数名}--%>
    <input type="text" name="username" value="${param.username}">
    <input type="submit" value="登录">
form>

<%--判断如果提交的用户是管理员,则登陆成功--%>
<c:if test="${param.username='admin'}" var="isAdmin">
    <c:out value="welcome"/>
c:if>

<c:out value="${isAdmin}"/>

switch实例:
<%--定义一个叫score的变量,值为85--%>
<c:set var="score" value="85"/>

<c:choose>
    <c:when test="${score>=90}">
        你的成绩为优秀
    c:when>
    <c:when test="${score>=80}">
        你的成绩为一般
    c:when>
    <c:when test="${score>=70}">
        你的成绩为良好
    c:when>
    <c:when test="${score<=60}">
        你的成绩为差
    c:when>
c:choose>
for实例:
<%
    ArrayList<String> people = new ArrayList<>();
    people.add(0,"张三");
    people.add(1,"李四");
    people.add(2,"王二");
    people.add(3,"麻子");
    request.setAttribute("list", people);
%>

<%--var为每一次遍历出来的变量;items为要遍历的对象--%>
<c:forEach var="people" items="${list}">
    <c:out value="${people}"/><br>
c:forEach>

<hr>

<%--begin、end和step分别为遍历的开始位置、结束位置和步长--%>
<c:forEach begin="1" end="3" step="2" var="people" items="${list}">
    <c:out value="${people}"/><br>
c:forEach>
九、JavaBean

相当于pojo(Plain Ordinary Java Object)、entity(实体类)
实体类,有特定的写法:
- 必须有一个无参构造
- 属性必须私有化
- 必须有对应的get/set方法
一般用来和数据库的字段做映射 ORM(对象关系映射)
- 表–>类
- 字段–>属性
- 行记录–>对象
一个表
| id | name | age | address |
|---|---|---|---|
| 1 | y1 | 10 | 西电北 |
| 2 | y2 | 20 | 西电南 |
对应到Java对象:
import lombok.Data;
@Data
//实体类一般都是和数据库中的表结构一一对应的
public class people {
    private int id;
    private String name;
    private int age;
    private String address;
}
<body>
<%
/*    people people = new people();
    people.setAddress("xi'an");
    people.setAge(18);
    people.setId(1);
    people.setName("ycr");*/
%>
<jsp:useBean id="people" class="com.y.pojo.people" scope="page" />

<jsp:setProperty name="people" property="address" value="xi'an"/>
<jsp:setProperty name="people" property="id" value="1"/>
<jsp:setProperty name="people" property="age" value="18"/>
<jsp:setProperty name="people" property="name" value="ycr"/>

姓名:<jsp:getProperty name="people" property="name"/>
id:<jsp:getProperty name="people" property="id"/>
年龄:<jsp:getProperty name="people" property="age"/>
地址<jsp:getProperty name="people" property="address"/>

body>
重要技巧之Lombok
通过Lombok插件我们只需要编写需要的属性类型、属性即可,构造器、toString方法可以通过对应的注解实现,不再需要我们构建:Lombok基本使用方法
@Getter/@Setter: 作用类上,生成所有成员变量的getter/setter方法;
	作用于成员变量上,生成该成员变量的getter/setter方法。

@ToString: 作用于类,覆盖默认的toString()方法

@EqualsAndHashCode: 作用于类,覆盖默认的equals和hashCode

@NoArgsConstructor:生成无参构造器;

@RequiredArgsConstructor:生成包含final和@NonNull注解的成员变量的构造器;

@AllArgsConstructor:生成全参构造器

@Data: 作用于类上,注解集合,使用它相当于使用下列注解:
	@ToString
	@EqualsAndHashCode
	@Getter
	@Setter
	@RequiredArgsConstructor

@Builder: 作用于类上,将类转变为建造者模式

@Log: 作用于类上,生成日志变量
十、MVC三层架构
MVC:model模型、view视图(JSP)、controller控制器(servlet)
架构思想:
从前,用户直接访问控制层,控制层再直接操作数据库。这样会带来程序臃肿、不便维护等弊端,然而可以通过一层一层增加架构来解决。例如:
- 通过JDBC提供的接口来操作数据库,而不必亲自操作数据库
- 让Servlet专注于处理请求以及控制视图跳转
- 让JSP专注于显示数据
- …
综上,提出MVC架构:

model:
- 业务处理:业务逻辑(Service)
- 数据持久层:CRUD增删改查(Dao)
view:
- 展示数据
- 提供链接发起Servlet请求(a链接、form表单、img)
controller:
- 接收用户请求:req参数、session
- 交给业务层处理对应的代码
- 控制视图的跳转
十一、Filter(重点)
- 处理中文乱码
- 登录验证

idea技巧之快速添加web框架支持:
对于一个普通maven项目,


自动生成,

过滤器开发步骤:
- 导包
    <dependencies>

        <dependency>
            <groupId>javax.servletgroupId>
            <artifactId>servlet-apiartifactId>
            <version>2.5version>
        dependency>
        <dependency>
            <groupId>javax.servlet.jspgroupId>
            <artifactId>javax.servlet.jsp-apiartifactId>
            <version>2.3.3version>
        dependency>
        <dependency>
            <groupId>javax.servlet.jsp.jstlgroupId>
            <artifactId>jstlartifactId>
            <version>1.2version>
        dependency>
        <dependency>
            <groupId>taglibsgroupId>
            <artifactId>standardartifactId>
            <version>1.1.2version>
        dependency>


        <dependency>
            <groupId>mysqlgroupId>
            <artifactId>mysql-connector-javaartifactId>
            <version>8.0.28version>
        dependency>
    dependencies>
- 编写并配置过滤器
package com.y.filter;

import javax.servlet.*;//注意要导servlet中的Filter
import java.io.IOException;

public class CharacterEncodingFilter implements Filter {
    //初始化:web服务器启动时初始化,随时等待过滤对象出现
    public void init(FilterConfig filterConfig) throws ServletException {
        System.out.println("字符编码过滤器初始化");
    }

    public void doFilter(ServletRequest servletRequest, ServletResponse servletResponse, FilterChain filterChain) throws IOException, ServletException {
        servletResponse.setContentType("text/html;charset=UTF-8");
        System.out.println("字符编码过滤器执行前");
        filterChain.doFilter(servletRequest,servletResponse);//让程序继续运行,否则程序就被拦截停止了
        System.out.println("字符编码过滤器执行后");
    }

    //销毁:web服务器关闭的时候销毁过滤器
    public void destroy() {
        System.out.println("字符编码过滤器销毁");
    }
}
被过滤的servlet源码:
protected void doGet(HttpServletRequest req, HttpServletResponse resp) throws ServletException, IOException {
        resp.getWriter().print("你好世界");
    }
web.xml:
    <filter>
        <filter-name>characterEncodingFilterfilter-name>
        <filter-class>com.y.filter.CharacterEncodingFilterfilter-class>
    filter>
    <filter-mapping>
        <filter-name>characterEncodingFilterfilter-name>

        <url-pattern>/servlet/*url-pattern>
    filter-mapping>
    <servlet>
        <servlet-name>servletShowservlet-name>
        <servlet-class>com.y.servlet.ServletShowservlet-class>
    servlet>
    <servlet-mapping>
        <servlet-name>servletShowservlet-name>
        <url-pattern>/showurl-pattern>
    servlet-mapping>
    <servlet-mapping>
        <servlet-name>servletShowservlet-name>
        <url-pattern>/servleturl-pattern>
    servlet-mapping>
- 测试
启动服务器,


紧接着刷新上面的页面,查看控制台发现又执行了一次过滤器,

停止tomcat服务器,

十二、监听器
监听器Listener有很多种,下面只举例一种说明监听器的开发:
实现监听器接口,
//统计网上在线人数:统计session
public class OnlineCountListener implements HttpSessionListener {
    //创建session监听:
    //一旦创建session就会触发以下事件
    public void sessionCreated(HttpSessionEvent httpSessionEvent) {
        ServletContext servletContext = httpSessionEvent.getSession().getServletContext();
        System.out.println(httpSessionEvent.getSession().getId());
        Integer onlineCount = (Integer) servletContext.getAttribute("OnlineCount");//注意Integer和int不一样
        if (onlineCount == null)
            onlineCount = new Integer(1);
        else {
            int count = onlineCount.intValue();
            onlineCount = new Integer(count+1);
        }
        servletContext.setAttribute("OnlineCount", onlineCount);
    }

    //销毁session监听
    //一旦销毁session就会触发以下事件.销毁session的方法见Session部分
    public void sessionDestroyed(HttpSessionEvent httpSessionEvent) {
        ServletContext servletContext = httpSessionEvent.getSession().getServletContext();
        Integer onlineCount = (Integer) servletContext.getAttribute("OnlineCount");//注意Integer和int不一样
        if (onlineCount == null)
            onlineCount = new Integer(1);
        else {
            int count = onlineCount.intValue();
            onlineCount = new Integer(count-1);
        }
        servletContext.setAttribute("OnlineCount", onlineCount);
    }
}
index.jsp,(这里总结了在jsp中获取ServletContext参数值(Attribute)的几个方法)
<body>

  <h1>当前有${OnlineCount}在线...EL表达式h1>
  <h1>当前有<%=pageContext.getServletContext().getAttribute("OnlineCount")%>在线...JSP的pageContext对象h1>
  <h1>当前有<%=application.getAttribute("OnlineCount")%>在线...JSP的application对象h1>

  $END$
  body>
web.xml中配置,
    <listener>
        <listener-class>com.y.listener.OnlineCountListenerlistener-class>
    listener>
测试,

十三、过滤器、监听器常见应用
监听器在GUI图形用户界面的应用:见Java基础
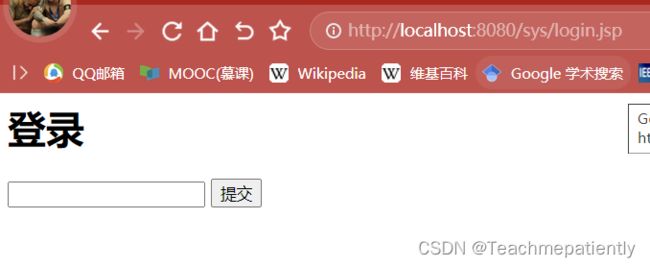
登录系统以及用过滤器实现登陆权限拦截:
- 用户登陆页面、登陆成功页面、登陆失败页面
<body>

<h1>登录h1>

<form action="/servlet/login" method="post"><%--将用户输入的参数提交到url为/servlet/login的服务器的请求中--%>
    <input type="text" name="username">
    <input type="submit">
form>
<body>

<%--先判断session中是否有USER_NAME参数,如果有,就意味着登陆成功,可以返回访问该页面.该部分可以用过滤器来实现--%>
<%--
<%
    Object user_session = request.getSession().getAttribute(Constant.USER_SESSION);
    if (user_session == null){
        pageContext.forward("/sys/login.jsp");//请求转发到/sys/login.jsp页面
    }
%>
--%>

<h1>主页h1>

<p>
    <a href="/sys/login.jsp">注销a><%--按钮,名字显示为"注销",用户点击后跳转到/servlet/logoin--%>
p>

body>
html>

<body>

<h1>用户名错误h1>

<a href="/servlet/login">返回登陆界面a>

body>

- 如果登陆成功,就向session中放入参数,并重定向到登陆成功页面
,否则直接重定向到登陆失败页面
protected void doGet(HttpServletRequest req, HttpServletResponse resp) throws ServletException, IOException {
        //获取前端请求参数
        String username = req.getParameter(Constant.USER_SESSION);
        if (username.equals("admin")){//登陆成功
            req.getSession().setAttribute(Constant.USER_SESSION, req.getSession().getId());//将参数USER_SESSION的值设置为该session的ID
            resp.sendRedirect("/sys/success.jsp");//重定向
        }else{//登陆失败
            resp.sendRedirect("/sys/fail.jsp");//重定向
        }
    }
- 用户直接访问登陆成功页面时,需要判断是否登陆成功过,如果没有就拦截并跳转到登陆失败页。该部分用过滤器来实现最便捷
public void doFilter(ServletRequest request, ServletResponse response, FilterChain chain) throws ServletException, IOException {
        /*HttpServletRequest是ServletRequest的子类,因此可以强转*/
        HttpServletRequest httprequest = (HttpServletRequest) request;
        HttpServletResponse httpresponse = (HttpServletResponse) response;

        /*判断session中是否有USER_NAME参数,如果没有,就意味着登陆失败,跳转到登陆失败页面*/
        if (httprequest.getSession().getAttribute(Constant.USER_SESSION) == null){
            httpresponse.sendRedirect("/sys/fail.jsp");//请求转发到/sys/fail.jsp页面
        }

        chain.doFilter(request, response);//filter中必须包含的语句
    }
    <filter>
        <filter-name>SysFilterfilter-name>
        <filter-class>com.y.filter.SysFilterfilter-class>
    filter>
    <filter-mapping>
        <filter-name>SysFilterfilter-name>
        <url-pattern>/sys/success.jspurl-pattern>
    filter-mapping>
重要技巧之静态static变量的使用:
package com.y.util;

/*把登录拦截示例中session的参数名(String)设置为静态变量,并在其他程序中用"Constant.USER_SESSION"调用,这样做的好处是今后在修改这个变量名的时候直接在这个程序中修改就可以了,而不需要在其他程序中再逐个修改*/
public class Constant {
    public final static String USER_SESSION = "USER_SESSION";
}
十四、回顾JDBC
idea技巧之快速键入main()方法的声明
输入“psvm”,会自动跳出快捷键
idea技巧之快速键入“System.out.println()”
输入“sout”,会自动跳出快捷键
- pom.xml导入版本与本地数据库相同的依赖
- 将IDEA与MySQL连接
(1和2见Java基础) - 编写JDBC程序
public static void main(String[] args) throws ClassNotFoundException, SQLException {
        //配置信息;解决中文乱码:...?useUnicode=true&characterEncoding=utf-8
        String url = "jdbc:mysql://localhost:3306/jdbc?useUnicode=true&characterEncoding=utf-8";
        String username = "root";
        String password = "123321";

        //1.加载驱动
        Class.forName("com.mysql.jdbc.Driver");
        //2.连接数据库
        Connection connection = DriverManager.getConnection(url, username, password);
        //3.向数据库发送SQL语句的对象
        Statement statement = connection.createStatement();
        //4.编写SQL,含义是查询所有行所有列
        String sql = "select * from users;";
        //5.执行SQL查询语句,返回一个ResultSet结果集
        ResultSet resultSet = statement.executeQuery(sql);

        while (resultSet.next()){
            System.out.println("id="+resultSet.getObject("id"));
            System.out.println("name="+resultSet.getObject("name"));
            System.out.println("password="+resultSet.getObject("password"));
            System.out.println("email="+resultSet.getObject("email"));
            System.out.println("birthday="+resultSet.getObject("birthday"));
        }

        //6.关闭连接释放资源,顺序是先开的后关
        resultSet.close();
        statement.close();
        connection.close();
    }
预编译的SQL:
public static void main(String[] args) throws ClassNotFoundException, SQLException {
        //配置信息;解决中文乱码:...?useUnicode=true&characterEncoding=utf-8
        String url = "jdbc:mysql://localhost:3306/jdbc?useUnicode=true&characterEncoding=utf-8";
        String username = "root";
        String password = "123321";

        //1.加载驱动
        Class.forName("com.mysql.jdbc.Driver");
        //2.连接数据库
        Connection connection = DriverManager.getConnection(url, username, password);
        //3.编写SQL
        /*String sql = "select * from users;";*/
        String sql = "insert into users(id, name,password, email,birthday) values (?,?,?,?,?)";
        //4.预编译的对象
        PreparedStatement preparedStatement=connection.prepareStatement(sql);
        preparedStatement.setInt(1,4);//给第一个占位符?的值赋为1
        preparedStatement.setString(2,"ycr");
        preparedStatement.setString(3,"1");
        preparedStatement.setString(4,"1");
        preparedStatement.setString(5,"1999-6-17");

        //5.执行SQL增删改语句;statement.executeUpdate()返回受影响的行数,例如这里的i=1
        int i = preparedStatement.executeUpdate();

        //6.关闭连接释放资源,顺序是先开的后关
        preparedStatement.close();
        connection.close();
    }
JDBC事务:
ACID原则:保证数据的安全
开启事务、事务提交、事务回滚、关闭事务
重要技巧之junit单元测试可以对某个方法单独运行而无需main()方法:
pom.xml(注意要把语句删掉):
        <dependency>
            <groupId>junitgroupId>
            <artifactId>junitartifactId>
            <version>4.12version>
        dependency>

测试方法必须是无参的
转账实例机制:name为张三的money减少100,李四的增加100,中间设置一个错误异常(int i=1/0;),如果检测到异常就执行回滚操作。那么张三付款后会遇到异常导致李四收不到款,并且系统会检测到异常而撤销张三的付款操作。
import org.junit.Test;
import java.sql.Connection;
import java.sql.DriverManager;
import java.sql.SQLException;
public class TestJdbc3 {
    @Test
    public void test(){
        //配置信息;解决中文乱码:...?useUnicode=true&characterEncoding=utf-8
        String url = "jdbc:mysql://localhost:3306/jdbc?useUnicode=true&characterEncoding=utf-8";
        String username = "root";
        String password = "123321";

        Connection connection = null;
        try {
            //1.加载驱动
            Class.forName("com.mysql.jdbc.Driver");

            //2.连接数据库
            connection = DriverManager.getConnection(url, username, password);

            //3.通知数据库开启事务,默认是关闭(true),相当于关闭自动进行commit命令,那么执行结果缓会存在程序中而不会提交到数据库中
            connection.setAutoCommit(false);

            String sql = "update users set money = money-100 where name = '张三';";
            connection.prepareStatement(sql).executeUpdate();

            //制造错误
            int i=1/0;

            String sql2 = "update users set money = money+100 where name = '李四';";
            connection.prepareStatement(sql2).executeUpdate();

            connection.commit();//上面的SQL都执行成功就提交事务
        } catch (Exception e) {
            //如果出现异常就通知数据库回滚,回滚就是撤销已进行未提交的操作
            try {
                connection.rollback();
            } catch (SQLException ex) {
                ex.printStackTrace();
            }
            e.printStackTrace();
        }finally {
            try {
                connection.close();
            } catch (SQLException e) {
                e.printStackTrace();
            }
        }
    }
}
运行前后张三和李四的money值不变;注释“int i=1/0;”后张三少100,李四多100。

十五、Ajax
Asynchronous JavaScript and XML,是一种在无需重新加载整个页面的情况下,能够更新部分网页的技术。例如:在搜索框输入关键字时,JavaScript会把这些字符发送到服务器,然后服务器会返回一个搜索建议的列表。
直接使用jQuery提供的Ajax,而不是js的。jQuery提供了多个与Ajax有关的方法。Ajax的本质是XMLHttpRequest对象(XHR),XHR为向服务器发送请求和解析服务器响应提供了接口,能够以异步的方式从服务器获取新数据。
使用(.js文件):
- 编写Ajax需要导入jQuery包,或自己原生态实现;
- Ajax的请求包括:1.type:“GET”或“POST”;2.url:Controller请求,它返回消息或者字符串或者json格式的数据,例如请求将被提交到的servlet的url;3.data:请求中传递的参数,键值对形式;4.dataType:通常为"json",主流开发都是用JSON实现前后端;5.success:回调函数;
- Ajax会绑定事件,例如点击click、失去焦点onblur、键盘弹起keyup。
十六、项目搭建实战(超市订单管理系统SMBMS)
1、准备工作
-
搭建maven项目
-
配置tomcat
-
测试运行
-
导入项目中会用到的jar包
    <dependencies>
        <dependency>
            <groupId>javax.servletgroupId>
            <artifactId>servlet-apiartifactId>
            <version>2.5version>
        dependency>
        <dependency>
            <groupId>javax.servlet.jspgroupId>
            <artifactId>javax.servlet.jsp-apiartifactId>
            <version>2.3.3version>
        dependency>
        <dependency>
            <groupId>mysqlgroupId>
            <artifactId>mysql-connector-javaartifactId>
            <version>5.1.17version>
        dependency>
    	dependency>
    	<dependency>
		    <groupId>javax.servlet.jsp.jstlgroupId>
		    <artifactId>jstlartifactId>
		    <version>1.2version>
    	dependency>
    	<dependency>
      		<groupId>taglibsgroupId>
      		<artifactId>standardartifactId>
      		<version>1.1.2version>
    	dependency>
    dependencies>
- 创建项目包结构

- 编写实体类
ORM过程:定义与数据库columns对应的private型参量及其get、set等方法,详见pojo包的文件
- 编写基础公共类
- 数据库配置文件(resource.database.properties)
driver=com.mysql.jdbc.Driver #必须
url=jdbc:mysql://localhost:3306/smbms?useUnicode=true&characterEncoding=utf-8 #数据库的url地址+编码方式
user=root #数据库用户名
password=123321 #数据库密码
- 编写数据库的公共类
DAO:数据访问对象,是一个面向对象的数据库接口
package com.y.dao;

import java.io.IOException;
import java.io.InputStream;
import java.sql.*;
import java.util.Properties;

/**
 * 操作数据库的基类--静态类
 * @author Administrator
 *
 */
public class BaseDao {

	static{//静态代码块,在类加载的时候执行
		init();
	}

	private static String driver;
	private static String url;
	private static String user;
	private static String password;

	//初始化连接参数,从配置文件.properties里获得
	public static void init(){
		Properties params=new Properties();
		String configFile = "database.properties";
		InputStream is=BaseDao.class.getClassLoader().getResourceAsStream(configFile);//通过类加载器ClassLoader获取对应文件的资源,或者可以用ServletContext获取
		try {
			params.load(is);
		} catch (IOException e) {
			e.printStackTrace();
		}
		driver=params.getProperty("driver");
		url=params.getProperty("url");
		user=params.getProperty("user");
		password=params.getProperty("password");

	}


	/**
	 * 获取数据库连接
	 * @return
	 */
	public static Connection getConnection(){
		Connection connection = null;
		try {
			Class.forName(driver);
			connection = DriverManager.getConnection(url, user, password);
		} catch (Exception e) {
			// TODO Auto-generated catch block
			e.printStackTrace();
		}

		return connection;
	}
	/**
	 * 查询操作
	 * @param connection
	 * @param pstm
	 * @param rs
	 * @param sql
	 * @param params
	 * @return
	 */
	public static ResultSet execute(Connection connection,PreparedStatement pstm,ResultSet rs,
			String sql,Object[] params) throws Exception{//将PreparedStatement和 ResultSet也提到参数里是为了方便统一关闭close
		pstm = connection.prepareStatement(sql);
		for(int i = 0; i < params.length; i++){
			pstm.setObject(i+1, params[i]);//使pstm有params.length个占位符;pstm的占位符是从1开始的,而不是0
		}
		rs = pstm.executeQuery();//前面的SQL是预编译的,因此这里不需要再加sql
		return rs;
	}
	/**
	 * 更新操作
	 * @param connection
	 * @param pstm
	 * @param sql
	 * @param params
	 * @return
	 * @throws Exception
	 */
	public static int execute(Connection connection,PreparedStatement pstm,
			String sql,Object[] params) throws Exception{
		int updateRows = 0;
		pstm = connection.prepareStatement(sql);
		for(int i = 0; i < params.length; i++){
			pstm.setObject(i+1, params[i]);
		}
		updateRows = pstm.executeUpdate();
		return updateRows;
	}

	/**
	 * 释放资源
	 * @param connection
	 * @param pstm
	 * @param rs
	 * @return
	 */
	public static boolean closeResource(Connection connection,PreparedStatement pstm,ResultSet rs){
		boolean flag = true;
		if(rs != null){
			try {
				rs.close();
				rs = null;//GC回收
			} catch (SQLException e) {
				// TODO Auto-generated catch block
				e.printStackTrace();
				flag = false;
			}
		}
		if(pstm != null){
			try {
				pstm.close();
				pstm = null;//GC回收
			} catch (SQLException e) {
				// TODO Auto-generated catch block
				e.printStackTrace();
				flag = false;
			}
		}
		if(connection != null){
			try {
				connection.close();
				connection = null;//GC回收
			} catch (SQLException e) {
				// TODO Auto-generated catch block
				e.printStackTrace();
				flag = false;
			}
		}

		return flag;
	}

}
- 编写字符编码过滤器
其中设置编码语句为
		request.setCharacterEncoding("UTF-8");
		response.setCharacterEncoding("UTF-8");
- 导入静态资源
导入到webapp下

功能实现阶段——先画出功能的MVC三层架构,再从底向上逐层实现功能:
2、登录功能实现
View层
-
编写前端页面

-
设置首页
web.xml:
    <welcome-file-list>
        <welcome-file>login.jspwelcome-file>
    welcome-file-list>
Modle层
DAO层
- 接口:通过userCode获取User的方法(interface com.y.dao.user.UserDao )
public User getLoginUser(Connection connection, String userCode)throws Exception;
- 实现类:实现上述方法(class com.y.dao.user.UserDaoImpl)
	public User getLoginUser(Connection connection, String userCode)
			throws Exception {
		PreparedStatement pstm = null;
		ResultSet rs = null;
		User user = null;
		if(null != connection){
			String sql = "select * from smbms_user where userCode=?";//"?"为一个占位符
			Object[] params = {userCode};
			rs = BaseDao.execute(connection, pstm, rs, sql, params);
			if(rs.next()){
				user = new User();
				user.setId(rs.getInt("id"));
				user.setUserCode(rs.getString("userCode"));
				user.setUserName(rs.getString("userName"));
				user.setUserPassword(rs.getString("userPassword"));
				user.setGender(rs.getInt("gender"));
				user.setBirthday(rs.getDate("birthday"));
				user.setPhone(rs.getString("phone"));
				user.setAddress(rs.getString("address"));
				user.setUserRole(rs.getInt("userRole"));
				user.setCreatedBy(rs.getInt("createdBy"));
				user.setCreationDate(rs.getTimestamp("creationDate"));
				user.setModifyBy(rs.getInt("modifyBy"));
				user.setModifyDate(rs.getTimestamp("modifyDate"));
			}
			BaseDao.closeResource(null, pstm, rs);
		}
		return user;
	}
idea技巧之快速键入某个参数的非空判断语句和@NotNull插件

得到,

@NotNull插件:@NotNull后的参数不能为空,否则不合法
参数定义处:
import org.jetbrains.annotations.NotNull;
@NotNull Connection connection
service层
- 接口:该层通过调用dao层,判断用户名和密码是否正确并返回适当的用户数据(User类对象)(Interface com.y.service.user.UserService)
public User login(String userCode, String userPassword);
- 实现类(class com.y.service.user.UserServiceImpl)
重要技巧之方便地对底层属性和方法进行调用
在service层的实现类中,声明一个底层的接口或类的对象,并在构造方法中创建该对象(new),例如在UserServiceImpl中:
	/*引入UserDao,方便下面的所有方法调用DAO的属性和方法*/
	private UserDao userDao;
	public UserServiceImpl(){
		userDao = new UserDaoImpl();
	}
	public User login(String userCode, String userPassword) {
		Connection connection = null;
		User user = null;
		try {
			connection = BaseDao.getConnection();
			user = userDao.getLoginUser(connection, userCode);
		} catch (Exception e) {
			e.printStackTrace();
		}finally{
			BaseDao.closeResource(connection, null, null);
		}
		//匹配密码
		if(null != user){
			if(!user.getUserPassword().equals(userPassword))
				user = null;
		}
		return user;
	}
Controller/Servlet层
- 编写servlet(class com.y.servlet.user.LoginServle)
public class LoginServlet extends HttpServlet {

	public void doGet(HttpServletRequest request, HttpServletResponse response)
			throws ServletException, IOException {

	}

	public void doPost(HttpServletRequest request, HttpServletResponse response)
			throws ServletException, IOException {

		System.out.println("login ============ " );
		//获取用户名和密码
		String userCode = request.getParameter("userCode");
		String userPassword = request.getParameter("userPassword");
		//调用service方法,进行用户匹配
		UserService userService = new UserServiceImpl();
		User user = userService.login(userCode,userPassword);
		if(null != user){//登录成功
			//放入session
			request.getSession().setAttribute(Constants.USER_SESSION, user);
			//页面跳转(frame.jsp)
			response.sendRedirect("jsp/frame.jsp");
		}else{
			//页面跳转(login.jsp)带出提示信息--转发
			request.setAttribute("error", "用户名或密码不正确");
			request.getRequestDispatcher("login.jsp").forward(request, response);
		}
	}
- 根据login.jsp中相应表单的服务器路径来注册servlet
3. 登录功能优化
- 登录注销功能:删除session,返回登录页面(class com.y.servlet.user.LogoutServlet)
	public void doPost(HttpServletRequest request, HttpServletResponse response)
			throws ServletException, IOException {
		//清除session
		request.getSession().removeAttribute(Constants.USER_SESSION);
		response.sendRedirect(request.getContextPath()+"/login.jsp");
	}
- 登录拦截功能(class com.y.filter.SysFilter)
public class SysFilter implements Filter {
	public void init(FilterConfig filterConfig) throws ServletException {}
	public void doFilter(ServletRequest request, ServletResponse response,
			FilterChain chain) throws IOException, ServletException {

		System.out.println("SysFilter doFilter()===========");
		HttpServletRequest rq = (HttpServletRequest)request;
		HttpServletResponse rp = (HttpServletResponse)response;
		User userSession = (User)rq.getSession().getAttribute("userSession");
		if(null == userSession){
			rp.sendRedirect("/SMBMS/error.jsp");
		}else{
			chain.doFilter(request, response);//该方法是为了寻找下一个过滤器,因此被拦截的用户就不用继续寻找过滤器了
		}
	}
	public void destroy() {}
}
    <filter>
        <filter-name>sysFilterfilter-name>
        <filter-class>com.y.filter.SysFilterfilter-class>
    filter>
    <filter-mapping>
        <filter-name>sysFilterfilter-name>
        <url-pattern>/jsp/*url-pattern>
    filter-mapping>
4. 密码修改功能实现
View层
- 编写前端页面

Model层
DAO层
- interface UserDao:
	/*修改当前用户密码*/
	public int updatePwd(Connection connection, int id, String pwd)throws Exception;
- class UserDaoImpl:
	public int updatePwd(Connection connection, int id, String pwd)
			throws Exception {
		// TODO Auto-generated method stub
		int flag = 0;
		PreparedStatement pstm = null;
		if(connection != null){
			String sql = "update smbms_user set userPassword= ? where id = ?";
			Object[] params = {pwd,id};
			flag = BaseDao.execute(connection, pstm, sql, params);
			BaseDao.closeResource(null, pstm, null);
		}
		return flag;
	}
Service层
- interface UserService
	/*根据userId修改密码*/
	public boolean updatePwd(int id, String pwd);
- class UserServiceImpl
	public boolean updatePwd(int id, String pwd) {
		boolean flag = false;
		Connection connection = null;
		try{
			connection = BaseDao.getConnection();
			if(userDao.updatePwd(connection,id,pwd) > 0)
				flag = true;
		}catch (Exception e) {
			e.printStackTrace();
		}finally{
			BaseDao.closeResource(connection, null, null);
		}
		return flag;
	}
Controller/Servlet层
- class com.y.servlet.user.UserServlet
重要技巧之Servlet复用
public void doPost(HttpServletRequest request, HttpServletResponse response)
			throws ServletException, IOException {
		//servlet的复用

		String method = request.getParameter("method");//从前端取出不同页面下的"method"参数

		System.out.println("method----> " + method);

		if(method != null && method.equals("add")){
			//增加操作
			this.add(request, response);
		}else if(method != null && method.equals("query")){
			this.query(request, response);
		}else if(method != null && method.equals("getrolelist")){
			this.getRoleList(request, response);
		}else if(method != null && method.equals("ucexist")){
			this.userCodeExist(request, response);
		}else if(method != null && method.equals("deluser")){
			this.delUser(request, response);
		}else if(method != null && method.equals("view")){
			this.getUserById(request, response,"userview.jsp");
		}else if(method != null && method.equals("modify")){
			this.getUserById(request, response,"usermodify.jsp");
		}else if(method != null && method.equals("modifyexe")){
			this.modify(request, response);
		}else if(method != null && method.equals("pwdmodify")){
			this.getPwdByUserId(request, response);
		}else if(method != null && method.equals("savepwd")){
			this.updatePwd(request, response);
		}

	}

//修改密码
private void updatePwd(HttpServletRequest request, HttpServletResponse response)
			throws ServletException, IOException {

		Object o = request.getSession().getAttribute(Constants.USER_SESSION);
		String newpassword = request.getParameter("newpassword");
		boolean flag = false;
		if(o != null && !StringUtils.isNullOrEmpty(newpassword)){//StringUtils.isNullOrEmpty(String))判断String是否为空
			UserService userService = new UserServiceImpl();
			flag = userService.updatePwd(((User)o).getId(),newpassword);
			if(flag){
				request.setAttribute(Constants.SYS_MESSAGE, "修改密码成功,请退出并使用新密码重新登录!");
				request.getSession().removeAttribute(Constants.USER_SESSION);//session注销
			}else{
				request.setAttribute(Constants.SYS_MESSAGE, "修改密码失败!");
			}
		}else{
			request.setAttribute(Constants.SYS_MESSAGE, "修改密码失败!");
		}
		request.getRequestDispatcher("pwdmodify.jsp").forward(request, response);
	}
5. 密码修改功能优化(Ajax)
- 在maven仓库中搜索fastjson,导入依赖
- 前端:Ajax
- 后端:根据Ajax的data的JSON参数键值对来实现功能
	//修改密码中的验证旧密码是否正确功能
	private void getPwdByUserId(HttpServletRequest request, HttpServletResponse response)
			throws ServletException, IOException {
		Object o = request.getSession().getAttribute(Constants.USER_SESSION);
		String oldpassword = request.getParameter("oldpassword");//
		Map<String, String> resultMap = new HashMap<String, String>();

		if(null == o ){//session过期
			resultMap.put("result", "sessionerror");
		}else if(StringUtils.isNullOrEmpty(oldpassword)){//旧密码输入为空
			resultMap.put("result", "error");
		}else{
			String sessionPwd = ((User)o).getUserPassword();//将o强转为User类型再调用getUserPassword()方法
			if(oldpassword.equals(sessionPwd)){
				resultMap.put("result", "true");
			}else{//旧密码输入不正确
				resultMap.put("result", "false");
			}
		}
		response.setContentType("application/json");//设置响应的文本类型为"application/json"
		PrintWriter outPrintWriter = response.getWriter();
		outPrintWriter.write(JSONArray.toJSONString(resultMap));//JSONArray是阿里巴巴的JSON工具类,toJSONString(resultMap)将Map转化为JSON格式的String字符串
		outPrintWriter.flush();
		outPrintWriter.close();
	}
6. 用户管理功能实现
View层
- 用户列表页面:userlist.jsp
util
- 分页工具类
package com.y.util;
public class PageSupport {
	//当前页码-来自于用户输入
	private int currentPageNo = 1;

	//总数量(表)
	private int totalCount = 0;

	//页面容量
	private int pageSize = 0;

	//总页数-totalCount/pageSize(+1)
	private int totalPageCount = 1;

	public int getCurrentPageNo() {
		return currentPageNo;
	}

	public void setCurrentPageNo(int currentPageNo) {
		if(currentPageNo > 0){
			this.currentPageNo = currentPageNo;
		}
	}

	public int getTotalCount() {
		return totalCount;
	}

	public void setTotalCount(int totalCount) {
		if(totalCount > 0){
			this.totalCount = totalCount;
			//设置总页数
			this.setTotalPageCountByRs();
		}
	}
	public int getPageSize() {
		return pageSize;
	}

	public void setPageSize(int pageSize) {
		if(pageSize > 0){
			this.pageSize = pageSize;
		}
	}

	public int getTotalPageCount() {
		return totalPageCount;
	}

	public void setTotalPageCount(int totalPageCount) {
		this.totalPageCount = totalPageCount;
	}

	public void setTotalPageCountByRs(){
		if(this.totalCount % this.pageSize == 0){
			this.totalPageCount = this.totalCount / this.pageSize;
		}else if(this.totalCount % this.pageSize > 0){
			this.totalPageCount = this.totalCount / this.pageSize + 1;
		}else{
			this.totalPageCount = 0;
		}
	}
}
Modle层
DAO层
- UserDao和RoleDao
	/*通过条件查询-用户表记录数*/
	public int getUserCount(Connection connection, String userName, int userRole)throws Exception;
	/*通过条件查询-userList*/
	public List<User> getUserList(Connection connection, String userName, int userRole, int currentPageNo, int pageSize)throws Exception;
	//获取角色列表
	public List<Role> getRoleList(Connection connection)throws Exception;
- UserDaoImpl(难点)和RoleDaoImpl
	public int getUserCount(Connection connection, String userName, int userRole)
			throws Exception {
		PreparedStatement pstm = null;
		ResultSet rs = null;
		int count = 0;
		if(connection != null){

			//根据不同的参数情况拼接出不同的sql命令
			StringBuffer sql = new StringBuffer();//StringBuffer的拼接方法append效率更高
			/*下面这句sql用到了多表拼接:将smbms_user和smbms_role两个表拼接(from u, r)后, 计算前者userRole的值等于smbms_role中id的值的条目数量(select count(1)),
			最终返回一个表给ResultSet,该表以"count"为列名(as count),以计数结果为条目*/
			sql.append("select count(1) as count from smbms_user u,smbms_role r where u.userRole = r.id");//count(1)比count(*)高效
			List<Object> list = new ArrayList<Object>();
			if(!StringUtils.isNullOrEmpty(userName)){
				//u.userName like "%"+userName+"%":userName这一列中包含username的条目.userName+"%"是以username开头的;"%"+userName是以username结尾的
				sql.append(" and u.userName like ?");//sql的两句话拼接时注意中间要有一个空格
				list.add("%"+userName+"%");
			}
			if(userRole > 0){
				sql.append(" and u.userRole = ?");
				list.add(userRole);
			}
			Object[] params = list.toArray();//List转数组的方法
			System.out.println("sql ----> " + sql.toString());

			rs = BaseDao.execute(connection, pstm, rs, sql.toString(), params);
			if(rs.next()){//rs的指针指向结果集的第一行
				count = rs.getInt("count");
			}
			BaseDao.closeResource(null, pstm, rs);
		}
		return count;
	}

	public List<User> getUserList(Connection connection, String userName,int userRole,int currentPageNo, int pageSize)
			throws Exception {
		PreparedStatement pstm = null;
		ResultSet rs = null;
		List<User> userList = new ArrayList<User>();
		if(connection != null){
			StringBuffer sql = new StringBuffer();
			sql.append("select u.*,r.roleName as userRoleName from smbms_user u,smbms_role r where u.userRole = r.id");
			List<Object> list = new ArrayList<Object>();
			if(!StringUtils.isNullOrEmpty(userName)){
				sql.append(" and u.userName like ?");
				list.add("%"+userName+"%");
			}
			if(userRole > 0){
				sql.append(" and u.userRole = ?");
				list.add(userRole);
			}

			sql.append(" order by creationDate DESC limit ?,?");//"limit currentPageNo, pageSize"只返回从currentPageNo(从0开始)开始的pageSize个条目
			currentPageNo = (currentPageNo-1)*pageSize;
			list.add(currentPageNo);
			list.add(pageSize);

			Object[] params = list.toArray();
			System.out.println("sql ----> " + sql.toString());
			rs = BaseDao.execute(connection, pstm, rs, sql.toString(), params);
			while(rs.next()){
				User _user = new User();
				_user.setId(rs.getInt("id"));
				_user.setUserCode(rs.getString("userCode"));
				_user.setUserName(rs.getString("userName"));
				_user.setGender(rs.getInt("gender"));
				_user.setBirthday(rs.getDate("birthday"));
				_user.setPhone(rs.getString("phone"));
				_user.setUserRole(rs.getInt("userRole"));
				_user.setUserRoleName(rs.getString("userRoleName"));
				userList.add(_user);
			}
			BaseDao.closeResource(null, pstm, rs);
		}
		return userList;
	}
public List<Role> getRoleList(Connection connection) throws Exception {
		PreparedStatement pstm = null;
		ResultSet rs = null;
		List<Role> roleList = new ArrayList<Role>();
		if(connection != null){
			String sql = "select * from smbms_role";
			Object[] params = {};
			rs = BaseDao.execute(connection, pstm, rs, sql, params);
			while(rs.next()){
				Role _role = new Role();
				_role.setId(rs.getInt("id"));
				_role.setRoleCode(rs.getString("roleCode"));
				_role.setRoleName(rs.getString("roleName"));
				roleList.add(_role);
			}
			BaseDao.closeResource(null, pstm, rs);
		}
		return roleList;
	}
Service层
- UserService和RoleService
	/*根据条件查询用户表记录数 */
	public int getUserCount(String queryUserName, int queryUserRole);
	/*根据条件查询用户列表*/
	public List<User> getUserList(String queryUserName, int queryUserRole, int currentPageNo, int pageSize);
public List<Role> getRoleList();
- UserServiceImpl和RoleServiceImpl
	public int getUserCount(String queryUserName, int queryUserRole) {
		// TODO Auto-generated method stub
		Connection connection = null;
		int count = 0;
		System.out.println("queryUserName ---- > " + queryUserName);
		System.out.println("queryUserRole ---- > " + queryUserRole);
		try {
			connection = BaseDao.getConnection();
			count = userDao.getUserCount(connection, queryUserName,queryUserRole);
		} catch (Exception e) {
			e.printStackTrace();
		}finally{
			BaseDao.closeResource(connection, null, null);
		}
		return count;
	}

	public List<User> getUserList(String queryUserName,int queryUserRole,int currentPageNo, int pageSize) {
		Connection connection = null;
		List<User> userList = null;
		System.out.println("queryUserName ---- > " + queryUserName);
		System.out.println("queryUserRole ---- > " + queryUserRole);
		System.out.println("currentPageNo ---- > " + currentPageNo);
		System.out.println("pageSize ---- > " + pageSize);
		try {
			connection = BaseDao.getConnection();
			userList = userDao.getUserList(connection, queryUserName,queryUserRole,currentPageNo,pageSize);
		} catch (Exception e) {
			// TODO Auto-generated catch block
			e.printStackTrace();
		}finally{
			BaseDao.closeResource(connection, null, null);
		}
		return userList;
	}
	/*引入RoleDao*/
	private RoleDao roleDao;
	public RoleServiceImpl(){
		roleDao = new RoleDaoImpl();
	}

	public List<Role> getRoleList() {
		Connection connection = null;
		List<Role> roleList = null;
		try {
			connection = BaseDao.getConnection();
			roleList = roleDao.getRoleList(connection);
		} catch (Exception e) {
			e.printStackTrace();
		}finally{
			BaseDao.closeResource(connection, null, null);
		}
		return roleList;
	}
Controller/Servlet层
- UserServlet(重难点)
//查询用户列表
	private void query(HttpServletRequest request, HttpServletResponse response)
			throws ServletException, IOException {
		//获取前端数据
		String queryUserName = request.getParameter("queryname");
		String temp = request.getParameter("queryUserRole");
		String pageIndex = request.getParameter("pageIndex");
		int queryUserRole = 0;

		//调用UserService获取并返回用户列表
		UserService userService = new UserServiceImpl();
		List<User> userList = null;
    	int pageSize = Constants.pageSize;//设置页面容量
    	int currentPageNo = 1;//第一次查询的结果都是第一页,因此当前页码currentPageNo初始值为1
		/*//**//**//**//**//**//**//**//**
		 * http://localhost:8090/SMBMS/userlist.do
		 * ----queryUserName --NULL
		 * http://localhost:8090/SMBMS/userlist.do?queryname=
		 * --queryUserName ---""
		 *//**//**//**//**//**//**//**//*/
		*/
		System.out.println("queryUserName servlet--------"+queryUserName);
		System.out.println("queryUserRole servlet--------"+queryUserRole);
		System.out.println("query pageIndex--------- > " + pageIndex);
		if(queryUserName == null){
			queryUserName = "";
		}
		if(temp != null && !temp.equals("")){
			queryUserRole = Integer.parseInt(temp);//int parseInt(String s)是将s转化为整型,例如"2"-->2,"a"-->抛出异常
		}
    	if(pageIndex != null){
    		try{
    			currentPageNo = Integer.valueOf(pageIndex);
    		}catch(NumberFormatException e){
    			response.sendRedirect("error.jsp");
    		}
    	}
    	//1.分页
    	int totalCount	= userService.getUserCount(queryUserName,queryUserRole);//获取满足条件的用户数量
    	PageSupport pages=new PageSupport();
    	pages.setCurrentPageNo(currentPageNo);
    	pages.setPageSize(pageSize);
    	pages.setTotalCount(totalCount);
    	int totalPageCount = pages.getTotalPageCount();
    	//控制当前页currentPageNo的范围为1到totalPageCount
    	if(currentPageNo < 1){
    		currentPageNo = 1;
    	}else if(currentPageNo > totalPageCount){
    		currentPageNo = totalPageCount;
    	}
		//2.获取当前页的查询用户User和角色Role;3.获取完所有前端需要的信息后,向前端返回
		userList = userService.getUserList(queryUserName,queryUserRole,currentPageNo, pageSize);
		request.setAttribute("userList", userList);
		List<Role> roleList = null;
		RoleService roleService = new RoleServiceImpl();
		roleList = roleService.getRoleList();
		request.setAttribute("roleList", roleList);
		request.setAttribute("queryUserName", queryUserName);
		request.setAttribute("queryUserRole", queryUserRole);
		request.setAttribute("totalPageCount", totalPageCount);
		request.setAttribute("totalCount", totalCount);
		request.setAttribute("currentPageNo", currentPageNo);

		//请求转发到指定的前端页面
		request.getRequestDispatcher("userlist.jsp").forward(request, response);
	}
十七、文件上传
文件下载见本文 二、HttpServletResponse
-
导入jar包:commons-io、commons-fileupload
-
使用类介绍
文件上传的注意事项:
- 为保证服务器安全,上传的文件应放在外界无法直接访问的目录下,比如WEB-INF
- 为防止文件覆盖的现象发生,要为上传文件产生一个唯一的文件名,比如用时间戳命名、md5加密
- 要限制上传文件的最大值
- 可以限制上传文件的类型,在收到上传文件名时,判断后缀名是否合法
(1)前端HTML
防止中文乱码:
<%@ page language="java" contentType="text/html; charset=UTF-8"
         pageEncoding="UTF-8"%>
在body标签内:
<%--通过表单上传文件
get方法上传文件大小有限制
post方法上传文件大小没有限制
--%>
<form action="${pageContext.request.contextPath}/upload.do" method="post" enctype="multipart/form-data">
    <p>用户名:<input type="text" name="username" placeholder="请填写用户名">p><%--p标签是段落标签,作用是分段--%>
    <p>上传文件:<input type="file" name="filename">p>
    <p><input type="submit" value="提交"><input type="reset" value="重置">p>
form>
(2)后端Servlet
ServletFileUpload负责处理上传的文件数据,并将表单中的每个输入项封装成一个FileItem对象,在使用ServletFileUpload对象解析请求时需要DiskFileItemFactory对象。所以,我们需要在进行解析工作前构造好DiskFileItemFactory对象,通过ServletFileItem对象的构造方法或setFileItemFactory()设置ServletFileUpload对象的fileItemFactory属性。
public class FileServlet extends HttpServlet {
        protected void doPost(HttpServletRequest request, HttpServletResponse response) throws javax.servlet.ServletException, IOException {
            //判断上传的表单是普通表单还是带文件的表单,是返回true,否返回false;
            if (!ServletFileUpload.isMultipartContent(request)){
                return;//如果这是一个普通表单就直接终止方法运行
            }//如果通过了这个if,说明我们的表单是带文件上传的

            //创建上传文件的保存目录,为了安全建议在WEB-INF目录下,用户无法访问
            String uploadpath = this.getServletContext().getRealPath("/WEB-INF/Upload");//获取上传文件的保存路径
            File uploadfile = new File(uploadpath);
            if (!uploadfile.exists()){
                uploadfile.mkdir();//如果目录不存在就创建这样一个目录
            }

            //临时文件
            //临时路径,如果上传的文件超过预期的大小,我们将它存放到一个临时目录中,过几天自动删除,或者提醒用户转存为永久
            String tmppath = this.getServletContext().getRealPath("/WEB-INF/tmp");
            File file = new File(tmppath);
            if (!file.exists()){
                file.mkdir();//如果目录不存在就创建这样临时目录
            }
            //处理上传的文件一般需要通过流来获取,我们可以通过request.getInputstream(),原生态文件上传流获取,十分麻烦
            //但是我们都建议使用Apache的文件上传组件来实现,common-fileupload,它需要依赖于common-io组件;

            try {
                //1、创建DiskFileItemFactory对象,处理文件上传路径或限制文件大小
                DiskFileItemFactory factory = gteDiskFileItemFactory(file);
                //2、获取ServletFileUpload
                ServletFileUpload upload = getServletFileUpload(factory);
                //3、处理上传文件
                String msg = uploadParseRequest(upload,request,uploadpath);
                //Servlet请求转发消息
                request.setAttribute("msg",msg);
                request.getRequestDispatcher("/info.jsp").forward(request,response);
            }catch (FileUploadException e){
                e.printStackTrace();
            }
        }
        public static DiskFileItemFactory gteDiskFileItemFactory(File file){
            //1、创建DiskFileItemFactory对象,处理文件上传路径或限制文件大小
            DiskFileItemFactory factory = new DiskFileItemFactory();
            //通过这个工厂设置一个缓冲区,当上传的文件大小大于缓冲区的时候,将它放到临时文件中;
            factory.setSizeThreshold(1024 * 1024);//缓冲区大小为1M
            factory.setRepository(file);
            return factory;
        }
        public static ServletFileUpload getServletFileUpload(DiskFileItemFactory factory){
            //2、获取ServletFileUpload
            ServletFileUpload upload = new ServletFileUpload(factory);
            //监听文件上传进度
            upload.setProgressListener(new ProgressListener() {
                public void update(long pBytesRead, long lpContentLenght, int i) {
                    //pBytesRead:已读取到的文件大小
                    //pContentLenght:文件大小
                    System.out.println("总大小:"+lpContentLenght+"已上传:"+pBytesRead);
                }
            });
            //处理乱码问题
            upload.setHeaderEncoding("UTF-8");
            //设置单个文件的最大值
            upload.setFileSizeMax(1024 * 1024 * 10);
            //设置总共能够上传文件的大小
            //1024 = 1kb * 1024 = 1M * 10 = 10M
            upload.setSizeMax(1024 * 1024 * 10);
            return upload;
        }
        public static String uploadParseRequest(ServletFileUpload upload,HttpServletRequest request,String uploadpath) throws IOException, FileUploadException {
            String msg = "";
            //3、处理上传文件
            //把前端的请求解析,封装成一个FileItem对象
            List<FileItem> fileItems = upload.parseRequest(request);
            for (FileItem fileItem : fileItems) {
                if (fileItem.isFormField()){ //判断是普通表单还是带文件的表单
                    //getFieldName指的是前端表单控件的name
                    String name = fileItem.getFieldName();
                    String value = fileItem.getString("UTF-8");//处理乱码
                    System.out.println(name+":"+value);
                }else {//判断它是带文件的表单

                    //======================处理文件=======================//
                    //拿到文件的名字
                    String uploadFileName = fileItem.getName();
                    System.out.println("上传的文件名:"+uploadFileName);
                    //如果文件名不合法就终止方法
                    if (uploadFileName.trim().equals("")) continue;
                    //获得上传的文件名,例如/img/girl/ooa.jpg,只需要ooa.jpg
                    String fileName = uploadFileName.substring(uploadFileName.lastIndexOf("/") + 1);
                    //获得文件的后缀名
                    String fileExtName = uploadFileName.substring(uploadFileName.lastIndexOf(".") + 1);
                    /*
                     * 如果后缀名 fileExtName 不是我们需要的
                     *就直接return,不处理,告诉用户类型不对
                     * */
                    System.out.println("文件信息【文件名:"+fileName+"文件类型:"+fileExtName+"】");
                    // 可以使用java.util.UUID(唯一通用识别码)来保证文件名的统一;UUID.randomUUID()可以随机生成一个唯一识别的通用码
                    // 网络传输中的东西都需要序列化,序列化就要实现java.io.Serializable接口;这个接口是一个标记接口,即没有方法的接口,通过JVM本地方法栈来识别实现这个接口的类
                    String uuidFileName = UUID.randomUUID().toString();

                    //=======================传输文件=========================//
                    //获得文件上传的流
                    InputStream inputStream = fileItem.getInputStream();
                    //创建一个文件输出流
                    FileOutputStream fos = new FileOutputStream(uploadpath + "/" + uuidFileName +"."+ fileExtName);
                    //创建一个缓冲区
                    byte[] buffer = new byte[1024 * 1024];
                    //判断是否读取完毕
                    int len;
                    //如果大于0,说明还存在数据
                    while ((len=inputStream.read(buffer))>0){
                        fos.write(buffer,0,len);
                    }
                    //关闭流
                    fos.close();
                    inputStream.close();
                    msg = "文件上传成功!";
                    fileItem.delete();//上传成功,清除临时文件
                }
            }
            return msg;
        }
}
maven项目查看上传的文件:在~\Tomcat\apache-tomcat-9.0.62\webapps\ROOT\WEB-INF\Upload中,每个上传的文件的文件名都是一个UUID(见代码注释),不会相互重复
十八、邮件发送原理和实现
- 原理:
邮件服务器主要由IMAP(或POP3)服务器、SMTP服务器和File System组成,分别负责邮件的接受、发送和存储与管理。
简单附件: 纯文本邮件; 复杂邮件: 纯文本邮件+附件
- 实现:
-
导包
JavaMail API (compat)和JavaBeans™ Activation Framework
前者是为Java开发实现邮件发送和接受功能而提供的一套标准开发包, 它支持一些常用的邮件协议, 如SMTP, POP3, IMAP, MIME(多用途互联网邮件扩展类型, 用于支持附件功能)等 -
发送简单邮件
import com.sun.mail.util.MailSSLSocketFactory;

import javax.mail.*;
import javax.mail.internet.InternetAddress;
import javax.mail.internet.MimeMessage;
import java.util.Properties;

//发送一封简单的邮件
public class MailDamo01 {
    public static void main(String[] args) throws Exception {
        Properties prop=new Properties();
        prop.setProperty("mail.host","smtp.qq.com");///设置QQ邮件服务器
        prop.setProperty("mail.transport.protocol","smtp");///邮件发送协议
        prop.setProperty("mail.smtp.auth","true");//需要验证用户密码

        //QQ邮箱需要设置SSL加密
        MailSSLSocketFactory sf=new MailSSLSocketFactory();
        sf.setTrustAllHosts(true);
        prop.put("mail.smtp.ssl.enable","true");
        prop.put("mail.smtp.ssl.socketFactory",sf);

        //使用javaMail发送邮件的5个步骤
        //1.创建定义整个应用程序所需要的环境信息的session对象
        //QQ才有!其他邮箱就不用
        Session session=Session.getDefaultInstance(prop, new Authenticator() {
            @Override
            protected PasswordAuthentication getPasswordAuthentication() {
                return new PasswordAuthentication("[email protected]","授权码");
            }
        });
        //开启session的debug模式,这样可以在控制台查看到程序发送Email的运行状态
        session.setDebug(true);

        //2.通过session得到transport对象
        Transport ts=session.getTransport();

        //3.使用邮箱的用户名和授权码连上邮件服务器.授权码可以登录验证后获得
        ts.connect("smtp.qq.com","[email protected]","授权码");

        //4.创建邮件:写文件
        //注意需要传递session
        MimeMessage message=new MimeMessage(session);
        //指明邮件的发件人
        message.setFrom(new InternetAddress("[email protected]"));
        //指明邮件的收件人,现在发件人和收件人是一样的,那就是自己给自己发.
        message.setRecipient(Message.RecipientType.TO,new InternetAddress("[email protected]"));
        //邮件标题
        message.setSubject("发送的标题");
        //邮件的文本内容
        message.setContent("内容","text/html;charset=UTF-8");

        //5.发送邮件
        ts.sendMessage(message,message.getAllRecipients());

        //6.关闭连接
        ts.close();

    }
}
- 复杂邮件
package com.kuang;
import com.sun.mail.util.MailSSLSocketFactory;
import javax.activation.DataHandler;
import javax.activation.FileDataSource;
import javax.mail.*;
import javax.mail.internet.InternetAddress;
import javax.mail.internet.MimeBodyPart;
import javax.mail.internet.MimeMessage;
import javax.mail.internet.MimeMultipart;
import java.util.Properties;
public class MailDamo01 {
public static void main(String[] args) throws Exception {
Properties prop=new Properties();
prop.setProperty("mail.host","smtp.qq.com");///设置QQ邮件服务器
prop.setProperty("mail.transport.protocol","smtp");///邮件发送协议
prop.setProperty("mail.smtp.auth","true");//需要验证用户密码
//QQ邮箱需要设置SSL加密
MailSSLSocketFactory sf=new MailSSLSocketFactory();
sf.setTrustAllHosts(true);
prop.put("mail.smtp.ssl.enable","true");
prop.put("mail.smtp.ssl.socketFactory",sf);
//使用javaMail发送邮件的5个步骤
//1.创建定义整个应用程序所需要的环境信息的session对象
Session session=Session.getDefaultInstance(prop, new Authenticator() {
@Override
protected PasswordAuthentication getPasswordAuthentication() {
return new PasswordAuthentication("[email protected]","授权码");
}
});
//开启session的debug模式,这样可以查看到程序发送Email的运行状态
session.setDebug(true);
//2.通过session得到transport对象
Transport ts=session.getTransport();
//3.使用邮箱的用户名和授权码连上邮件服务器
ts.connect("smtp.qq.com","[email protected]","授权码");
//4.创建邮件:写文件
//注意需要传递session
MimeMessage message=new MimeMessage(session);
//指明邮件的发件人
message.setFrom(new InternetAddress("[email protected]"));
//指明邮件的收件人
message.setRecipient(Message.RecipientType.TO,new InternetAddress("[email protected]"));
//邮件标题
message.setSubject("java发出");
//邮件的文本内容
//=================================准备图片数据=======================================
MimeBodyPart image=new MimeBodyPart();
//图片需要经过数据化的处理
DataHandler dh=new DataHandler(new FileDataSource("D:\\CCC\\mail-java\\src\\01.jpg"));
//在part中放入这个处理过图片的数据
image.setDataHandler(dh);
//给这个part设置一个ID名字
image.setContentID("bz.jpg");
//准备正文的数据
MimeBodyPart text=new MimeBodyPart();
text.setContent("这是一张正文 ","text/html;charset=UTF-8");
//描述数据关系
MimeMultipart mm=new MimeMultipart();
mm.addBodyPart(text);
mm.addBodyPart(image);
mm.setSubType("related");
//设置到消息中,保存修改
message.setContent(mm);
message.saveChanges();
//5.发送邮件
ts.sendMessage(message,message.getAllRecipients());
//6.关闭连接
ts.close();
}
}
","text/html;charset=UTF-8");
//描述数据关系
MimeMultipart mm=new MimeMultipart();
mm.addBodyPart(text);
mm.addBodyPart(image);
mm.setSubType("related");
//设置到消息中,保存修改
message.setContent(mm);
message.saveChanges();
//5.发送邮件
ts.sendMessage(message,message.getAllRecipients());
//6.关闭连接
ts.close();
}
}
注意:
- 用户发送邮件后,可以边发送邮件边令用户跳转到“发送成功”的页面,以提高用户体验感。方法是使用多线程,其中的Servlet程序如下,其中的Sendmail类继承了Thread,它的run方法内容就是上面发送邮件的代码:
package com.kuang.servlet;

import com.kuang.pojo.User;
import com.kuang.utils.Sendmail;
import javax.servlet.ServletException;
import javax.servlet.http.HttpServlet;
import javax.servlet.http.HttpServletRequest;
import javax.servlet.http.HttpServletResponse;
import java.io.IOException;

public class RegisterServlet extends HttpServlet {
    @Override
    protected void doPost(HttpServletRequest req, HttpServletResponse resp) throws ServletException, IOException {
    	//从前端获取用户信息
        String username=req.getParameter("username");
        String password=req.getParameter("pwd");
        String email=req.getParameter("email");
        User user=new User(username,password,email);

        Sendmail send=new Sendmail(user);
        //启动线程,线程启动之后就会执行run方法来发送邮件
        send.start();

        //发送成功页面
        req.setAttribute("message","注册成功,我们已经发了一封带了注册信息的电子邮件,请查收!如网络不稳定,可能过会儿才能收到!");
        req.getRequestDispatcher( "info.jsp").forward(req,resp);
        System.out.println("success");
    }

    @Override
    protected void doGet(HttpServletRequest req, HttpServletResponse resp) throws ServletException, IOException {
        doPost(req, resp);
    }
}
- 使用Spring框架可以简化操作