springboot使用mybatis和jdbcTemplate搭建多数据源连接(mysql等)
源代码下载
链接:https://pan.baidu.com/s/1xXdbLuigUQYUtknaODew8A
提取码:x9jm
文章目录
-
-
- 源代码下载
-
- 一 创建springboot项目
-
- 创建项目
- 添加依赖
- 创建mapper (使用mybatis整合mysql1的数据)
- 创建jdbcTemplate(使用mybatis整合mysql2的数据)
- 使用Test测试
一 创建springboot项目
创建项目
我的IDE是IDEA
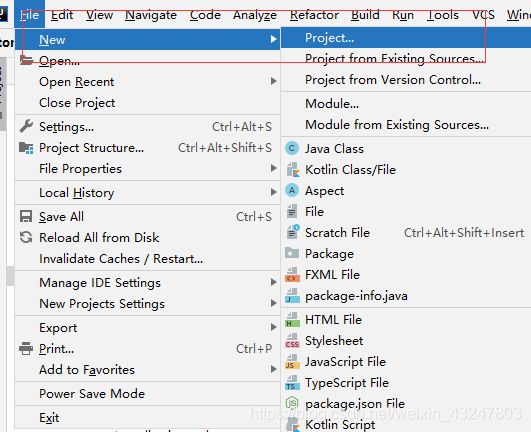
File->NEW -> Project
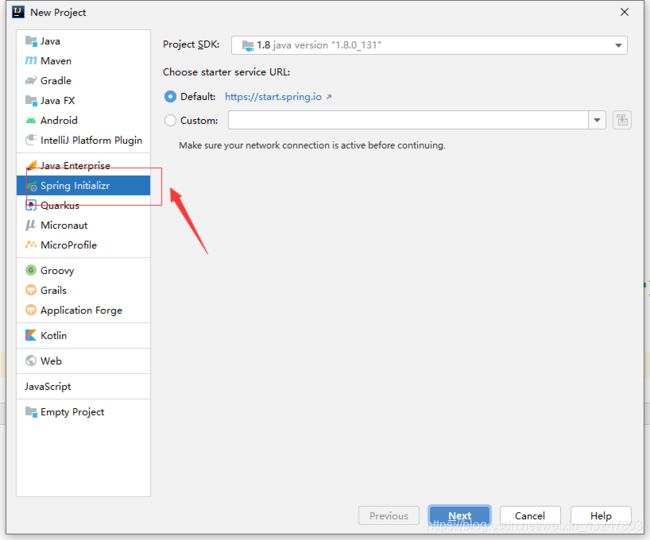
选择Spring Initializr 点击next
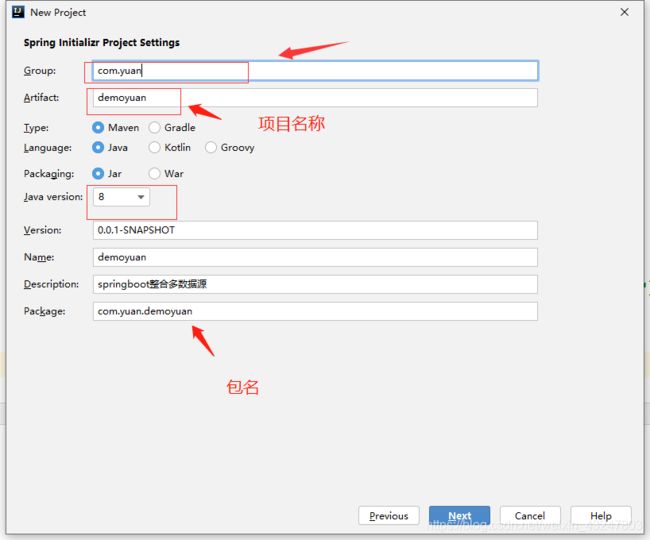
修改项目名等信息 --> 点击Next
选择 Lombok、Spring Web、JDBC API、MYSQL Driver 、Oracle Driver (我这里是阿里云的镜像 根据自己的镜像选择对应的Dependencies)
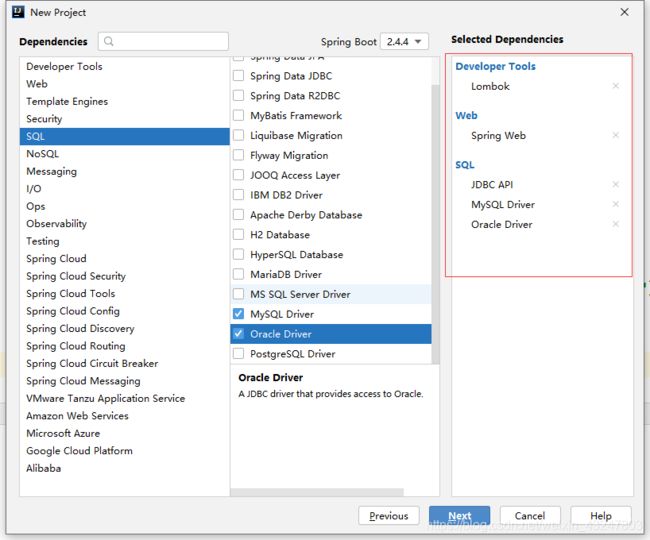
添加依赖
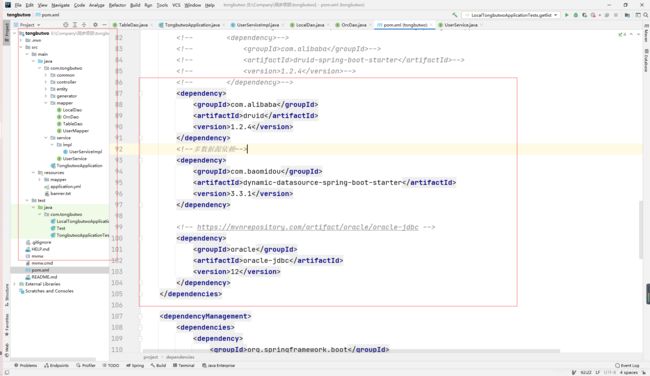
创建好后添加多数据源依赖
            com.alibaba
            druid
            1.2.4


            com.baomidou
            dynamic-datasource-spring-boot-starter
            3.3.1
    4.0.0

        org.springframework.boot
        spring-boot-starter-parent
        2.4.4


    com.yuan
    demoyuan
    0.0.1-SNAPSHOT
    demoyuan
    Spring整合多数据源

        1.8


            org.springframework.boot
            spring-boot-starter-jdbc


            org.springframework.boot
            spring-boot-starter-web


            com.oracle.database.jdbc
            ojdbc8
            runtime


            mysql
            mysql-connector-java
            runtime


            org.projectlombok
            lombok
            true


            org.springframework.boot
            spring-boot-starter-test
            test


            com.alibaba
            druid
            1.2.4


            com.baomidou
            dynamic-datasource-spring-boot-starter
            3.3.1


            com.baomidou
            mybatis-plus-boot-starter
            3.2.0


            org.springframework.boot
            spring-boot-starter-freemarker


            com.baomidou
            mybatis-plus-generator
            3.2.0


                org.springframework.boot
                spring-boot-maven-plugin


                            org.projectlombok
                            lombok
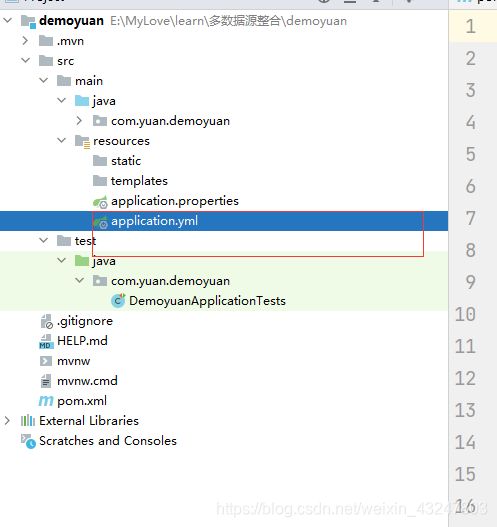
# DataSource Config
spring:
  datasource:
    dynamic:
      primary: master # 配置默认数据库
      datasource:
        resources:
          static-locations: classpath:/static/
        master: # 数据源1配置
          #    我的本地連接要將uerSSL改成true 或者將driver-class-name 改成com.mysql.jdbc.Driver驱动
          #    因为mysql5及之前的版本使用的是旧版驱动"com.mysql.jdbc.Driver",
          #    mysql6以及之后的版本需要更新到新版驱动,对应的Driver是"com.mysql.cj.jdbc.Driver"
          # 换成自己的ip+库 mysql的配置
          url: jdbc:mysql://127.0.0.1:3306/tongbu?characterEncoding=utf8&useUnicode=true&useSSL=true&serverTimezone=GMT%2B8
          username: root
          password: 123456
          # mysql5用 com.mysql.jdbc.Driver mysql6以上com.mysql.cj.jdbc.Driver
          driver-class-name: com.mysql.jdbc.Driver
        slave: # 数据源2 mysql 配置
          url: jdbc:mysql://127.0.0.1:3306/tongbu2?characterEncoding=utf8&useUnicode=true&useSSL=false&serverTimezone=GMT%2B8
          username: root
          password: 123456
          driver-class-name: com.mysql.cj.jdbc.Driver
        slave2: # 数据源2配置 oracle的配置
          url: jdbc:oracle:thin:@192.168.188.103:1521:helowin
          username: LSZ
          password: 123
          driver-class-name: oracle.jdbc.driver.OracleDriver
logging: #myabtis log Plugin配置
  level:
    com: debug
创建mapper (使用mybatis整合mysql1的数据)
创建TableDao.java
@DS 注解 : (@DS=数据源名称) 具体详情可以百度一下 这个很重要
@DS注解可用于方法或类上。若同时存在,则方法上的注解优先于类上的注解。
官网推荐@DS注解在service层使用,且是实现类上使用,在接口层无效。
注解用在service实现或mapper接口方法上,
不要同时在service和mapper注解 。
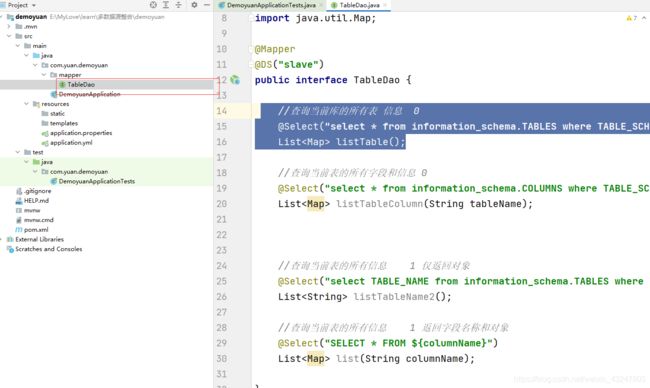
package com.yuan.demoyuan.mapper;
import com.baomidou.dynamic.datasource.annotation.DS;
import org.apache.ibatis.annotations.Mapper;
import org.apache.ibatis.annotations.Select;
import java.util.List;
import java.util.Map;
@Mapper
@DS("slave")
public interface TableDao {
//查询当前库的所有表 信息 0
@Select("select * from information_schema.TABLES where TABLE_SCHEMA=(select database())")
List创建jdbcTemplate(使用mybatis整合mysql2的数据)
创建UserService2.java 和 UserServiceImpl2.java
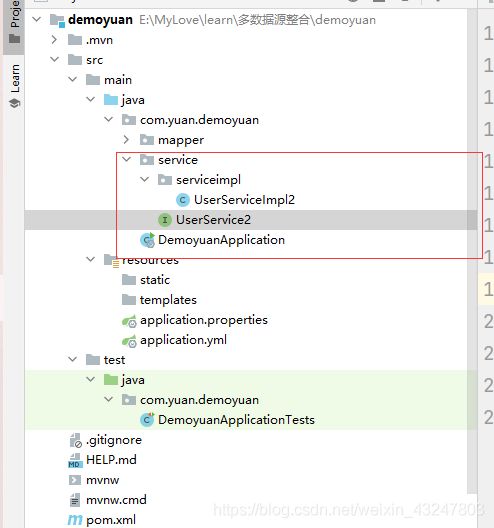
- UserService2.java
package com.yuan.demoyuan.service;

import com.baomidou.mybatisplus.extension.service.IService;
import org.springframework.stereotype.Service;

import java.util.List;
import java.util.Map;

/**
 *
 *  服务类
 *
 *
 * @author 深林中的书海
 * @since 2021-03-24
 */
@Service
public interface UserService2  {

    List> selectAll();
}
- UserServiceImpl2.java
package com.yuan.demoyuan.service.serviceimpl;

import com.baomidou.dynamic.datasource.annotation.DS;
import com.baomidou.mybatisplus.extension.service.impl.ServiceImpl;

import com.yuan.demoyuan.service.UserService2;
import org.springframework.beans.factory.annotation.Autowired;
import org.springframework.jdbc.core.JdbcTemplate;
import org.springframework.stereotype.Service;

import java.util.List;
import java.util.Map;

/**
 *
 *  服务实现类
 *
 *
 * @author 深林中的书海
 * @since 2021-03-24
 */

/**
 *
 * jdbcTemplate整合数据源
 */
@Service
public class UserServiceImpl2  implements UserService2 {


    @Autowired
    private JdbcTemplate jdbcTemplate;

    @DS("slave")
    public List> selectAll(){
        List> lists = jdbcTemplate.queryForList("select * from user1");
        return lists;
    }


}
使用Test测试
package com.yuan.demoyuan;

import com.yuan.demoyuan.mapper.TableDao;
import com.yuan.demoyuan.service.UserService2;
import org.junit.jupiter.api.Test;
import org.springframework.beans.factory.annotation.Autowired;
import org.springframework.boot.test.context.SpringBootTest;

import java.util.List;
import java.util.Map;

@SpringBootTest
class DemoyuanApplicationTests {

    @Autowired
    TableDao tableDao;

    @Autowired
    UserService2 userService2;


    @Test
    void contextLoads() {
        System.err.println("调用TableDao测试 调用mysql1的");
        List maps = tableDao.listTable();
        maps.forEach(m->{
            m.forEach((k,v)->{
                System.err.println("打印k:"+k+"\t打印v:"+v);
            });
        });
        System.out.println();
        System.err.println("jdbcTemplate整合数据源 整合mysql2");
        userService2.selectAll();
        List> maps1 = userService2.selectAll();
        maps1.forEach(m->{
            m.forEach((k,v)->{
                System.err.println("打印k:"+k+"\t打印v:"+v);
            });
        });
    }

    /**
     * 调用TableDao测试 调用mysql1的
     */
    @Test
    void listTable() {
        List maps = tableDao.listTable();
        maps.forEach(m->{
            m.forEach((k,v)->{
                System.err.println("打印k:"+k+"\t打印v:"+v);
            });
        });

    }

    /**
     * jdbcTemplate整合数据源
     * 整合mysql2
     */
    @Test
    void selectAll() {
        userService2.selectAll();
        List> maps = userService2.selectAll();
        maps.forEach(m->{
            m.forEach((k,v)->{
                System.err.println("打印k:"+k+"\t打印v:"+v);
            });
        });

    }
}
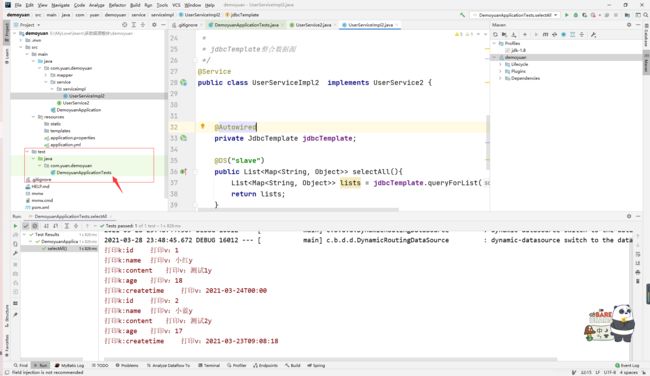
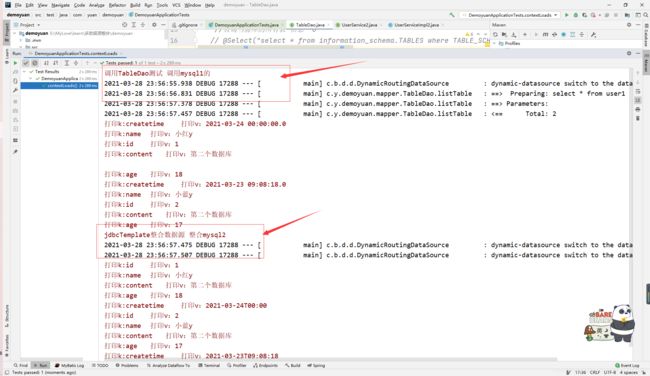
测试效果
