FastDFS从入门到精通笔记
JAVA上传+Springboot1+Springboot2文件上传源码
链接:https://pan.baidu.com/s/1EY0KPBpwaW9tpUOxSq8HcQ
提取码:lrzj
工具包下载
链接:https://pan.baidu.com/s/1l0zvQ-xvLtcdG_r65hh-ww
提取码:53wr
根据B站博主雷哥视频记录的笔记
https://www.bilibili.com/video/BV1iJ411j7QY
文章目录
- JAVA上传+Springboot1+Springboot2文件上传源码
- 工具包下载
- 根据B站博主雷哥视频记录的笔记
- FastDFS从入门到精通(建议直接用docker安装 实际常用sprngboot2文件上传的模式)
-
- FastDFS介绍
-
- FastDFS概述
- FastDFS简介
- 上传交互过程
- 下载交互过程
- Linux安装FastDFS
-
- 1.安装gcc(编译时需要)
- 2.安装libevent(运行时需要)
- 3. 安装创建目录上传所有文件
- 4,安装libfastcommon
- 5、安装fastdfs
-
- 5.1,下载 https://sourceforge.net/projects/fastdfs/files/
- 5.2,安装相关依赖库
- 5.3,安装fastdfs
- 5.4,查看tracker和storage的可执行脚本(后面有用)
- 5.5,准备配置文件 默认在/etc/fdfs/下面
- 5.6先把配置文件名中的sample去了。[可以复制一份]
- 5.7 然后修改tracker的存放数据和日志的目录。
- 6、配置和启动tracker
-
- 6.1,切换目录到: /etc/fdfs/ 目录下;
- 6.2,修改tracker.conf
- 6.3,启动tracker,运行如下命令:
- 7、配置和启动storage
-
- 7.1,切换目录到: /etc/fdfs/ 目录下;
- 7.2,修改storage.conf ; vim storage.conf
- 7.3,创建/home/leige/fastdfs/storage 目录
- 7.4,启动storage, 运行命令如下:
- 8、使用FastDFS自带工具测试
-
- 8.1 切换目录到/etc/fdfs
- 8.2 修改client.conf(7.2修改的是tracker.conf)
- 8.3,拷贝一张图片kmd.jpg到Centos服务器上的 /etc/fdfs目录下;
- 8.4,进行测试 运行如下(运行测试程序,读取/etc/fdfs/client.conf 文件,上传/root/目录下的baobao.png 文件)
- 9、FastDFS 和nginx整合
-
- 9.1 在tracker上安装 nginx
- 9.2 在storage 上安装nginx (目录: /fileservice/fast/)
- 9.3 进入之前解压的fastdfs目录下,把http.conf、mime.conf移动至/etc/fdfs
- 10, Nginx的安装
-
- 10.1,上传 nginx-1.15.2.tar.gz 到Centos服务器上;
- 10.2,解压 nginx-1.15.2.tar.gz
- 10.3,进入nginx解压的目录下
- 10.4,加入模块命令配置
- 10.5,进入nginx解压的目录下
- 10.6,进入nginx解压的目录下
- 10.7,进入nginx解压的目录下
- 11、在浏览器中访问上传到fastDFS的图片
- Docker安装FastDFS
-
- 1,拉取镜像并启动
- 2,测试上传
- 3,配置端口(阿里云)
- 4,测试访问
- 使用java代码测试上传(java上传)
-
- 1.0 创建项目
- 2,加入依赖
-
- 3,创建fdfs_client.conf客户端配置文件
- 4,测试类
- Springboot上传1
-
- 创建项目
- 2,修改pom.xml加入依赖
- 3,修改yml
- 4,创建文件上传工具类
- 5,创建UploadController
- 6,创建index.html页面测试
- 使用springboot2上传文件(开发中常使用的方法)
-
- 创建项目
- 1,创建项目加入依赖
- 2,修改yml
- 3,创建配置属性类
- 4,创建服务类
- 5,创建UploadController
- 6,创建index.html页面测试
FastDFS从入门到精通(建议直接用docker安装 实际常用sprngboot2文件上传的模式)
FastDFS介绍
FastDFS概述
FastDFS是一个开源的轻量级分布式文件系统,它对文件进行管理,功能包括:文件存储、文件同步、文件访问(文件上传、文件下载)等,解决了大容量存储和负载均衡的问题。特别适合以文件为载体的在线服务,如相册网站、视频网站等等。
FastDFS为互联网量身定制,充分考虑了冗余备份、负载均衡、线性扩容等机制,并注重高可用、高性能等指标,使用FastDFS很容易搭建一套高性能的文件服务器集群提供文件上传、下载等服务。
FastDFS简介
FastDFS服务端有两个角色:跟踪器(tracker)和存储节点(storage)。跟踪器主要做调度工作,在访问上起负载均衡的作用。
存储节点存储文件,完成文件管理的所有功能:就是这样的存储、同步和提供存取接口,FastDFS同时对文件的metadata进行管理。所谓文件的meta data就是文件的相关属性,以键值对(key value)方式表示,如:width=1024,其中的key为width,value为1024。文件metadata是文件属性列表,可以包含多个键值对。
跟踪器和存储节点都可以由一台或多台服务器构成。跟踪器和存储节点中的服务器均可以随时增加或下线而不会影响线上服务。其中跟踪器中的所有服务器都是对等的,可以根据服务器的压力情况随时增加或减少。
为了支持大容量,存储节点(服务器)采用了分卷(或分组)的组织方式。存储系统由一个或多个卷组成,卷与卷之间的文件是相互独立的,所有卷的文件容量累加就是整个存储系统中的文件容量。一个卷可以由一台或多台存储服务器组成,一个卷下的存储服务器中的文件都是相同的,卷中的多台存储服务器起到了冗余备份和负载均衡的作用。
在卷中增加服务器时,同步已有的文件由系统自动完成,同步完成后,系统自动将新增服务器切换到线上提供服务。
当存储空间不足或即将耗尽时,可以动态添加卷。只需要增加一台或多台服务器,并将它们配置为一个新的卷,这样就扩大了存储系统的容量。
FastDFS中的文件标识分为两个部分:卷名和文件名,二者缺一不可。
上传交互过程
- client询问tracker上传到的storage,不需要附加参数;
- tracker返回一台可用的storage;
- client直接和storage通讯完成文件上传。
下载交互过程
- client询问tracker下载文件的storage,参数为文件标识(卷名和文件名);
- tracker返回一台可用的storage;
- client直接和storage通讯完成文件下载。
需要说明的是,client为使用FastDFS服务的调用方,client也应该是一台服务器,它对tracker和storage的调用均为服务器间的调用。
Linux安装FastDFS
安装fastDFS分别需要安装fastdfs-nginx-moudle,fastdfs,nginx,libfastcommon
1.安装gcc(编译时需要)
yum install -y gcc gcc-c++
2.安装libevent(运行时需要)
yum -y install libevent
3. 安装创建目录上传所有文件
mkdir -p /fileservice/fast
cd /fileservice/fast

4,安装libfastcommon
```
1 进入fast目录:cd /fileservice/fast
2 解压文件: tar ‐zxvf libfastcommon‐1.0.35.tar.gz
3 进入libfast文件目录:cd libfastcommon‐1.0.35
4 执行编译:./make.sh
5 安装:./make.sh install
```
5、安装fastdfs
-
5.1,下载 https://sourceforge.net/projects/fastdfs/files/
网官下载很慢,看我准备的安装文件
链接:https://pan.baidu.com/s/1l0zvQ-xvLtcdG_r65hh-ww
提取码:53wr -
5.2,安装相关依赖库
1 yum install perl 2 yum install pcre 3 yum install pcre‐devel 4 yum install zlib 5 yum install zlib‐devel 6 yum install openssl 7 yum install openssl‐devel-
5.3,安装fastdfs
1 进入fast目录:cd /fileservice/fast
2 解压文件:tar ‐zxvf fastdfs‐5.11.tar.gz
3 进入解压后的目录:cd fastdfs‐5.11
4 执行编译:./make.sh
5 安装:./make.sh install
安装成功:

-
-
5.4,查看tracker和storage的可执行脚本(后面有用)
ll /etc/init.d/ | grep fdfs -
5.5,准备配置文件 默认在/etc/fdfs/下面
cd /etc/fdfs/
ll
查看一下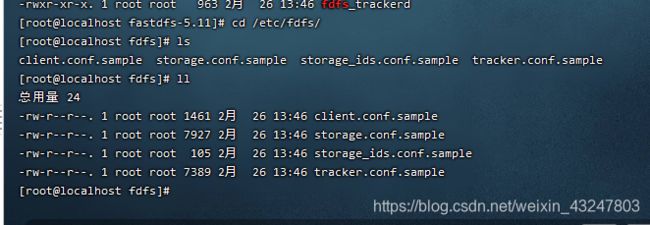
-
5.6先把配置文件名中的sample去了。[可以复制一份]
1 cp client.conf.sample client.conf
2 cp storage.conf.sample storage.conf
3 cp storage_ids.conf.sample storage_ids.conf
4 cp tracker.conf.sample tracker.conf
-
5.7 然后修改tracker的存放数据和日志的目录。
mkdir ‐p /home/lsz/fastdfs/tracker
6、配置和启动tracker
-
6.1,切换目录到: /etc/fdfs/ 目录下;
cd /etc/fdfs/ -
6.2,修改tracker.conf
vim tracker.conf

base_path=/home/yuqing/fastdfs 改为: base_path=/home/lsz/fastdfs/tracker
-
6.3,启动tracker,运行如下命令:
service fdfs_trackerd start
注意:在/home/lsz/fastdfs/tracker 目录下生成两个目录, 一个是数据,一个是日志;
cd /home/lsz/fastdfs/tracker
7、配置和启动storage
由于上面已经安装过FastDFS,这里只需要配置storage就好了;
-
7.1,切换目录到: /etc/fdfs/ 目录下;
cd /etc/fdfs/ -
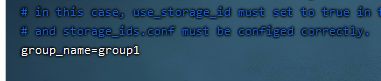
7.2,修改storage.conf ; vim storage.conf
group_name=group1 #配置组名
base_path=/home/yuqing/fastdfs 改为: base_path=/home/lsz/fastdfs/storage

#store存放文件的位置(store_path) store_path0=/home/yuqing/fastdfs 改为: store_path0=/home/lsz/fastdfs/storage
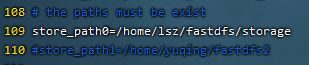
#如果有多个挂载磁盘则定义多个store_path,如下
#store_path1=…
#store_path2=…
#配置tracker服务器:IP
tracker_server=192.168.188.101:22122

#如果有多个则配置多个tracker
#tracker_server=192.168.188.101:22122 -
7.3,创建/home/leige/fastdfs/storage 目录
mkdir ‐p /home/leige/fastdfs/storage -
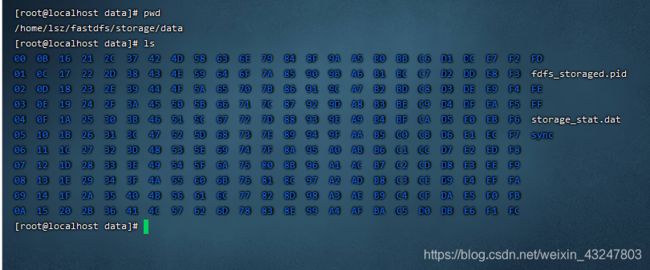
7.4,启动storage, 运行命令如下:
service fdfs_storaged start启动完成后进入 /home/lsz/fastdfs/storage/data 目录下,显示目录如下:
8、使用FastDFS自带工具测试
-
8.1 切换目录到/etc/fdfs
cd /etc/fdfs -
8.2 修改client.conf(7.2修改的是tracker.conf)
vim client.conf
修改基本路径和tracker_server如下:
 base_path=/home/lsz/fastdfs/storage

 tracker_server=192.168.188.101:22122
注意:若tracker有多个,可以配置多个,如下:
#tracker_server=…
#tracker_server=… -
8.3,拷贝一张图片kmd.jpg到Centos服务器上的 /etc/fdfs目录下;

-
8.4,进行测试 运行如下(运行测试程序,读取/etc/fdfs/client.conf 文件,上传/root/目录下的baobao.png 文件)
如果你反正root项目可以指定目录:
/usr/bin/fdfs_upload_file /etc/fdfs/client.conf /root/baobao.png如果你当前目录在/etc/fdfs 可以如下:
/usr/bin/fdfs_upload_file ./client.conf ./kmd.jpg返回:group1/M00/00/00/wKi8ZWA4nrqAcw1QACcmUui3-1g192.jpg

以上图中的文件地址: http://192.168.188.101/group1/M00/00/00/wKi8ZWA4nrqAcw1QACcmUui3-1g192.jpg对应storage服务器上 的/home/lsz/fastdfs/storage/data/00/00/wKi8ZWA4nrqAcw1QACcmUui3-1g192.jpg 文件; 由于现在还没有和nginx整合无法使用http下载
查看图片的位置
cd /home/lsz/fastdfs/storage/data/00/00
9、FastDFS 和nginx整合
-
9.1 在tracker上安装 nginx
在tracker上安装 nginx
在每个tracker上安装nginx,的主要目的是做负载均衡及实现高可用。如果只有一台tracker 可以不配置nginx。
一个tracker对应多个storage,通过nginx对storage负载均衡; -
9.2 在storage 上安装nginx (目录: /fileservice/fast/)
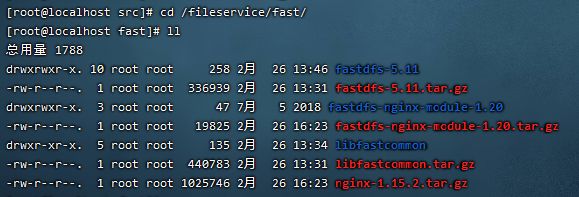
(0)注意:找到我们上传文件的位置
cd /fileservice/fast/
(1)上传fastdfsnginxmodule1.20.tar.gz 到Centos服务器上
没有上传的可以上传到 /fileservice/fast目录(2)解压fastdfsnginxmodule1.20.tar.gz 并移动到 /usr/local目录下;
tar -zxvf fastdfs-nginx-module_v1.16.tar.gz 解压
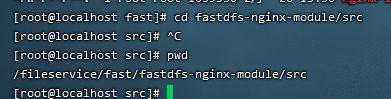
(3)切换目录到: fastdfsnginxmodule1.20/src 目录下
cd fastdfs-nginx-module/src
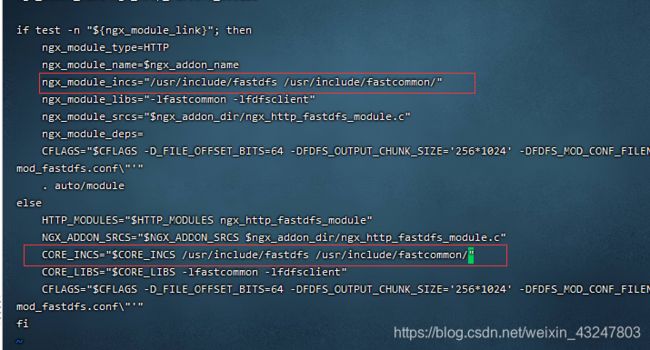
(4)修改config文件,将文件中的所有 /usr/local/ 路径改为 /usr/
vim config
ngx_module_incs="/usr/include/fastdfs /usr/include/fastcommon/"
CORE_INCS="$CORE_INCS /usr/include/fastdfs /usr/include/fastcommon/"修改后:
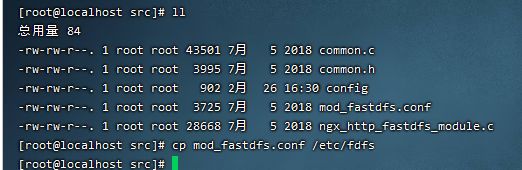
(5)将fastdfs-nginx-module/src下的mod_fastdfs.conf拷贝至/etc/fdfs/下
cp mod_fastdfs.conf /etc/fdfs/
(6)并修改 /etc/fdfs/mod_fastdfs.conf 的内容;
vi /etc/fdfs/mod_fastdfs.conf
tracker_server=117.48.203.125:22122

#tracker_server=192.168.172.20:22122 #(多个tracker配置多行)url_have_group_name=true #url中包含group名称

store_path0=/home/fdfs_storage #指定文件存储路径(上面配置的store路径)

-
9.3 进入之前解压的fastdfs目录下,把http.conf、mime.conf移动至/etc/fdfs
1.0 移动到fast目录
cd /fileservice/fast/
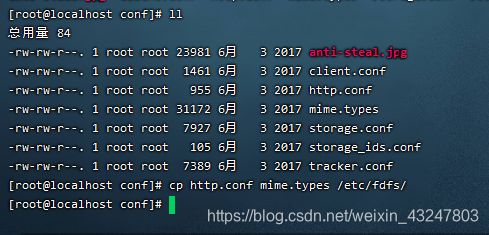
2.0 移动到 fastdfs-5.11/conf
cd fastdfs-5.11/conf
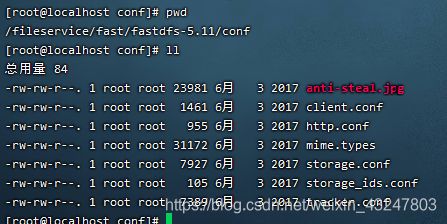
3.0 执行复制
cp http.conf mime.types /etc/fdfs/
10, Nginx的安装
-
10.1,上传 nginx-1.15.2.tar.gz 到Centos服务器上;
移动到我们上传好的位置
cd /fileservice/fast

-
10.2,解压 nginx-1.15.2.tar.gz
1 cd /fileservice/fast/
2 tar -zxvf nginx-1.15.2.tar.gz

-
10.3,进入nginx解压的目录下
cd nginx-1.15.2/

-
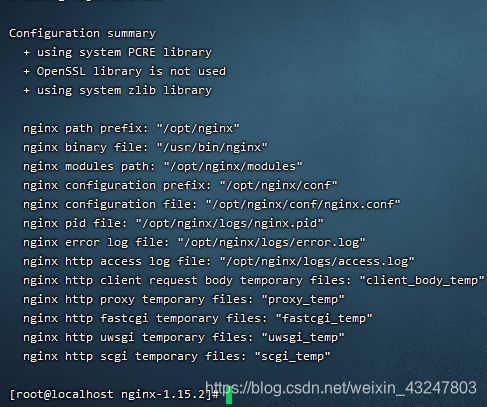
10.4,加入模块命令配置
./configure --prefix=/opt/nginx --sbin-path=/usr/bin/nginx --add-module=/fileservice/fast/fastdfs-nginx-module-1.20/src
-
10.5,进入nginx解压的目录下
make && make install
-
10.6,进入nginx解压的目录下
cd /opt/nginx/conf
vim nginx.conflocation ~/group([0-9]) {
# root html;
# index index.html index.htm;
ngx_fastdfs_module;
}
-
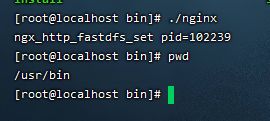
10.7,进入nginx解压的目录下
cd /usr/bin/
./nginx #启动
11、在浏览器中访问上传到fastDFS的图片
因为Centos系统有防火墙,需要先关闭掉,才可以在浏览器中访问;
(1)CentOS 7.0默认使用的是firewall作为防火墙;若没有启用iptables 作为防火墙,则使用以下方式关闭防火墙:
systemctl stop firewalld.service #停止firewall
systemctl disable firewalld.service #禁止firewall开机启动
firewall-cmd --state #查看默认防火墙状态(关闭后显示notrunning,开启后显示running)
(2)若已经启用iptables作为防火墙,则使用以下方式关闭:
service iptables stop #临时关闭防火墙
chkconfig iptables off #永久关闭防火墙
(3)在谷歌浏览器中访问刚才上传的图片:
刚才上传的图片地址为:
http://192.168.188.101/group1/M00/00/00/wKi8ZWA4nrqAcw1QACcmUui3-1g192.jpg
Docker安装FastDFS
1,拉取镜像并启动
docker run -d --restart=always --privileged=true --net=host --name=fastdfs -e IP=192.168.188.103 -e WEB_PORT=80 -v ${HOME}/fastdfs:/var/local/fdfs registry.cn-beijing.aliyuncs.com/tianzuo/fastdfs
–privileged=true是权限
–net=host是网卡
IP就是ip
web_port是端口号
-v ${HOME}/fastdfs 是容器
其中-v H O M E / f a s t d f s : / v a r / l o c a l / f d f s 是 指 : 将 {HOME}/fastdfs:/var/local/fdfs是指:将 HOME/fastdfs:/var/local/fdfs是指:将{HOME}/fastdfs这个目录挂载到容器里的/var/local/fdfs这个目录里。所以上传的文件将被持久化到${HOME}/fastdfs/storage/data里,IP 后面是自己的服务器公网ip或者虚拟机ip,-e WEB_PORT=80 指定nginx端口
删除:(如果ip錯了 直接刪除)
docker rm -f $(docker ps -aq)
2,测试上传
 //进入容器
docker exec -it fastdfs /bin/bash
//创建文件
echo "Hello FastDFS!">index.html
//测试文件上传
fdfs_test /etc/fdfs/client.conf upload index.html
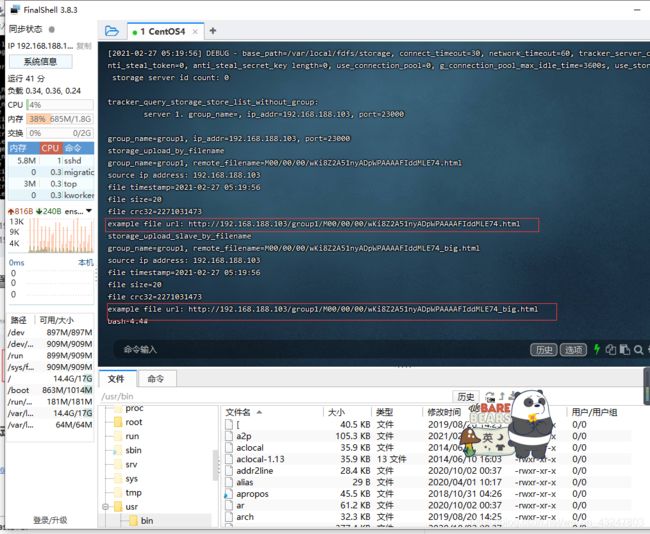
http://192.168.188.103/group1/M00/00/00/wKi8Z2A51nyADpWPAAAAFIddMLE74.html
http://192.168.188.103/group1/M00/00/00/wKi8Z2A51nyADpWPAAAAFIddMLE74_big.html
3,配置端口(阿里云)

4,测试访问

使用java代码测试上传(java上传)
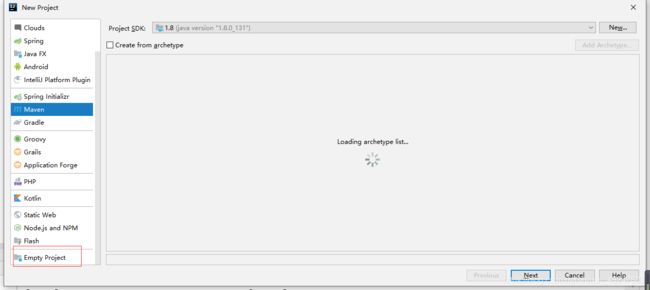
1.0 创建项目
创建空项目
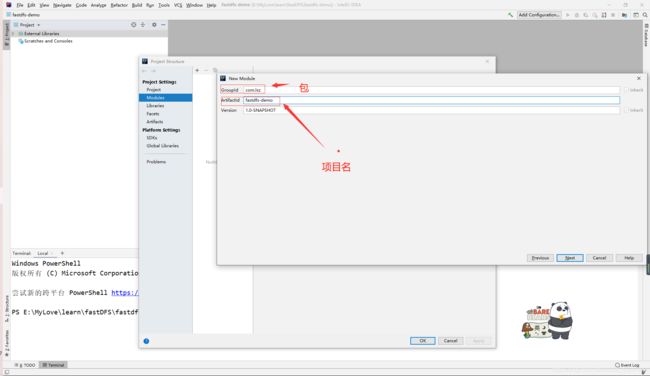
点击file->project structure…->Modules
点击右上角+加号 -》New Modules
我这里项目名用fastdfsjava 截图里面用的是fastdfs-demo

2,加入依赖
修改成1.8
 <properties>
    <project.build.sourceEncoding>UTF-8</project.build.sourceEncoding>
    <maven.compiler.source>1.8</maven.compiler.source>
    <maven.compiler.target>1.8</maven.compiler.target>
  </properties>
	<dependency>
      <groupId>net.oschina.zcx7878</groupId>
      <artifactId>fastdfs-client-java</artifactId>
      <version>1.27.0.0</version>
    </dependency>
    <!-- spring-core -->
    <dependency>
      <groupId>org.springframework</groupId>
      <artifactId>spring-core</artifactId>
      <version>4.3.25.RELEASE</version>
    </dependency>
pom.xml
<?xml version="1.0" encoding="UTF-8"?>

<project xmlns="http://maven.apache.org/POM/4.0.0" xmlns:xsi="http://www.w3.org/2001/XMLSchema-instance"
  xsi:schemaLocation="http://maven.apache.org/POM/4.0.0 http://maven.apache.org/xsd/maven-4.0.0.xsd">
  <modelVersion>4.0.0</modelVersion>

  <groupId>com.lsz</groupId>
  <artifactId>fastdfsjava</artifactId>
  <version>1.0-SNAPSHOT</version>

  <name>fastdfsjava</name>
  <!-- FIXME change it to the project's website -->
  <url>http://www.example.com</url>

  <properties>
    <project.build.sourceEncoding>UTF-8</project.build.sourceEncoding>
    <maven.compiler.source>1.8</maven.compiler.source>
    <maven.compiler.target>1.8</maven.compiler.target>
  </properties>

  <dependencies>
    <dependency>
      <groupId>junit</groupId>
      <artifactId>junit</artifactId>
      <version>4.11</version>
      <scope>test</scope>
    </dependency>

    <dependency>
      <groupId>net.oschina.zcx7878</groupId>
      <artifactId>fastdfs-client-java</artifactId>
      <version>1.27.0.0</version>
    </dependency>
    <!-- spring-core -->
    <dependency>
      <groupId>org.springframework</groupId>
      <artifactId>spring-core</artifactId>
      <version>4.3.25.RELEASE</version>
    </dependency>

  </dependencies>

  <build>
    <pluginManagement><!-- lock down plugins versions to avoid using Maven defaults (may be moved to parent pom) -->
      <plugins>
        <!-- clean lifecycle, see https://maven.apache.org/ref/current/maven-core/lifecycles.html#clean_Lifecycle -->
        <plugin>
          <artifactId>maven-clean-plugin</artifactId>
          <version>3.1.0</version>
        </plugin>
        <!-- default lifecycle, jar packaging: see https://maven.apache.org/ref/current/maven-core/default-bindings.html#Plugin_bindings_for_jar_packaging -->
        <plugin>
          <artifactId>maven-resources-plugin</artifactId>
          <version>3.0.2</version>
        </plugin>
        <plugin>
          <artifactId>maven-compiler-plugin</artifactId>
          <version>3.8.0</version>
        </plugin>
        <plugin>
          <artifactId>maven-surefire-plugin</artifactId>
          <version>2.22.1</version>
        </plugin>
        <plugin>
          <artifactId>maven-jar-plugin</artifactId>
          <version>3.0.2</version>
        </plugin>
        <plugin>
          <artifactId>maven-install-plugin</artifactId>
          <version>2.5.2</version>
        </plugin>
        <plugin>
          <artifactId>maven-deploy-plugin</artifactId>
          <version>2.8.2</version>
        </plugin>
        <!-- site lifecycle, see https://maven.apache.org/ref/current/maven-core/lifecycles.html#site_Lifecycle -->
        <plugin>
          <artifactId>maven-site-plugin</artifactId>
          <version>3.7.1</version>
        </plugin>
        <plugin>
          <artifactId>maven-project-info-reports-plugin</artifactId>
          <version>3.0.0</version>
        </plugin>
      </plugins>
    </pluginManagement>
  </build>
</project>
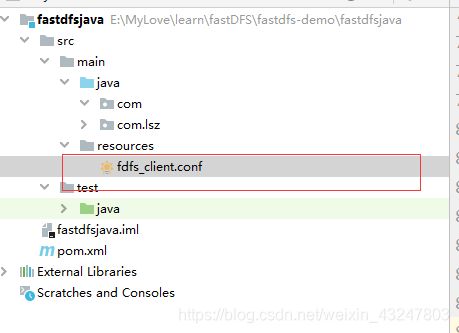
3,创建fdfs_client.conf客户端配置文件
connect_timeout=30


network_timeout=60

base_path=/home/fastdfs

#改为自己服务器的ip
tracker_server=192.168.188.103:22122

log_level=info


use_connection_pool = false


connection_pool_max_idle_time = 3600


load_fdfs_parameters_from_tracker=false

use_storage_id = false

storage_ids_filename = storage_ids.conf

http.tracker_server_port=80
4,测试类
package com.lsz;
import org.csource.common.MyException;
import org.csource.fastdfs.*;
import org.springframework.core.io.ClassPathResource;
import java.io.IOException;
/**
* Hello world!
*
*/
public class App
{
public static void main( String[] args ) throws IOException, MyException {
String uploadFilePath="C:/Users/dell/Desktop/作业/ps/P8/1.jpg";
//得到当前conf的绝对路径
String filePath = new ClassPathResource("fdfs_client.conf").getFile().getAbsolutePath();
// 1、加载配置文件,配置文件中的内容就是 tracker 服务的地址。
ClientGlobal.init(filePath);
// 2、创建一个 TrackerClient 对象。直接 new 一个。
TrackerClient trackerClient = new TrackerClient();
// 3、使用 TrackerClient 对象创建连接,获得一个 TrackerServer 对象。
TrackerServer trackerServer = trackerClient.getConnection();
// 4、创建一个 StorageServer 的引用,值为 null
StorageServer storageServer = null;
// 5、创建一个 StorageClient 对象,需要两个参数 TrackerServer 对象、StorageServer 的引用
StorageClient storageClient = new StorageClient(trackerServer, storageServer);
// 6、使用 StorageClient 对象上传图片。
//扩展名不带“.”
// String[] strings = storageClient.upload_file("C:/Users/LJH/Pictures/Camera Roll/bj1.jpg", "jpg",
// null);
String[] strings = storageClient.upload_file( filePath , "jpg",
null);
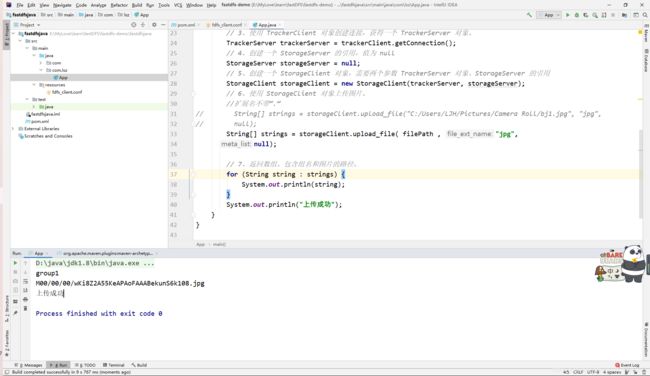
// 7、返回数组。包含组名和图片的路径。
for (String string : strings) {
System.out.println(string);
}
System.out.println("上传成功");
}
}
Springboot上传1
创建项目

选中+号New Module 然后next
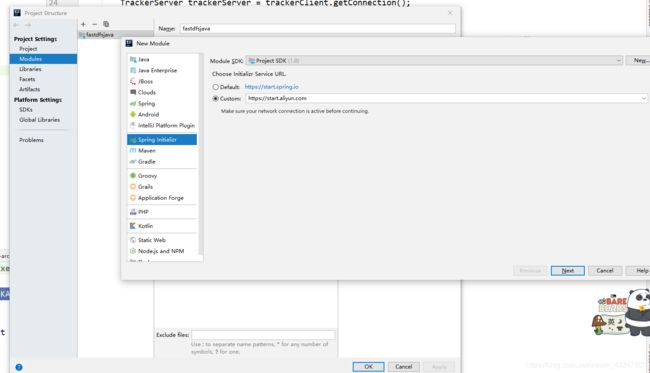
修改 然后next
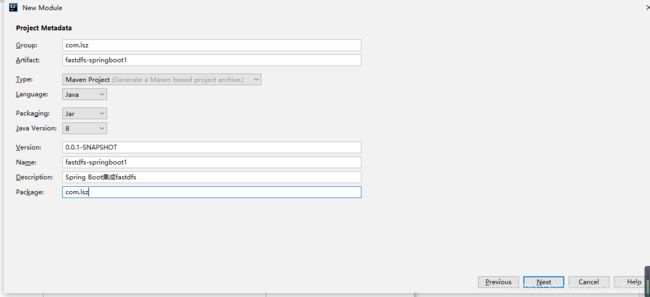
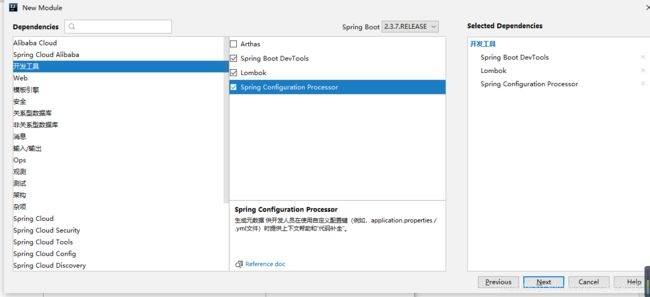
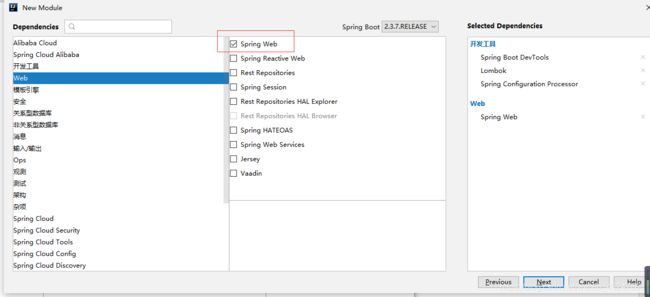
选中如下 NEXT Finish 搞定
2,修改pom.xml加入依赖
		<dependency>
            <groupId>net.oschina.zcx7878</groupId>
            <artifactId>fastdfs-client-java</artifactId>
             <version>1.27.0.0</version>
        </dependency>
  		<dependency>
            <groupId>org.apache.commons</groupId>
            <artifactId>commons-lang3</artifactId>
        </dependency>
3,修改yml
fastdfs:
  connect_timeout_in_seconds: 30
  network_timeout_in_seconds: 60
  charset: UTF-8
  tracker_servers: 117.48.203.125:22122 #多个 trackerServer中间以逗号分隔
4,创建文件上传工具类
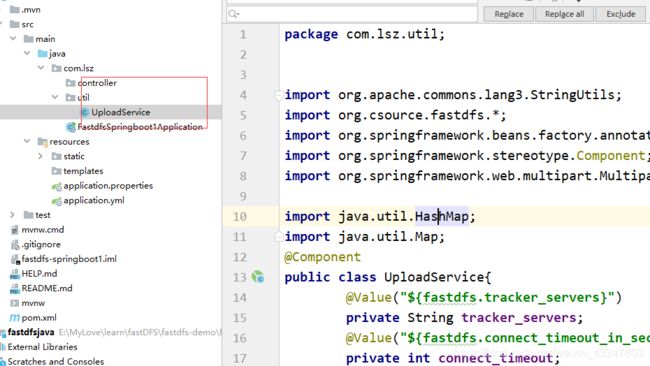
package com.lsz.util;


import org.apache.commons.lang3.StringUtils;
import org.csource.fastdfs.*;
import org.springframework.beans.factory.annotation.Value;
import org.springframework.stereotype.Component;
import org.springframework.web.multipart.MultipartFile;

import java.util.HashMap;
import java.util.Map;
@Component
public class UploadService{
        @Value("${fastdfs.tracker_servers}")
        private String tracker_servers;
        @Value("${fastdfs.connect_timeout_in_seconds}")
        private int connect_timeout;
        @Value("${fastdfs.network_timeout_in_seconds}")
        private int network_timeout;
        @Value("${fastdfs.charset}")
        private String charset;

        public Map<String,Object> upload(MultipartFile multipartFile) {
            if (multipartFile == null) {
                throw new RuntimeException("文件不能为空");
            }
            // 上传至fastDFS, 返回文件id
            String fileId = this.fdfsUpload(multipartFile);
            if (StringUtils.isEmpty(fileId)) {
                System.out.println("上传失败");
                throw  new RuntimeException("上传失败");
            }
            Map<String, Object> map=new HashMap<>();
            map.put("code",200);
            map.put("msg","上传成功");
            map.put("fileId",fileId);
            return map;
        }

        /**
         * 上传至fastDFS

         * @param multipartFile
         * @return 文件id
         */
        private String fdfsUpload(MultipartFile multipartFile) {
            // 1. 初始化fastDFS的环境
            initFdfsConfig();

            // 2. 获取trackerClient服务
            TrackerClient trackerClient = new TrackerClient();
            try {
                TrackerServer trackerServer = trackerClient.getConnection();
                // 3. 获取storage服务
                StorageServer storeStorage = trackerClient.getStoreStorage(trackerServer);
                // 4. 获取storageClient
                StorageClient1 storageClient1 = new StorageClient1(trackerServer, storeStorage);
                // 5. 上传文件 (文件字节, 文件扩展名, )
                // 5.1 获取文件扩展名
                String originalFilename = multipartFile.getOriginalFilename();
                String extName = originalFilename.substring(originalFilename.lastIndexOf(".") + 1);


                // 5.2 上传
                String fileId = storageClient1.upload_file1(multipartFile.getBytes(), extName, null);

                return fileId;


            } catch (Exception e) {


                System.out.println(e);

                return null;

            }

        }

        /**

         * 初始化fastDFS的环境

         */
        private void initFdfsConfig() {

            try {
                ClientGlobal.initByTrackers(tracker_servers);

                ClientGlobal.setG_connect_timeout(connect_timeout);

                ClientGlobal.setG_network_timeout(network_timeout);

                ClientGlobal.setG_charset(charset);


            } catch (Exception e) {

                System.out.println(e);


            }

        }
}
5,创建UploadController
import org.springframework.beans.factory.annotation.Autowired;
import org.springframework.web.bind.annotation.RequestMapping;
import org.springframework.web.bind.annotation.ResponseBody;
import org.springframework.web.bind.annotation.RestController;
import org.springframework.web.multipart.MultipartFile;

import java.util.HashMap;
import java.util.Map;

@RestController
@RequestMapping("upload")
public class UploadController {
   @Autowired
   private UploadService uploadService;
    @RequestMapping("doUpload")
    @ResponseBody
    public Map<String,Object> doUpload(MultipartFile mf){
        System.out.println(mf.getOriginalFilename());
        Map<String, Object> map = uploadService.upload(mf);
        return map;
    }
}
6,创建index.html页面测试
<!DOCTYPE html>
<html lang="en">
<head>
    <meta charset="UTF-8">
    <title>Title</title>
</head>
<body>
    <h1>文件上传</h1>
    <hr/>
    <form class="" method="post" enctype="multipart/form-data" action="upload/doUpload">
        <input type="file" class="mf"  name = "mf"/>
        <input  type="submit" value="上传"/>
    </form>
</body>
</html>
使用springboot2上传文件(开发中常使用的方法)
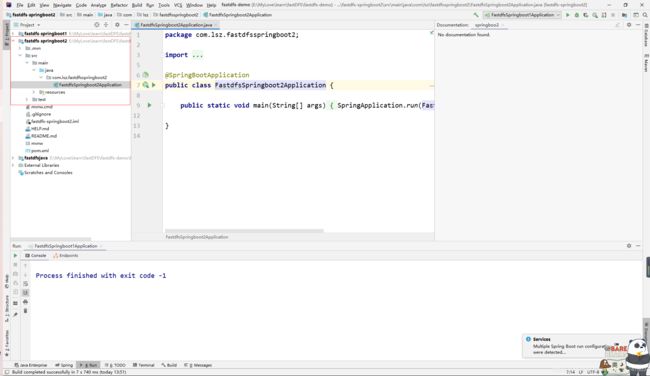
创建项目
选中+号New Module 然后next
修改这里是的项目名应该是fastdfs-springboot2 然后next
选中如下 NEXT Finish 搞定
1,创建项目加入依赖
<!-- https://mvnrepository.com/artifact/com.github.tobato/fastdfs-client -->
<dependency>
    <groupId>com.github.tobato</groupId>
    <artifactId>fastdfs-client</artifactId>
    <version>1.26.7</version>
</dependency>
2,修改yml
fdfs:
  so-timeout: 2500       # 读取时间
  connect-timeout: 600   # 连接超时时间
  thumb-image:           # 缩略图
    width: 100
    height: 100
  tracker-list:          # tracker服务配置地址列表
    - 192.168.188.103:22122 #换成你的ip
upload:
    base-url: http://192.168.188.103/ #换成你的饿ip
    allow-types:
      - image/jpeg
      - image/png
      - image/bmp
注入FastFileStorageClient后,可以直接调用其uploadFile(),比上一种方法省去了手动设置配置信息,也不需要自己建立tracker连接、获取storage、再获得storageClient这些准备工作。
3,创建配置属性类
@ConfigurationProperties(prefix = "upload")
@Data
public class UploadProperties {
    private String baseUrl;
    private List<String> allowTypes;
}
4,创建服务类
@Service
@EnableConfigurationProperties(UploadProperties.class)
public class UploadService {
        private Log log= LogFactory.getLog(UploadService.class);
        @Autowired
        private FastFileStorageClient storageClient;
        @Autowired
        private UploadProperties prop;

        public String uploadImage(MultipartFile file) {
            // 1、校验文件类型
            String contentType = file.getContentType();
            if (!prop.getAllowTypes().contains(contentType)) {
                throw new RuntimeException("文件类型不支持");
            }
            // 2、校验文件内容
            try {
                BufferedImage image = ImageIO.read(file.getInputStream());
                if (image == null || image.getWidth() == 0 || image.getHeight() == 0) {
                    throw new RuntimeException("上传文件有问题");
                }
            } catch (IOException e) {
                log.error("校验文件内容失败....{}", e);
                throw new RuntimeException("校验文件内容失败"+e.getMessage());
            }
            try {
                // 3、上传到FastDFS
                // 3.1、获取扩展名
                String extension = StringUtils.substringAfterLast(file.getOriginalFilename(), ".");
                // 3.2、上传
                StorePath storePath = storageClient.uploadFile(file.getInputStream(), file.getSize(), extension, null);
                // 返回路径
                return prop.getBaseUrl() + storePath.getFullPath();
            } catch (IOException e) {
                log.error("【文件上传】上传文件失败!....{}", e);

                throw  new RuntimeException("【文件上传】上传文件失败!"+e.getMessage());

            }
        }
    }
5,创建UploadController
import org.springframework.beans.factory.annotation.Autowired;
import org.springframework.web.bind.annotation.RequestMapping;
import org.springframework.web.bind.annotation.ResponseBody;
import org.springframework.web.bind.annotation.RestController;
import org.springframework.web.multipart.MultipartFile;

import java.util.HashMap;
import java.util.Map;

@RestController
@RequestMapping("upload")
public class UploadController {

   @Autowired
   private UploadService uploadService;

    @RequestMapping("doUpload")
    @ResponseBody
    public Map<String,Object> doUpload(MultipartFile mf){
        System.out.println(mf.getOriginalFilename());
        Map<String, Object> upload =new HashMap<>();
        String path = this.uploadService.uploadImage(mf);
        upload.put("path",path);
        return upload;
    }
}
6,创建index.html页面测试
<!DOCTYPE html>
<html lang="en">
<head>
    <meta charset="UTF-8">
    <title>Title</title>
</head>
<body>
    <h1>文件上传</h1>
    <hr/>
    <form class="" method="post" enctype="multipart/form-data" action="upload/doUpload">
        <input type="file" class="mf"  name = "mf"/>
        <input  type="submit" value="上传"/>
    </form>
</body>
</html>