gitLab下载安装和使用教程
一、下载
系统环境
下载安装
gitlab/gitlab-ce - Packages · packages.gitlab.com
或gitLab的linux安装包-管理软件文档类资源-CSDN下载
ce表示开源
el表示centos 选64位
el6对应CentOS 6
我这里是先下载再上传后安装
在linux上创建了一个gitLab用于存放上传安装包的文件目录
二、安装
在安装前请先确定是已安装以下软件了,防止安装失败
先执行 rpm -i gitlab-ce-7.13.0-ce.0.el6.x86_64.rpm
安装完成后会提示执行
sudo vim /etc/gitlab/gitlab.rb
修改配置
#external_url 'http://instance-0ndv0diu' -- 原来的
#修改后的
external_url 'http://1xx.xx.5x.1xx'
然后执行
sudo gitlab-ctl reconfigure
如果 端口被占用,需要重新设置一个端口,保存后重新执行一下sudo gitlab-ctl reconfigure
gitlab-ctl status # 查看服务状态
试着用IP 直接访问 http://182.xx.xx.xx:8031/users/sign_in
GIT 常用命令
gitlab-ctl start # 启动所有 gitlab 组件
gitlab-ctl stop # 停止所有 gitlab 组件
gitlab-ctl restart # 重启所有 gitlab 组件
gitlab-ctl status # 查看服务状态
gitlab-ctl reconfigure # 启动服务
gitlab-ctl show-config # 验证配置文件
gitlab-ctl tail # 查看日志
gitlab-rake gitlab:check SANITIZE=true --trace # 检查gitlab
vim /etc/gitlab/gitlab.rb # 修改默认的配置文件
官网一些常用命令
GitLab![]() https://docs.gitlab.com/ee/security/unlock_user.html
https://docs.gitlab.com/ee/security/unlock_user.html
三、登陆
无登陆密码
由于我无法找到 /etc/gitlab/initial_root_password 这个文件看不到初始化密码
sudo gitlab-rails console -e production #我直接输入的sudo gitlab-rails console
User.where(username: 'root').first 用这个找到root帐户
user = User.where(username: 'root').first
user.password = "123456"
修改好了保存:user.save!
报错提示密码太短
重新输入
user.password = "xxxxx"
user.password_confirmation= "xxxxx"
user.save!
保存成功并退出
root帐户被锁
user.unlock_access!
user.save!
参照:Locked users | GitLab![]() https://docs.gitlab.com/ee/security/unlock_user.html
https://docs.gitlab.com/ee/security/unlock_user.html
首次登陆会让你重置密码
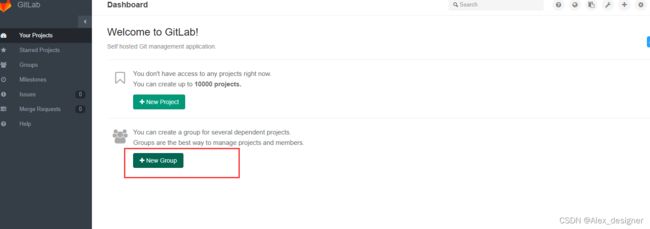
四、创建组类别和项目
先创建组类别
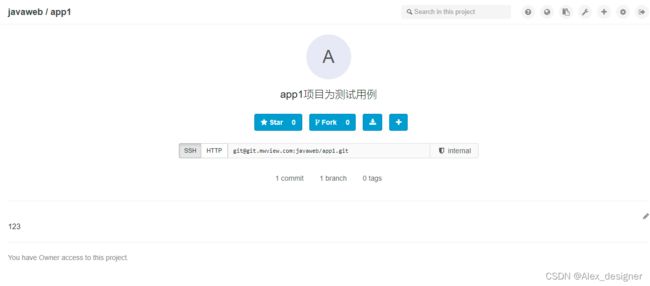
再创建具体的项目
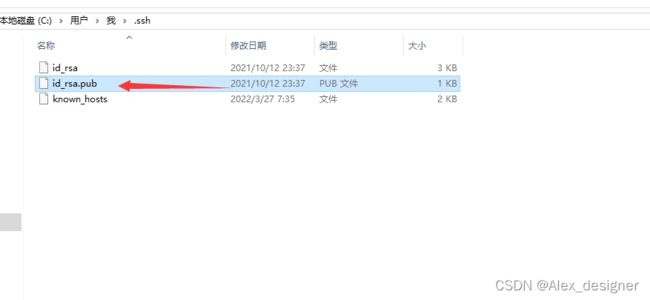
和其它地方一样,需要保存对应的key
我的本地路径在C:\Users\我\.ssh
五、代码上传
手动创建一些文件
git init
git config --local user.name "Administrator"
git config --local user.email "[email protected]"
git remote add origin [email protected]:javaweb/app1.git
git push -u origin master
上传时报错,原因是我还没有执行add和commit
推成功
六、代码克隆
和其它git获取资源一样
git clone [email protected]:javaweb/app1.git
七、修改成二级域名
1、首先去阿里云新增一个二级域名(其它服务器同理)
这个地方有10分钟的等待生效时间
配置我们自己的域名地址
sudo vim /etc/gitlab/gitlab.rb
执行sudo gitlab-ctl reconfigure
重新进入就是以下这样子,可以通过这个地址正常下载
八、nginx冲突
【以下方案可能不是最优的,但改动小,亲测有效,有好的建议,请留言】
原服务器本身有一个nginx 和其它测试项目,为了快速搭gitlab关闭了原服务的nginx
如何让原nginx配置都生效了?
以下是原服器nginx重启的报错80端口被占用
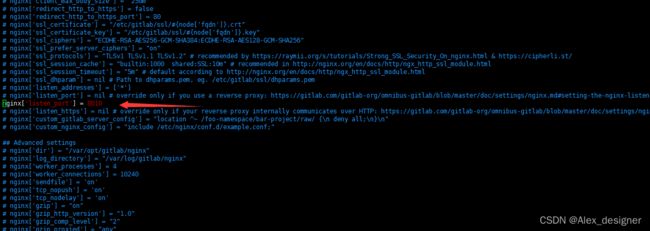
sudo vim /etc/gitlab/gitlab.rb 修改gitlab中的配置
nginx['listen_port'] = 8010
原nginx配置加一个映射
server{
 listen 80;
 server_name git.mwview.com;
 location / {
        proxy_pass http://localhost:8010;
 }
}
现在都可以正常访问,成功解决


