Spring Boot:零XML配置的Spring框架2.0
一、异常显示页面
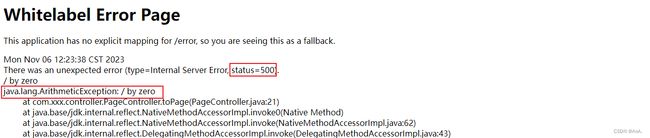
默认情况,Spring Boot项目错误页面如下。
1. 设置具体的状态码页面
在templates/下新建error文件夹,在error中新建:状态码.html的页面。例如当出现500时显示的页面为500.html。
2. 使用x进行模糊匹配
当出现5开头状态码的错误时,显示页面可以命名为5xx.html
当出现50开头状态码的错误时,显示页面可以命名为50x.html
3. 统一错误显示页面
在templates下新建error.html。如果项目中不存在具体状态码的页面或没有使用x成功匹配的页面时,显示error.html作为错误显示页面。
二、异常处理机制
在Spring Boot项目中除了设置错误页面,还可以通过注解实现错误处理。
-
在控制器类中添加一个方法,结合@ExceptionHandler。但是只能对当前控制器中方法出现异常进行解决。
-
新建全局异常类,通过@ControllerAdvice结合@ExceptionHandler。当全局异常处理和局部处理同时存在时,局部生效(就近原则)
1. 通过@ExceptionHandler注解处理异常
@Controller
public class UsersController {


    @ExceptionHandler(value = {java.lang.NullPointerException.class} )
    public ModelAndView nullpointExcepitonHandler(Exception e){
        ModelAndView mv = new ModelAndView();
        mv.addObject("err",e.toString());
        mv.setViewName("error1");
        return mv;
    }
}
2. 通过@ControllerAdvice与@ExceptionHandler注解处理异常
/**
 * 全局异常处理类
 */
@ControllerAdvice
public class GlobalException {
    @ExceptionHandler(value = {java.lang.NullPointerException.class} )
    public ModelAndView nullpointExcepitonHandler(Exception e){
        ModelAndView mv = new ModelAndView();
        mv.addObject("err",e.toString());
        mv.setViewName("error1");
        return mv;
    }

    @ExceptionHandler(value = {java.lang.ArithmeticException.class} )
    public ModelAndView arithmeticExceptionHandler(Exception e){
        ModelAndView mv = new ModelAndView();
        mv.addObject("err",e.toString());
        mv.setViewName("error2");
        return mv;
    }
}
3. 通过SimpleMappingExceptionResolver对象处理异常
/**
 * 全局异常
 * SimpleMappingExceptionResolver
 */
@Configuration
public class GlobalException2 {
    /**
     * 此方法返回值必须是SimpleMappingExceptionResolver对象
     * @return
     */
    @Bean
    public SimpleMappingExceptionResolver getSimpleMappingExceptionResolver(){
        SimpleMappingExceptionResolver resolver = new SimpleMappingExceptionResolver();
        Properties properties = new Properties();
        /*
         * 参数一:异常类型,并且是全名
         * 参数二:视图名称
         */
        properties.put("java.lang.NullPointerException","error3");
        properties.put("java.lang.ArithmeticException","error4");

        resolver.setExceptionMappings(properties);
        return resolver;
    }

}
4. 通过自定义HandlerExceptionResolver对象处理异常
/**
 * 自定义HandlerExceptionResolver对象处理异常
 * 必须要实现HandlerExceptionResolver
 */
@Component
public class GlobalException3 implements HandlerExceptionResolver {
    @Override
    public ModelAndView resolveException(HttpServletRequest httpServletRequest, HttpServletResponse httpServletResponse, Object handler, Exception e) {
        ModelAndView mv = new ModelAndView();
        //判断不同异常类型,做不同视图的跳转
        if(e instanceof NullPointerException){
            mv.setViewName("error5");
        }
        if(e instanceof ArithmeticException){
            mv.setViewName("error6");
        }
        mv.addObject("error",e.toString());
        return mv;
    }
}
三、文件上传,下载
1. 文件上传
上传文件解析器已经被自动配置,直接只用MultipartFile接收上传的文件。
所以在文件上传时都会生成一个全局唯一的文件名。常见有两种方式:
(1)时间戳+随机数
(2)UUID
/**
 * 文件上传控制单元方法实现
 * @param photo 名字必须和表单中文件域的name属性值相同
 * @return
 * @throws IOException transferTo抛出的异常,可以使用try...catch处理异常。示例中为了让代码看起来简洁直接抛出了。
 */
@RequestMapping("/upload")
@ResponseBody
public String upload(MultipartFile photo, HttpServletRequest request) throws IOException {
    // 判断上传文件流是否为空。如果不为空继续执行
    if(!photo.isEmpty()) {
        // 使用UUID生成文件名称
        // String fileName = UUID.randomUUID().toString();
        // 使用时间戳+随机数生成文件名
        long timeMillis = System.currentTimeMillis();
        Random random = new Random();
        String fileName = timeMillis + "" + random.nextInt(1000);
        // 获取上传时文件名
        String oldName = photo.getOriginalFilename();
        // 获取上传时文件的扩展名
        String suffix = oldName.substring(oldName.lastIndexOf("."));
        // 获取到当前项目images目录,发布到Tomcat后的绝对路径。
        String realPath = request.getServletContext().getRealPath("/images");
        photo.transferTo(new File(realPath,fileName + suffix));
        return "ok";
    }
    return "err";
}
2. 文件下载
如果希望所有的文件都是下载,而不是能打开则打开。可以在响应头中设置Content-Disposition参数为attachment。attachment结合filename可以设置下载文件的名称。
因为需要设置响应头,所以就必须编写一个下载的控制器。
@RequestMapping("/download")
public void download(HttpServletRequest req, HttpServletResponse response, String filename) {
    try {
        // filename=的值就是客户端看到的下载文件名称
         String newFilename = new String(filename.getBytes("utf-8"),"iso-8859-1");
        response.setHeader("Content-Disposition", "attachment;filename=" + newFilename);
        File file = new File(req.getServletContext().getRealPath("/images"), filename);
        FileInputStream fis = new FileInputStream(file);
        ServletOutputStream os = response.getOutputStream();
        IOUtils.copy(fis, os);
    } catch (IOException e) {
        e.printStackTrace();
    }
}
四、更换内置的服务器
1. 添加依赖
当前我们做的SpringBoot⼊⻔案例勾选了Spirng-web的功能,并且导⼊了对应的starter。
    org.springframework.boot
    spring-boot-starter-web
2. 更换服务器
根据SpringBoot的⼯作机制,⽤什么技术,加⼊什么依赖就⾏了。SpringBoot提供了3款内置的服务器:
-
tomcat(默认):apache出品,粉丝多,应⽤⾯⼴,负载了若⼲较重的组件
-
jetty:更轻量级,负载性能远不及tomcat
-
undertow:负载性能勉强跑赢tomcat
想⽤哪个,加个坐标就OK。前提是把tomcat排除掉,因为tomcat是默认加载的。qiqi
         org.springframework.boot
         spring-boot-starter-web


             org.springframework.boot
             spring-boot-starter-tomcat


         org.springframework.boot
         spring-boot-starter-undertow
五、Spring Boot多环境配置文件
Spring Boot应用支持多环境配置文件,在开发、测试、上线等不同的环境中,可以激活不同的环境配置,解决切换环境时修改配置文件的麻烦。
1. 环境配置文件定义要求
-
必须定义在application配置文件所在目录中,即只能是 classpath、classpath/config、 root、 root/config 等四个目录之一。
-
配置文件命名是application-xxx。其中xxx即环境名称,如: application-dev、application-test、application-prod等。
-
application配置文件中需要激活相应的环境配置,使用 spring.profiles.active=环境名称 来激活。或者在启动时,增加启动参数 -Dspring.profiles.active=环境名称。
-
配置文件类型: yaml、yml、properties。
-
可以一次性激活若干环境配置,按照激活顺序依次读取环境配置,后读取的覆盖先读取的同名配置。不同名的配置使用保留|追加方式处理。
2. 环境配置文件使用方式
在application配置文件激活
# 选择使用的环境
spring:
  profiles:
    active: prop
application-dev.yml配置如下:
server:
  port: 81
application-prop.yml配置如下:
server:
  port: 82
六、SpringBoot整合拦截器
1. 新建拦截器类
不要忘记类上注解@Component。
@Component
public class DemoInterceptor implements HandlerInterceptor {
    @Override
    public boolean preHandle(HttpServletRequest request, HttpServletResponse response, Object handler) throws Exception {
        System.out.println("执行拦截器");
        return false;
    }
}
2. 配置拦截器
类上有注解@Configuration。此类相当于SpringMVC配置文件。
addPathPattern(): 拦截哪些URL。 /* 拦截全部
excludePathPatterns(): 不拦截哪些URL。当和addPathPattern()冲突时,excludePathPatterns()生效。
@Configuration
public class MyConfig implements WebMvcConfigurer {
    @Autowired
    private DemoInterceptor demoInterceptor;
    //配置拦截器的映射
    @Override
    public void addInterceptors(InterceptorRegistry registry) {
        registry.addInterceptor(demoInterceptor).addPathPatterns("/*").excludePathPatterns("/login");
    }
}
七、原生组件注入
-
注入Servlet的过滤器,拦截器。
1. 启动器配置
@SpringBootApplication
//扫描Servlet原生组件
@ServletComponentScan({"com.xxx.filter", "com.xxx.listener"})
public class Springboot02Application {

    public static void main(String[] args) {
        SpringApplication.run(Springboot02Application.class, args);
    }
}
2. 自定义过滤器,拦截器
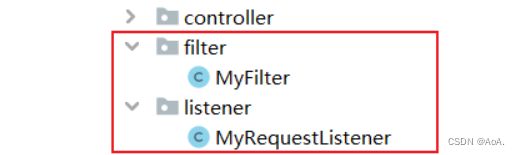
@WebFilter("/*")
public class MyFilter implements Filter {
    @Override
    public void doFilter(ServletRequest servletRequest, ServletResponse servletResponse, FilterChain filterChain) throws IOException, ServletException {
        System.out.println("执行访问资源之前 执行");
        filterChain.doFilter(servletRequest, servletResponse);
        System.out.println("执行访问资源之后 执行");
    }
}
@WebListener
public class MyRequestListener extends RequestContextListener {
@Override
public void requestInitialized(ServletRequestEvent requestEvent) {
uu
}
@Override
public void requestDestroyed(ServletRequestEvent requestEvent) {
System.out.println("请求对象初销毁了");
}
}八、Spring Boot中的常见注解
@Configuration
通常使用在配置类(组件)上。
@Bean
通常用在方法上,方法的返回值交由IOC管理,IOC中的默认id为方法名。
@Import
通常用在配置类上,导入其它的类,被导入的类交由IOC管理,类中的方法有@Bean注解,同上。
@Conditional
-
提交注解,符合条件才会进行。
-
注解 例如 解释 @ConditionalOnBean @ConditionalOnBean(User.class) Spring容器中存在对应的bean生效 @ConditionalOnMissingBean @ConditionalOnMissingBean(name = "user") Spring容器中不存在对应的bean生效 @ConditionalOnClass @ConditionalOnClass(Menu.class) 类加载器可以加载到对应的类生效 @ConditionalOnMissingClass @ConditionalOnMissingClass(Menu.class) 类加载器加载不到对应的类生效 @ConditionalOnProperty @ConditionalOnProperty(prefix = “spring.aop”) 应用环境中的属性满足条件生效 @ConditionalOnSingleCandidate @ConditionalOnMissingClass(Menu.class) 表示当指定Bean在容器中只有一个,或者虽然有多个但是指定首选Bean @ConditionalOnWebApplication 当前应用是Web应用生效 @ConditionalOnNotWebApplication
@ConfigurationProperties
-
读取Springboot配置文件中的数据,自动注入到属性中。
application.yml中添加
menu:
    id: 1
    name: Good
    url: menu/show
@ConfigurationProperties("menu")
public class Menu {
private int id;
private String name;
private String url;
}@EnableConfigurationProperties
-
很多时候我们注入的类(组件)是第三方提供的,我们不可能在组件上添加@Component注解,通过@EnableConfigurationProperties注解注册第三方组件
@Data
@NoArgsConstructor
@AllArgsConstructor
@ConfigurationProperties("menu")
public class Menu {
    private int id;
    private String name;
    private String url;
}
@EnableConfigurationProperties(Menu.class)
class Springboot02ApplicationTests {
@Autowired
Menu menu;
}九、Spring Boot 启动流程和自动配置原理
2. @SpringBootApplication注解
1 @Configuration
@Configuration,Spring Ioc容器管理的配置类使用@Configuration,SpringBoot社区推荐使用基于JavaConfig的配置形式,所以,这里的启动类标注了@Configuration之后,本身其实也是一个IoC容器的配置类。
2 @ComponentScan
@ComponentScan这个注解在Spring中很重要,@ComponentScan的功能其实就是扫描并加载符合条件的类(组件),扫描@Component注解及子注解,将扫描的这些bean交给IoC容器管理。
可以通过注解的basePackages属性来细粒度的指定@ComponentScan扫描的范围,如果不指定,则默认Spring框架会从声明@ComponentScan所在类的包及该包的子包进行扫描。
3 @EnableAutoConfiguration
@EnableAutoConfiguration这个注解最为重要,所以放在最后来解读,这个注解我们在下面详细讲解,@EnableAutoConfiguration是借助@Import的帮助,将所有符合自动配置条件的bean定义加载到IoC容器,仅此而已!
@SpringBootApplication:组合注解
*   1、@SpringBootConfiguration 封装了 @Configuration
*   2、@ComponentScan 扫描@Component及子注解,扫描当前包及子包
*   3、@EnableAutoConfiguration 启动自动配置
*       1、@AutoConfigurationPackage  自动配置包
*              @Import(AutoConfigurationPackages.Registrar.class)
*              注册了启动类所在的包为自动配置的包,后续该包及子包中存在需要自动配置的类,完成自动配置。
*
*       2、@Import(AutoConfigurationImportSelector.class) 自动配置导入选择器
*
自动配置入口:
*   spring提供的ConfigurationClassParser,获取到@Import中导入的类。
*
*   ConfigurationClassParser -》 DeferredImportSelectorGrouping -》getImports()   AutoConfigurationImportSelector入口
*
*
*   1.通过ConfigurationClassParser内部类DeferredImportSelectorGrouping中的getImports()方法,获取到AutoConfigurationImportSelector,
*   2.getAutoConfigurationEntry() -> getCandidateConfigurations() -> loadFactoryNames() -> loadSpringFactories()
*     去所有的META-INF/spring.factories 加载类的信息,获取所有的key - value,
*     获取org.springframework.boot.autoconfigure.EnableAutoConfiguration 作为key的value,此时value为第三方自动配置类的信息
*     获取META-INF/spring/org.springframework.boot.autoconfigure.AutoConfiguration.imports 获取springboot提供的自动配置类信息,
*
*   3.去除重复的配置类信息
*   4.去除排除的配置类信息
*   5.过滤(通过 @Conditionalxxx) 条件过滤
*   6.存储自动配置类的信息
*   7.spring完成自动配置(将配置类交由spring管理)
*
* 自动配置什么时候执行:
*   1.启动器类中调用了run()方法
*   2.调用refreshContext()
*       1.调用invokeBeanFactoryPostProcessors(),在该方法中 完成自动装配
*       2.调用onrefresh(),创建Tomcat服务器,启动Tomcat服务器
*       3...
* */
流程总结
执行流程文字说明:
-
SpringBoot项目通过SpringApplication.run()作为启动入口
-
执行SpringApplication构造方法
-
从META-INF/spring.factories中读取初始化器和监听器
-
获取main所在主类,记录主类。
-
-
执行run方法
-
声明上下文对象ConfigurableApplicationContext
-
创建并启动运行时监听器
-
存储命令行参数
-
准备配置环境ConfigurableEnvironment
-
打印Banner
-
创建上下文对象,如果WebApplicationType为SERVLET(使用内置服务器)
创建AnnotationConfigServletWebServerApplicationContext容器对象
-
刷新容器
-
将bean对象存储到IoC容器中
-
使用AutoConfigurationImportSelector完成自动配置
-
使用AutoConfigurationPackage存储自动配置包路径(为后续的自动配置准备)
-
启动内置服务器
-
-
容器刷新后的回调
-
计算执行时间
-
启动上下文监听器
-
执行运行器
-
记录执行时间
-
完成上下文监听器准备
-
返回创建好的上下文对象
-
十、深入Spring Boot自动化配置原理
该配置模块的主要使用到了SpringFactoriesLoader,即Spring工厂加载器,该对象提供了loadFactoryNames方法,入参为factoryClass和classLoader,即需要传入上图中的工厂类名称和对应的类加载器,方法会根据指定的classLoader,加载该类加器搜索路径下的指定文件,即spring.factories文件,传入的工厂类为接口,而文件中对应的类则是接口的实现类,或最终作为实现类,所以文件中一般为如下图这种一对多的类名集合,获取到这些实现类的类名后,loadFactoryNames方法返回类名集合,方法调用方得到这些集合后,再通过反射获取这些类的类对象、构造方法,最终生成实例。

自动装配文字说明
-
启动类中@SpringBootApplication中包含@EnableAutoConfiguration。
-
加载项目依赖的META-INF/spring.factories中EnableAutoConfiguration对应类,进行实例化。
-
实例化自动化配置类时会同时加载属性类,从配置文件中读取。
-
生效自动化配置,把对应的Bean放入到Spring容器中。
自定义启动器的流程 文字说明
-
创建自动化配置项目 xxx-spring-boot-autoconfigure。
-
在项目中提供自定义类,自定义属性。在类上添加@ConfigurationProperties。
-
再创建一个自动化配置类。添加@Configuration、@EnableConfigrationProperties。
-
在类路径下添加META-INF/spring.factories设置自动化配置类的全限定路径。
-
打包项目后,需要使用的项目引入自动化配置项目的依赖。