SpringBoot整合FreeMarker模板引擎实战篇3:Freemarker和Thymeleaf是模板引擎
freemarker和thymeleaf是模板引擎。在早前我们使用Struts或者SpringMVC等框架的时候,使用的都是jsp,jsp的本质其实就是一个Servlet,其中的数据需要在后端进行渲染,然后再在客户端显示,效率比较低下。而模板引擎恰恰相反,其中的数据渲染是在客户端,效率方面比较理想一点。前后端不分离的话用模板引擎比较好,前后端分离的话其实用处并不大很大。Spring官方比较推荐的是thymeleaf,其文件后缀是html。本篇文章我们主要来看看SpringBoot整合freemarker,SpringBoot整合thymeleaf我们将在后面的文章中讲解。
先来看一下项目文件目录: 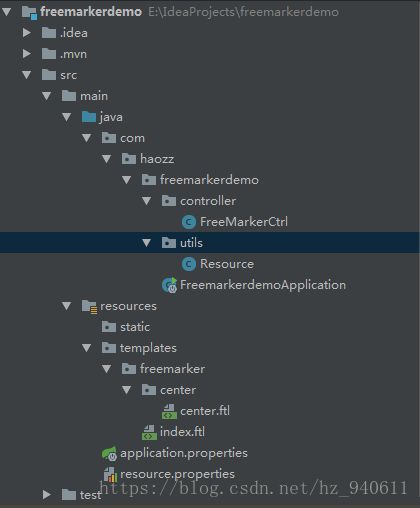
首先,pom.xml中导入freemarker的依赖:
    org.springframework.boot
    spring-boot-starter-freemarker
在application.properties(或yml)配置文件中加入freemarker相关配置:
#    freemarker静态资源配置

#       设定ftl文件路径
spring.freemarker.tempalte-loader-path=classpath:/templates
#        关闭缓存,及时刷新,上线生产环境需要修改为true
spring.freemarker.cache=false
spring.freemarker.charset=UTF-8
spring.freemarker.check-template-location=true
spring.freemarker.content-type=text/html
spring.freemarker.expose-request-attributes=true
spring.freemarker.expose-session-attributes=true
spring.freemarker.request-context-attribute=request
spring.freemarker.suffix=.ftl
这里指定了freemarker文件的路径是classpath/templates,在resources文件夹下的templates新建freemarker文件夹,并且在其中新建index.ftl(上面配置文件中已经指定了freemarker模板的文件后缀为ftl):
${resource.name}
${resource.website}
${resource.language}
我们在resources下新建resource.properties:
com.haozz.opensource.name=wangshu
com.haozz.opensource.website=www.haozz.top:18158/
com.haozz.opensource.language=chinese
在SpringBoot启动类统计目录下新建utils包,在其中新建Resources类(此处使用配置文件引入相关数据):
package com.haozz.freemarkerdemo.utils;

import org.springframework.boot.context.properties.ConfigurationProperties;
import org.springframework.context.annotation.Configuration;
import org.springframework.context.annotation.PropertySource;

//表示这个类是一个读取配置文件的类
@Configuration

//指定配置的一些属性,其中的prefix表示前缀
@ConfigurationProperties(prefix = "com.haozz.opensource")

//指定所读取的配置文件的路径
@PropertySource(value = "classpath:resource.properties")
public class Resource {

    private String name;
    private String website;
    private String language;

    //...setter and getter
}
新建Controller包,新建FreeMarkerCtrl类:
package com.haozz.freemarkerdemo.controller;

import com.haozz.freemarkerdemo.utils.Resource;
import org.springframework.beans.factory.annotation.Autowired;
import org.springframework.stereotype.Controller;
import org.springframework.ui.ModelMap;
import org.springframework.web.bind.annotation.RequestMapping;

@Controller
@RequestMapping(value = "/ftl")
public class FreeMarkerCtrl {

    @Autowired
    private Resource resource;

    @RequestMapping(value = "index")
    public String index(ModelMap map){
        map.addAttribute("resource",resource);
        return "freemarker/index";
    }
}
这里的ModelMap就相当于SpringMVC中的ModelAndView,其中的很多方法也很类似,我们这里返回的字符串就是freemarker模板的路径,不用写后缀,因为配置文件中已经指定了后缀为.ftl
浏览器发起请求,得到结果: 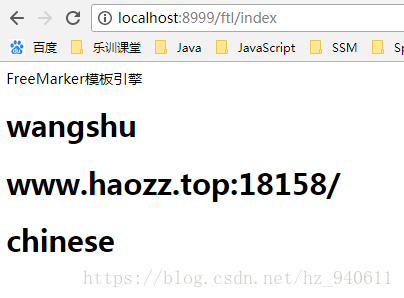
这样,SpringBoot整合freemarker就好了。
我们再来试一下表格的形式。
FreeMarkerCtrl中新增方法:
@RequestMapping(value ="center")
public String center(ModelMap map){
map.put("users",parseUsers());
map.put("title","用户列表");
return "freemarker/center/center";
}
private List
在resources/templates/freemarker下新建center文件夹,新建center.ftl:
${title}
Name
Age
Phone
<#list users as user>
${user.name}
${user.age}
${user.phone}
浏览器请求: 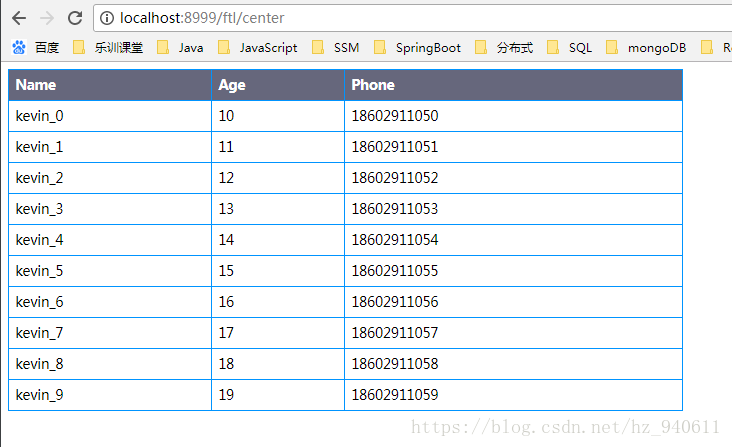
可以看到,在center.ftl中,我们使用了<#list users as user>的写法,这个相当于jstl表达式中的c:forEach。而users集合我们在FreeMarkerCtrl已经初始化了。