虚拟机安装homeassistant 米家
vm 安装虚拟机
http://www.taodudu.cc/news/show-5456363.html?action=onClick
HomeAssistant下载
地址 https://www.home-assistant.io/installation/


通过vm导入homeassistant的虚拟机时,需要配置虚拟机的操作系统。

完成
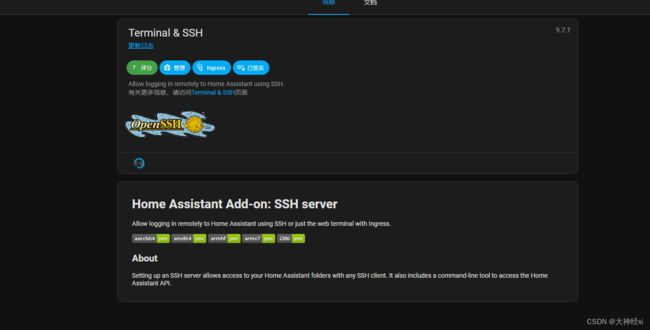
安装 terminal ssh

在安装docker及hassio
输入apt install http://docker.io 安装docker直至进度走完。
5、安装docker可视面板:
docker run --restart always --name fast -p 8081:8081 -d -v /var/run/docker.sock:/var/run/docker.sock wangbinxingkong/fast
安装完成后浏览器访问http://IP:8081,第一次要注册后登录,进入后可以查看docker的运行情况。
6、安装HASSIO,直接复制输入:
docker run -d --name hassio_supervisor --privileged \
-v /var/run/docker.sock:/var/run/docker.sock \
-v /var/run/dbus:/var/run/dbus \
-v /opt/docker/hassio:/data \
-e SUPERVISOR_SHARE="/opt/docker/hassio" \
-e SUPERVISOR_NAME=hassio_supervisor \
-e HOMEASSISTANT_REPOSITORY="homeassistant/qemuarm-homeassistant" \
--restart unless-stopped homeassistant/armv7-hassio-supervisor
#进入hass目录,安装hacs
doceker ps
docker exec -it name  bash
wget -O - https://get.hacs.xyz | bash -    或者 wget -O - https://hacs.vip/get | bash -
exit
docker  restart   ID
ssh输入 wget -O - http://get.hacs.xyz | bash - 安装hacs
完成后输入 reboot 重启 homeassistant
hyper V 安装
https://zhuanlan.zhihu.com/p/611203682
http://homeassistant.local:8123/
进入ha

 安装时 需要加速器
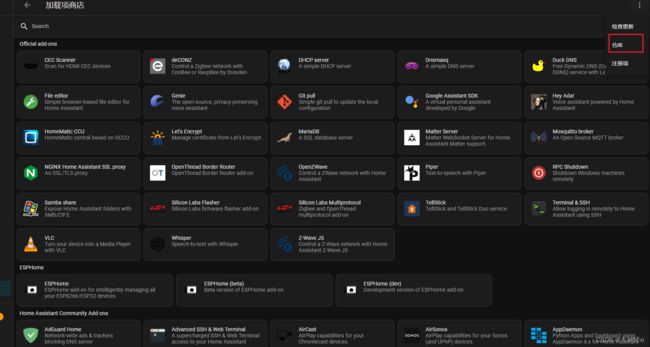
如果还是不行的话,那说明你的网络还是有问题,需要用到github的国内镜像源替换加载项商店,我亲测可用的有两个:
    https://hub.nuaa.cf/

    https://cdn.githubjs.cf/
具体方法是点击上方图片右上角的三个小点,点击仓库,输入以下网址,选择添加,如果能添加上去,二选一即可。添加完成后刷新几次,或者重启Homeassistant试试。
    https://hub.nuaa.cf/hassio-addons/repository

    https://cdn.githubjs.cf/hassio-addons/repository


输入下面的代码 并授权


重启


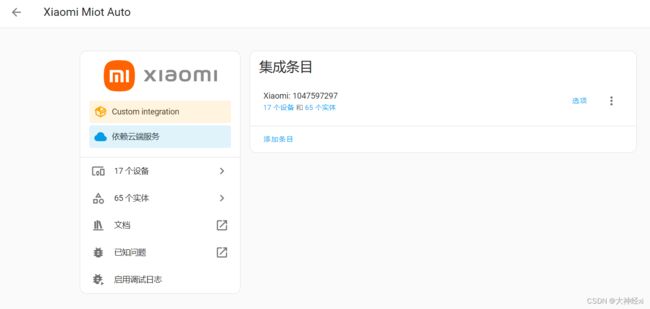
home assistant 小米插件 登录失败时 关闭 梯子
 ### 注释 治!](https://img-blog.csdnimg.cn/d9f818210cea400c883191ede02812ab.png)

这里发现小米lot 添加失败 换成了另一个集成


win10 开机不需要登录
win+R
输入命令“gpedit.msc”
 自动登录系统设置
win+R 输入control userpasswords2后按下回车键,打开“用户账户”的属性,取消“要使用本机,用户必须输入用户名和密码(E)”的勾选,然后按下“确定”;