源码安装Samba 4.15.0版本(超详细)
一、环境配置:
- 操作系统CentOS8,最小化安装。
systemctl stop firewalld.service
systemctl disable firewalld.service
vi /etc/selinux/config
#SELINUX=enforcing #注释掉
SELINUX=disabled #增加
:wq! #保存退出
setenforce 0 #使配置立即生效
yum install net-tools -y
yum install vim -y
yum install lrzsz -y
- 配置环境:
yum install -y dnf-plugins-core

yum config-manager --set-enabled PowerTools

yum install -y epel-release

yum install -y
–setopt=install_weak_deps=False
“@Development Tools”
acl
attr
autoconf
avahi-devel
bind-utils
binutils
bison
ccache
chrpath
cups-devel
curl
dbus-devel
docbook-dtds
docbook-style-xsl
flex
gawk
gcc
gdb
git
glib2-devel
glibc-common
glibc-langpack-en
glusterfs-api-devel
glusterfs-devel
gnutls-devel
gpgme-devel
gzip
hostname
htop
jansson-devel
keyutils-libs-devel
krb5-devel
krb5-server
libacl-devel
libarchive-devel
libattr-devel
libblkid-devel
libbsd-devel
libcap-devel
libcephfs-devel
libicu-devel
libnsl2-devel
libpcap-devel
libtasn1-devel
libtasn1-tools
libtirpc-devel
libunwind-devel
libuuid-devel
libxslt
lmdb
lmdb-devel
make
mingw64-gcc
ncurses-devel
openldap-devel
pam-devel
patch
perl
perl-Archive-Tar
perl-ExtUtils-MakeMaker
perl-JSON
perl-Parse-Yapp
perl-Test-Simple
perl-generators
perl-interpreter
pkgconfig
popt-devel
procps-ng
psmisc
python3
python3-cryptography
python3-devel
python3-dns
python3-gpg
python3-iso8601
python3-libsemanage
python3-markdown
python3-policycoreutils
python3-pyasn1
python3-setproctitle
quota-devel
readline-devel
redhat-lsb
rng-tools
rpcgen
rpcsvc-proto-devel
rsync
sed
sudo
systemd-devel
tar
tree
wget
which
xfsprogs-devel
yum-utils
zlib-devel
回车安装,安装完成了后,输入 kill -TERM 1 执行。
二、安装配置:
用浏览器下载:http://samba.org/samba/ftp/samba-latest.tar.gz
将文件下载后,上传到linxu,我上传到了/root目录
tar -xzvf samba-latest.tar.gz
解压后如下:

编译执行: ./configure --without-ad-dc --with-systemd
(我不要安装AD和DC)
![]()

添加环境变量:
vi /etc/profile
export PATH=/usr/local/samba/bin/:/usr/local/samba/sbin/:$PATH
![]()
source /etc/profile
检查:echo $PATH 看到环境变量添加完成。
![]()
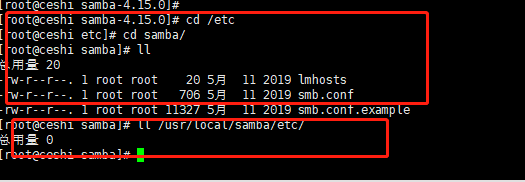
在我的/etc/samba下存放了一份smb.conf文件,我直接拷贝过来使用(cp /etc/samba/smb.conf /usr/local/samba/etc/),如果没有,就自己touch一个空的smb.conf,具体里面的内容自己百度找一下就可以。


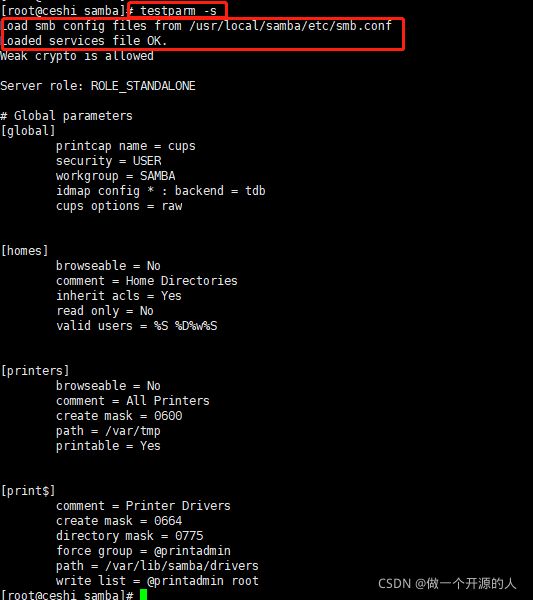
检查配置是否正确:testparm -s,同时可以看到调用的配置目录为/usr/local/samba/etc/smb.conf:

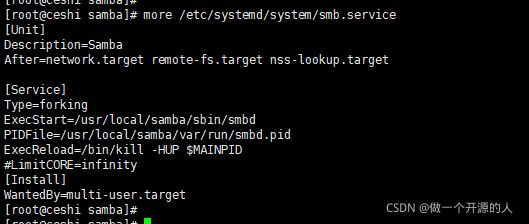
配置systemctl 可以用systemctl管理smb服务,创建systemcd 名字为 smb.service:
[root@ceshi system]# more /etc/systemd/system/smb.service
[Unit]
Description=Samba
After=network.target remote-fs.target nss-lookup.target
[Service]
Type=forking
ExecStart=/usr/local/samba/sbin/smbd
PIDFile=/usr/local/samba/var/run/smbd.pid
ExecReload=/bin/kill -HUP $MAINPID
#LimitCORE=infinity
[Install]
WantedBy=multi-user.target

systemctl daemon-reload
![]()
如果提示拒绝,就使用 kill -TERM 1 命令干掉守护进程,再执行systemctl daemon-reload就可以了。
systemctl status smb.service

systemctl start smb.service
![]()
systemctl status smb.service

systemctl enable smb.service
![]()
三、参考文献:
https://wiki.samba.org/index.php/Package_Dependencies_Required_to_Build_Samba
https://wiki.samba.org/index.php?title=Build_Samba_from_Source&action=edit
https://wiki.samba.org/index.php/Setting_up_Samba_as_a_Standalone_Server
四、配置文件配置:
在/usr/local/samba/etc/下创建smb.conf(如果没有smb.conf文件): touch smb.conf
在/usr/local/samba/etc/下创建文件夹smbconfigfile:mkdir smbconfigfile
[root@mudangongxiang etc]# more smb.conf
[global]
workgroup = WORKGROUP
security = user
passdb backend = tdbsam

   # username map = /etc/samba/smbusers
    log file = /var/log/samba/log.%m
    log level = 3
    server string = Samba Server Version %v
#include 和 config file ,如果存在同名用户子配置文件,则谁在前面就执行谁。
include = /usr/local/samba/etc/smbconfigfile/smb.%U.conf.in
config file = /usr/local/samba/etc/smbconfigfile/smb.conf.%U
printing = cups
printcap name = cups
load printers = yes
cups options = raw
创建用户:
useradd -M -s /sbin/nologin ytmdshare
pdbedit -a -u ytmdshare
mima
进入:cd /usr/local/samba/etc/smbconfigfile,创建用户配置文件:touch smb.conf.ytmdshare (一个用户一个配置文件)
vi smb.conf.ytmdshare
[root@mudangongxiang smbconfigfile]# more smb.conf.ytmdshare
[global]
workgroup = WORKGROUP
security = user
passdb backend = tdbsam
log file = /var/log/samba/%U%i.%m
server string = Samba Server Version %v
log level = 3
printing = cups
printcap name = cups
load printers = yes
cups options = raw
[共享流转]
comment = 共享流转
path = /data/samba/ytmd/test
browseable = yes
public = no
writable = no
write list = ytmdshare
valid users = ytmdshare
invalid users =
admin users = ytmdshare
create mask = 0666
create mask = 0666
directory mask = 0777
force create mode = 0666
force directory mode = 0777
五、测试:
在电脑上打开记事本,另存为test.bat
@echo off
net use * /del /y >nul
echo …
echo … …
echo … … … … [文件服务器:测试 - 载入中 … ]
net use \(文件服务器的IP地址) mima /user:ytmdshare >nul
start \(文件服务器的IP地址) >nul
保存后,在本地双击打开。

