iOS 高德地图以及自定义大头针和气泡、导航
前段时间,我的项目里面要求使用地图,然后自己疯狂百度和翻阅高德官方文档,总结了一下我所使用的高德地图功能和一些坑。
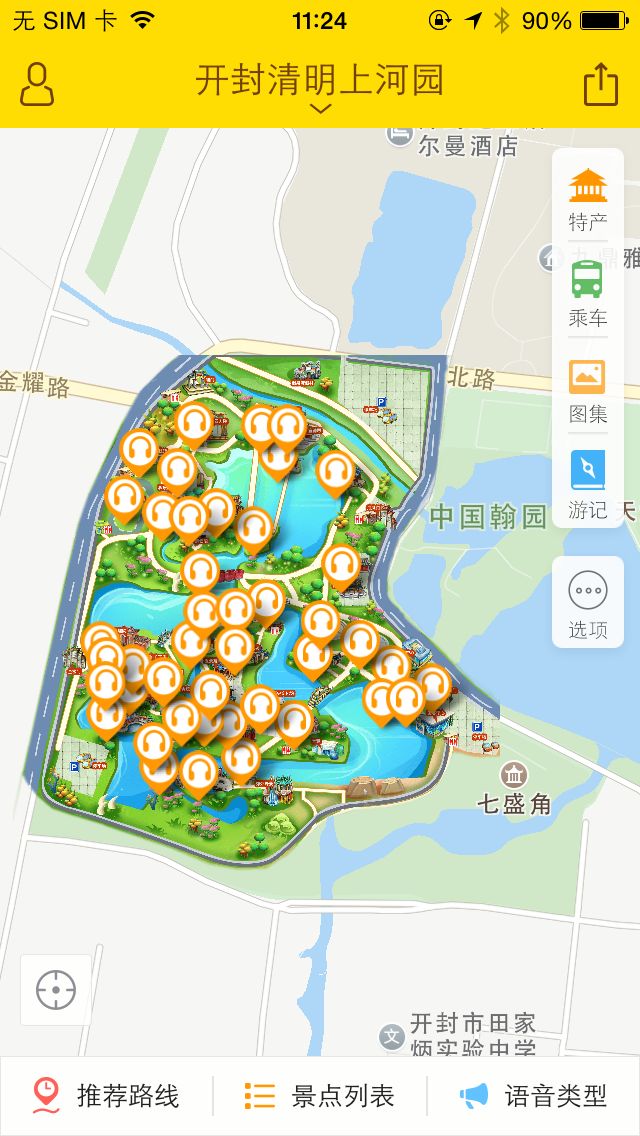
我们的效果是这样的.PNG
-
首先集成高德地图高德地图API
1.获取Key,到控制台创建应用,然后获取Key
[AMapServices sharedServices].apiKey = @"您的Key";
2.部署高德地图SDK(推荐使用cocopods)建议选择3D地图,3D地图功能要比2D的多,而且页面比较好看
-
显示地图(可以结合着demo来做)
地图就是一个View,你可以自定义它的位置。它的代理方法跟UITableview的代理方法差不多,这样好理解一点
-
显示大头针
#pragma mark - 设置大头针坐标
- (void)initAnnotations
{
    NSMutableArray *coordinates = [NSMutableArray array];
    for (int i = 0; i < _dataArray.count; i++)
    {
        AudioModel *model = _dataArray[i];
        MAPointAnnotation *a1 = [[MAPointAnnotation alloc] init];
        a1.coordinate = CLLocationCoordinate2DMake([model.coordinateLat doubleValue],[model.coordinateLng doubleValue]);
        [coordinates addObject:a1];
    }
    [self.mapView addAnnotations:coordinates];
}
我们把接口给的坐标装在一个数组里面,然后转化成高德坐标,再添加在地图上面,如果要使用高德自带的气泡的话,可以直接修改MAPointAnnotation、title、id之类的
-
自定义气泡
- (MAAnnotationView*)mapView:(MAMapView *)mapView viewForAnnotation:(id )annotation
需要在这个方法里面自定义,重写annotationView
这个方法就相当于UITabelView的cellForRow方法
我们需要创建一个基于MAAnnotationView的View,然后在创建的这个View里面进行自定义
annotationView.canShowCallout = NO;
这个canShowCallout就是控制是否显示自带的气泡
问题来了,我要怎么把每个大头针对应每个气泡呢,还要把信息给赋值上
1.我们现在已经有服务器给我们的所有大头针数据,包括坐标在内,文字,图片什么的,这个是已知的,这些东西应该是在一个数组里面
2.我们需要把这个这个数组,也就是数据源,传给我们刚才创建的这个自定义气泡的View之中
[annotationView sendDataArray:self.dataArray];
尽量用方法去传,不要直接传,直接传的话,View接收不到
3.来到这个自定义View里面
-(void)sendDataArray:(NSMutableArray *)dataArray
实现这个方法,去接收传递过来的dataArray
你可以发现,官方给的demo当中,点击大头针出来的气泡,是每点击一次,才去创建一次
CLLocationCoordinate2D coorinate = [self.annotation coordinate];
这个方法可以得到,你点击大头针的坐标,现在点击的坐标有了,我们刚才传递过来的所有关于大头针的数据源也有了,这不是就好办了吗
for (int i = 0; i < self.dataArray.count; ++i)
{
 AudioModel *model = _dataArray[i];
 if ([model.coordinateLat doubleValue] == coorinate.latitude && [model.coordinateLng doubleValue] == coorinate.longitude){

 _TouristNameLabel.text = [NSString stringWithFormat:@"%@",model.name];
     }
 }
遍历数据源,比较数据源里面的坐标,如果数据源里面的坐标和点击的坐标相同的话,那么就赋值
4.调试一下看看吧,应该出来了
**插播一个label文字自适应宽度,就是这个自定义View的
CGSize size = CGSizeMake(320*ScaleNumberWidth,2000*ScaleNumberHeight);
CGSize labelsize = [_TouristNameLabel.text sizeWithFont:_TouristNameLabel.font constrainedToSize:size lineBreakMode:UILineBreakModeWordWrap];
 _TouristNameLabel.frame = CGRectMake(-(labelsize.height+10*ScaleNumberHeight)/3.5, -25*ScaleNumberHeight, labelsize.width+10*ScaleNumberWidth, labelsize.height+10*ScaleNumberHeight);
类似于这样.PNG
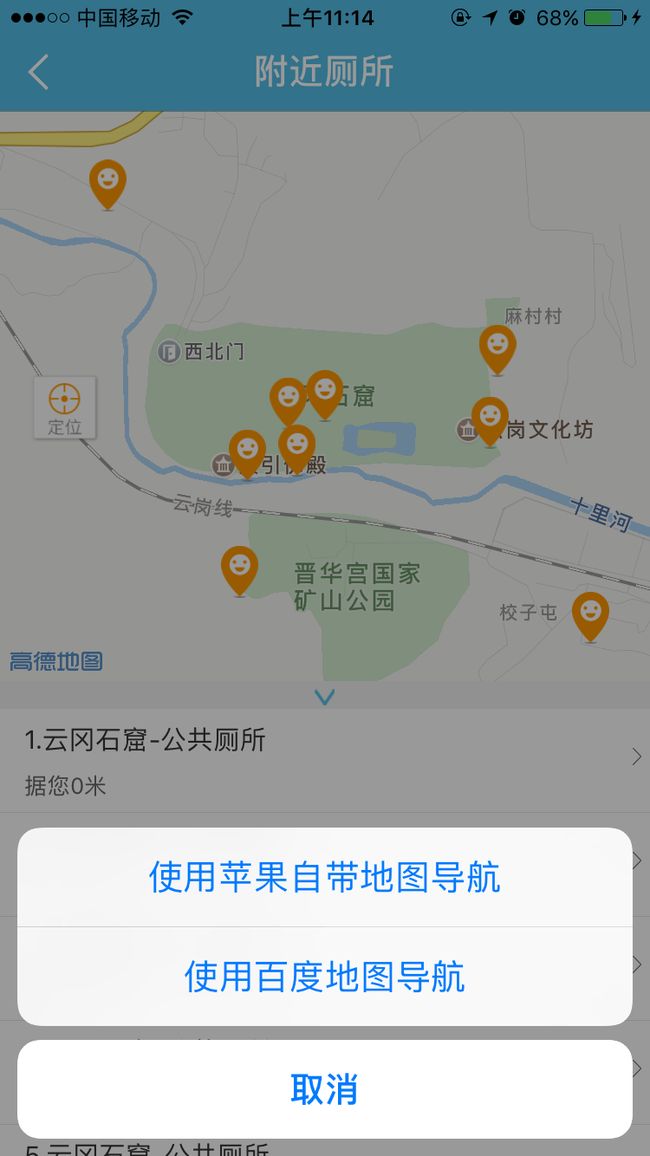
附近厕所的数据,我们直接用的高德的数据
1.获取导航位置终点的坐标和起点坐标
2.创建actionSheet
_actionSheet= [[UIActionSheet alloc] initWithTitle:nil delegate:self
                                     cancelButtonTitle:nil
                                destructiveButtonTitle:nil
                                     otherButtonTitles:nil];

    NSMutableArray *mapsArray=[[NSMutableArray alloc] initWithCapacity:0];
    _mapsUrlArray=[[NSMutableArray alloc] init];

    NSURL * apple_App = [NSURL URLWithString:@"http://maps.apple.com/"];
    if ([[UIApplication sharedApplication] canOpenURL:apple_App]) {
        [mapsArray addObject:@"使用苹果自带地图导航"];

        NSString *urlString=[NSString stringWithFormat:@"http://maps.apple.com/?daddr=%f,%f&saddr=%f,%f",self.mapView.userLocation.coordinate.latitude,self.mapView.userLocation.coordinate.longitude,[_ToiletX doubleValue],[_ToiletY doubleValue]];

        [_mapsUrlArray addObject:urlString];
    }
    NSURL * baidu_App = [NSURL URLWithString:@"baidumap://"];

    if ([[UIApplication sharedApplication] canOpenURL:baidu_App]) {
        [mapsArray addObject:@"使用百度地图导航"];

        NSString *stringURL = [NSString stringWithFormat:@"baidumap://map/direction?origin=%f,%f&destination=%f,%f&&mode=driving",self.mapView.userLocation.coordinate.latitude,self.mapView.userLocation.coordinate.longitude,[_ToiletX doubleValue],[_ToiletY doubleValue]];

        [_mapsUrlArray addObject:stringURL];
    }
    NSURL * gaode_App = [NSURL URLWithString:@"iosamap://"];
    if ([[UIApplication sharedApplication] canOpenURL:gaode_App]) {
        [mapsArray addObject:@"使用高德地图导航"];

        NSString *urlString = [[NSString stringWithFormat:@"iosamap://navi?sourceApplication=%@&backScheme=%@&poiname=%@&lat=%f&lon=%f&dev=1&style=2",@"app名称", @"boundleId", @"终点", [_ToiletX doubleValue], [_ToiletY doubleValue]] stringByAddingPercentEscapesUsingEncoding:NSUTF8StringEncoding];

        [_mapsUrlArray addObject:urlString];
    }

    for (int x=0; x
先判断用户手机安装的哪种地图,如果没有安装,就不让显示了
这样.PNG
图片覆盖物类为MAGroundOverlay,可完成将一张图片以合适的大小贴在地图指定的位置上的功能
1.在ViewController.m的viewDidLoad方法中根据范围和图片构造图片覆盖物
- (void) viewDidLoad
{
    MACoordinateBounds coordinateBounds = MACoordinateBoundsMake(CLLocationCoordinate2DMake
(39.939577, 116.388331),CLLocationCoordinate2DMake(39.935029, 116.384377));

    MAGroundOverlay *groundOverlay = [MAGroundOverlay groundOverlayWithBounds:coordinateBounds icon:[UIImage imageNamed:@"GWF"]];

    [_mapView addOverlay:groundOverlay];
    _mapView.visibleMapRect = groundOverlay.boundingMapRect;
}
2.实现
- (MAOverlayRenderer *)mapView:(MAMapView *)mapView rendererForOverlay:(id)overlay{

    if ([overlay isKindOfClass:[MAGroundOverlay class]])
    {
        MAGroundOverlayRenderer *groundOverlayView = [[MAGroundOverlayRenderer alloc]
                                                  initWithGroundOverlay:overlay];

        return groundOverlayView;
    }
    return nil;
}


