DAY09_SpringBoot—整合SpringMVC&SpringMVC参数取值用法
目录
- 1 SpringMVC
-
- 1.1 SpringMVC框架介绍
- 1.2 SpringMVC入门案例
-
- 1.2.1 创建项目
- 1.2.2 添加依赖项
- 1.2.3 检查pom.xml文件
- 1.2.4 编辑YML配置文件
- 1.2.5 在templates中添加index.html文件
- 1.2.6 默认页面跳转机制
- 1.3 @RequestMapping注解测试
-
- 1.3.1 编辑HelloController
- 1.3.2 页面请求效果
- 1.4 实现数据传递
-
- 1.4.1 导入头标前
- 1.4.2 编辑UserController
- 1.4.3 页面取值
- 1.4.4 页面请求效果
- 1.4 SpringMVC原理说明
- 1.4.1 Servlet作用
-
- 1.4.2 重要组件
- 1.4.3 SpringMVC调用流程图
- 1.4.4 SpringMVC调用步骤
- 1.5 简单参数传递
-
- 1.5.1 服务器向页面传值
- 1.5.2 页面取值
- 1.5.3 页面请求效果
- 1.6 页面向服务器传递数据
-
- 1.6.1 编辑提交数据的页面
- 1.6.2 编辑提交成功的页面
- 1.6.3 Request 对象接收参数
- 1.6.4 利用SpringMVC为属性赋值
- 2 SpringMVC 高级用法
-
- 2.1 @RequestParam
-
- 2.1.1 需求说明
- 2.1.2 编辑UserController
- 2.2 同名提交问题
-
- 2.2.1 业务描述
- 2.2.2 数据接收
- 2.3 对象的方式接收参数
-
- 2.3.1 需求说明
- 2.3.2 封装User对象
- 2.3.3 编辑UserController
- 2.4 为对象的引用赋值
-
- 2.4.1 业务需求
- 2.4.2 封装Dog对象
- 2.4.3 对象引用
- 2.4.4 编辑页面
- 2.4.5 编辑Controller
1 SpringMVC
1.1 SpringMVC框架介绍
Spring MVC属于SpringFrameWork的后续产品,已经融合在Spring Web Flow里面。Spring 框架提供了构建 Web 应用程序的全功能 MVC 模块。使用 Spring 可插入的 MVC 架构,从而在使用Spring进行WEB开发时,可以选择使用Spring的Spring MVC框架或集成其他MVC开发框架,如Struts1(现在一般不用),Struts 2(一般老项目使用)等等。
总结来说就是Spring内部整合SpringMVC(web的包)
1.2 SpringMVC入门案例
1.2.1 创建项目
1.2.2 添加依赖项
- 添加Lombok/DevTools/Thymeleaf/SpringWeb
1.2.3 检查pom.xml文件
<project xmlns="http://maven.apache.org/POM/4.0.0" xmlns:xsi="http://www.w3.org/2001/XMLSchema-instance"
	xsi:schemaLocation="http://maven.apache.org/POM/4.0.0 https://maven.apache.org/xsd/maven-4.0.0.xsd">
	<modelVersion>4.0.0modelVersion>
	<parent>
		<groupId>org.springframework.bootgroupId>
		<artifactId>spring-boot-starter-parentartifactId>
		<version>3.1.8version>
		<relativePath/>
	parent>
	<groupId>com.jtgroupId>
	<artifactId>springboot_demo_3artifactId>
	<version>0.0.1-SNAPSHOTversion>
	<name>springboot_demo_3name>
	<description>springboot_demo_3description>
	<properties>
		<java.version>17java.version>
	properties>
	<dependencies>
		<dependency>
			<groupId>org.springframework.bootgroupId>
			<artifactId>spring-boot-starterartifactId>
		dependency>

		<dependency>
			<groupId>org.springframework.bootgroupId>
			<artifactId>spring-boot-devtoolsartifactId>
			<scope>runtimescope>
			<optional>trueoptional>
		dependency>

		<dependency>
			<groupId>org.projectlombokgroupId>
			<artifactId>lombokartifactId>
			<optional>trueoptional>
		dependency>

		<dependency>
			<groupId>org.springframework.bootgroupId>
			<artifactId>spring-boot-starter-testartifactId>
			<scope>testscope>
		dependency>

		<dependency>
			<groupId>org.springframework.bootgroupId>
			<artifactId>spring-boot-starter-webartifactId>
		dependency>

		<dependency>
			<groupId>org.springframework.bootgroupId>
			<artifactId>spring-boot-starter-thymeleafartifactId>
		dependency>
	dependencies>

	<build>
		<plugins>
			<plugin>
				<groupId>org.springframework.bootgroupId>
				<artifactId>spring-boot-maven-pluginartifactId>
				<configuration>
					<image>
						<builder>paketobuildpacks/builder-jammy-base:latestbuilder>
					image>
					<excludes>
						<exclude>
							<groupId>org.projectlombokgroupId>
							<artifactId>lombokartifactId>
						exclude>
					excludes>
				configuration>
			plugin>
		plugins>
	build>

project>
1.2.4 编辑YML配置文件
#配置服务端口
server:
  port: 8090
#配置模版工具类
spring:
  thymeleaf:
    #设置页面前缀
    prefix: classpath:/templates/
    #设置页面后缀
    suffix: .html
    #是否使用缓存
    cache: false
1.2.5 在templates中添加index.html文件
DOCTYPE html>
<html lang="en">
<head>
    <meta charset="UTF-8">
    <title>SpringMVC入门案例title>
head>
<body>
    <h1>Hello SpringMVCh1>
body>
html>
1.2.6 默认页面跳转机制
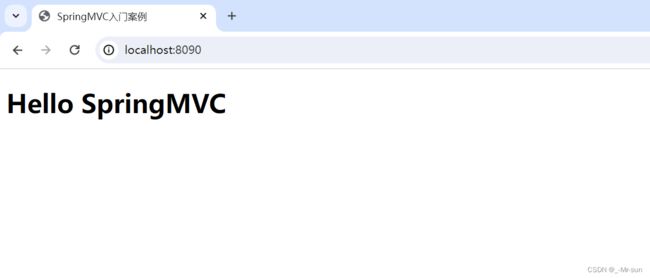
说明: SpringMVC项目启动时默认设置一个欢迎页面 并且名称必须为index
页面效果 如图所示
1.3 @RequestMapping注解测试
说明: 使用@RequestMapping注解拦截用户请求 实现业务调用
1.3.1 编辑HelloController
import org.springframework.stereotype.Controller;
import org.springframework.web.bind.annotation.RequestMapping;

@Controller //1.将该类交给Spring容器管理 2.同时开启Spring mvc机制
public class HelloController {
    /**
     * 需求: http://localhost:8090/hello 访问hello.html
     * 实现步骤:
     * 		1.拦截用户请求 @RequestMapping("/hello")
     * 		2.String 类型的返回值 表示返回页面名称
     * 		3.根据YML配置文件中的内容 动态的拼接前缀和后缀 形成页面唯一路径
     */

    //该方法以后使用的主流的方法
    @RequestMapping("/hello")
    public String hello() {
        //动态的拼接前缀+后缀
        //classpath:/templates/hello.html
        return "hello";
    }
}
1.3.2 页面请求效果
http://localhost:8090/hello
1.4 实现数据传递
1.4.1 导入头标前
DOCTYPE html>

<html lang="en" xmlns:th="http://www.thymeleaf.org">
1.4.2 编辑UserController
package com.jt.controller;

import org.springframework.stereotype.Controller;
import org.springframework.web.bind.annotation.RequestMapping;
import org.springframework.web.servlet.ModelAndView;

@Controller
public class UserController {
    /**
     *  mvc底层数据传输原则
     *  url: http://localhost:8090/user
     *  ModelAndView:
     *      1.model 封装数据的
     *      2.View  封装视图页面的
     * handler处理器真正的执行时 才会调用方法
     */
    @RequestMapping("/user")
    public ModelAndView toUser(){
        ModelAndView modelAndView = new ModelAndView();
        //封装数据
        modelAndView.addObject("id", 1001);
        modelAndView.addObject("name", "安琪拉");
        //封装页面数据
        modelAndView.setViewName("user");
        return modelAndView;
    }
}
1.4.3 页面取值
DOCTYPE html>

<html lang="en" xmlns:th="http://www.thymeleaf.org">
<head>
    <meta charset="UTF-8">
    <title>SpringMVC测试案例title>
head>
<body>
    <h1>用户测试代码h1>

    <h3 th:text="${id}">h3>
    <h3 th:text="${name}">h3>
body>
html>
1.4.4 页面请求效果
1.4 SpringMVC原理说明
1.4.1 Servlet作用
servlet是浏览器与服务器(tomcat) 进行交互的一种机制
- 核心对象:
- Request 包含了用户的所有的请求相关信息(参数…协议…地址…)
- Response 包含了服务器相关的信息(服务器地址,返回的数据)
1.4.2 重要组件
- 前端控制器
- DispatcherServlet(内部核心机制) 接收用户所有请求
- 处理器映射器
- HandlerMapping 查找用户的请求与业务处理的映射
- 处理器适配器
- HandlerAdapter 在众多处理器中挑选合适的处理器去执行业务
- 视图解析器
- ViewResolver 实现页面的路径的拼接
1.4.3 SpringMVC调用流程图
1.4.4 SpringMVC调用步骤
- 当用户发起请求时,被SpringMVC框架中的前端控制器拦截.
- 由于前端控制器,并不清楚哪个方法与请求对应,所以查询处理器映射器.
- 当tomcat服务器启动,则处理器映射器会加载所有的@RequestMapping注解,将其中的路径与方法进行绑定, Map,将查找到的方法信息回传给前端控制器 进行后续调用.
- 秉承着松耦合的思想,前端控制器将查询得到的方法, 请求处理器适配器(mvc针对不同的配置文件有专门的处理器(运行程序的机制))挑选合适的处理器去执行(程序内置的规则 无需人为干预)
- 当挑选合适的处理器之后,程序开始真正的执行业务方法. Controller-Service-Mapper(Dao),执行业务. 当业务执行成功之后.返回统一的ModelAndView对象.
- 其中包含2部分数据
- Model(服务器数据)
- View(页面逻辑名称)
- 其中包含2部分数据
- 当前端控制器获取ModelAndView对象之后,交给视图解析器 解析View对象的逻辑名称. 动态的拼接前缀 + 页面逻辑名称 + 后缀. 最终形成了用户展现页面的全路径.
- 将Model数据填充到页面中的过程,叫做视图渲染. 渲染之后,将数据交给前端控制器处理.
- 将得到的完整页面 响应给用户进行展现.
1.5 简单参数传递
1.5.1 服务器向页面传值
//简化数据传递
@RequestMapping("/user")
public String toUser2(Model model) {
    //将数据通过model进行传递
    model.addAttribute("id", 1003);
    model.addAttribute("name", "SpringMVC");
    return "user";
}
1.5.2 页面取值
DOCTYPE html>

<html lang="en" xmlns:th="http://www.thymeleaf.org">
<head>
    <meta charset="UTF-8">
    <title>SpringMVC测试案例title>
head>
<body>
    <h1>用户测试代码h1>

    <h3 th:text="${id}">h3>
    <h3 th:text="${name}">h3>
body>
html>
1.5.3 页面请求效果
1.6 页面向服务器传递数据
1.6.1 编辑提交数据的页面
DOCTYPE html>
<html lang="en" xmlns:th="http://www.thymeleaf.org">
<head>
    <meta charset="UTF-8">
    <title>SpringMVC测试案例title>
head>
<body>
<form action="/addUser" method="POST">
    <table border="1px" cellspacing="0" align="center" width="350px" style="margin-top: 50px">
        <tr align="center">
            <td colspan="2"><h1>表格数据提交h1>td>
        tr>
        <tr>
            <td>ID:td>

            <td><input id="id" name="id" type="text"/>td>
        tr>
        <tr>
            <td>姓名:td>
            <td><input id="name" name="name" type="text"/>td>
        tr>
    table>
form>
body>
html>
- 页面预览
1.6.2 编辑提交成功的页面
DOCTYPE html>
<html lang="en">
<head>
    <meta charset="UTF-8">
    <title>title>
head>
<body>
    <h1>提交成功!!!!h1>
body>
html>
1.6.3 Request 对象接收参数
当用户点击提交按钮时,将数据进行传递. 所以必须编辑Controller的方法进行接收.利用request对象进行参数的接收.
/**
    * 请求路径: http://localhost:8090/addUser
    * 请求参数: id: 100  name: 张三
    * request/response对象说明  只要用户调用就会自动的赋值
    * servlet缺点:  接收的参数都是String类型
*/
@RequestMapping("/addUser")
public String addUser(HttpServletRequest request){
    //利用工具API进行类型转化
    Integer id = Integer.parseInt(request.getParameter("id"));
    String name = request.getParameter("name");
    System.out.println("参数:"+id+":"+name);
    return "success";
}
- 运行结果
1.6.4 利用SpringMVC为属性赋值
/**
    * SpringMVC赋值:
    * 内部根据request.getParameter("id") 方式获取数据.
*/
@RequestMapping("/addUser")
public String addUser2(Integer id, String name) {
    System.out.println("参数获取:" + id + ":" + name);
    return "success";
}
- 运行结果
2 SpringMVC 高级用法
2.1 @RequestParam
2.1.1 需求说明
有时用户的数据可能为null,如果后端服务器数据有特殊的要求
- 要求:
- 数据为必填项
- 如果没有填写数据,可以为其设定默认值.
- 通过@RequestParam注解实现.
2.1.2 编辑UserController
说明: 图中演示了@RequestParam的注解用法
/**
    * 请求参数: id: 100  name: 张三
    *
    * @RequestParam 参数说明:
    *      1.name/value   接收参数的名称
    *      2.required     默认值true  该数据项为必填项
    *      3.defaultValue 设定数据默认值  如果参数为null则设定默认值
    * required与defaultValue 是互斥的
*/
@RequestMapping("/addUser")
public String addUserParam(
    @RequestParam(value = "id", required = true, defaultValue = "1001") Integer id,
    @RequestParam(value = "name", required = true, defaultValue = "张三") String name) {
    System.out.println("参数获取:" + id + ":" + name);
    return "success";
}
- 运行结果
2.2 同名提交问题
2.2.1 业务描述
SpringMVC中对于页面要求应该保证name属性尽可能唯一
但是如果遇到复选框操作时 重名问题将不能避免,使用如下操作优化
DOCTYPE html>
<html lang="en" xmlns:th="http://www.thymeleaf.org">
<head>
    <meta charset="UTF-8">
    <title>SpringMVC测试案例title>
head>
<body>
<form action="/addUser" method="POST">
    <table border="1px" cellspacing="0" align="center" width="350px" style="margin-top: 50px">
        <tr align="center">
            <td colspan="2"><h1>表格数据提交h1>td>
        tr>
        <tr>
            <td>ID:td>

            <td><input id="id" name="id" type="text"/>td>
        tr>
        <tr>
            <td>姓名:td>
            <td><input id="name" name="name" type="text"/>td>
        tr>
        <tr>
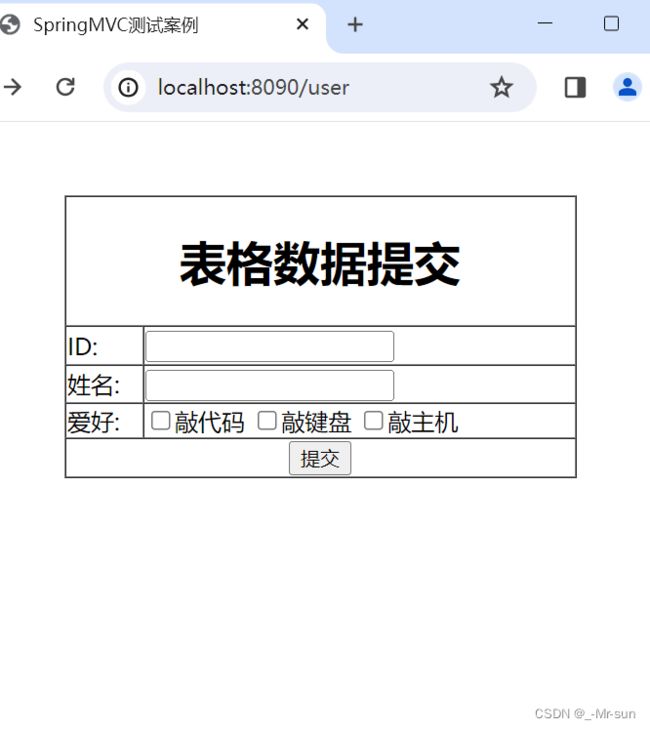
            <td>爱好:td>
            <td>
                <input name="hobbys" type="checkbox" value="敲代码"/>敲代码
                <input name="hobbys" type="checkbox" value="敲键盘"/>敲键盘
                <input name="hobbys" type="checkbox" value="敲主机"/>敲主机
            td>
        tr>
        <tr>
            <td colspan="2" align="center">
                <button type="submit">提交button>
            td>
        tr>
    table>
form>
body>
html>
- 页面预览
2.2.2 数据接收
/**
    * 同名提交测试
    * url参数: id: name:  hobbys: 敲代码  hobbys: 敲键盘 hobbys: 敲主机
    * 参数提交的形式:springMVC自动的将参数进行了","号拼接  敲键盘,敲主机
    * SpringMVC优化:
    *      1.可以根据,号 自动的将字符串进行拆分
    *      2.如果数据类型不是String类型,则可以自动的转化
    * 总结: 如果以后遇到了同名提交问题.则使用数组或者可变参数类型接收
    * String... hobbys 可变参数类型 实质就是数组
*/
@RequestMapping("/addUser")
public String addHobbys(Integer id, String name, String hobbys) {
    System.out.println("参数获取:" + id + ":" + name + ":" + hobbys);
    return "success";
}

@RequestMapping("/addUser")
public String addHobbys(Integer id, String name, String[] hobbys) {
    System.out.println("参数获取:" + id + ":" + name + ":" + Arrays.toString(hobbys));
    return "success";
}
- 运行结果
2.3 对象的方式接收参数
2.3.1 需求说明
如果有大量的页面的提交数据,如果采用单独的参数接收,必然导致Controller方法结构混乱,不便于理解.所以采用对象的方式进行封装
2.3.2 封装User对象
import lombok.Data;
import lombok.experimental.Accessors;

/**
 * POJO实体对象中"必须"使用包装类型
 * 规则说明:
 *      1.基本类型有默认值  包装类型默认值为null
 *      2.基本类型中没有多余的方法 对后续代码取值有问题
 */
@Data//get/set/toString....
@Accessors(chain = true)//几乎不用构造方法赋值
public class User {
    //页面name属性 id/name/hobbys
    private Integer id;
    private String name;
    private String[] hobbys;
}
2.3.3 编辑UserController
实现以对象的方式接收参数
/**
    * 使用对象的方式接收数据
    * URL地址: /addUser
    * url参数: id: name:  hobbys: 敲代码 hobbys: 敲键盘 hobbys: 敲主机
    * 对象赋值的原理:
    * 		要求: POJO对象中必须有get/set方法
    * 			  当用户提交数据之后,利用对象的set方法为属性赋值.
*/
@RequestMapping("/addUser")
public String addUser(User user) {
    System.out.println(user);
    return "success";
}
- 运行结果
2.4 为对象的引用赋值
2.4.1 业务需求
有时可能会遇到 name属性重复的问题. 由于业务需要不得不写一个重复的名称.那么这时采用对象的引入赋值.
2.4.2 封装Dog对象
import lombok.Data;
import lombok.experimental.Accessors;

@Data
@Accessors(chain = true)
public class Dog {
    private Integer id;
    private String name;
}
2.4.3 对象引用
说明: 为了实现数据封装,必须将对象进行嵌套(引用)
import lombok.Data;
import lombok.experimental.Accessors;

/**
 * POJO实体对象中"必须"使用包装类型
 * 规则说明:
 *      1.基本类型有默认值  包装类型默认值为null
 *      2.基本类型中没有多余的方法 对后续代码取值有问题
 */
@Data//get/set/toString....
@Accessors(chain = true)//几乎不用构造方法赋值
public class User {
    //页面name属性 id/name/hobbys
    private Integer id;
    private String name;
    private String[] hobbys;
    private Dog dog;//通过对象的引入赋值.
}
2.4.4 编辑页面
DOCTYPE html>
<html lang="en" xmlns:th="http://www.thymeleaf.org">
<head>
    <meta charset="UTF-8">
    <title>SpringMVC测试案例title>
head>
<body>
<form action="/addUser" method="POST">
    <table border="1px" cellspacing="0" align="center" width="350px" style="margin-top: 50px">
        <tr align="center">
            <td colspan="2"><h1>表格数据提交h1>td>
        tr>
        <tr>
            <td>ID:td>

            <td><input id="id" name="id" type="text"/>td>
        tr>
        <tr>
            <td>姓名:td>
            <td><input id="name" name="name" type="text"/>td>
        tr>
        <tr>
            <td>宠物IDtd>
            <td><input name="dog.id" type="text"/>td>
        tr>
        <tr>
            <td>宠物名称td>
            <td><input name="dog.name" type="text"/>td>
        tr>
        <tr>
            <td>爱好:td>
            <td>
                <input name="hobbys" type="checkbox" value="敲代码"/>敲代码
                <input name="hobbys" type="checkbox" value="敲键盘"/>敲键盘
                <input name="hobbys" type="checkbox" value="敲主机"/>敲主机
            td>
        tr>
        <tr>
            <td colspan="2" align="center">
                <button type="submit">提交button>
            td>
        tr>
    table>
form>
body>
html>
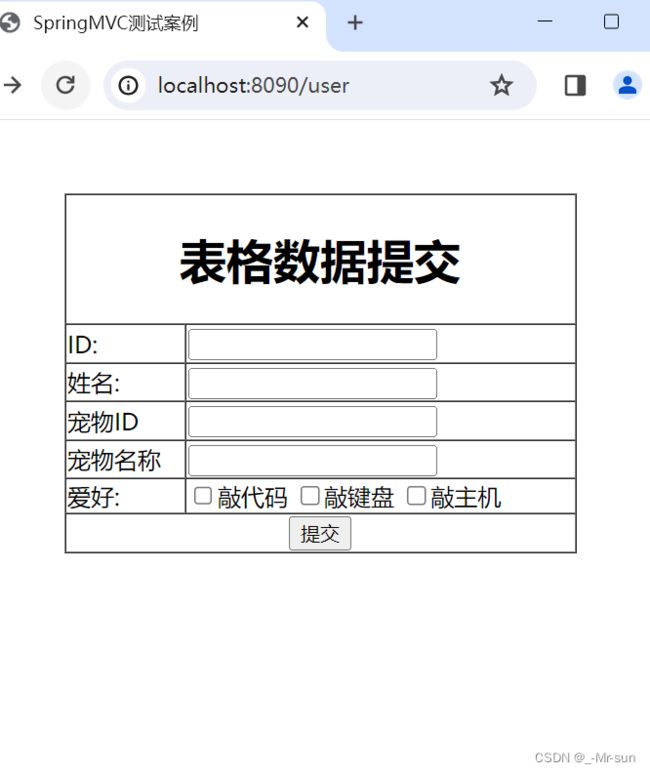
- 页面预览
- 通过对象.的方式封装所属关系
2.4.5 编辑Controller
/**
    * 在内部封装引用对象. 使用User接收全部数据.
*/
@RequestMapping("/addUser")
public String addUserDog(User user) {
    System.out.println(user);
    return "success";
}
- 运行结果


