Spring Security+Oauth2四种授权模式
上一篇文章:Spring Security + OAuth2.0项目搭建:https://blog.csdn.net/qq_42402854/article/details/123057625
接着认识 Oauth2的四种授权模式。
一、Oauth2认证服务
在项目中,我们采用将用户,客户端,token等数据保存在数据库中。
1、认证服务具体配置
1.1 YML配置文件
server:
  port: 18091

# jsp配置
spring:
  application:
    # 服务实例名,每个服务名必须唯一
    name: OAUTH-SERVER
  datasource:
    driver-class-name: com.mysql.cj.jdbc.Driver
    url: jdbc:mysql://localhost:3306/security_authority?useUnicode=true;characterEncoding=utf8;useSSL=true;serverTimezone=GMT
    username: root
    password: 123456
    main:
      allow-bean-definition-overriding: true #允许我们自己覆盖spring放入到IOC容器的对象

# mybatis配置
mybatis:
  configuration:
    map-underscore-to-camel-case: true
  mapper-locations: classpath:mybatis/mapper/*.xml

logging:
  level:
    com.charge.learn.springsecurity.oauth2.parent.oauth.dao: debug

eureka:
  instance:
    # 服务主机名称
    hostname: localhost
  client:
    service-url:
      defaultZone: http://admin:1qaz2wsx@${eureka.instance.hostname}:18090/eureka/
1.2 SpringSecurity配置类
@Configuration
@EnableWebSecurity
@EnableGlobalMethodSecurity(securedEnabled = true) // 开启SpringSecurity权限注解
public class WebSecurityConfig extends WebSecurityConfigurerAdapter {

	@Autowired
	private SysUserService userService;

	// 密码解析器注入IOC容器
	@Bean
	public BCryptPasswordEncoder passwordEncoder() {
		return new BCryptPasswordEncoder();
	}

	// 指定认证对象的来源
	@Override
	public void configure(AuthenticationManagerBuilder auth) throws Exception {
		auth.userDetailsService(userService).passwordEncoder(passwordEncoder());
	}

	// SpringSecurity配置信息
	@Override
	public void configure(HttpSecurity http) throws Exception {
		// 这里简单点,使用默认的认证页面
		http.authorizeRequests()
				.anyRequest().authenticated() //所有资源必须授权后访问
				.and()
				.formLogin()
				.loginProcessingUrl("/login")
				.permitAll() //指定认证页面可以匿名访问
				.and()
				.csrf()//关闭跨站请求防护
				.disable();
	}

	/**
	 * AuthenticationManager对象在OAuth2认证服务中要使用,提前注入IOC容器中,即就变成了 Oauth2授权认证。只给授权码模式使用,其他模式可以不写
	 * @return
	 * @throws Exception
	 */
	@Bean
	@Override
	public AuthenticationManager authenticationManagerBean() throws Exception {
		return super.authenticationManagerBean();
	}
}
1.3 OAuth2授权配置类
@Configuration
@EnableAuthorizationServer
public class OauthServerConfig extends AuthorizationServerConfigurerAdapter {

    //数据库连接池对象
    @Autowired
    private DataSource dataSource;

    //认证业务对象
    @Autowired
    private SysUserService userService;

    //授权模式专用对象
    @Autowired
    private AuthenticationManager authenticationManager;

    //客户端信息来源
    @Bean
    public JdbcClientDetailsService jdbcClientDetailsService(){
        return new JdbcClientDetailsService(dataSource);
    }

    //token保存策略
    @Bean
    public TokenStore tokenStore(){
        return new JdbcTokenStore(dataSource);
    }

    //授权信息保存策略
    @Bean
    public ApprovalStore approvalStore(){
        return new JdbcApprovalStore(dataSource);
    }

    //授权码模式数据来源
    @Bean
    public AuthorizationCodeServices authorizationCodeServices(){
        return new JdbcAuthorizationCodeServices(dataSource);
    }

    //指定客户端信息的数据库来源
    @Override
    public void configure(ClientDetailsServiceConfigurer clients) throws Exception {
        clients.withClientDetails(jdbcClientDetailsService());
    }

    //检查token的策略
    @Override
    public void configure(AuthorizationServerSecurityConfigurer security) throws Exception {
        security.allowFormAuthenticationForClients(); // 可接受form表单提交
        security.checkTokenAccess("permitAll()"); // 允许校验 token,匿名访问
    }

    /**
     * OAuth2的主配置信息,将上面所有配置都整合注册进来
     * @param endpoints
     * @throws Exception
     */
    @Override
    public void configure(AuthorizationServerEndpointsConfigurer endpoints) throws Exception {
        endpoints
                .userDetailsService(userService) // 刷新 token, 不配置的话,刷新token是使用不了的
                .approvalStore(approvalStore())
                .authenticationManager(authenticationManager) //认证管理器
                .authorizationCodeServices(authorizationCodeServices()) //授权码服务
                .tokenStore(tokenStore()); //令牌管理服务
    }

}
1.3.1 默认端点 URL
框架默认的URL链接有如下几个:
- /oauth/authorize : 授权端点
- /auth/token : 令牌端点
- /oauth/confirm_access :用户确认授权提交的端点
- /oauth/error : 授权服务错误信息端点。
- /oauth/check_token :用于资源服务访问的令牌进行解析的端点。
- /oauth/token_key : 使用Jwt令牌需要用到的提供公有密钥的端点。
需要注意的是,这几个授权端点应该被Spring Security保护起来只供授权用户访问。
也可以通过 pathMapping()方法来自定义端点URL地址来替代默认端点 URL。
   @Override
    public void configure(AuthorizationServerEndpointsConfigurer endpoints) throws Exception {
        endpoints
                //.pathMapping("/oauth/confirm_access","/customer/confirm_access")//定制授权同意页面
                .authenticationManager(authenticationManager)//认证管理器
。。。
    }
1.4 用户和角色
用户和角色/权限的类和使用数据库认证授权一样。这里简单截几个图。

注意:这里必须将用户和角色类放到公共模板中,认证服务和资源服务使用的是同一个用户和角色对象。否则会报 token反序列化问题。

1.5 启动类
@SpringBootApplication
@MapperScan("com.charge.learn.springsecurity.oauth2.parent.oauth.dao")
@EnableEurekaClient
public class OAuthServerApplication {

    public static void main(String[] args) {
        SpringApplication.run(OAuthServerApplication.class, args);
    }
}
启动项目,ok。

在 oauth_client_details表中插入一条数据:
INSERT INTO `oauth_client_details`(`client_id`, `resource_ids`, `client_secret`, `scope`, `authorized_grant_types`, `web_server_redirect_uri`, `authorities`, `access_token_validity`, `refresh_token_validity`, `additional_information`, `autoapprove`)
VALUES ('charge8_all', 'order_source_api', '$2a$10$CYX9OMv0yO8wR8rE19N2fOaXDJondci5uR68k2eQJm50q8ESsDMlC', 'read,write', 'client_credentials,implicit,authorization_code,refresh_token,password', 'http://www.baidu.com', NULL, NULL, NULL, NULL, 'false');
2、四种授权模式
OAuth2定义了四种授权方式,其实是代表了OAuth授权第三方的不同互信程度。
四种授权模式(authorization grant):
- Authorization code Grant:授权码模式,推荐使用
- Implicit Grant:隐藏/简化模式,不推荐使用
- Resource Owner Password Credentials Grant:密码模式
- Client Credentials Grant:客户端模式
客户端(第三方应用)必须得到资源所有者(用户)的同意授权(authorization grant)以后,才能向客户端颁发令牌(access token)。客户端通过令牌,就可以访问资源服务器,请求数据。
注意:不管哪一种授权方式,第三方应用申请令牌之前,都必须先到系统备案,说明自己的身份,然后会拿到两个身份识别码:客户端 ID(client ID)和客户端密钥(client secret)。这是为了防止令牌被滥用,没有备案过的第三方应用,是不会拿到令牌的。
图来自参考文章。
2.1 授权码模式
授权码(authorization code)方式:指的是第三方应用先申请一个授权码,然后再用该授权码获取令牌。
授权码只能使用一次。
授权码通过前端传送,令牌则是储存在后端,而且所有与资源服务器的通信都在后端完成。这样的前后端分离,可以避免令牌泄漏。
授权码模式是 OAuth2中安全性最高,应用场景最广泛的模式,它适用于那些有后端的 Web 应用。常见的微信,QQ等第三方登录也可采用这种方式实现。
A 网站提供一个链接,用户点击后就会跳转到 B 网站,进行授权用户数据给 A 网站使用。
跳转链接URL如下:
http://localhost:18091/oauth/authorize?response_type=code&client_id=charge8_all
参数说明:
- response_type参数:表示要求返回授权码(code),
- client_id参数:客户端id,让 B 网站知道是谁在请求,
- redirect_uri参数:是 B 网站接受或拒绝请求后的跳转网址,即回调地址,
- scope参数:表示要求的授权范围(读,写)。
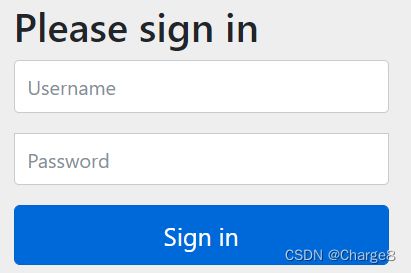
之后会调转到登录接口,输入用户名密码。

第二步:B 网站会要求用户登录,并询问是否同意给予 A 网站授权
用户跳转后,B 网站会要求用户登录,然后询问是否同意给予 A 网站授权。
用户表示同意,这时 B 网站就会跳转到回调地址(redirect_uri参数指定的网址)。跳转时会携带一个授权码,传给 A 网站。

回调地址URL:

- code参数:表示授权码。
注意:这个回调地址应该回调给 A系统, code就是授权码。授权码只能使用一次。
测试时,报错oauth_code表的authentication数据内容超过大小了,这里把它改成 longblob类型即可。
第三步:A 网站通过授权码向 B 网站请求令牌
A 网站拿到授权码以后,就可以在后端,向 B 网站请求令牌(access token)。
- client_id参数:客户端id
- client_secret参数:客户端秘钥,用来让 B 网站确认 A 的身份(client_secret参数是保密的,因此只能在后端发请求),
- grant_type参数:值是AUTHORIZATION_CODE,表示采用的授权方式是授权码,
- code参数:是上一步拿到的授权码,
- redirect_uri参数:是令牌颁发后的回调网址。一定和申请授权码时用的redirect_uri一致。数据在数据库,可以不填。
第四步:B 网站颁发令牌
B 网站收到请求令牌以后,就会颁发令牌。具体做法是向 redirect_uri指定的网址,发送一段 JSON 数据。如上图。access_token字段就是令牌,A 网站在后端拿到了令牌,就可以访问资源服务了。
当再次点击时,会报错,说明code只能使用一次。
{
    "error": "invalid_grant",
    "error_description": "Invalid authorization code: LibMDT"
}
2.2 简化模式
简化模式整个过程没有授权码这个中间步骤,允许直接向前端颁发令牌,即token直接暴露在浏览器。所以又称为(授权码)“隐藏式”(implicit)。
简化模式适用于纯前端页面应用,没有后端。
所谓纯静态页面应用,也就是应用没有在服务器上执行代码的权限(通常是把代码托管在别人的服务器上),只有前端 JS 代码的控制权。
这种方式把令牌直接传给前端,是很不安全的。
因此,只能用于一些安全要求不高的场景,并且令牌的有效期必须非常短,通常就是会话期间(session)有效,浏览器关掉,令牌就失效了。
一般流程:
![]()
第一步:A 网站跳转 B 网站
A 网站提供一个链接,要求用户跳转到 B 网站,进行授权用户数据给 A 网站使用。
跳转链接URL如下:
http://localhost:18091/oauth/authorize?response_type=token&client_id=charge8_all
参数说明:
- response_type参数:为token,表示要求直接返回令牌。
之后会调转到登录接口,输入用户名密码。
第二步:B 网站会要求用户登录,并询问是否同意给予 A 网站授权
用户跳转后,B 网站会要求用户登录,然后询问是否同意给予 A 网站授权。
用户表示同意,这时 B 网站就会跳转到回调地址(redirect_uri参数指定的网址)。跳转时,并且把令牌作为 URL 参数,传给 A 网站。
由于上面用户已经登录过了,所以这里直接返回了token。如果是新窗口,还是需要登录(同上)之后才会返回了token。
回调地址URL:
https://www.baidu.com/#access_token=9b0e9571-bb81-4226-a873-d898b266586a&token_type=bearer&expires_in=42784&scope=read%20write
- token参数:就是令牌,直接向前端(A 网站)颁发令牌。
注意:令牌的位置是 URL 锚点(fragment),而不是查询字符串(querystring),这是因为 OAuth 2.0 允许跳转网址是 HTTP 协议,因此存在"中间人攻击"的风险,而浏览器跳转时,锚点不会发到服务器,就减少了泄漏令牌的风险。
2.3 密码模式
密码模式,用户把自己用户名和密码直接告诉客户端(客户端不得储存密码),客户端使用这些信息申请令牌。
这种方式需要用户给出自己的用户名/密码,显然风险很大,因此只适用于其他授权方式都无法采用的情况,而且必须是用户高度信任的应用。
一般流程:
![]()
第一步:A 应用向 B 应用发出请求令牌。
A 应用要求用户提供 B 应用的用户名和密码。拿到信息以后,A 应用就直接向 B 应用请求令牌。

参数说明:
- grant_type参数:是授权方式,这里的password表示"密码式",
- username参数:是 B 的用户名,
- password参数:是 B 的用户密码。
- client_id参数:客户端id
- client_secret参数:客户端秘钥
第二步:B 网站验证用户身份,并直接颁发令牌
B 网站验证用户身份通过后,直接颁发令牌。
注意:这时不需要跳转,而是把令牌放在 JSON 数据里面,作为 HTTP 回应, A 因此拿到令牌。
{
    "access_token": "9b0e9571-bb81-4226-a873-d898b266586a",
    "token_type": "bearer",
    "refresh_token": "9e48fec7-b6df-46db-84d2-7e8e79019652",
    "expires_in": 42294,
    "scope": "read write"
}
2.4 客户端模式
客户端模式就是直接对客户端进行身份验证,验证通过后,颁发token。
这种模式其实有点不太属于OAuth2的范畴了。客户端(A 网站)完全脱离用户,以自己的身份去向 B 网站申请 token。
换言之,用户无需具备B服务的使用权也可以。完全是A服务与B服务内部的交互,与用户无关了。
适用于没有前端,没有用户界面的后端模块。
一般流程:
![]()
第一步:A 应用向 B 应用发出请求令牌。
A 应用向 B 应用发出请求令牌。

参数说明:
- grant_type参数:值为client_credentials表示采用凭证式,
- client_id参数:客户端id,
- client_secret参数:客户端秘钥,用来让 B 确认 A 的身份。
第二步:B 应用验证通过以后,直接返回令牌。
B 应用验证通过以后,直接返回令牌。
{
    "access_token": "d68df8cc-8643-44e2-ae17-1e85933100d6",
    "token_type": "bearer",
    "expires_in": 43199,
    "scope": "read write"
}
这种方式给出的令牌,是针对第三方应用的,而不是针对用户的,即有可能多个用户共享同一个令牌。
3、令牌的使用
3.1 更新令牌
令牌的有效期到了,如果让用户重新走一遍上面的流程,再申请一个新的令牌,很可能体验不好,而且也没有必要。OAuth 2.0 允许用户自动更新令牌。
注意:除了客户端模式,其他几个模式都可以刷新 token。
首先,需要开启刷新token,OAuth2授权配置类中加上它:
- .userDetailsService(userService) // 刷新 token, 不配置的话,刷新token是使用不了的
重启认证服务。
令牌到期前,用户使用 refresh token 发一个请求,去更新令牌。
- grant_type参数:值为refresh_token表示要求更新令牌,
- client_id参数:客户端id
- client_secret参数:客户端秘钥,用来让 B 确认 A 的身份,
- refresh_token参数:就是用于更新令牌的令牌。
B 网站验证通过以后,就会颁发新的令牌。就可以通过新的令牌来访问资源服务。
3.2 检查token
/oauth/check_token端点,此接口没有允许,默认是不允许访问。
报错如下:
{
    "timestamp": "2022-02-23T15:37:14.715+0000",
    "status": 401,
    "error": "Unauthorized",
    "message": "Unauthorized",
    "path": "/oauth/check_token"
}
所以我们需要设置该接口允许访问。
方式1:
// AuthorizationServerConfigurerAdapter

	@Override
    public void configure(AuthorizationServerSecurityConfigurer oauthServer) throws Exception {
        //允许表单认证
        oauthServer.allowFormAuthenticationForClients();
        oauthServer.checkTokenAccess("permitAll()");
    }
方法2:
security.oauth2.authorization.check-token-access=permitAll()

3.3 通过令牌请求资源服务
A 应用拿到令牌(access token)以后,就可以向 B 引用请求API 数据了,每个 API 请求都必须带有令牌。
具体做法:
方式一:
需要将令牌添加在请求头,key为Authorization,值为Bearer xxxtoken格式,再次访问,发现获取到了资源。
方式二:
在API请求跟上参数?access_token=xxxtoken
二、资源服务器
1、资源服务器配置
资源服务器配置比较简单,这里说明一下重要配置。
1.1 OAuth2授权配置类
@Configuration
@EnableResourceServer
@EnableGlobalMethodSecurity(securedEnabled = true) // 开启SpringSecurity权限注解
public class OauthSourceConfig extends ResourceServerConfigurerAdapter {

    @Autowired
    private DataSource dataSource;

    /**
     * 指定token的持久化策略
     * InMemoryTokenStore表示将token存储在内存
     * Redis表示将token存储在redis中
     * JdbcTokenStore存储在数据库中
     * @return
     */
    @Bean
    public TokenStore jdbcTokenStore(){
        return new JdbcTokenStore(dataSource);
    }

    /**
     * 指定当前资源的id和存储方案
     * @param resources
     * @throws Exception
     */
    @Override
    public void configure(ResourceServerSecurityConfigurer resources) throws Exception {
        resources.resourceId("order_source_api")//资源ID
                .tokenStore(jdbcTokenStore());//令牌策略
    }

    @Override
    public void configure(HttpSecurity http) throws Exception{
        //一般固定写法
        http.authorizeRequests()
                //指定不同请求方式访问资源所需要的权限,一般查询是read,其余是write。
                .antMatchers(HttpMethod.GET, "/**").access("#oauth2.hasScope('read')")
                .antMatchers(HttpMethod.POST, "/**").access("#oauth2.hasScope('write')")
                .antMatchers(HttpMethod.PATCH, "/**").access("#oauth2.hasScope('write')")
                .antMatchers(HttpMethod.PUT, "/**").access("#oauth2.hasScope('write')")
                .antMatchers(HttpMethod.DELETE, "/**").access("#oauth2.hasScope('write')")
                .and()
                .headers().addHeaderWriter((request, response) -> {
            response.addHeader("Access-Control-Allow-Origin", "*");//允许跨域
            if (request.getMethod().equals("OPTIONS")) {//如果是跨域的预检请求,则原封不动向下传达请求头信息
                response.setHeader("Access-Control-Allow-Methods", request.getHeader("Access-Control-Request-Method"));
                response.setHeader("Access-Control-Allow-Headers", request.getHeader("Access-Control-Request-Headers"));
            }
        });
    }


}
1.2 controller
@RestController
@RequestMapping("/order")
public class OrderController {

    @Secured({"ROLE_USER","ROLE_ORDER"})
    @RequestMapping(value = "/findOrder", method = {RequestMethod.GET, RequestMethod.POST})
    public String findOrder(){

        Authentication authentication = SecurityContextHolder.getContext().getAuthentication();
        System.out.println("SecurityContextHolder.getContext().getAuthentication() ->" + authentication.toString());
        return " findOrder成功!" + authentication.toString();
    }

    @Secured({"ROLE_ADMIN","ROLE_ORDER"})
    @RequestMapping(value = "/updateOrder", method = RequestMethod.POST)
    public String updateOrder(){

        Authentication authentication = SecurityContextHolder.getContext().getAuthentication();
        System.out.println("SecurityContextHolder.getContext().getAuthentication() ->" + authentication.toString());
        return " updateOrder成功!" + authentication.toString();
    }

}
2、通过令牌访问
携带令牌访问,令牌需要添加在请求头,key为Authorization,值为Bearer xxxtoken格式。

参考文章:
- OAuth2的四种授权模式:https://www.cnblogs.com/Innocent-of-Dabber/p/11009811.html
- SpringSecurity OAuth2 资源服Token反序列化解析失败:https://blog.csdn.net/CSDN877425287/article/details/120663052
– 求知若饥,虚心若愚。


