elk之安装和简单配置
写在前面
本文看下elk的安装和简单配置,安装我们会尝试通过不同的方式来完成,也会介绍如何使用docker,docker-compose安装。
1:安装es
1.1:安装单实例
groupadd elk
useradd -g elk elk
chown -R elk:elk /opt/program
chmod -R 755  /opt/program
因为es不允许使用root账号启动,所以需要新建账号,并且到该账号。
- 启动
注意:执行该步骤前不要使用root启动,不然后续会有文件权限问题,如果已经启动报了权限问题,则可重新执行:
chown -R elk:elk /opt/program
chmod -R 755  /opt/program
# 切换到非root账号
su elk
[elk@localhost elasticsearch-7.6.2]$ /opt/program/elasticsearch-7.6.2/bin/elasticsearch -d
[elk@localhost elasticsearch-7.6.2]$ OpenJDK 64-Bit Server VM warning: Option UseConcMarkSweepGC was deprecated in version 9.0 and will likely be removed in a future release.
# 停止
[elk@localhost elasticsearch-7.6.2]$ ps -ef | grep elasti
elk        2957      1 40 01:56 pts/0    00:00:20 /opt/program/elasticsearch-7.6.2/jdk/bin/java -Des.networkaddress.cache.ttl=60 -Des.networkaddress.... -cp /opt/program/elasticsearch-7.6.2/lib/* org.elasticsearch.bootstrap.Elasticsearch -d
[elk@localhost elasticsearch-7.6.2]$ kill -9 2957
- 启动后访问
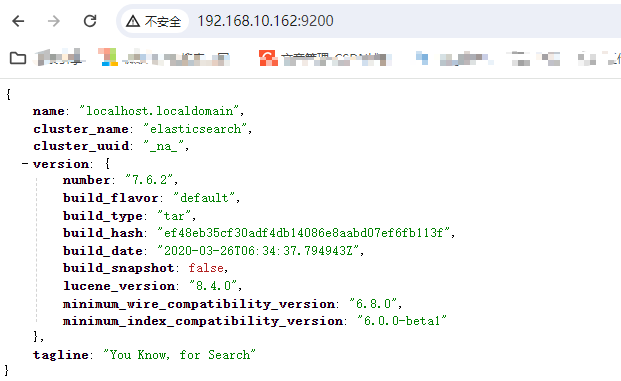
默认只可本机访问,若要外部机器访问,则需要修改配置config/elasticsearch.yml,改变其绑定的IP地址:
# 绑定所有网卡IP
network.host: 0.0.0.0
# 没这个会报错,集群节点发现相关配置
discovery.seed_hosts: ["127.0.0.1"]

# 给自己起个名字,集群中不可重复
node.name: node-1
# 集群只有自己,那就自己当老大,即作为master节点
cluster.initial_master_nodes: ["node-1"]
systemctl status firewalld.service
systemctl stop firewalld.service
systemctl status firewalld.service
systemctl disable firewalld.service
使用vim /etc/sysconfig/selinux,将SELINUX=enforcing改为SELINUX=disabled。
最后重启。
一般就好了。
- 安装es插件
[elk@localhost elasticsearch-7.6.2]$ ./bin/elasticsearch-plugin list
[elk@localhost elasticsearch-7.6.2]$ ./bin/elasticsearch-plugin install analysis-icu
-> Installing analysis-icu
-> Downloading analysis-icu from elastic
[=================================================] 100%
-> Installed analysis-icu
[elk@localhost elasticsearch-7.6.2]$ ./bin/elasticsearch-plugin list
analysis-icu
1.2:安装多实例
TODO
2:安装kibana
2.1:下载
在这里 下载,下载后解压。
2.2:修改配置和启动
主要修改如下配置:
server.port: 5601
server.host: "0.0.0.0"
elasticsearch.hosts: ["http://127.0.0.1:9200"]
elasticsearch.hosts这里注意修改为你本地的es地址,因为我是在同一个虚拟机,所以指定为127就行。
启动:
nohup ./bin/kibana --allow-root &
其中的--allow-root如果不是root启动的话可以不加,通过nohup.log查看日志(在执行启动命令的目录生成)。
访问http://192.168.10.162:5601/:

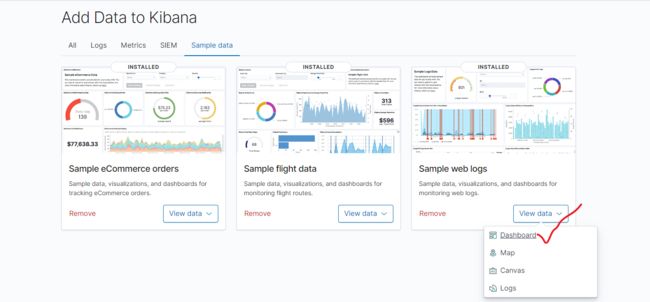
kibana为我们准备了电商数据,飞行数据,以及web程序运行日志数据,点击add data导入:

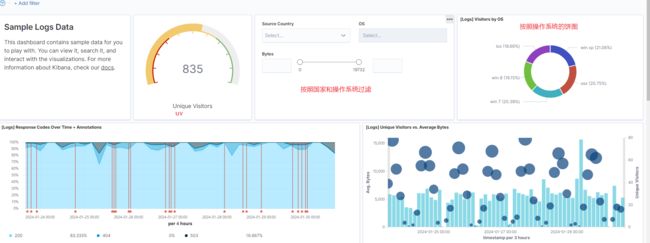
成功后可以查看dashboard:

看日志:

2.3:dev tools (重要!!!)
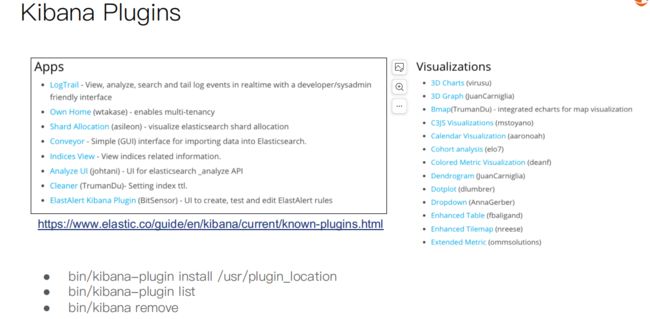
2.4:kibana plugin
3:安装logstash
3.1:下载
在这里 下载。
3.2:配置和启动
在config目录下增加logstash.conf:
input {
  file {
    path => "/opt/program/packages/movie.csv"
    start_position => "beginning"
    sincedb_path => "/dev/null"
  }
}
filter {
  csv {
    separator => ","
    columns => ["id","content","genre"]
  }

  mutate {
    split => { "genre" => "|" }
    remove_field => ["path", "host","@timestamp","message"]
  }

  mutate {

    split => ["content", "("]
    add_field => { "title" => "%{[content][0]}"}
    add_field => { "year" => "%{[content][1]}"}
  }

  mutate {
    convert => {
      "year" => "integer"
    }
    strip => ["title"]
    remove_field => ["path", "host","@timestamp","message","content"]
  }

}
output {
   elasticsearch {
     hosts => "http://localhost:9200"
     index => "movies"
     document_id => "%{id}"
   }
  stdout {}
}
这里使用文件作为数据源,其中movie.csv从这里 下载。输出到elasticsearch,hosts注意改成你本地实际的,其他的不需要动,接着启动:
[elk@localhost jdk1.8.0_151]$ nohup /opt/program/logstash-7.6.2/bin/logstash -f /opt/program/logstash-7.6.2/config/logstash.conf &
[2] 4491
[elk@localhost jdk1.8.0_151]$ nohup: ignoring input and appending output to ‘nohup.out’
[elk@localhost jdk1.8.0_151]$ tail -f nohup.out
...
{
    "@version" => "1",
       "title" => "Gintama",
       "genre" => [
        [0] "Action",
        [1] "Adventure",
        [2] "Comedy",
        [3] "Sci-Fi"
    ],
          "id" => "191005",
        "year" => 2017
}
...
看到刷这些信息就说明在导入logstash了。
接着我们就可以在kibana中创建索引来查看数据了:

点击创建索引:


接着在dicovery就能看到movies索引了:

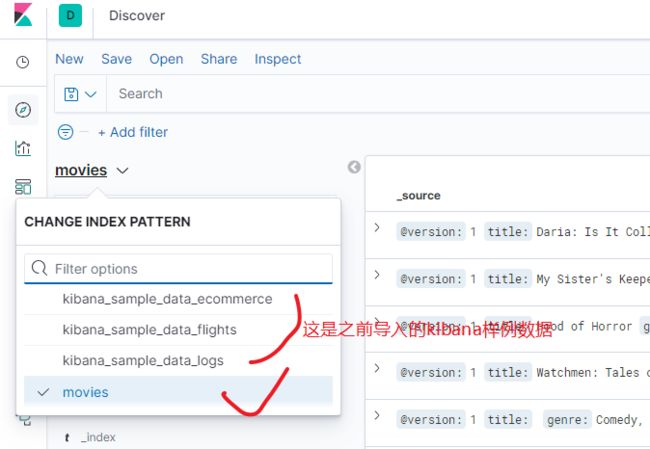
后续我们会使用这些数据来进行学习。
4:docker一键安装
参考这里 。
写在后面
参考文章列表
es启动报错解决 maybe these locations are not writable or multiple nodes were started without increasing 。
ElasticSearch启动&停止命令 。
Elasticssearch 7.6.2单机版的安装配置 。
springcloud之链路追踪 。

