【运维安装部署】Linux安装Maven,以及基于Nexus安装Maven私有化仓库
【Linux基于Nexus安装Maven私有化仓库】
1.安装maven(需要先安装java环境)
1.在服务器创建一个存放maven数据的文件夹
mkdir /mydata/maven
cd /mydata/maven
2.下载maven安装包
我比较喜欢使用3.6.3版本,如果需要修改版本,那么只需要修改地址上两处的版本号即可
wget https://dlcdn.apache.org/maven/maven-3/3.6.3/binaries/apache-maven-3.6.3-bin.tar.gz
3.解压
tar -zxvf apache-maven-3.6.3-bin.tar.gz
4.创建一个文件夹当作maven仓库
mkdir repository
5.配置文件
cd apache-maven-3.6.3/conf
#备份原来的settings文件,重新构建一份
mv settings.xml settings.xml.bak
#重新创建一个配置文件
vim settings.xml
新的配置文件内容,暂时先配置这么多,后续细讲配置文件的内容
/mydata/maven/repository
6.环境变量配置
vim /etc/profile
在配置文件最下方添加内容
#定义环境变量maven目录
MAVEN_HOME=/mydata/maven/apache-maven-3.6.3
#把maven目录追加到path里去
PATH=$MAVEN_HOME/bin:$PATH
#把变量设置为全局变量
export PATH MAVEN_HOME
保存后退出,并重新加载环境变量
source /etc/profile
7.安装成功检测
mvn -v
2.安装nexus
1.创建文件目录
mkdir /mydata/nexus
cd /mydata/nexus
2.下载nexus
下载地址https://help.sonatype.com/repomanager3/product-information/download
可以自行下载然后上传到服务器安装,我这里推荐使用wget
wget https://download.sonatype.com/nexus/3/nexus-3.47.1-01-unix.tar.gz
如果提示连接失败或者超时,那么自行百度一下网友下载好的安装好上传服务器即可
3.解压
tar -zxvf nexus-3.47.1-01-unix.tar.gz
4.启动nexus
移动到文件目录的nexus的bin里面去
这里我给出全路径,你们可以自己判断子路劲在哪
cd /mydata/nexus/nexus-3.47.1-01/bin
#启动nexus
./nexus start
#停止
./nexus stop
#查看状态
./nexus status
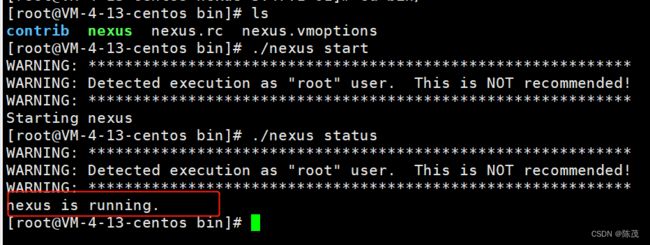
这样就启动成功了,然后就可以在浏览器上访问默认端口8081
如果访问不同,请排查服务器防火墙或者云服务器安全组端口设置
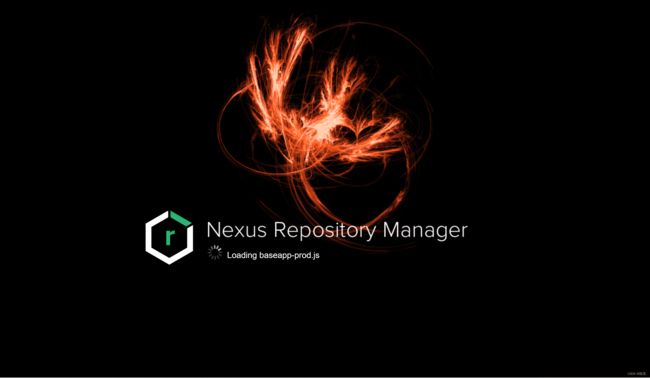
这样就启动成功了
5.登录
查看默认密码
还记得解压之后出现的另外一个目录吗sonatype-work
/mydata/nexus/sonatype-work/nexus3
ls
![]()
查看默认密码
cat admin.password
然后回到浏览器
默认用户名是admin
登录之后会强制修改密码
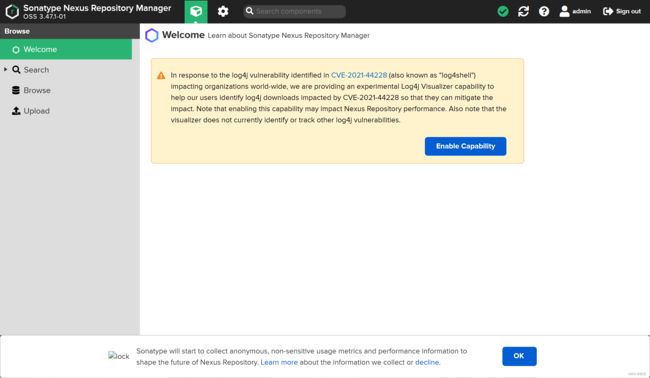
这样就登录成功了
3.使用nexus
1.页面解释
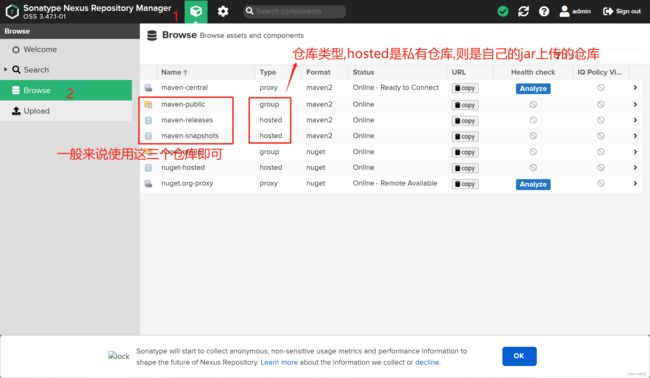
也可以自行创建私有仓库
但是这里就不一一讲解了,主要讲解基础功能,其他的需要自己单独去学习了解一下
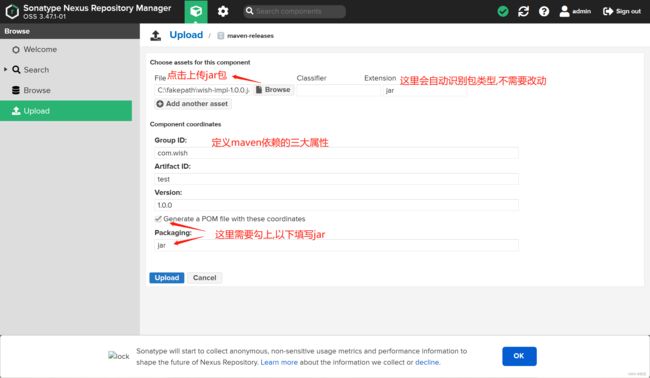
2.可视化页面上传私有的jar包
3.服务器命令上传方式
首先需要配置服务器的maven
vim /mydata/maven/apache-maven-3.6.3/conf
配置文件内容
 /mydata/maven/repository


          nexus
          admin
          自己的password


       nexus


                 nexus

                 http://ip:8081/repository/maven-releases/

                    true


                    true


                    nexus
                    http://ip:8081/repository/maven-public/

                        true


                        true


    nexus
上传命令是
mvn deploy:deploy-file -Dfile=xx.jar -DgroupId=com.wish -DartifactId=test -Dversion=1.0.0 -Dpackaging=Jar -Durl=http://ip:8081/repository/maven-releases/ -DrepositoryId=nexus
命令解析
-Dfile=上传的jar包相对路径或者绝对路径
-DgroupId=上传到组id
-DartifactId=上传到的名
-Dversion=上传包的版本
-Dpackaging=上传包的类型,默认jar
-Durl=上传到的仓库地址
-DrepositoryId=这里是和maven配置文件里server的id保持一致,以便识别配置的账号密码
第一次推送可以需要一定的时间,因为需要下载一些依赖文件
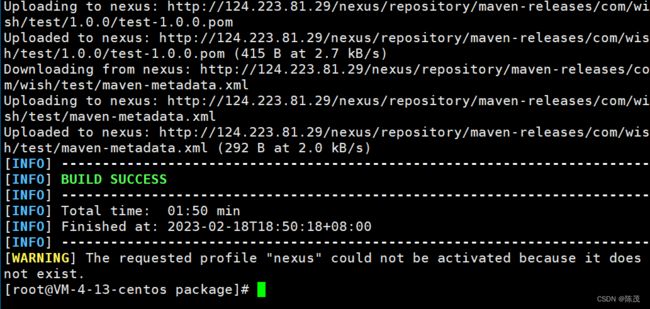
看到Build Success就是推送成功了
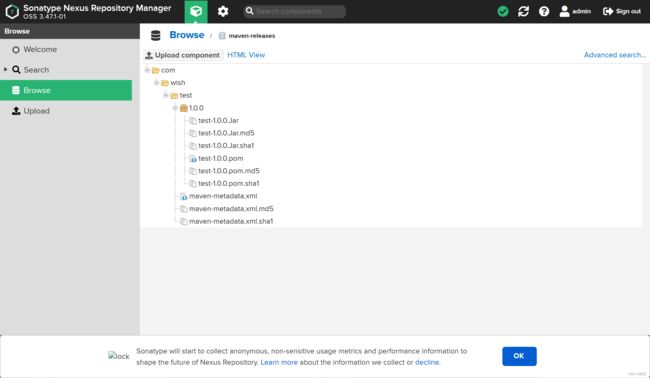
可以在nexus里面查看到
4.idea里直接打包一键上传
这个步骤区别就是在本地执行了,就不是在服务器执行了,一般这个操作是不开放的,因为这样特别容易导致版本代码混乱,但是为了同学自己练习的时候方便开发,也可以尝试
1.配置本地maven
          nexus
          admin
          password


        nexus

        central
        Nexus aliyun

        http://ip:8081/repository/maven-public/


       nexus


                 central
                 http://ip:8081/repository/maven-public/

                    true


                    true


                    central
                    http://ip:8081/repository/maven-public/

                        true


                        true


		JDK-1.8

			1.8
			1.8
			1.8


    JDK-1.8
    nexus
这样先配置了maven连接私库的配置
然后在需要打包的项目的pom.xml里配置
            nexus
            admin
            http://ip:8081/repository/maven-releases/
然后点击
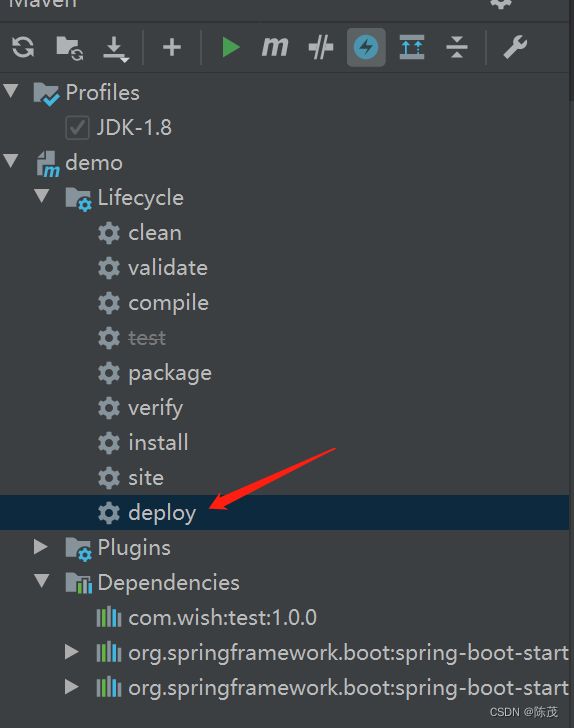
这样就可以了,然后去可视化页面看一下,是否推送成功

4.本地引用私库的jar包
1.只需要在本地maven配置引用地址即可
,这里我把我的配置文件贴出来,除了配置了私库地址之外,还配置里阿里云的maven库地址,这样除了自己私有的jar,其他的就可以在阿里云去下载了
D:\software\repository


          nexus
          admin
          PASSWORD


        nexus

        central
        Nexus aliyun

        http://IP:8081/repository/maven-public/


        aliyun

        central
        Nexus aliyun

        http://maven.aliyun.com/nexus/content/groups/public


       nexus


                 central
                 http://IP:8081/repository/maven-public/

                    true


                    true


                    central
                    http://IP:8081/repository/maven-public/

                        true


                        true


        alimaven


                central
                http://maven.aliyun.com/nexus/content/groups/public/
                true
                true


                nexus
                http://maven.aliyun.com/nexus/content/groups/public/

                    true


                    true


		JDK-1.8

			1.8
			1.8
			1.8


    JDK-1.8
    nexus
    alimaven
这样就可以直接在项目的pom.xml里直接引用啦,OK!
ps:文章内容性质属于笔记,由本人查看网上资料或实践后的个人理解,不保证准确性,仅供参考,如有意见,欢迎讨论指正。


