【底层语言专题】C++语言基础——模块化开发
模块化开发——.h与.cpp(前言)
符号空间——基本定义
头文件(.h文件)
在编译中向全局符号空间提供符号的原型,例如:函数原型;一般来讲原型的加载优先于所有源文件
源文件(.cpp文件)
头文件提供了接口,让源代码之间的相互调用可以通过符号引用建立关系,但是接口就必须要有实现,也就是编译器在执行期间必须通过符号找到具体的代码这些代码就是写在cpp中,用头文件的同名符号去指定,比如:
函数头文件:
文件名: Demo01-FunctionDemo.h
void printVersion01();
函数源文件:
文件名: Demo01-FunctionDemo.cpp
#include 注意cpp和.h之间建立关系不是通过文件名,而是全局符号空间的符号一致性,例如printVersion01就只会找printVersion01,所以c语言中是比较容易发生符号冲突的,这个时候就需要命名空间的概念我们后续学习
符号空间——多模块(h关系)
只有.cpp文件才会在代码中建立各个模块的引用关系,因此如果你的.cpp文件需要要用到其他的模块的文件,就必须#include这个头文件
#include "../header/Demo01-FunctionDemo.h"
符号空间——独立性(cpp)
在h文件中声明的数据的共享的,但是在cpp文件中声明的数据是独立的;
模块化开发——.h与.cpp(预备)
Clion中如何指定多个的main函数?
创建多个main函数

修改CMakeLists

注意add_executable第一个参数就是我们的测试运行的名字,他会被映射在这里

创建头文件和源文件
Clion中右键新增Header
#ifndef和#define以及#endif 都是自动生成的,我们只需要指定头文件的函数原型即可

例子:
#ifndef UNTITLED_DEMO01_FUNCTIONHEADER_H
#define UNTITLED_DEMO01_FUNCTIONHEADER_H
void printVersion01();
void printVersion02();
void printVersion03();

#endif //UNTITLED_DEMO01_FUNCTIONHEADER_H
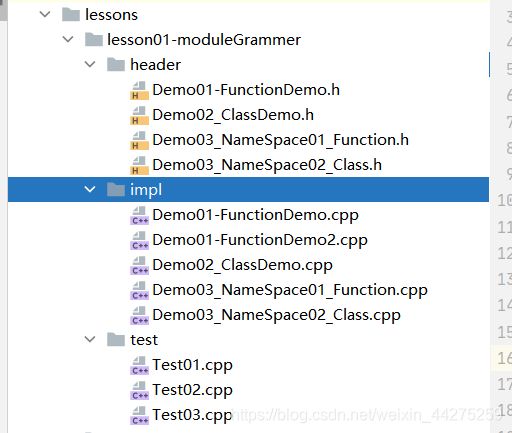
源代码管理
header:放头文件;
impl:放源文件;
test:放测试文件;
模块化开发——.h与.cpp(测试)
测试——头文件和源文件一一对应
声明函数原型
#ifndef UNTITLED_DEMO01_FUNCTIONHEADER_H
#define UNTITLED_DEMO01_FUNCTIONHEADER_H
void printVersion01();
void printVersion02();
void printVersion03();

#endif //UNTITLED_DEMO01_FUNCTIONHEADER_H
实现函数原型
#include 引入函数原型(Test01.cpp中)
引入函数原型,在编译器期间就可以利用这些符号处理上下文以及各种编译设计,而运行时则利用相同的符号去找到他的实现类
#include "../header/Demo01-FunctionHeader.h"
int main() {
     printVersion01();
     printVersion02();
     printVersion03();
    return 0;
}
结果

特殊情况——头文件没有实现
随意注释一个,函数原型的实现


显示没有当前头文件的引用没有指向任何一个具体的函数
再一次告诉我们,header文件里面函数原型是提供了一个简单的结构引用,这些引用必须要指向具体的代码
特殊情况——头文件有多个实现
新建多个cpp,用同一个符号引用

加入编译
add_executable(
        Test01
        lessons/lesson01-headerAndCpp/test/Test01.cpp
        lessons/lesson01-headerAndCpp/impl/Demo01-FunctionDemo.cpp
        lessons/lesson01-headerAndCpp/impl/Demo01-FunctionDemo2.cpp
)
编译报错,符号冲突,由此体现设计命名空间的作用性

特殊情况——直接引用源文件
修改CMakeList.txt
add_executable(
        Test02
        lessons/lesson01-headerAndCpp/test/Test01.cpp
)
修改main函数
#include "../impl//Demo01-FunctionDemo.cpp"
int main() {
     printVersion01();
     printVersion02();
     printVersion03();
    return 0;
}
结果
事实证明直接include源文件也是直接直接调用的,但是开发过程中源文件的位置以及实现是经常发生变化,这样不太方便维护,因此通过h文件建立关系是非常好可扩展的,类似于java的接口的意义

头文件与源文件——类头文件测试
建立类原型
#ifndef UNTITLED_DEMO02_CLASSDEMO_H
#define UNTITLED_DEMO02_CLASSDEMO_H

class Circle {
    /**
     * 私有
     */
private:
    double r;//半径
public:
    Circle();//构造函数
    Circle(double R);//构造函数
    double Area();//对象函数
};

#endif //UNTITLED_DEMO02_CLASSDEMO_H
实现类原型
如果实现需要用到h里面的命名或者类的空间则需要引入相应的头文件
一般这么写就规范点 而不至于符号冲突
#include  "../header/Demo02_ClassDemo.h"
Circle::Circle()
{
    this->r=5.0;
}
Circle::Circle( double  R)
{
    this->r=R;
}
double  Circle:: Area()
{
    return 3.14*r*r;
}
调用
#include 测试

模块化开发——命名空间设计
函数命名空间
命名空间原型
#ifndef UNTITLED_DEMO02_NAMESPACE01_H
#define UNTITLED_DEMO02_NAMESPACE01_H
namespace print01 {
     void print();
}
namespace print02 {
    void print();
}
namespace print03 {
    void print();
}
#endif //UNTITLED_DEMO02_NAMESPACE02_H
命名空间实现
#include "../header/Demo03_NameSpace01_Function.h"
#include 命名空间调用
#include "../header/Demo03_NameSpace01_Function.h"
int main(){
    /**
     * 调用方式(一)
     * 利用::
     */
    print01::print();
    print01::print();
    print03::print();
    /**
    * 调用方式(二)
    * use
    */
    using namespace print01;
    print();
    /**
     * 错误:use 之后的变量名只能用于一个命名空间
    */
//    using namespace print01;
//    using namespace print02;
//    using namespace print03;
//    print();
    return 0;
}
类的命名空间
原型
#ifndef UNTITLED_DEMO02_NAMESPACE02_H
#define UNTITLED_DEMO02_NAMESPACE02_H
namespace version01{
    class ConsoleOuter {
    public:
        ConsoleOuter();
        void print();
    };
}
namespace version02{
    class ConsoleOuter {
    public:
        ConsoleOuter();
        void print();
    };
}
namespace version03{
    class ConsoleOuter {
    public:
        ConsoleOuter();
        void print();
    };
}
#endif //UNTITLED_DEMO02_NAMESPACE02_H
实现
namespace version01{
    ConsoleOuter::ConsoleOuter() {

    }
    void ConsoleOuter::print() {
        std::cout << "version01命名空间的输出;" << std::endl;
    }
}
namespace version02{
    ConsoleOuter::ConsoleOuter() {

    }
    void ConsoleOuter::print() {
        std::cout << "version02命名空间的输出;" << std::endl;
    }
}
namespace version03{
    ConsoleOuter::ConsoleOuter() {

    }
    void ConsoleOuter::print() {
        std::cout << "version03命名空间的输出;" << std::endl;
    }
}
调用
int main(){
    /**
    * 调用方式 (1)
    */
    version01::ConsoleOuter consoleOuter1=version01:: ConsoleOuter();
    version02::ConsoleOuter consoleOuter2=version02:: ConsoleOuter();
    version03::ConsoleOuter consoleOuter3=version03:: ConsoleOuter();
    consoleOuter1.print();
    consoleOuter2.print();
    consoleOuter3.print();
    /**
     * 调用方式 (2)
     */
    using namespace version01;
    ConsoleOuter consoleOuter=ConsoleOuter();
    consoleOuter.print();
    return 0;
}
调用方式三
在不同代码块内,可以独立使用命名空间
void printVersion01() {
    using namespace version01;
    ConsoleOuter consoleOuter = ConsoleOuter();
    consoleOuter.print();

}

void printVersion02() {
    using namespace version02;
    ConsoleOuter consoleOuter = ConsoleOuter();
    consoleOuter.print();

}

void printVersion03() {
    using namespace version03;
    ConsoleOuter consoleOuter = ConsoleOuter();
    consoleOuter.print();

}
int main() {
    printVersion01();
    printVersion03();
    printVersion02();
    return 0;
}