前言
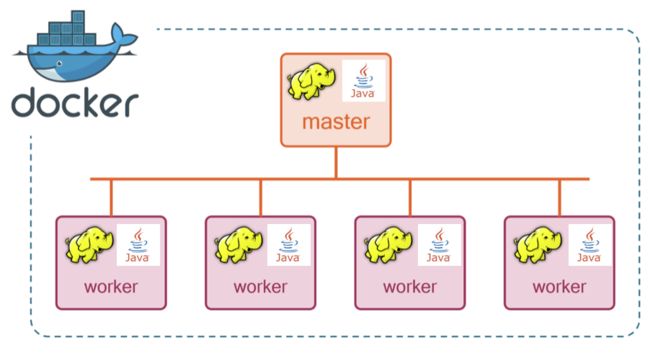
最近刚好在学习 Hadoop,在安装过程中遇到了一些小麻烦,正好将此次过程记录并分享出来,希望能对准备学习本块内容的读者们有所帮助。本次操作在 Ubuntu 中完成,如何安装 Ubuntu 本文不再赘述。
本文所涉及到的代码及配置文件可在微信公众号「01 二进制」后台回复「hadoop」获取。
在 Ubuntu 中安装配置 Docker
使用官方安装脚本自动安装
安装命令如下:
curl -fsSL https://get.docker.com | bash -s docker --mirror Aliyun也可以使用国内 daocloud 一键安装命令:
curl -sSL https://get.daocloud.io/docker | shDocker 镜像加速
之后我们会利用 docker 拉取一些镜像,国内从 DockerHub 拉取镜像有时会遇到困难,此时可以配置镜像加速器。这里以 ubuntu 系统为例,我们可以通过修改 daemon 配置文件/etc/docker/daemon.json来使用加速器
{
  "registry-mirrors": ["https://hub-mirror.c.163.com"]
}
然后执行以下命令重启 docker 服务即可
sudo systemctl daemon-reload
sudo systemctl restart docker
Hadoop 集群安装
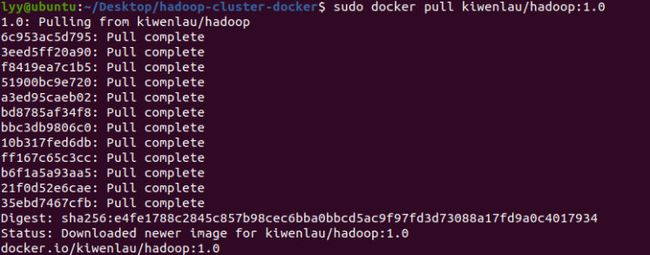
1. 拉取 docker 镜像
sudo docker pull kiwenlau/hadoop:1.02. 下载启动脚本
git clone https://github.com/kiwenlau/hadoop-cluster-docker3. 创建网桥
由于 Hadoop 的 master 节点需要与 slave 节点通信,需要在各个主机节点配置节点 IP,为了不用每次启动都因为 IP 改变了而重新配置,在此配置一个 Hadoop 专用的网桥,配置之后各个容器的 IP 地址就能固定下来。
sudo docker network create --driver=bridge hadoop4. 下载完成后进入该目录
cd hadoop-cluster-docker/5. 编辑并运行 docker 的启动脚本
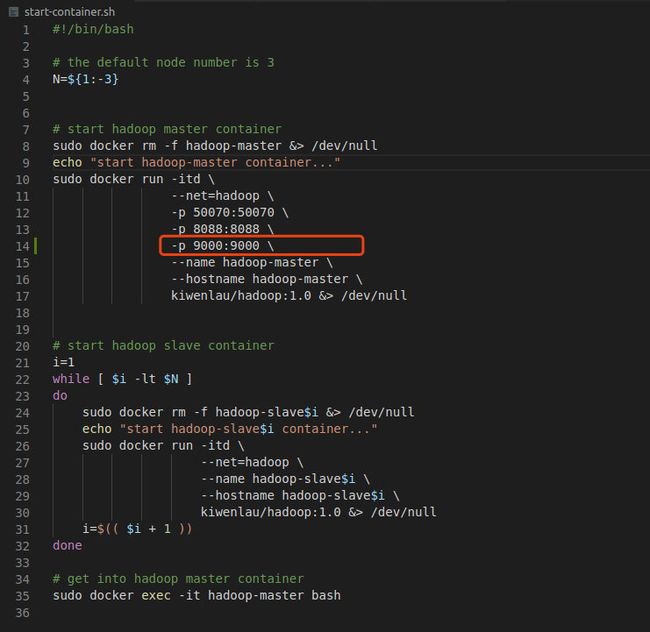
为了方便后续通过 Java API 访问 HDFS,需要修改脚本,添加一个端口映射,将容器的 9000 端口映射到本地的 9000 端口,我们需要在-p 8088:8088 \下添加一行,如下图所示
然后执行以下命令完成 docker 容器的启动
./start-container.sh随即会进入容器内的终端
6. 在容器内启动 hadoop
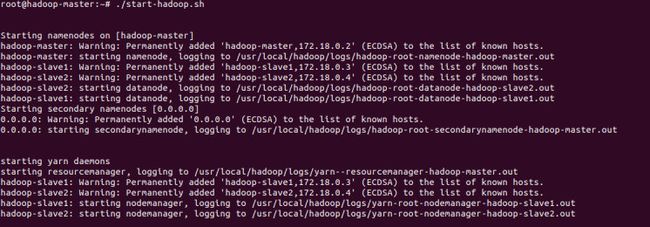
./start-hadoop.sh至此,hadoop 集群启动完成。
我们可以分别访问http://localhost:8088和http://localhost:50070/来访问 hadoop 集群的可视化界面
- http://localhost:8088
- http://localhost:50070/
7. 查看 hadoop 使用情况
hadoop dfsadmin -report网络配置
1. 关闭 Linux 防火墙并编辑 hosts 文件
由于在本案例中使用的是 docker 部署集群,如果想通过 Java API 访问 hadoop 集群,我们就需要给 docker 开放一个外网访问的权限,这里采用的方式是关闭防火墙+编辑 hosts 文件映射
1.1 关闭 Linux 防火墙
我们可以通过sudo ufw status命令查看防火墙状态
如果返回结果为Status: inactive则说明防火墙已关闭,否则我们执行以下代码关闭防火墙
sudo ufw disable另外,我们也可以通过sudo ufw enable命令开启防火墙。
1.2 编辑 hosts 文件
执行sudo vim /etc/hosts来编辑文件
在文档末尾添加如下内容
172.18.0.2 hadoop-master
172.18.0.3 hadoop-slave1
172.18.0.4 hadoop-slave2
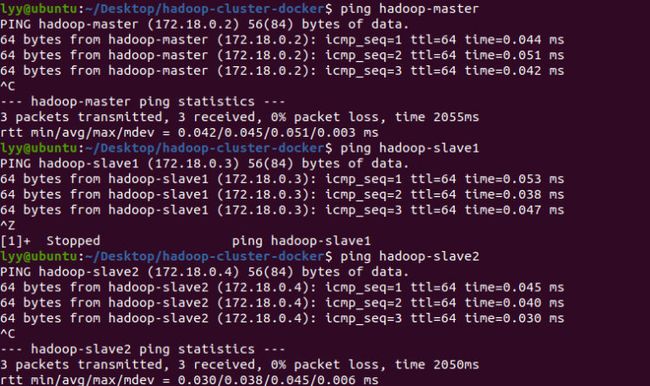
1.3 通过 ping 命令来查看集群的访问情况
利用 Java API 访问 Hadoop 集群
1. 编写 Java 代码
1.1 新建 maven 工程
此步骤省略
1.2 编辑 pom.xml
        org.apache.hadoop
        hadoop-common
        2.7.2


        org.apache.hadoop
        hadoop-hdfs
        2.7.2


        org.apache.hadoop
        hadoop-client
        2.7.2


        junit
        junit
        4.12
1.3 创建 HDFSApp.java 并编辑
import org.apache.hadoop.conf.Configuration;
import org.apache.hadoop.fs.FSDataOutputStream;
import org.apache.hadoop.fs.FileSystem;
import org.apache.hadoop.fs.Path;
import org.apache.hadoop.io.IOUtils;
import org.apache.hadoop.security.UserGroupInformation;

import java.io.IOException;
import java.io.InputStream;
import java.security.PrivilegedExceptionAction;

/**
 * 实现java远程操作hdfs:远程创建目录、创建文件、上传文件、下载文件、读取文件、重命名、删除文件
 */
public class HDFSApp {
    static FileSystem hdfs;

    //初始化访问hdfs的配置信息
    static {
        UserGroupInformation ugi = UserGroupInformation.createRemoteUser("root");
        try {
            ugi.doAs(new PrivilegedExceptionAction() {
                public Void run() throws Exception {
                    Configuration conf = new Configuration();
                    conf.set("dfs.client.use.datanode.hostname", "true");
                    conf.set("fs.defaultFS", "hdfs://127.0.0.1:9000/");
                    conf.set("fs.hdfs.impl", "org.apache.hadoop.hdfs.DistributedFileSystem");
                    Path path = new Path("hdfs://127.0.0.1:9000/");
                    hdfs = FileSystem.get(path.toUri(), conf);
                    //hdfs = path.getFileSystem(conf); // 这个也可以
                    return null;
                }
            });
        } catch (IOException e) {
            e.printStackTrace();
        } catch (InterruptedException e) {
            e.printStackTrace();
        }
    }

    /**
     * 方法2:创建文件
     *
     * @throws IOException
     */
    public static void createFile() throws IOException {
        String fileName = "/test/myfile.txt";
        String fileContent = "this is new file";
        Path dst = new Path(fileName);
        if (hdfs.exists(dst)) {
            System.out.println("Error:文件已存在");
        } else {
            //将文件内容转成字节数组
            byte[] bytes = fileContent.getBytes();
            FSDataOutputStream output = hdfs.create(dst);
            output.write(bytes);
            output.close();
            System.out.println("创建文件\t" + fileName);
        }
    }

    /**
     * 方法3:读取HDFS文件,并在本地控制台打印
     *
     * @throws IOException
     */
    public static void readFile() throws IOException {
        String uri = "/test/myfile.txt";
        // 判断文件是否存在
        if (!hdfs.exists(new Path(uri))) {
            System.out.println("Error;文件不存在");
            return;
        }
        InputStream in = null;
        try {
            in = hdfs.open(new Path(uri));
            // 复制到标准输出流
            IOUtils.copyBytes(in, System.out, 4096, false);
        } catch (Exception e) {
            e.printStackTrace();
        } finally {
            IOUtils.closeStream(in);
        }
    }

    /**
     * 方法6:重命名hdfs上面的文件
     *
     * @throws IOException
     */
    public static void renameFile() throws IOException {
        String oldName = "/test/myfile.txt";
        String newName = "/test/myfile1.txt";
        Path oldPath = new Path(oldName);
        Path newPath = new Path(newName);
        if (hdfs.exists(oldPath)) {
            hdfs.rename(oldPath, newPath);
            System.out.println("rename success");
        } else {
            System.out.println("文件不存在,rename fail");
        }
    }

    /**
     * 方法7:给hdfs上面的文件追加内容
     *
     * @throws IOException
     */
    public static void appendFile() throws IOException {
        String fileName = "/test/myfile1.txt";
        String appendContent = "这是追加的内容";
        Path dst = new Path(fileName);
        byte[] bytes = appendContent.getBytes();
        //如果文件不存在
        if (!hdfs.exists(dst)) {
            System.out.println("Error:文件不存在");
            return;
        }
        FSDataOutputStream output = hdfs.append(dst);
        output.write(bytes);
        output.close();
        System.out.println("success:追加内容到\t" + fileName);
    }

    /**
     * 方法8:删除hdfs上面的文件
     *
     * @param fileName
     * @throws IOException
     */
    public static void deleteFile(String fileName) throws IOException {
        if ("".equals(fileName)) {
            fileName = "/test/myfile1.txt";
        }
        Path f = new Path(fileName);
        boolean isExists = hdfs.exists(f);
        if (isExists) {
            boolean isDel = hdfs.delete(f, true);
            System.out.println(fileName + "删除状态:" + isDel);
        } else {
            System.out.println(fileName + "文件不存在!");
        }
    }

    public static void main(String[] args) throws IOException {
        System.out.println("Hello World!");
        createFile();
        readFile();
//        deleteFile("/test/myfile.txt");
    }

}
2. 执行代码并查看返回结果
2.1 函数入口
2.2 在 hdfs 上创建文件
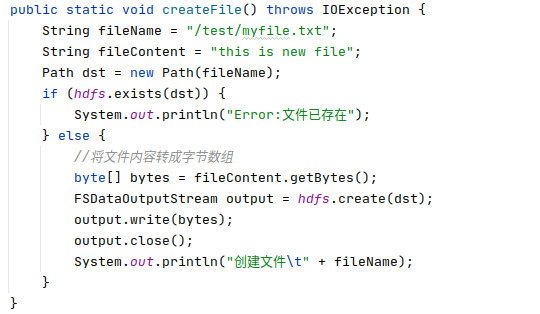
我们先在创建一个文件,创建的文件名为"/test/myfile.txt",文件内容为"this is new file",创建的代码如下:
2.3 读取 hdfs 上的文件
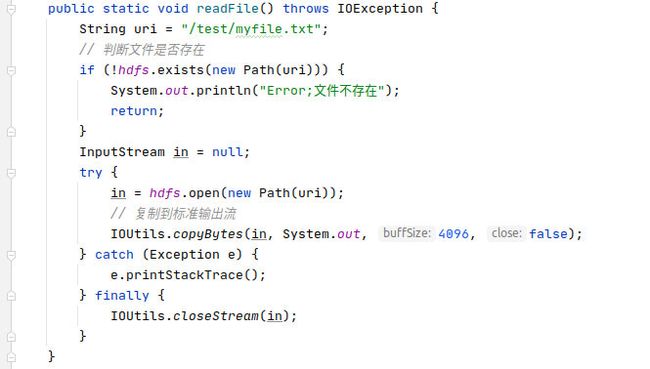
随后读取 hdfs 上的"/test/myfile.txt"文件
执行结果如下:
最后
以上就是本文的全部内容了,如果你觉得对你有所帮助,不放关注点赞支持一波。
