Expo Router + Supabase使用流程
unsetunset前言unsetunset
Expo是一个React-native生态中的一个工具包,提供了非常多的功能,Expo Router是Expo最近推出的功能,其效果类似于Nextjs的router,可以基于目录结构来实现路由。 Supabase是一个开源的postgres数据库,还带有用户体系功能,可以快速实现login、register这些功能。
我将记录一下,我使用这2个工具,构建基础基础IOS APP的流程。
本文不是手把手教程。
unsetunset项目搭建unsetunset
请阅读expo文档:https://docs.expo.dev/router/installation/#quick-start
注意,我这里使用的是expo router的文档,而不是expo的文档,因为单独使用expo也可以构建APP,而我们需要使用expo router,简化我们APP的路由设计。
我们将使用当前最新的expo 50和expo router 3.0来构建项目骨架,按下面的命令,一行行执行则可:
npx create-expo-app

yarn

npx expo install expo-router react-native-safe-area-context react-native-screens expo-linking expo-constants expo-status-bar

npx expo install react-native-web react-dom
在app.json中,添加如scheme和bundler:
{
  "scheme": "your-app-scheme",
  "web": {
    "bundler": "metro"
  }
}
弄好后,直接yarn start启动项目,然后点击【i】,通过IOS simulator(IOS模拟器)打开项目。

unsetunset开发Tabs结构unsetunset
首先,你需要了解一下目录对应路由的基本概念:https://docs.expo.dev/router/create-pages/,然后开始写代码。
首先,在package.json中,修改main,使用expo-router的入口逻辑:
{
  "main": "expo-router/entry"
}
这样,expo就会使用根目录下app文件夹中的index.js作为入口文件了,而App.js就没有用了,可以删掉。
我们创建app/index.js,写入如下代码:
// app/index.js
import { Text } from 'react-native';
export default function Page() {
return Home page ;
}等待expo刷新一下,就可以从模拟器看见Home page字样了,如果等了一会,没有看见,代码也确定没有问题,就退出一下expo,跟在iphone强退应用一样的操作。
然后,我们来写tabs的具体逻辑。
在(tabs)目录中创建home与settings目录,然后在home与settings目录下,分别创建_layout.js和index.js,因为写法相同,所以以home目录为例,_layout.js和index.js代码如下:
// app/(tabs)/home/index.js

import { Stack } from "expo-router";
import { Text, View } from "react-native";

export default function Home() {
  return (

      // 设置页面 title的

      Index page of Home Tab

  );
}
// app/(tabs)/home/_layout.js
import { Stack } from "expo-router";
export default function HomeLayout() {
return 上面代码,使用了expo-router中的Stack,正如其名,它的作用就是创建一个页面,然后用户访问新页面时,会像栈一样操作它,具体而言,访问新页面时,入栈,返回时,出栈,这样,返回页面时,就会回到上一个页面,当然Stack提供了replace操作,替换当前页面,这样返回时,当前页面就没了,一会我们做auth时,会用。
更多,可以阅读:https://docs.expo.dev/router/navigating-pages/
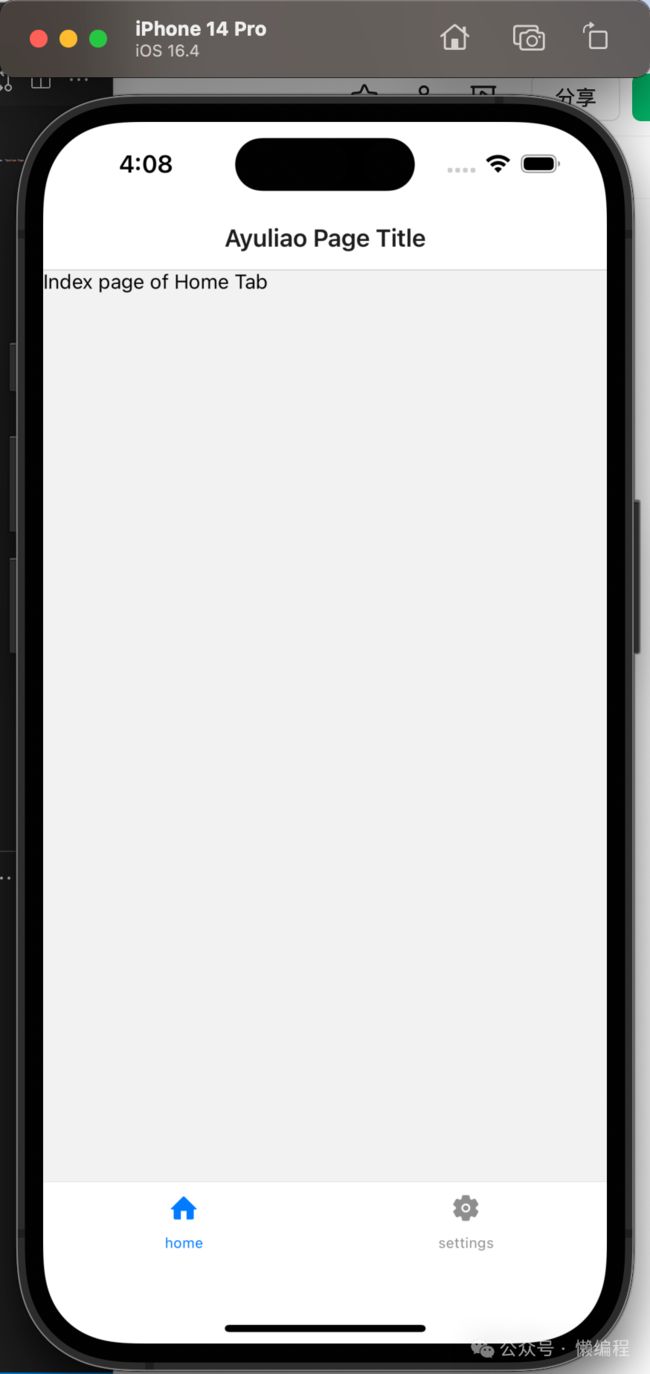
然后,我们需要在(tabs)目录下创建_layout.js文件,用来定义tabs,关于expo-router tabs可以阅读:https://docs.expo.dev/router/advanced/tabs ,这里贴出相关的代码:
// app/(tabs)/_layout.js
import { Tabs } from "expo-router";
import { Entypo, Ionicons } from '@expo/vector-icons';
export default function TabsLayout() {
return (
这样,我们就实现了tabs,这里有一个细节,就是使用了icon,我们需要安装相关的库:
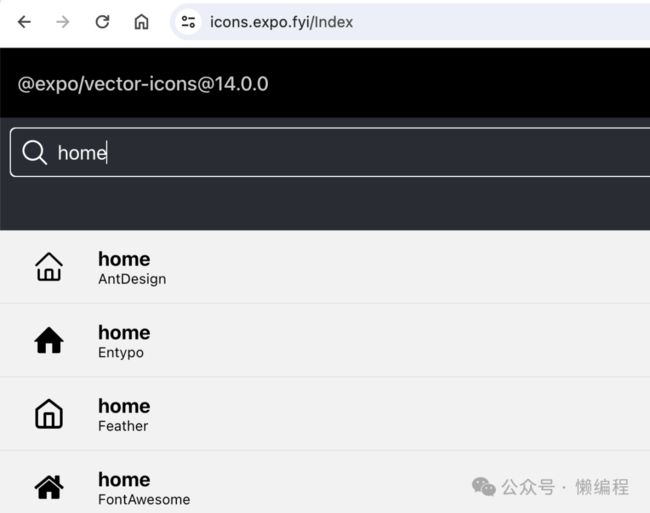
yarn add @expo/vector-icons然后在这个网页中https://icons.expo.fyi/Index,搜索需要的icon,比如home的icon,然后就可以直接使用了,非常方便。

至此tabs功能就实现了。为了体验一下Stack切换页面时,可以切回上一页的效果,我这里,在settings中加一个Link调整,然后在app/(tabs)/home中创建page2.js,然后让settings页调到page2.js页,修改后的settings index.js代码如下:
import { Link, Stack } from "expo-router";
import { Text, View } from "react-native";

export default function Page() {
  return (


      Index page of Settings Tab 2
      // 跳转页面

        Go To Page2


  );
}
效果如下:
 从settings跳转后,可以home页面页
这里,你可能的一个疑惑是,为什么从settings页面跳过去的page2,返回时,是跳回home页?
这是因为,page2.js跟home的index.js都在home目录下,一个目录,是一个栈的结构,所以会是上面的效果。
unsetunsetAuth逻辑unsetunset
先安装相关的依赖库:
yarn add @supabase/supabase-js
yarn add react-native-elements @react-native-async-storage/async-storage react-native-url-polyfill
npx expo install expo-secure-store
我们只需要参考expo和supabase相关的文档,就可以实现登录的效果。
首先,我们在创建app/lib/supabase-client.js文件,代码如下:
// app/lib/supabase-client.js

import 'react-native-url-polyfill/auto'
import * as SecureStore from 'expo-secure-store'
import { createClient } from '@supabase/supabase-js'

const ExpoSecureStoreAdapter = {
  getItem: (key) => {
    return SecureStore.getItemAsync(key)
  },
  setItem: (key, value) => {
    SecureStore.setItemAsync(key, value)
  },
  removeItem: (key) => {
    SecureStore.deleteItemAsync(key)
  },
}

const supabaseUrl = process.env.EXPO_PUBLIC_SUPABASE_URL
const supabaseAnonKey = process.env.EXPO_PUBLIC_SUPABASE_ANON_KEY

export const supabase = createClient(supabaseUrl, supabaseAnonKey, {
  auth: {
    storage: ExpoSecureStoreAdapter,
    autoRefreshToken: true
  },
})
获得supabase对象,用户auth数据存到expo-secure-store中,环境变量写在根目录的.env文件中,使用EXPO_开头。
然后,我们创建(auth)目录,然后创建login.js文件,写入如下代码:
// app/(auth)/login.js

import React, { useState } from "react";
import { Alert, StyleSheet, TextInput, View, Button, Text } from "react-native";
import { supabase } from "../lib/supabase-client";
import { GestureHandlerRootView, TouchableOpacity } from "react-native-gesture-handler";
import { Stack } from "expo-router";

export default function AuthPage() {
  const [email, setEmail] = useState("");
  const [password, setPassword] = useState("");
  const [loading, setLoading] = useState(false);

  async function signInWithEmail() {
    setLoading(true);
    const { error } = await supabase.auth.signInWithPassword({
      email: email,
      password: password,
    });

    if (error) {
        Alert.alert("Sign In Error", error.message);
    } else {
        Alert.alert("sign In Success")
    }
    setLoading(false);
  }

  async function signUpWithEmail() {
    setLoading(true);
    const { error } = await supabase.auth.signUp({
      email: email,
      password: password,
    });

    if (error) {
        Alert.alert("Sign Up Error", error.message);
    } else {
        Alert.alert('Sign Up Finish')
    }

    setLoading(false);
  }

  return (


         setEmail(text)}
          value={email}
          placeholder="[email protected]"
          autoCapitalize={"none"}
        />


         setPassword(text)}
          value={password}
          secureTextEntry={true}
          placeholder="Password"
          autoCapitalize={"none"}
        />


         signInWithEmail()}
          style={styles.buttonContainer}
        >
          SIGN IN


         signUpWithEmail()}
          style={styles.buttonContainer}
        >
          SIGN UP


  );
}
这里,有个细节,就是我们使用了react-native-gesture-handler库的TouchableOpacity来实现触控点击效果。TouchableOpacity需要在GestureHandlerRootView布局下才可被使用。
因为TouchableOpacity与react-native原生的Pressable功能似乎相似,所以在刚接触时,我就有点疑惑两者的区别。
react-native-gesture-handler库它直接与原生手势系统集成,提供更接近原生性能的触摸反馈,从而可以提供更流畅的用户体验。而Pressable使用JavaScript线程来处理触摸事件,多数情况下,是够用的,除非出现复杂的手势需求。
简单总结:简单用例,可以用Pressable,你不需要安装第三方库,而复杂的手势处理和对性能有要求的,就用TouchableOpacity,这里,我统一使用TouchableOpacity来处理所有触摸点击需求。
然后,我们需要修改一下index.js,让没有登录的用户重定向到login页面。
// app/index.js

import { router } from "expo-router";
import { useEffect } from "react";
import { supabase } from "./lib/supabase-client";

console.log('supabase obj: ', supabase)

export default function IndexPage() {
  useEffect(() => {
    supabase.auth.getSession().then(({ data: { session } }) => {
      // 如果获取不到session,表明用户没有登录
      if (session) {
        router.replace("/(tabs)/home/");
      } else {
        console.log("no user");
      }
    });

    // 用户登录状态变化
    supabase.auth.onAuthStateChange((_event, session) => {
      if (session) {
        router.replace("/(tabs)/home/");
      } else {
        console.log("no user");
        router.replace("/(auth)/login");
      }
    });
  }, []);

}
运行起来后,会获得如下效果

然后成功登录后

unsetunset结尾unsetunset
相关代码:https://github.com/ayuLiao/expo-router-supabase


