WPF and Silverlight 学习笔记(三十):Brush(2)
上一篇文章主要绍介的是Brush中的SolidColorBrush、渐变Brush及TileBrush,本篇将详细探讨TileBrush的三种子类型:ImageBrush、DrawingBrush和VisualBrush。
一、ImageBrush
ImageBrush通过一幅位图填充区域,定义一种Brush。其主要属性即ImageSource指定一幅位图图片。
二、DrawingBrush
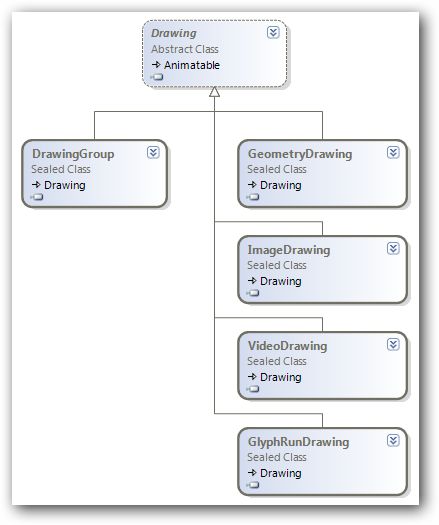
DrawingBrush以矢量为源填充区域,与ImageBrush的区别在于其与分辨率无关,在放大时不会出现位图的失真。使用DrawingBrush时通常使用其Drawing属性,其类型为System.Windows.Media.Drawing类对象,Drawing类是一个抽象类,其继承关系如下:

使用GeometryDrawing绘制几何图形,使用ImageDrawing和VideoDrawing利用图片和视频填充,使用GlyphRunDrawing利用文本填充,使用DrawingGroup可以组合各种Drawing对象。
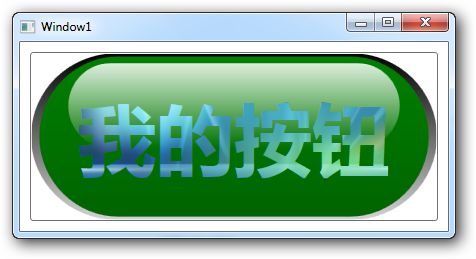
例如,定义一个完整的Brush,填充后的效果类似于上一篇中线性渐变组合后的效果:
1: <Window x:Class="WPF_30.Window1"
2: xmlns="http://schemas.microsoft.com/winfx/2006/xaml/presentation"
3: xmlns:x="http://schemas.microsoft.com/winfx/2006/xaml"
4: Title="Window1" Height="227" Width="444">
5: <Window.Resources>
6: <DrawingBrush x:Key="MyDrawingBrush">
7: <DrawingBrush.Drawing>
8: <DrawingGroup>
9: <DrawingGroup.Children>
10: <GeometryDrawing>
11: <GeometryDrawing.Brush>
12: <LinearGradientBrush StartPoint="0,0" EndPoint="0,1">
13: <GradientStop Color="Green" Offset="0" />
14: <GradientStop Color="DarkGreen" Offset="1" />
15: </LinearGradientBrush>
16: </GeometryDrawing.Brush>
17:
18: <GeometryDrawing.Pen>
19: <Pen Thickness="0.02">
20: <Pen.Brush>
21: <LinearGradientBrush StartPoint="0,0" EndPoint="0,1">
22: <GradientStop Color="Black" Offset="0" />
23: <GradientStop Color="LightGray" Offset="1" />
24: </LinearGradientBrush>
25: </Pen.Brush>
26: </Pen>
27: </GeometryDrawing.Pen>
28: <GeometryDrawing.Geometry>
29: <RectangleGeometry RadiusX="0.2" RadiusY="0.5"
30: Rect="0.02,0.02,0.96,0.96" />
31: </GeometryDrawing.Geometry>
32: </GeometryDrawing>
33:
34: <GeometryDrawing>
35: <GeometryDrawing.Brush>
36: <LinearGradientBrush StartPoint="0,0" EndPoint="0,1">
37: <GradientStop Color="#dfff" Offset="0" />
38: <GradientStop Color="#0fff" Offset="1" />
39: </LinearGradientBrush>
40: </GeometryDrawing.Brush>
41: <GeometryDrawing.Geometry>
42: <RectangleGeometry RadiusX="0.1" RadiusY="0.5"
43: Rect="0.1,0.07,0.8,0.5" />
44: </GeometryDrawing.Geometry>
45: </GeometryDrawing>
46: </DrawingGroup.Children>
47: </DrawingGroup>
48: </DrawingBrush.Drawing>
49: </DrawingBrush>
50: </Window.Resources>
51: <Grid>
52: <Button Content="我的按钮" Margin="10" Background="{StaticResource MyDrawingBrush}"
53: FontSize="78" FontFamily="微软雅黑" FontWeight="Bold">
54: <Button.Foreground>
55: <ImageBrush ImageSource="bg.jpg" />
56: </Button.Foreground>
57: </Button>
58: </Grid>
59: </Window>

在这个DrawingBrush中,使用到的线性渐变,但它不像上篇例子中的多个图形的组全,它是一个完整的Brush,可以直接作为一个Resource使用。
三、VisualBrush
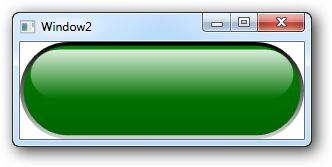
使用VisualBrush可以将任意的WPF元素(Visual类的子类)组合在一起,从而形成一个Brush。例如实现上例中DrawingBrush实现的效果:
1: <Window x:Class="WPF_30.Window2"
2: xmlns="http://schemas.microsoft.com/winfx/2006/xaml/presentation"
3: xmlns:x="http://schemas.microsoft.com/winfx/2006/xaml"
4: Title="Window2" Height="135" Width="300">
5: <Window.Resources>
6: <VisualBrush x:Key="MyVisualBrush">
7: <VisualBrush.Visual>
8: <Grid Width="80" Height="26">
9: <Grid.RowDefinitions>
10: <RowDefinition Height="2*" />
11: <RowDefinition Height="*" />
12: </Grid.RowDefinitions>
13: <Rectangle Grid.RowSpan="2" RadiusX="13" RadiusY="13">
14: <Rectangle.Fill>
15: <LinearGradientBrush StartPoint="0,0" EndPoint="0,1">
16: <GradientStop Color="Green" Offset="0" />
17: <GradientStop Color="DarkGreen" Offset="1" />
18: </LinearGradientBrush>
19: </Rectangle.Fill>
20: <Rectangle.Stroke>
21: <LinearGradientBrush StartPoint="0,0" EndPoint="0,1">
22: <GradientStop Color="Black" Offset="0" />
23: <GradientStop Color="LightGray" Offset="1" />
24: </LinearGradientBrush>
25: </Rectangle.Stroke>
26: </Rectangle>
27:
28: <Rectangle Margin="3,2" RadiusX="8" RadiusY="12">
29: <Rectangle.Fill>
30: <LinearGradientBrush StartPoint="0,0" EndPoint="0,1">
31: <GradientStop Color="#dfff" Offset="0" />
32: <GradientStop Color="#0fff" Offset="1" />
33: </LinearGradientBrush>
34: </Rectangle.Fill>
35: </Rectangle>
36:
37: </Grid>
38: </VisualBrush.Visual>
39: </VisualBrush>
40: </Window.Resources>
41: <Grid>
42: <Rectangle Fill="{StaticResource MyVisualBrush}" />
43: </Grid>
44: </Window>

需注意的是,如果使用DrawingBrush可以实现的效果,尽量使用DrawingBrush而不是VisualBrush,以提高应用程序的性能。
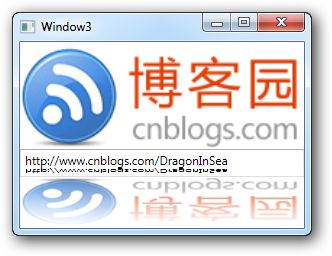
再例如定义一个带“镜面”效果的Brush。
1: <Window x:Class="WPF_30.Window3"
2: xmlns="http://schemas.microsoft.com/winfx/2006/xaml/presentation"
3: xmlns:x="http://schemas.microsoft.com/winfx/2006/xaml"
4: Title="Window3" Height="224" Width="300">
5: <Grid>
6: <Grid.RowDefinitions>
7: <RowDefinition />
8: <RowDefinition Height="60"/>
9: </Grid.RowDefinitions>
10:
11: <Grid x:Name="mainUI" IsSharedSizeScope="True" Background="#EEE">
12: <Grid.RowDefinitions>
13: <RowDefinition Height="Auto" />
14: <RowDefinition Height="Auto"/>
15: </Grid.RowDefinitions>
16: <Image Source="cnblogs.gif" Grid.Row="0" />
17: <TextBox Text="http://www.cnblogs.com/DragonInSea" Grid.Row="1" />
18: </Grid>
19:
20: <Rectangle Grid.Row="1">
21: <Rectangle.LayoutTransform>
22: <ScaleTransform ScaleY="-1" />
23: </Rectangle.LayoutTransform>
24:
25: <Rectangle.Fill>
26: <VisualBrush Visual="{Binding ElementName=mainUI}" />
27: </Rectangle.Fill>
28:
29: <Rectangle.OpacityMask>
30: <LinearGradientBrush StartPoint="0,0" EndPoint="0,1">
31: <GradientStop Offset="0" Color="Transparent" />
32: <GradientStop Offset="1" Color="White" />
33: </LinearGradientBrush>
34: </Rectangle.OpacityMask>
35: </Rectangle>
36:
37: </Grid>
38: </Window>
