Android学习笔记30:列表ListView控件的使用
在Android开发中,ListView是比较常用的控件,它以列表的形式显示具体内容,并且能够根据数据的长度自适应显示。 在ListView中可以根据需要显示自定义的列表内容,包括文字(TextView)、图片(ImageView)、按钮(Button)等,以此构成图文并茂的显示效果。
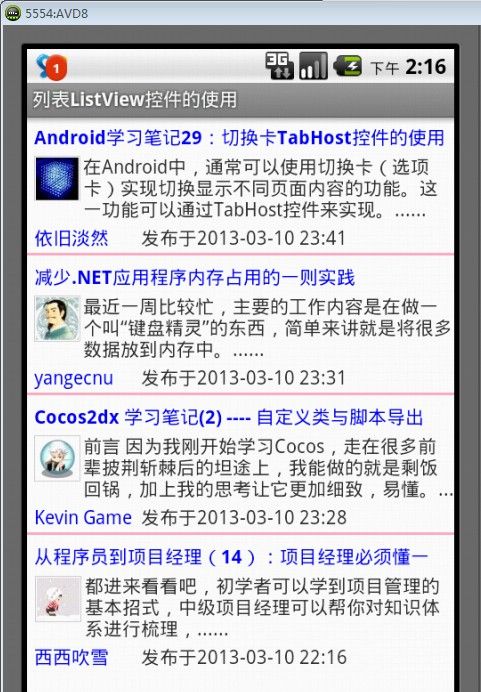
在本篇博文中,将使用ListView控件实现简单的博客园首页博文条目显示效果,如图1所示。
图1 ListView实例效果图
1.界面布局
由图1的ListView实例效果图可以看出,在该ListView控件中,我们添加了四条列表项,而每一个列表项都是由五部分构成的,分别是:博文题目(TextView)、作者头像(ImageView)、博文概要(TextView)、作者昵称(TextView)和发布日期(TextView)。
我们需要自己定义一个xml布局文件,来对ListView控件的列表项进行布局,以符合我们的式样需求。这里,我定义了一个名为“listviewitem”的xml布局文件,用来对列表项中的五个控件进行布局,其具体内容如下:
 1   <?xml version="1.0" encoding="utf-8"?>
 2   <LinearLayout xmlns:android="http://schemas.android.com/apk/res/android"
 3       android:descendantFocusability="afterDescendants"
 4       android:layout_width="match_parent"
 5       android:layout_height="match_parent"
 6       android:orientation="vertical" >
 7
 8       <!-- 博文题目 -->
 9       <TextView
10           android:id="@+id/title"
11           android:layout_marginLeft="5dp"
12           android:layout_marginTop="5dp"
13           android:layout_width="match_parent"
14           android:layout_height="wrap_content"
15           android:textStyle="bold"
16           android:textColor="#0000FF"
17           android:lines="1"    >
18       </TextView>
19
20       <!-- 作者头像和博文概要 -->
21       <LinearLayout
22           android:layout_width="match_parent"
23           android:layout_height="wrap_content"
24           android:layout_marginTop="2dp"
25           android:layout_marginLeft="5dp"
26           android:orientation="horizontal"    >
27           <ImageView
28               android:id="@+id/photograph"
29               android:layout_marginTop="2dp"
30               android:layout_width="wrap_content"
31               android:layout_height="wrap_content" ></ImageView>
32           <TextView
33               android:id="@+id/summary"
34               android:layout_marginLeft="2dp"
35               android:layout_width="wrap_content"
36               android:layout_height="wrap_content"
37               android:lines="3"    ></TextView>
38       </LinearLayout>
39
40       <!-- 作者昵称和发布日期 -->
41       <LinearLayout
42           android:layout_width="match_parent"
43           android:layout_height="wrap_content"
44           android:layout_marginLeft="5dp"
45           android:layout_marginTop="2dp"
46           android:layout_marginBottom="2dp"
47           android:orientation="horizontal"    >
48           <TextView
49               android:id="@+id/author"
50               android:layout_width="80dp"
51               android:layout_height="wrap_content"
52               android:textColor="#0000FF"    ></TextView>
53           <TextView
54               android:id="@+id/publishtime"
55               android:layout_width="wrap_content"
56               android:layout_height="wrap_content"    ></TextView>
57       </LinearLayout>
58
59   </LinearLayout>
可以看出,在该布局文件中,使用了LinearLayout的垂直布局方式将每个列表项分成了上中下三部分,上方显示博文题目,中间则使用LinearLayout的水平布局方式显示作者头像和博文概要,下方同样使用LinearLayout的水平布局方式显示作者昵称和发布日期。
2.ListView的xml属性
ListView的xml属性如图2所示。
图2 ListView的xml属性
其中,android:divider[Drawable/Color]用于设置相邻两个列表项之间的分界线式样;android:dividerHeight[dimension]用于设置相邻两个列表项之间的分界线高度;android:entries[array resource]用于将静态数组中的内容直接填充到ListView列表中。
根据以上的ListView的xml属性介绍,我们便可以activity_main.xml布局文件中设置ListView的属性如下:
 1   <LinearLayout xmlns:android="http://schemas.android.com/apk/res/android"
 2       xmlns:tools="http://schemas.android.com/tools"
 3       android:layout_width="match_parent"
 4       android:layout_height="match_parent"
 5       android:orientation="vertical"    >
 6
 7       <ListView
 8           android:id="@+id/listview"
 9           android:layout_width="match_parent"
10           android:layout_height="wrap_content"
11           android:divider="@drawable/dividerimage"    >
12       </ListView>
13
14   </LinearLayout>
其中,我们设置了相邻两个列表项之间的分界线式样为一根粉色的分界线。
3.数据加载
如何将数据加载到ListView控件的各个列表项中是使用ListView控件的关键。
通过查看ListView的API帮助文档,我们可以找到相关的设置ListView控件的适配器的方法如下:
public void setAdapter (ListAdapter adapter);
不难看出,ListView控件的适配器类型为ListAdapter,而ListAdapter的子类有ArrayAdapter<T>、BaseAdapter、CursorAdapter、HeaderViewListAdapter、SimpleAdapter、ResourceCursorAdapter、SimpleCursorAdapter和WrapperListAdapter,所以我们可以使用SimpleAdapter作为ListView控件的适配器使用。
简单适配器SimpleAdapter具有良好的可扩充性,可方便的将xml中的控件与所要填充的数据匹配起来。具体实现方法如下:
 1    /*
 2      * Function     :    onCreate()
 3      * Author       :    博客园-依旧淡然
 4      */
 5     public void onCreate(Bundle savedInstanceState) {
 6         super.onCreate(savedInstanceState);
 7         setContentView(R.layout.activity_main);
 8
 9         mListView = (ListView)this.findViewById(R.id.listview);
10
11         //创建简单适配器SimpleAdapter
12         simpleAdapter = new SimpleAdapter(this, this.getItem(), R.layout.listviewitem,
13                 new String[] {"itemTitle","itemPhoto", "itemSummary", "itemAuthor", "itemPublishtime"},
14                 new int[] {R.id.title, R.id.photograph, R.id.summary, R.id.author, R.id.publishtime});
15
16         //加载SimpleAdapter到ListView中
17         mListView.setAdapter(simpleAdapter);
18     }
在如上的代码中,用到了自定义的getItem()方法,该方法的作用是获取所有的列表内容。我们可以使用HashMap来储存一个列表项中的每一条数据(通过键值对的形式),这样每一个HashMap便储存了一个列表项的所有信息,然后再将HashMap添加到ArrayList中进行储存。如此,我们便可以通过使用自定义的getItem()方法来获取所有的列表内容了。具体的实现方法如下:
 1   /*
 2      * Function     :    获取所有的列表内容
 3      * Author       :    博客园-依旧淡然
 4      */
 5     public ArrayList<HashMap<String, Object>> getItem() {
 6         ArrayList<HashMap<String, Object>> item = new ArrayList<HashMap<String, Object>>();
 7         for (int i = 0; i < ListViewItemData.getItemNum(); i++) {
 8             HashMap<String, Object> map = new HashMap<String, Object>();
 9             map.put("itemTitle", ListViewItemData.getTitle(i));
10             map.put("itemPhoto", ListViewItemData.getPhotoResId(i));
11             map.put("itemSummary", ListViewItemData.getSummary(i));
12             map.put("itemAuthor", ListViewItemData.getAuthor(i));
13             map.put("itemPublishtime", ListViewItemData.getPublishtime(i));
14             item.add(map);
15         }
16         return item;
17     }
在如上的代码中,ListViewItemData是自定义的一个类,通过静态数组的形式储存了所有列表项中所要显示的文本和图片资源。
4.事件监听
我们可以为ListView控件设置事件监听器OnItemClickListener,用来对用户的点击事件进行监听,并根据用户所选列表项的不同进行与之相对应的响应。我们需要实现OnItemClickListener接口中的抽象方法onItemClick(),如下:
public void onItemClick(AdapterView<?> parent, View view, int position, long id);
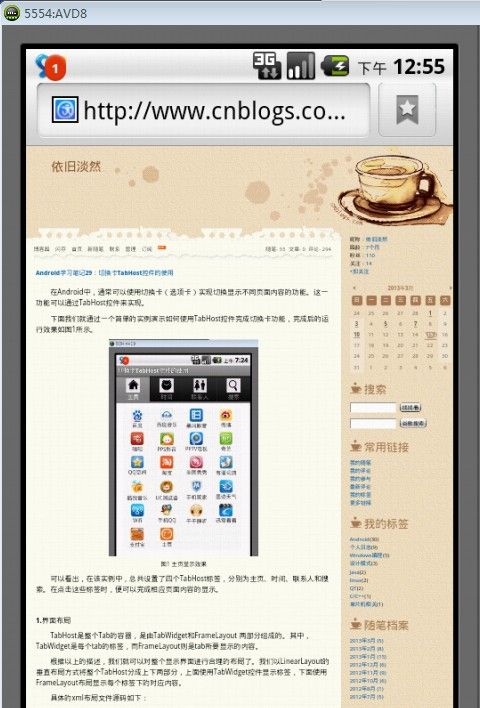
其中,参数position表示各个列表项在ListView控件中所处的位置,自上往下从0开始算起。在该实例中,当点击第一个列表项时,将关闭当前的Activity,并打开一个新的Activity,在新的Activity中,我们通过使用WebView控件来载入我的博客首页,如图3所示。
图3 通过WebView控件载入网页
5.待完善点
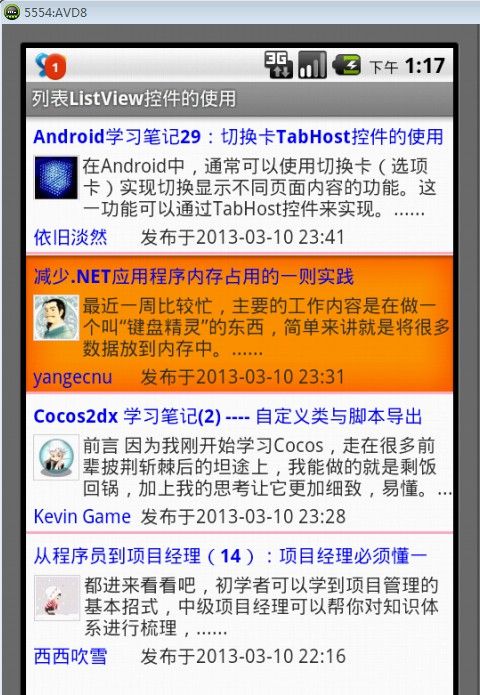
在该实例中,只能获取整个列表项的焦点,并响应整个列表项的点击事件,如图4所示。
图4 ListView控件获取焦点示例
如何让每个列表项中的各个子项(比如:博文标题、作者)都可以获取焦点,并响应点击事件,将是后续学习和完善的一个方面。
此外,在该实例中,每个列表项中的内容,都是储存在自定义的ListViewItemData类中的。显然这是不符合实际开发需求的,正确的做法应当是通过解析来自网络的JSON(或XML)数据,然后将其填充到ListView控件列表中。所以,如何解析JSON数据也是后续的一个学习方向。


