Spring Boot 中文参考指南
Spring Boot 版本 2.7.8
原文:https://docs.spring.io/spring-boot/docs/2.7.8/reference/htmlsingle/
—
笔者注:
Spring Boot 3.x 第一个 GA 版本已于22年底发布,2.7.8 是2.x 的最后一个 GA版本,我觉得一段时间内依然会以2.x为主,该文大部分通过软件翻译,再加上自己的经验理解进行整理和注释,目的用来作为手册查找和知识扫盲,如对内容有不理解的地方欢迎交流。
这篇主要是Spring Boot 参考指南中的“Spring Boot 开发”和“Spring Boot 核心功能”
Spring Boot 中文参考指南(一)
Spring Boot 中文参考指南(二)-Web
Spring Boot 中文参考指南(三)-Data
Spring Boot 中文参考指南(四)-消息
Spring Boot 中文参考指南(五)-IO
Spring Boot 中文参考指南(六)-容器镜像
Spring Boot 中文参考指南(七)-生产就绪功能
Spring Boot 中文参考指南(八)-部署
Spring Boot 中文参考指南(九)-Spring Boot CLI
Spring Boot 中文参考指南(十)-构建工具
Spring Boot 中文参考指南(十一)-“How-to” 指南
Spring Boot 中文参考指南(十二)-附录
1. 文档预览
2. 开始
本节对Spring Boot进行介绍 以及如何安装,我们将引导您构建第一个Spring Boot 应用,同时讨论一些核心准则。
2.1 Spring Boot 介绍
Spring Boot 帮助您创建可以独立运行的,生产级的Spring 应用程序。
您创建的Spring Boot 应用程序,可以通过java -jar 或者 传统的war包方式启动,另外还提供了一个运行spring scripts的命令行工具。
2.2 系统要求
Spring Boot 2.7.8 需要Java8 ,兼容Java19,Spring 版本5.3.25或更高。
| 构建工具 | 版本 |
|---|---|
| Maven | 3.5+ |
| Gradle | 6.8.x, 6.9.x, and 7.x |
2.2.1 Servlet 容器
Spring Boot 支持如下嵌入式servlet容器:
| 名称 | Servlet 版本 |
|---|---|
| Tomcat 9.0 | 4.0 |
| Jetty 9.4 | 3.1 |
| Jetty 10.0 | 4.0 |
| Undertow 2.0 | 4.0 |
您也可以将Spring Boot部署到任何兼容servlet 3.1+的容器中。
2.3 Spring Boot 安装
安装之前使用java -version检查 Java 版本,Spring Boot 2.7.8 需要Java8 或更高的版本。
2.3.1 面向Java开发人员
Maven 安装
Spring Boot 依赖项使用org.springframework.boot groupId。通常,您的Maven POM文件继承自spring-boot-starter-parent ,并声明一个或多个“Starters”的依赖关系。
另外Spring Boot 还提供了可选的Maven 插件来创建可执行的jar,更多信息参考 Spring Boot Maven 插件文档。
Gradle 安装
同Maven,Spring Boot 也提供了一个 Gradle插件,用于创建可执行的jar,更多信息参考 Spring Boot Gradle 插件文档。
2.3.2 安装Spring Boot CLI
Spring Boot CLI是一个命令行工具,可用于快速创建Spring Boot 初始化应用程序,这在没有IDE的情况下非常有用。
手动安装
您可以从如下地址下载Spring CLI发行版本:
- spring-boot-cli-2.7.8-bin.zip
- spring-boot-cli-2.7.8-bin.tar.gz
另外提供了 快照列表
下载后,按照解压缩存档中的INSTALL.txt说明进行操作。.zip文件的bin/目录中有一个spring脚本(适用于Windows的spring.bat),或者可以使用jar -jar 运行 jar包。
使用SDKMAN安装
SDKMAN(软件开发工具包管理器)可用于管理各种二进制SDK版本,包括Groovy和Spring Boot CLI。从sdkman.io获取并使用以下命令安装 Spring Boot:
$ sdk install springboot
$ spring --version
Spring CLI v2.7.8
如果您为 CLI 开发功能并希望访问您构建的版本,请使用以下命令:
$ sdk install springboot dev /path/to/spring-boot/spring-boot-cli/target/spring-boot-cli-2.7.8-bin/spring-2.7.8/
$ sdk default springboot dev
$ spring --version
Spring CLI v2.7.8
前面的说明安装了一个spring名为instance 的本地dev实例。它指向您的目标构建位置,因此每次您重建 Spring Boot 时,spring它都是最新的。
您可以通过运行以下命令来查看它:
$ sdk ls springboot

================================================================================
Available Springboot Versions
================================================================================
> + dev
* 2.7.8

================================================================================
+ - local version
* - installed
> - currently in use
================================================================================
使用OSX Homebrew安装
在Mac上可以使用Homebrew安装。
$ brew tap spring-io/tap
$ brew install spring-boot
Homebrew 安装 spring 到 /usr/local/bin.
如果找不到这个命令,尝试使用
brew update更新后重试
使用MacPorts安装
在Mac上使用MacPorts 安装。
$ sudo port install spring-boot-cli
使用 Windows Scoop安装
在Window使用Scoop安装。
> scoop bucket add extras
> scoop install springboot
Scoop 安装 spring 到 ~/scoop/apps/springboot/current/bin
如果提示命令不存,请使用
scoop update更新后再重试
Spring CLI 快速启动示例
首先创建一个名为app.groovy的文件。
@RestController
class ThisWillActuallyRun {

    @RequestMapping("/")
    String home() {
        "Hello World!"
    }

}
然后使用如下命令运行:
$ spring run app.groovy
第一次运行需要下载依赖,会比较慢,后面运行会快很多。
最后,使用浏览器打开localhost:8080,输出
Hello World!
2.4 开发第一个Spring Boot 应用程序
建议使用start.spring.io 创建Spring Boot 应用程序。
3. 升级Spring Boot
3.1 从1.x升级
从1.x升级,可以查看GitHub wiki上的升级指南
3.2 升级到最新的功能版本
Spring Boot提供了一种方法来分析应用程序的环境并在启动时打印诊断信息,还可以在运行时临时迁移属性,要启动该功能,在项目中添加以下依赖:
<dependency>
    <groupId>org.springframework.bootgroupId>
    <artifactId>spring-boot-properties-migratorartifactId>
    <scope>runtimescope>
dependency>
完成升级后,删除该依赖。
4. Spring Boot开发
4.1 构建系统
可以使用Maven、Gradle、Ant 构建系统
4.1.1 Starters
所有官方启动器都遵循类似的命名模式:spring-boot-starter-*,其中*是特定类型的应用程序,如果是自己创建的启动器一般以项目名称开头,如thirdpartyproject-spring-boot-starter。
Spring Boot 提供了以下应用启动器org.springframework.boot:
| 名称 | 描述 |
|---|---|
spring-boot-starter |
Core starter,包括自动配置支持、日志记录和 YAML |
spring-boot-starter-activemq |
使用 Apache ActiveMQ 的 JMS 消息传递启动器 |
spring-boot-starter-amqp |
使用 Spring AMQP 和 Rabbit MQ 的启动器 |
spring-boot-starter-aop |
使用 Spring AOP 和 AspectJ 进行面向方面编程的入门 |
spring-boot-starter-artemis |
使用 Apache Artemis 的 JMS 消息传递启动器 |
spring-boot-starter-batch |
使用 Spring Batch 的启动器 |
spring-boot-starter-cache |
使用 Spring Framework 的缓存支持的 Starter |
spring-boot-starter-data-cassandra |
使用 Cassandra 分布式数据库和 Spring Data Cassandra 的 Starter |
spring-boot-starter-data-cassandra-reactive |
使用 Cassandra 分布式数据库和 Spring Data Cassandra Reactive 的 Starter |
spring-boot-starter-data-couchbase |
使用 Couchbase 面向文档的数据库和 Spring Data Couchbase 的启动器 |
spring-boot-starter-data-couchbase-reactive |
使用 Couchbase 面向文档的数据库和 Spring Data Couchbase Reactive 的 Starter |
spring-boot-starter-data-elasticsearch |
使用 Elasticsearch 搜索和分析引擎以及 Spring Data Elasticsearch 的 Starter |
spring-boot-starter-data-jdbc |
使用 Spring Data JDBC 的启动器 |
spring-boot-starter-data-jpa |
将 Spring Data JPA 与 Hibernate 一起使用的启动器 |
spring-boot-starter-data-ldap |
使用 Spring Data LDAP 的启动器 |
spring-boot-starter-data-mongodb |
使用 MongoDB 面向文档的数据库和 Spring Data MongoDB 的启动器 |
spring-boot-starter-data-mongodb-reactive |
使用 MongoDB 文档型数据库和 Spring Data MongoDB Reactive 的 Starter |
spring-boot-starter-data-neo4j |
使用 Neo4j 图形数据库和 Spring Data Neo4j 的启动器 |
spring-boot-starter-data-r2dbc |
使用 Spring Data R2DBC 的启动器 |
spring-boot-starter-data-redis |
用于将 Redis 键值数据存储与 Spring Data Redis 和 Lettuce 客户端一起使用的 Starter |
spring-boot-starter-data-redis-reactive |
将 Redis 键值数据存储与 Spring Data Redis 反应式和 Lettuce 客户端一起使用的启动器 |
spring-boot-starter-data-rest |
使用 Spring Data REST 通过 REST 公开 Spring Data 存储库的 Starter |
spring-boot-starter-freemarker |
使用 FreeMarker 视图构建 MVC Web 应用程序的启动器 |
spring-boot-starter-graphql |
使用 Spring GraphQL 构建 GraphQL 应用程序的 Starter |
spring-boot-starter-groovy-templates |
使用 Groovy 模板视图构建 MVC web 应用程序的启动器 |
spring-boot-starter-hateoas |
使用 Spring MVC 和 Spring HATEOAS 构建基于超媒体的 RESTful Web 应用程序的启动器 |
spring-boot-starter-integration |
使用 Spring Integration 的启动器 |
spring-boot-starter-jdbc |
将 JDBC 与 HikariCP 连接池一起使用的启动器 |
spring-boot-starter-jersey |
使用 JAX-RS 和 Jersey 构建 RESTful Web 应用程序的启动器。的替代品spring-boot-starter-web |
spring-boot-starter-jooq |
使用 jOOQ 通过 JDBC 访问 SQL 数据库的启动器。替代spring-boot-starter-data-jpa或spring-boot-starter-jdbc |
spring-boot-starter-json |
读写json的starter |
spring-boot-starter-jta-atomikos |
使用 Atomikos 的 JTA 事务启动器 |
spring-boot-starter-mail |
使用 Java Mail 和 Spring Framework 的电子邮件发送支持的 Starter |
spring-boot-starter-mustache |
使用 Mustache 视图构建 Web 应用程序的启动器 |
spring-boot-starter-oauth2-client |
使用 Spring Security 的 OAuth2/OpenID Connect 客户端功能的 Starter |
spring-boot-starter-oauth2-resource-server |
使用 Spring Security 的 OAuth2 资源服务器功能的启动器 |
spring-boot-starter-quartz |
使用 Quartz 调度器的启动器 |
spring-boot-starter-rsocket |
用于构建 RSocket 客户端和服务器的启动器 |
spring-boot-starter-security |
使用 Spring Security 的启动器 |
spring-boot-starter-test |
用于使用 JUnit Jupiter、Hamcrest 和 Mockito 等库测试 Spring Boot 应用程序的 Starter |
spring-boot-starter-thymeleaf |
使用 Thymeleaf 视图构建 MVC Web 应用程序的启动器 |
spring-boot-starter-validation |
将 Java Bean Validation 与 Hibernate Validator 结合使用的 Starter |
spring-boot-starter-web |
用于使用 Spring MVC 构建 Web(包括 RESTful)应用程序的 Starter。使用 Tomcat 作为默认的嵌入式容器 |
spring-boot-starter-web-services |
使用 Spring Web 服务的启动器 |
spring-boot-starter-webflux |
用于使用 Spring Framework 的 Reactive Web 支持构建 WebFlux 应用程序的 Starter |
spring-boot-starter-websocket |
使用 Spring Framework 的 MVC WebSocket 支持构建 WebSocket 应用程序的 Starter |
除了应用程序启动器之外,还可以使用以下启动器来添加*生产就绪*功能:
| 名称 | 描述 |
|---|---|
spring-boot-starter-actuator |
使用 Spring Boot Actuator 的 Starter,它提供生产就绪功能来帮助您监控和管理您的应用程序 |
最后,Spring Boot 还包括以下启动器:
| 名称 | 描述 |
|---|---|
spring-boot-starter-jetty |
使用 Jetty 作为嵌入式 servlet 容器的启动器的替代品spring-boot-starter-tomcat |
spring-boot-starter-log4j2 |
使用 Log4j2 进行日志记录的启动器的替代品spring-boot-starter-logging |
spring-boot-starter-logging |
使用 Logback 进行日志记录的启动器。默认日志记录启动器 |
spring-boot-starter-reactor-netty |
使用 Reactor Netty 作为嵌入式响应式 HTTP 服务器的启动器。 |
spring-boot-starter-tomcat |
将 Tomcat 用作嵌入式 servlet 容器的启动器。使用的默认 servlet 容器启动器spring-boot-starter-web |
spring-boot-starter-undertow |
使用 Undertow 作为嵌入式 servlet 容器的启动器的替代品spring-boot-starter-tomcat |
其他社区贡献的starter列表,请参阅GitHub 上模块 中的自述文件。
spring-boot-starters
4.2 构建代码
Spring Boot 没有固定的代码布局,但是有些实践提供参考。
4.2.1 "default"包
当一个类不包含package时,它被认为在“default package”中。通常不建议使用“default package”,它可能会导致@ComponentScan、@ConfigurationPropertiesScan、@EntityScan或@SpringBootApplication 注解出现问题,我们应该遵循推荐的包命名方式,比如com.example.project
4.2.2 主程序类
通常建议将主程序类放在其他类之上的根包中,@SpringBootApplication通常放在主类中,其隐式的定义了基本的包搜索功能,其内部引入了@EnableAutoConfiguration和@ComponentScan。
下面是一个典型的布局:
com
 +- example
     +- myapplication
         +- MyApplication.java
         |
         +- customer
         |   +- Customer.java
         |   +- CustomerController.java
         |   +- CustomerService.java
         |   +- CustomerRepository.java
         |
         +- order
             +- Order.java
             +- OrderController.java
             +- OrderService.java
             +- OrderRepository.java
MyApplication.java 定义了一个main方法以及@SpringBootApplication,如下所示:
import org.springframework.boot.SpringApplication;
import org.springframework.boot.autoconfigure.SpringBootApplication;

@SpringBootApplication
public class MyApplication {

    public static void main(String[] args) {
        SpringApplication.run(MyApplication.class, args);
    }

}
4.3 配置类
Spring Boot 支持使用Java进行配置,虽然SpringApplication 跟XML可以一起使用,但还是建议@Configuration是独立的类。
4.3.1 导入其他的配置类
你不需要把所有的@Configuration 放到一个类中,该@Import注解可用于导入其他的配置类,或者可以使用@ComponentScan自动获取所有的Spring 组件,包括@Configuration类。
4.3.2 导入XML配置
如果你还是要使用XML配置,依然建议使用@Configuration类,然后使用@ImportResource来加载XML配置。
4.4 自动配置
Spring Boot会尝试将starter自动配置到应用程序,比如引入了HSQLDB的starter,但是没有手动配置任何数据库连接bean,那么Spring Boot 会自动配置一个内存数据库。
开启自动配置,需要添加@EnableAutoConfiguration或者@SpringBootApplication。
4.4.1 替换自动配置
自动配置是非侵入式的,任何时候都可以使用自定义配置替换自动配置的指定部分,比如,添加了DataSource bean,默认的嵌入式数据库就会被替换。
使用--debug启动应用程序,可以打印出当前应用了哪些自动配置。
4.4.2 禁用指定的自动配置类
如果想要禁用指定的自动配置类,可以使用@SpringBootApplication的exclude属性,如:
import org.springframework.boot.autoconfigure.SpringBootApplication;
import org.springframework.boot.autoconfigure.jdbc.DataSourceAutoConfiguration;

@SpringBootApplication(exclude = { DataSourceAutoConfiguration.class })
public class MyApplication {

}
如果排除的类不在类路径中,可以使用excludeName指定类的完全限定名,另外如果不用@SpringBootApplication,@EnableAutoConfiguration的exclude和excludeName也是可用的。
最后也能用spring.autoconfigure.exclude的配置来排除自动配置类。
4.5 Spring Beans和依赖注入
通常建议使用构造函数注入依赖项,和@ComponentScan查找bean。
如果是按照4.2的方式构建的代码,则可以使用@ComponentScan不带任何参数或者使用@SpringBootApplication其已经包含了@ComponentScan注解,这样所有的组件(@Component、@Service、@Repository、@Controller和其他)都会自动注册为Spring Beans。
如下示例表示一个@Service使用构造函数来注入RiskAssessor Bean。
import org.springframework.stereotype.Service;

@Service
public class MyAccountService implements AccountService {

    private final RiskAssessor riskAssessor;

    public MyAccountService(RiskAssessor riskAssessor) {
        this.riskAssessor = riskAssessor;
    }

    // ...

}
如果一个Bean有多个构造函数,需要使用@Autowired标记哪个需要Spring 注入:
import java.io.PrintStream;

import org.springframework.beans.factory.annotation.Autowired;
import org.springframework.stereotype.Service;

@Service
public class MyAccountService implements AccountService {

    private final RiskAssessor riskAssessor;

    private final PrintStream out;

    @Autowired
    public MyAccountService(RiskAssessor riskAssessor) {
        this.riskAssessor = riskAssessor;
        this.out = System.out;
    }

    public MyAccountService(RiskAssessor riskAssessor, PrintStream out) {
        this.riskAssessor = riskAssessor;
        this.out = out;
    }

    // ...

}
使用构造函数注入应该使用
final标记,表示后面不能再被修改。
4.6 使用@SpringBootApplication 注解
使用@SpringBootApplication注解可以启用如下三个功能:
-
@EnableAutoConfiguration: 启用Spring Boot 的自动配置机制 -
@ComponentScan @Component:在应用程序所在的包上启用扫描 -
@SpringBootConfiguration: 允许在上下文中注册额外的 beans 或导入额外的配置类。Spring 标准的替代方案@Configuration,有助于在集成测试中进行配置检测。
import org.springframework.boot.SpringApplication;
import org.springframework.boot.autoconfigure.SpringBootApplication;

// Same as @SpringBootConfiguration @EnableAutoConfiguration @ComponentScan
@SpringBootApplication
public class MyApplication {

    public static void main(String[] args) {
        SpringApplication.run(MyApplication.class, args);
    }

}
如果不想使用@SpringBootApplication,也可以单独使用注解,如下示例并未使用@ComponentScan 自动扫描功能,而使用显示导入(@Import):
import org.springframework.boot.SpringApplication;
import org.springframework.boot.SpringBootConfiguration;
import org.springframework.boot.autoconfigure.EnableAutoConfiguration;
import org.springframework.context.annotation.Import;

@SpringBootConfiguration(proxyBeanMethods = false)
@EnableAutoConfiguration
@Import({ SomeConfiguration.class, AnotherConfiguration.class })
public class MyApplication {

    public static void main(String[] args) {
        SpringApplication.run(MyApplication.class, args);
    }

}
4.7 运行应用程序
4.7.1 从IDE运行
4.7.2 作为打包应用程序运行
使用java -jar运行:
$ java -jar target/myapplication-0.0.1-SNAPSHOT.jar
也可以附加远程调式器:
$ java -Xdebug -Xrunjdwp:server=y,transport=dt_socket,address=8000,suspend=n \
       -jar target/myapplication-0.0.1-SNAPSHOT.jar
4.7.3 使用Maven插件
Spring Boot Maven 插件包含一个run命令:
$ mvn spring-boot:run
另外还可以使用MAVEN_OPTS 设置环境变量:
$ export MAVEN_OPTS=-Xmx1024m
4.7.4 使用Gradle插件
Gradle插件包含一个bootRun命令:
$ gradle bootRun
使用JAVA_OPTS设置环境变量:
$ export JAVA_OPTS=-Xmx1024m
4.7.5 热插拨
Spring Boot 的热插拨基于JVM,JVM在某种程序上受限于可以替换的字节码,对于完整方案可以使用JRebel 。
spring-boot-devtools模块还包括对应用程序快速重启的支持,详细信息查看后面的热插拔“操作方法”。
4.8 开发者工具
Spring Boot 提供spring-boot-devtools 模块提供开发时的额外功能,要支持该功能,需要将依赖添加到项目中:
Maven
<dependencies>
    <dependency>
        <groupId>org.springframework.bootgroupId>
        <artifactId>spring-boot-devtoolsartifactId>
        <optional>trueoptional>
    dependency>
dependencies>
Gradle
dependencies {
    developmentOnly("org.springframework.boot:spring-boot-devtools")
}
默认情况下,打包的应用程序不包含devtools,如果想要使用某个远程devtool特性,在Maven插件中配置,excludeDevtools为false,Gradle插件中配置task任务以包含
developmentOnly,如tasks.named("bootWar") { classpath configurations.developmentOnly }
当打包生产应用程序时,开发者工具将被自动禁用。如果您的应用程序是从一个特殊的类加载器启动的或者 使用
java -jar,那么会被认为是一个"生产的应用程序"。可以使用spring.devtools.restart.enabled来控制,要开启devtools,使用-Dspring.devtools.restart.enabled=true启动,要禁用devtools,排除依赖项或者使用-Dspring.devtools.restart.enabled=false启动。
Maven 中使用optional,Gradle 使用 developmentOnly,表示可以防止devtools被传递到项目的其他模块。
4.8.1 诊断类加载问题
开发者工具的重启功能是通过使用两个类加载器实现的,对于大不多应用程序效果很好,但是有时候会导致类加载问题,特别是在多模块项目中。
要判断是不是由于这个问题,可以尝试禁用重启,使用spring.devtools.restart.enabled=false属性禁用它。
另外可以 自定义重启类加载器,自定义由哪个类加载加载,详见[4.8.3自动重启](#4.8.3 自动重启)。
4.8.2 属性默认值
Spring Boot 的一些库使用缓存来提高性能,比如,模版引擎会缓存编译后的模版,以此避免重复解析,但这样在开发过程中我们就不能即时看到模版的变更。spring-boot-devtools 默认禁用了缓存。
下表列出了所有应用的属性:
| 名称 | 默认值 |
|---|---|
server.error.include-binding-errors |
always |
server.error.include-message |
always |
server.error.include-stacktrace |
always |
server.servlet.jsp.init-parameters.development |
true |
server.servlet.session.persistent |
true |
spring.freemarker.cache |
false |
spring.graphql.graphiql.enabled |
true |
spring.groovy.template.cache |
false |
spring.h2.console.enabled |
true |
spring.mustache.servlet.cache |
false |
spring.mvc.log-resolved-exception |
true |
spring.template.provider.cache |
false |
spring.thymeleaf.cache |
false |
spring.web.resources.cache.period |
0 |
spring.web.resources.chain.cache |
false |
如果不想应用属性默认值,可以在应用程序配置文件中配置
spring.devtools.add-properties=false
在开发WEB应用的时候,可以开启DEBUG日志,这样会显示请求、正在处理的程序,响应结果和其他详细信息,如果希望显示所有的详细信息(比如潜在的敏感信息),可以打开spring.mvc.log-request-details或spring.codec.log-request-details。
⚠️笔者注:
开启spring.mvc.log-request-details 后的日志
关闭spring.mvc.log-request-details后的日志:


4.8.3 自动重启
只要类路径上的文件发生变更,使用了spring-boot-devtools的应用程序就会自动重启,但是某些资源(如静态资源和视图模版)不需要重启应用程序。
触发重启的方法:
由于DevTools 通过监听类路径上的资源来触发重启,所以不管使用哪个IDE都需要重新编译后才能触发重启:
Eclipse 中,保存修改后会更新类文件并触发重启
IDEA中,通过Build 触发或者编辑项目的
Edit Configurations -> On Update action:Update classes and resources也可以触发重启使用构建工具,
mvn compile或者gradle build可以触发重启
⚠️笔者注:
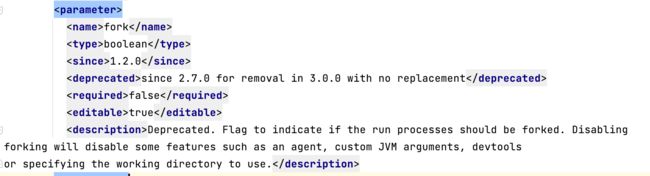
官方文档提示:使用Maven或者Gradle时,需要将
forking设置为enabled,才能触发重启。实测,新版本的
spring-boot-maven-plugin在项目引入spring-boot-devtools后会自动开启fork,如图:
并且插件的注释也标记为过期,将在3.0.0中彻底删除:
在重启期间 DevTools 依赖应用上下文的 shutdown hook 来关闭,如果设置为SpringApplication.setRegisterShutdownHook(false),就会导致其无法正常工作。
⚠️笔者注:
在笔者按照这样设置后,发现自动重启并无失效
public static void main(String[] args) {
 SpringApplication application = new SpringApplication(SpringBootDemoApplication.class);
 application.setRegisterShutdownHook(false);
 application.run(args);
}
AspectJ 切面不支持自动重启
重新启动与重新加载
Spring Boot 的重启技术通过使用两个类加载器来工作的,不会更改的类(如:第三方jar的类)被加载到基类加载器中,频繁修改的类被加载到一个重启类加载器中。当应用程序重启时,旧的重启类加载器被丢弃并创建一个新的类加载器,这种方法会被“冷启动”快得多,因为基类加载器已经可用。
如果自动重启还是比较慢的,或者遇到类加载问题,可用尝试使用重新加载技术,如JRebel,他们通过加载类时重写类来获得更快的速度。
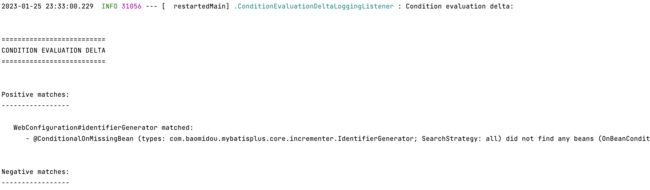
记录条件评估中的变化
默认每次自动重启应用程序的时候,都会显示一份对自动配置的变更报告(比如添加或删除bean或者设置配置属性)
禁用报告设置:
spring.devtools.restart.log-condition-evaluation-delta=false
⚠️笔者注:
开启时候的报告示例:
排除资源
某些资源在更改时并不会触发自动重启,默认情况下更改 /META-INF/maven, /META-INF/resources, /resources, /static, /public, /templates目录下的资源不会触发重启但是会触发[实时加载](#4.8.4 实时加载),如果要自定义这些排除项,可以使用spring.devtools.restart.exclude属性,比如仅排除/static和/public目录:
spring.devtools.restart.exclude=static/**,public/**
如果要保留默认的配置,并且添加新的排除项,使用spring.devtools.restart.additional-exclude。
监听其他路径文件
如果要监听不在类路径中的文件时,使用spring.devtools.restart.additional-paths属性。另外可以配合spring.devtools.restart.exclude来设置其他路径下的文件变更是触发重启还是实时加载。
禁用重启
使用spring.devtools.restart.enabled禁用重启,如果在application.properties配置,重启类加载器还是会初始化,只是不会监听文件的变更,要完全禁用需要设置系统变量spring.devtools.restart.enabled为false,如下:
import org.springframework.boot.SpringApplication;
import org.springframework.boot.autoconfigure.SpringBootApplication;

@SpringBootApplication
public class MyApplication {

    public static void main(String[] args) {
        System.setProperty("spring.devtools.restart.enabled", "false");
        SpringApplication.run(MyApplication.class, args);
    }

}
使用触发式文件
使用某个指定的文件变更来触发自动重启,使用spring.devtools.restart.trigger-file配置指定文件(不包括路径),该文件必须在类路径下。
比如:有这样一个结构的项目:
src
+- main
   +- resources
      +- .reloadtrigger
那么trigger-file的配置是
spring.devtools.restart.trigger-file=.reloadtrigger
自定义重启类加载器
默认情况下,IDE中打开的项目都使用重启类加载器,其他.jar文件使用基类加载器。使用mvn spring-boot:run或者gradle bootRun也是这样。
可以通过META-INF/spring-devtools.properties文件来自定义,spring-devtools.properties文件包含前缀为restart.exclude和restart.include的属性,include属性被重启类加载器加载,exclude属性被基类加载器排除,该属性适用类路径的正则表达式,如:
restart.exclude.companycommonlibs=/mycorp-common-[\\w\\d-\\.]+\\.jar
restart.include.projectcommon=/mycorp-myproj-[\\w\\d-\\.]+\\.jar
键必须是唯一的,只要是
restart.exclude和restart.include开头的属性都会被考虑。
META-INF/spring-devtools.properties的内容可以打包中项目中,也可以打包到库中。
已知限制
对于使用标准ObjectInputStream反序列化的对象,重新启动功能不起作用。如果您需要反序列化数据,则可能需要将Spring的ConfigurableObjectInputStream与Thread.currentThread().getContextClassLoader()结合使用。
⚠️笔者注:
这个点我觉得略过即可
4.8.4 实时加载
spring-boot-devtools包含一个嵌入式的LiveReload服务器,可用于资源变更时实时触发浏览器刷新。LiveReload 浏览器扩展可从livereload.com免费获得 Chrome、Firefox 和 Safari 。如果您不想在应用程序运行时启动 LiveReload 服务器,您可以将该spring.devtools.livereload.enabled属性设置为false.
您一次只能运行一个 LiveReload 服务器。在启动您的应用程序之前,请确保没有其他 LiveReload 服务器正在运行。如果您从 IDE 启动多个应用程序,则只有第一个应用程序支持 LiveReload。
⚠️笔者注:
这个点我觉得略过即可,浏览器手动刷新一下也不费事
4.8.5 全局设置
可以通过将以下任何文件添加到$HOME/.config/spring-boot目录来配置全局 devtools 设置:
spring-boot-devtools.propertiesspring-boot-devtools.yamlspring-boot-devtools.yml
添加到该文件的任何配置都适用于该机器上的所有Spring Boot 应用程序,例如,要将自动重启配置为使用触发式文件,可以这样配置:
spring.devtools.restart.trigger-file=.reloadtrigger
默认情况下,$HOME是用户的主目录。要自定义此位置,请设置SPRING_DEVTOOLS_HOME环境变量或spring.devtools.home系统属性。
如果在
$HOME/.config/spring-boot中找不到 devtools 配置文件,则会在根$HOME目录中搜索是否存在.spring-boot-devtools.properties文件。这允许您与不支持该$HOME/.config/spring-boot位置的旧版本 Spring Boot 上共享 devtools 全局配置。
在
.spring-boot-devtools.properties中的配置都不会影响其他的应用配置文件(如application-{profile}之类的文件),并且不支持spring-boot-devtools-.properties和spring.config.activate.on-profile 之类的配置。
配置文件监听器
FileSystemWatcher通过一定的时间间隔轮询类文件的变更来工作,然后等待预定义的静默期以确保没有更多变更。如果您发现有时候某些更改并没有及时变化,可以尝试修改spring.devtools.restart.poll-interval和spring.devtools.restart.quiet-period参数。
spring.devtools.restart.poll-interval=2s
spring.devtools.restart.quiet-period=1s
受监视的类路径目录现在每 2 秒轮询一次更改,并保持 1 秒的静默期以确保没有其他类更改。
4.8.6 远程应用
Spring Boot 支持部分远程功能,但有一定安全风险,只能在受信任的网络或SSL保护下运行,并且不能在生产环境上开启该功能。
启用该功能,确保如下配置:
<build>
    <plugins>
        <plugin>
            <groupId>org.springframework.bootgroupId>
            <artifactId>spring-boot-maven-pluginartifactId>
            <configuration>
                <excludeDevtools>falseexcludeDevtools>
            configuration>
        plugin>
    plugins>
build>
然后使用spring.devtools.remote.secret设置一个复杂的密码。
Spring WebFlux 不支持该功能
运行远程客户端应用程序
远程客户端应用程序旨在从IDE中运行。您需要使用与连接到的远程项目相同的类路径运行org.springframework.boot.devtools.RemoteSpringApplication。应用程序的单个必需参数是它连接的远程URL。
例如,如果您使用的是Eclipse或STS,并且已经部署到Cloud Foundry的项目名为my-app,则可以执行以下操作:
- 从
Run菜单中选择Run Configurations…。 - 创建一个新的
Java Application“启动配置”。 - 浏览
my-app项目。 - 使用
org.springframework.boot.devtools.RemoteSpringApplication作为主类。 - 将
https://myapp.cfapps.io添加到Program arguments(或任何远程URL)。
正在运行的远程客户端可能类似于以下列表:
  .   ____          _                                              __ _ _
 /\\ / ___'_ __ _ _(_)_ __  __ _          ___               _      \ \ \ \
( ( )\___ | '_ | '_| | '_ \/ _` |        | _ \___ _ __  ___| |_ ___ \ \ \ \
 \\/  ___)| |_)| | | | | || (_| []::::::[]   / -_) '  \/ _ \  _/ -_) ) ) ) )
  '  |____| .__|_| |_|_| |_\__, |        |_|_\___|_|_|_\___/\__\___|/ / / /
 =========|_|==============|___/===================================/_/_/_/
 :: Spring Boot Remote ::  (v2.7.8)

2023-01-19 14:18:32.205  INFO 16947 --- [           main] o.s.b.devtools.RemoteSpringApplication   : Starting RemoteSpringApplication v2.7.8 using Java 1.8.0_362 on myhost with PID 16947 (/Users/myuser/.m2/repository/org/springframework/boot/spring-boot-devtools/2.7.8/spring-boot-devtools-2.7.8.jar started by myuser in /opt/apps/)
2023-01-19 14:18:32.211  INFO 16947 --- [           main] o.s.b.devtools.RemoteSpringApplication   : No active profile set, falling back to 1 default profile: "default"
2023-01-19 14:18:32.566  INFO 16947 --- [           main] o.s.b.d.a.OptionalLiveReloadServer       : LiveReload server is running on port 35729
2023-01-19 14:18:32.584  INFO 16947 --- [           main] o.s.b.devtools.RemoteSpringApplication   : Started RemoteSpringApplication in 0.804 seconds (JVM running for 1.204)
因为远程客户端使用与真实应用程序相同的类路径,所以它可以直接读取应用程序属性。这是
spring.devtools.remote.secret属性的读取方式并传递给服务器进行身份验证。
始终建议使用
https://作为连接协议,以便加密连接并且不会截获密码。如果需要使用代理来访问远程应用程序,请配置
spring.devtools.remote.proxy.host和spring.devtools.remote.proxy.port属性。
远程更新
远程客户端以与[本地重新启动](#4.8.3 自动重启)相同的方式监视应用程序类路径以进行更改 。任何更新的资源都会被推送到远程应用程序,并且(如果需要)会触发重新启动。如果您迭代使用本地没有的云服务的功能,这将非常有用。通常,远程更新和重新启动比完全重建和部署周期快得多。
仅在远程客户端运行时监视文件。如果在启动远程客户端之前更改文件,则不会将其推送到远程服务器
⚠️笔者注:
对于目前的大型微服务集群来说,并不实用,而且操作繁琐,使用这种更新方式部分类还有可能不生效,如果只是在测试环境使用,还不如Jenkins重新打包部署
4.9 打包应用程序
使用Maven 或者Gradle 打包应用程序,生成jar包文件。
5. 核心功能
5.1 SpringApplication
SpringApplication提供了一个main()方法方便引导Spring 应用程序启动,并委托给静态方法SpringApplication.run。
import org.springframework.boot.SpringApplication;
import org.springframework.boot.autoconfigure.SpringBootApplication;

@SpringBootApplication
public class MyApplication {

    public static void main(String[] args) {
        SpringApplication.run(MyApplication.class, args);
    }

}
启动后,会看到如下信息:
  .   ____          _            __ _ _
 /\\ / ___'_ __ _ _(_)_ __  __ _ \ \ \ \
( ( )\___ | '_ | '_| | '_ \/ _` | \ \ \ \
 \\/  ___)| |_)| | | | | || (_| |  ) ) ) )
  '  |____| .__|_| |_|_| |_\__, | / / / /
 =========|_|==============|___/=/_/_/_/
 :: Spring Boot ::                (v2.7.8)

2023-01-19 14:18:33.375  INFO 17059 --- [           main] o.s.b.d.f.s.MyApplication                : Starting MyApplication using Java 1.8.0_362 on myhost with PID 17059 (/opt/apps/myapp.jar started by myuser in /opt/apps/)
2023-01-19 14:18:33.379  INFO 17059 --- [           main] o.s.b.d.f.s.MyApplication                : No active profile set, falling back to 1 default profile: "default"
2023-01-19 14:18:34.288  INFO 17059 --- [           main] o.s.b.w.embedded.tomcat.TomcatWebServer  : Tomcat initialized with port(s): 8080 (http)
2023-01-19 14:18:34.301  INFO 17059 --- [           main] o.apache.catalina.core.StandardService   : Starting service [Tomcat]
2023-01-19 14:18:34.301  INFO 17059 --- [           main] org.apache.catalina.core.StandardEngine  : Starting Servlet engine: [Apache Tomcat/9.0.71]
2023-01-19 14:18:34.371  INFO 17059 --- [           main] o.a.c.c.C.[Tomcat].[localhost].[/]       : Initializing Spring embedded WebApplicationContext
2023-01-19 14:18:34.371  INFO 17059 --- [           main] w.s.c.ServletWebServerApplicationContext : Root WebApplicationContext: initialization completed in 943 ms
2023-01-19 14:18:34.754  INFO 17059 --- [           main] o.s.b.w.embedded.tomcat.TomcatWebServer  : Tomcat started on port(s): 8080 (http) with context path ''
2023-01-19 14:18:34.769  INFO 17059 --- [           main] o.s.b.d.f.s.MyApplication                : Started MyApplication in 1.789 seconds (JVM running for 2.169)
默认情况下日志级别是INFO,如果需要额外的日志级别设置,查看[5.4.5 日志级别](#5.4.5 日志级别)。通过spring.main.log-startup-info设置为false,可以关闭应用程序的日志记录。
5.1.1 启动失败
如果应用启动失败,能够通过已注册的FailureAnalyzers获取错误信息以便修复问题。比如应用程序启动的8080端口被占用。
***************************
APPLICATION FAILED TO START
***************************

Description:

Embedded servlet container failed to start. Port 8080 was already in use.

Action:

Identify and stop the process that is listening on port 8080 or configure this application to listen on another port.
Spring Boot 支持自定义
FailureAnalyzer实现
如果没有故障分析器能够处理异常,您需要给org.springframework.boot.autoconfigure.logging.ConditionEvaluationReportLoggingListener[启用debug属性](#5.2 外部配置),或者[开启DEBUG日志](#5.4.5 日志级别)。
使用java -jar启动应用程序,使用debug开启日志:
$ java -jar myproject-0.0.1-SNAPSHOT.jar --debug
5.1.2 惰性初始化
SpringApplication 允许延迟初始化应用程序,当启用惰性初始化时,bean 在需要时创建,而不是在启动期间创建。
惰性初始化的一个缺点是会延迟发现应用程序的问题,如果配置错误的bean被惰性初始化,则在启动期间不会发生故障,只有在bean 被初始化时才发现问题。另外还要注意确保JVM有足够的内存来容纳所有的bean。因此建议在启用惰性初始化前微调JVM堆大小。
使用SpringApplicationBuilder的lazyInitialization或者SpringApplication的setLazyInitialization方法开启惰性初始化,也可以使用spring.main.lazy-initialization开启。
spring.main.lazy-initialization=true
指定某些bean延迟初始化,使用
@Lazy(false)
5.1.3 自定义横幅
通过将banner.txt添加到类路径中,或者设置spring.banner.location为该类文件的位置,来更改应用启动时打印的横幅。
如果文件编码不是UTF-8,可以设置spring.banner.charset。
除了使用文本文件外,还可以使用图片,将图片添加到类路径中,或者设置spring.banner.image.location,图形将被转换为ASCII格式。
在banner.txt文件中,您可以使用Environment中可用的任何键和以下占位符。
| 占位符 | 描述 |
|---|---|
${application.version} |
您的应用程序的版本号,如在MANIFEST.MF声明的那样。例如,Implementation-Version: 1.0打印为1.0. |
${application.formatted-version} |
您的应用程序的版本号,在MANIFEST.MF中声明并格式化显示(用括号括起来并以 为前缀v)。例如(v1.0)。 |
${spring-boot.version} |
您正在使用的 Spring Boot 版本。例如2.7.8。 |
${spring-boot.formatted-version} |
您正在使用的 Spring Boot 版本,经过格式化以供显示(用方括号括起来并以 为前缀v)。例如(v2.7.8)。 |
${Ansi.NAME}(或${AnsiColor.NAME},,${AnsiBackground.NAME})${AnsiStyle.NAME} |
NAMEANSI 转义代码的名称在哪里。详情请见AnsiPropertySource。 |
${application.title} |
您的应用程序的标题,如MANIFEST.MF中声明的那样。例如Implementation-Title: MyApp打印为MyApp. |
使用
SpringApplication.setBanner(…)以编程方式设置横幅,使用org.springframework.boot.Banner接口并实现printBanner()方法自定义打印横幅。
可以使用spring.main.banner-mode 设置是否在System.out( console)、或者日志文件中打印横幅、或者不打印横幅
${application.version}和${application.formatted-version}配置仅仅在使用Spring Boot启动器的时候可用。如果你使用未打包的jar并使用java -cp启动,则不会生效。这就是为什么我们建议您始终使用java org.springframework.boot.loader.JarLauncher启动未打包的jar。这将在构建类路径和启动应用程序之前初始化
application.*banner变量。
5.1.4 自定义SpringApplication
如果默认的SpringApplication 不适合您,您可以自己创建一个实例,并进行自定义。例如,要关闭横幅:
import org.springframework.boot.Banner;
import org.springframework.boot.SpringApplication;
import org.springframework.boot.autoconfigure.SpringBootApplication;

@SpringBootApplication
public class MyApplication {

    public static void main(String[] args) {
        SpringApplication application = new SpringApplication(MyApplication.class);
        application.setBannerMode(Banner.Mode.OFF);
        application.run(args);
    }

}
也可以使用application.properties配置SpringApplication,详细查看[外部配置](#5.2 外部配置)
5.1.5 流式API生成器
如果您需要构建ApplicationContext层次结构(具有父子关系的多个上下文)或者更喜欢使用流式API构建器,可以使用SpringApplicationBuilder。
SpringApplicationBuilder让你将多个方法链式调用,包括parent和child方法创建层级结构,比如:
new SpringApplicationBuilder()
        .sources(Parent.class)
        .child(Application.class)
        .bannerMode(Banner.Mode.OFF)
        .run(args);
ApplicationContext创建层次结构 时有一些限制。例如,Web 组件必须包含在子上下文中,并且同样Environment用于父上下文和子上下文。有关详细信息,请参阅SpringApplicationBuilderJavadoc。
5.1.6 应用可用性
当部署在平台上时,应用程序可以使用Kubernetes Probe等基础设施向平台提供有关其可用性的信息。
Spring Boot 对常用的“liveness” 和 “readiness”状态提供开箱即用的支持。如果您使用了Spring Boot 的actuator那么状态将以监控端点的形式提供。
另外,您还可以通过ApplicationAvailability接口将可用性状态注入到自己的bean中。
Liveness 状态
应用程序的"Liveness"状态表示其是否能正常工作,或者当前是失败状态,则自行修复。中断的“Liveness”状态意味着应用程序处于无法恢复的状态,那么基础架构应重启应用程序。
“Liveness”状态不应该基于外部检查,比如健康检查。如果这样,一个失败的外部信息(如数据库、外部缓存等)将导致大规模重启和整个平台的连锁故障。
Spring Boot 应用程序的内部状态主要根据Spring 的 ApplicationContext。如果应用程序上下文成功启动,则Spring Boot 会认为应用程序处于有效状态,上下文刷新的话,应用程序被认为处于活跃,更多参考[5.1.7 应用程序事件和监听器](#5.1.7 应用程序事件和监听器)
Readiness 状态
“Readiness”状态表示应用程序是否已经准备好处理请求。失败的“Readiness”状态表示现在不应该接收流量。这通常发生在启动期间,同时处理CommandLineRunner和ApplicationRunner组件,或者在应用程序认为太忙的时候发生。一旦应用程序和使用命令行调用应用程序被调用,就被认为是“Readiness 状态”。
预期在启动期间运行的任务应该由组件
CommandLineRunner和ApplicationRunner执行,不是使用 Spring 组件生命周期回调,例如@PostConstruct
管理应用程序可用性状态
应用程序可用随时通过注入ApplicationAvailability 接口并调用其上的方法来获取其可用性状态。还有的情况是,应用程序希望监听状态更新或者更新应用程序的状态。
例如,我们可以将应用程序的“Readiness”状态导出到一个文件中,以便Kubernetes“exec Probe”可以查看该文件:
import org.springframework.boot.availability.AvailabilityChangeEvent;
import org.springframework.boot.availability.ReadinessState;
import org.springframework.context.event.EventListener;
import org.springframework.stereotype.Component;

@Component
public class MyReadinessStateExporter {

    @EventListener
    public void onStateChange(AvailabilityChangeEvent<ReadinessState> event) {
        switch (event.getState()) {
            case ACCEPTING_TRAFFIC:
                // create file /tmp/healthy
                break;
            case REFUSING_TRAFFIC:
                // remove file /tmp/healthy
                break;
        }
    }

}
当应用程序中断并且不能恢复的时候,还可以更新这个应用程序的状态。
import org.springframework.boot.availability.AvailabilityChangeEvent;
import org.springframework.boot.availability.LivenessState;
import org.springframework.context.ApplicationEventPublisher;
import org.springframework.stereotype.Component;

@Component
public class MyLocalCacheVerifier {

    private final ApplicationEventPublisher eventPublisher;

    public MyLocalCacheVerifier(ApplicationEventPublisher eventPublisher) {
        this.eventPublisher = eventPublisher;
    }

    public void checkLocalCache() {
        try {
            // ...
        }
        catch (CacheCompletelyBrokenException ex) {
            AvailabilityChangeEvent.publish(this.eventPublisher, ex, LivenessState.BROKEN);
        }
    }

}
Spring Boot 提供[Kubernetes HTTP接口](#11.2.9 Kubernetes Probes),用于Actuator 健康端点的"Liveness" and "Readiness"状态,你能够获取更多指导关于[在Kubernetes上部署应用程序](#12.1.2 Kubernetes)。
5.1.7 应用程序事件和监听器
除了Spring Framework事件之外,比如ContextRefreshedEvent,SpringApplication 还会发送一些额外的事件。
有些事件实际上是在创建
ApplicationContext创建之前,因此你不能作为@Bean注册监听器。你能够通过SpringApplication.addListeners(…)方法或者SpringApplicationBuilder.listeners(…)注册。如果希望自动注册这些监听器,可以将监听器添加到
META-INF/spring.factories中,使用org.springframework.context.ApplicationListener做为key。
运行应用程序的时候,按以下顺序发送事件:
ApplicationStartingEvent在应用程序开始运行时发送(任何处理之前),除了监听器和初始化程序的注册ApplicationEnvironmentPreparedEvent发送,当上下文中要使用的已知Environment时但在创建上下文之前。ApplicationContextInitializedEvent发送,在准备了ApplicationContext并且调用了ApplicationContextInitializers后,但在加载任何bean之前ApplicationPreparedEvent在刷新开始之前,但在加载Bean定义后发送ApplicationStartedEvent在刷新上下文之后,但在任何应用程序和命令行程序被调用之前发送AvailabilityChangeEvent在表示应用程序状态为LivenessState.CORRECT时发送ApplicationReadyEvent在任何应用程序和命令行程序被调用之后发送AvailabilityChangeEvent在表示应用程序已经做好接收请求准备时发送,状态为ReadinessState.ACCEPTING_TRAFFICApplicationFailedEvent在启动异常时发送
上面的列表只包括与SpringApplication相关的SpringApplicationEvent事件。以下事件也在ApplicationPreparedEvent之后和ApplicationStartedEvent之前发送。
WebServerInitializedEvent在WebServer准备好后发送,ServletWebServerInitializedEvent和ReactiveWebServerInitializedEvent分别是servlet 和 reactive的变体ContextRefreshedEvent在ApplicationContext刷新后发送
事件监听器不应该运行冗长的任务,因为他们默认在同一线程中运行
应用程序事件使用Spring Framework的事件发布机制发送。此机制的一部分确保在子上下文中发布给监听器的事件也会在任何祖先上下文中发布给监听器。因此,如果您的应用程序使用SpringApplication实例的层次结构,则监听器可能会收到相同类型的应用程序事件的多个实例。
为了允许监听器区分其上下文的事件和后代上下文的事件,它应该请求注入其应用程序上下文,然后将注入的上下文与事件的上下文进行比较。可以通过实现ApplicationContextAware或者如果监听器是bean,使用@Autowired来注入上下文。
5.1.8 Web环境
SpringApplication会试图创建正确类型的ApplicationContext。用于确定WebApplicationType的算法如下:
- 如果存在 Spring MVC,使用
AnnotationConfigServletWebServerApplicationContext - 如果 Spring MVC 不存在而 Spring WebFlux 存在,使用
AnnotationConfigReactiveWebServerApplicationContext - 否则,使用
AnnotationConfigApplicationContext
这意味着如果您WebClient在同一应用程序中使用 Spring MVC 和 Spring WebFlux ,则默认情况下将使用 Spring MVC。您可以通过调用setWebApplicationType(WebApplicationType)来覆盖。
也可以完全控制ApplicationContext调用所使用的类型setApplicationContextClass(…)。
在JUnit测试中使用
SpringApplication时,通常需要调用setWebApplicationType(WebApplicationType.NONE)
5.1.9 访问应用程序参数
如果您需要访问传递给SpringApplication.run(…)的应用程序参数,则可以注入org.springframework.boot.ApplicationArguments bean。ApplicationArguments接口提供对原始String[]参数以及解析的option和non-option参数的访问,如以下示例所示:
import java.util.List;

import org.springframework.boot.ApplicationArguments;
import org.springframework.stereotype.Component;

@Component
public class MyBean {

    public MyBean(ApplicationArguments args) {
        boolean debug = args.containsOption("debug");
        List<String> files = args.getNonOptionArgs();
        if (debug) {
            System.out.println(files);
        }
        // if run with "--debug logfile.txt" prints ["logfile.txt"]
    }

}
Spring Boot还注册
CommandLinePropertySource和SpringEnvironment。这使您还可以使用@Value注释注入单个应用程序参数。
5.1.10 使用ApplicationRunner 或 CommandLineRunner
如果您需要在启动后运行一些特定的代码SpringApplication,您可以实现ApplicationRunner或CommandLineRunner接口。这两个接口以相同的方式工作,并提供一个run方法,该方法在SpringApplication.run(…)完成之前被调用。
非常适合在应用程序启动后但在接受请求之前运行的任务
这些CommandLineRunner接口提供字符串数组用于访问对应用程序参数,而ApplicationRunner使用ApplicationArguments。以下示例显示了CommandLineRunner一个run方法:
import org.springframework.boot.CommandLineRunner;
import org.springframework.stereotype.Component;

@Component
public class MyCommandLineRunner implements CommandLineRunner {

    @Override
    public void run(String... args) {
        // Do something...
    }

}
如果CommandLineRunner或ApplicationRunner bean必须按顺序调用,可以实现org.springframework.core.Ordered接口或者使用org.springframework.core.annotation.Order注解,
5.1.11 应用程序退出
每个都SpringApplication向 JVM 注册一个关闭钩子,以确保ApplicationContext在退出时正常关闭。可以使用所有标准的 Spring 生命周期回调(例如DisposableBean接口或@PreDestroy注释)。
此外,如果希望在SpringApplication.exit()被调用时返回特定的退出代码,则可以实现该接口org.springframework.boot.ExitCodeGenerator,然后可以将此退出代码传递给System.exit()其将作为状态码返回,如以下示例所示:
import org.springframework.boot.ExitCodeGenerator;
import org.springframework.boot.SpringApplication;
import org.springframework.boot.autoconfigure.SpringBootApplication;
import org.springframework.context.annotation.Bean;

@SpringBootApplication
public class MyApplication {

    @Bean
    public ExitCodeGenerator exitCodeGenerator() {
        return () -> 42;
    }

    public static void main(String[] args) {
        System.exit(SpringApplication.exit(SpringApplication.run(MyApplication.class, args)));
    }

}
此外,ExitCodeGenerator接口可以通过异常来实现。遇到此类异常时,Spring Boot 会返回已实现getExitCode()方法提供的退出代码。
如果存在多个ExitCodeGenerator,则使用生成的第一个非零退出代码。要控制调用生成器的顺序,请另外实现org.springframework.core.Ordered接口或使用org.springfframework.core.annotation.order注解。
5.1.12 管理员功能
可以通过指定spring.application.admin.enabled属性为应用程序启用与管理相关的功能。这暴露了SpringApplicationAdminMXBean平台上的MBeanServer。您可以使用此功能远程管理您的 Spring Boot 应用程序。此功能也可用于任何服务包装器实现。
如果您想知道应用程序在哪个 HTTP 端口上运行,获取
local.server.port属性的值。
5.1.13 应用程序启动跟踪
在应用程序启动期间,SpringApplication执行ApplicationContext许多与应用程序生命周期、bean 生命周期甚至处理应用程序事件相关的任务。有了ApplicationStartupSpring Framework ,您就可以使用StartupStep对象跟踪应用程序启动顺序。可以收集这些数据用于分析目的,或者只是为了更好地了解应用程序启动过程。
可以使用setApplicationStartup设置一个实现ApplicationStartup的实例,比如,使用BufferingApplicationStartup的示例:
import org.springframework.boot.SpringApplication;
import org.springframework.boot.autoconfigure.SpringBootApplication;
import org.springframework.boot.context.metrics.buffering.BufferingApplicationStartup;

@SpringBootApplication
public class MyApplication {

    public static void main(String[] args) {
        SpringApplication application = new SpringApplication(MyApplication.class);
        application.setApplicationStartup(new BufferingApplicationStartup(2048));
        application.run(args);
    }

}
第一个可用的实现FlightRecorderApplicationStartup由 Spring Framework 提供。它将特定于 Spring 的启动事件添加到 Java Flight Recorder 会话,旨在分析应用程序并将其 Spring 上下文生命周期与 JVM 事件(例如分配、GC、类加载……)相关联。配置完成后,您可以在启用飞行记录器的情况下运行应用程序来记录数据:
$ java -XX:StartFlightRecording:filename=recording.jfr,duration=10s -jar demo.jar
Spring Boot 附带BufferingApplicationStartup变体;此实现旨在缓冲启动步骤并将它们排入外部指标系统。BufferingApplicationStartup应用程序可以在任何组件中请求类型的 bean 。
Spring Boot 还可以配置为公开一个以 JSON 文档形式提供此信息的startup端点。
5.2 外部化配置
Spring Boot 允许您外部化您的配置,以便您可以在不同的环境中使用相同的应用程序代码。您可以使用各种外部配置源,包括 Java 属性文件、YAML 文件、环境变量和命令行参数。
属性值可以通过注解直接注入 bean @Value,通过 Spring 的抽象Environment访问,或者通过@ConfigurationProperties绑定到对象。
Spring Boot 使用一种非常特殊的PropertySource顺序,旨在允许合理地覆盖值。后面的属性源可以覆盖前面定义的值。来源按以下顺序考虑:
- 默认properties,由
SpringApplication.setDefaultProperties指定 - 在
@Configuration上的@PropertySource注解,请注意,在刷新应用程序上下文之前,这些属性源不会添加到Environment中。而logging.*和spring.main.*是在应用程序上下文刷新之前读取。 - Config 数据,比如
application.properties RandomValuePropertySource中仅为random.*的配置- 操作系统环境变量
- Java系统配置,System.getProperties()
- 来自
java:comp/env的JNDI属性 ServletContext初始化参数ServletConfig初始化参数- 来自
SPRING_APPLICATION_JSON的属性,嵌入在环境变量(environment variable )或系统属性(system property)中的内联 JSON - 命令行参数
- 在单元测试中的
properties,在@SpringBootTest和用于测试应用程序特定部分的测试注解上有效。 - 单元测试中的
@TestPropertySource - 在devtools激活下,
$HOME/.config/spring-boot目录中的Devtools全局设置配置
Config 数据的加载按照以下顺序:
- 打包在jar包中的Application配置,
application.properties和 YAML变体 - 打包在jar包中的
application-{profile}.properties和 YAML 变体 - jar包外的
application.properties和 YAML 变体 - jar包外的
application-{profile}.properties和 YAML 变体
建议使用一种配置文件格式,如果同时有properties和yaml,properties优先。
假设您开发了一个@Component使用name属性的应用程序,如以下示例所示:
import org.springframework.beans.factory.annotation.Value;
import org.springframework.stereotype.Component;

@Component
public class MyBean {

    @Value("${name}")
    private String name;

    // ...

}
在您的应用程序类路径中(例如,在您的 jar 中),您可以有一个application.properties文件为name. 在新环境中运行时,application.properties可以在 jar 之外提供一个文件来覆盖name. 对于一次性测试,您可以使用特定的命令行开关(例如,java -jar app.jar --name="Spring")启动。
env和configprops端点可用于确定属性具有特定值的原因。可以使用这两个端点来诊断预期外的属性值。有关详细信息,请参阅"Production ready features"部分。
5.2.1 访问命令行属性
默认情况下,SpringApplication将任何命令行选项参数(即以 --开头的参数,例如--server.port=9000)转换为property并将它们添加到 SpringEnvironment中,命令行属性始终优先于基于文件的属性源。
如果您不想将命令行属性添加到 中Environment,您可以使用SpringApplication.setAddCommandLineProperties(false)禁用它们。
5.2.2 JSON 应用程序属性
环境变量和系统属性通常有限制,这意味着某些属性名称不能使用。为了解决这个问题,Spring Boot 允许您将属性块编码为单个 JSON 结构。
当您的应用程序启动时,任何spring.application.json或SPRING_APPLICATION_JSON属性将被解析并添加到Environment.
例如,SPRING_APPLICATION_JSON可以在 UN*X shell 的命令行中将属性作为环境变量提供:
$ SPRING_APPLICATION_JSON='{"my":{"name":"test"}}' java -jar myapp.jar
在前面的示例中,您最终在 Spring 的Environment中获取my.name=test。
同样的 JSON 也可以作为系统属性提供:
$ java -Dspring.application.json='{"my":{"name":"test"}}' -jar myapp.jar
或者您可以使用命令行参数提供 JSON:
$ java -jar myapp.jar --spring.application.json='{"my":{"name":"test"}}'
如果要部署到经典应用程序服务器,您还可以使用名为java:comp/env/spring.application.json的JNDI 变量。
虽然JSON中的null将添加到结果属性源中,但PropertySourcesPropertyResolver会将null属性视为缺少的值。这意味着JSON不能用null值覆盖低优先级属性源中的属性。
5.2.3 外部应用程序属性
当您的应用程序启动时,Spring Boot 将自动从以下位置查找并加载application.properties和application.yaml
- 从classpath
- classpath根目录
- classpath 的 /config 包
- 从当前目录
- 当前目录
- 当前目录的config/子目录
- config/的直接子目录
这个列表按顺序排列(较低的项会覆盖较早的项)。加载的文件会做为PropertySources添加到Spring Environment中。
如果您不想用application作为配置文件名,您可以通过指定一个spring.config.name环境属性来切换到另一个文件名。例如,要查找myproject.properties和myproject.yaml文件,您可以按如下方式运行您的应用程序:
$ java -jar myproject.jar --spring.config.name=myproject
您还可以使用spring.config.location环境属性来引用显式位置。此属性接受一个或多个要检查的位置的逗号分隔列表。
以下示例显示如何指定两个不同的文件:
$ java -jar myproject.jar --spring.config.location=\
    optional:classpath:/default.properties,\
    optional:classpath:/override.properties
optional前缀表示,位置是可选的,允许不存在
spring.config.name,spring.config.location, 和spring.config.additional-location很早就用于确定必须加载哪些文件。它们必须定义为环境属性(通常是操作系统环境变量、系统属性或命令行参数)。
如果spring.config.location包含目录(而不是文件),应该以/结尾。在运行时,它们将在加载之前附加从spring.config.name生成的名称
目录和文件定位也用于 检查 profile指定文件。例如,如果
spring.config.location配置为classpath:myconfig.properties,classpath:myconfig-的文件也会被加载.properties
在大多数情况下,spring.config.location您添加的每个项目都将引用一个文件或目录。位置按照它们被定义的顺序处理,后面的可以覆盖前面的值。
如果您有一个复杂的位置要设置,并且您使用profile指定的配置文件,那么您可能需要提供进一步的提示,以便Spring Boot知道它们应该如何分组。位置组是所有被认为处于同一级别的位置的集合。例如,您可能希望对所有类路径位置进行分组,然后对所有外部位置进行分组。位置组中的项目用;分隔,详细查看Profile Specific Files
使用spring.config.location替换默认的位置配置。例如,如果spring.config.location设置为optional:classpath:/custom-config/,optional:file:./custom-config/,则完整的位置集是:
optional:classpath:custom-config/optional:file:./custom-config/
如果您更喜欢添加其他位置,而不是替换它们,您可以使用spring.config.additional-location. 从其他位置加载的属性可以覆盖默认位置中的属性。
例如,如果spring.config.additional-location配置了值optional:classpath:/custom-config/,optional:file:./custom-config/,则考虑的完整位置集是:
optional:classpath:/;optional:classpath:/config/optional:file:./;optional:file:./config/;optional:file:./config/*/optional:classpath:custom-config/optional:file:./custom-config/
此搜索顺序使您可以在一个配置文件中指定默认值,然后在另一个配置文件中有选择地覆盖这些值。您可以在默认位置之一的application.properties(或您选择的任何其他基本名称spring.config.name)中为您的应用程序提供默认值。然后可以在运行时使用位于自定义位置之一的不同文件覆盖这些默认值。
如果您使用环境变量而不是系统属性,大多数操作系统不允许使用句点分隔的键名,但您可以使用下划线代替(例如,
SPRING_CONFIG_NAME代替spring.config.name)。有关详细信息,请参阅从环境变量绑定。
如果您的应用程序在 servlet 容器或应用程序服务器中运行,则可以使用 JNDI 属性(在
java:comp/env中)或 servlet 上下文初始化参数来代替或同时使用环境变量或系统属性。
可选位置
默认情况下,当指定的配置数据位置不存在时,Spring Boot 将抛出ConfigDataLocationNotFoundException,并且应用程序将停止。
如果需要指定一个位置,但不是必须存在,使用optional:前缀。可以在spring.config.location和spring.config.additional-location以及spring.config.import中声明。
比如,spring.config.import属性,值为optional:file:./myconfig.properties,在文件不存在的情况下,应用程序也能够启动。
如果你想要忽略所有的ConfigDataLocationNotFoundExceptions异常,并且始终允许应用程序继续启动,可以使用spring.config.on-not-found配置。或者通过SpringApplication.setDefaultProperties(…)或者使用系统/环境变量设置忽略的值。
通配符位置定位
如果一个配置文件位置路径最后包含*,则表示其为通配符位置。这在多个配置文件的情况下,非常有用。
比如,有一些Redis配置和Mysql配置,可以想要把这两个配置文件分开,但又在application.properties文件中,这样可能会有两个不同的路径,/config/redis/application.properties 和/config/mysql/application.properties,通过config/*/可以将两个配置文件都进行加载。
默认情况下,Spring Boot在默认搜索位置包含config/*/,这意味着将搜索jar之外的/config目录的所有子目录。
您可以将通配符与spring.config.location和spring.config.additional-location一起使用。
通配符位置定位只能包含一个
*,对于搜索目录必须以*/结尾,对于搜索文件,则必须以*/结尾。带有通配符的位置根据文件名的绝对路径按字母顺序排序。
通配符位置仅适用于外部目录。不能在
classpath:location中使用通配符。
Profile特定文件
除了application属性文件之外,Spring Boot还将尝试使用命名约定application-{profile}加载profile特定文件。例如,如果应用程序激活名为prod的配置文件并使用YAML文件,那么将同时加载application.yml和application-prod.yml。
Profile特定文件的属性加载与标准应用程序属性加载的位置相同,profile特定文件总是覆盖非特定的文件(application.yml)。如果指定了多个配置文件,则采用最后获胜策略。例如,如果配置文件 prod 、live 是由spring.profiles.active属性指定的,那么application-prod.properties中的值可以被application-live.properties中的值覆盖。
最后获胜策略适用于位置组级别。
spring.config.location的classpath:/cfg/,classpath:/ext/配置和classpath:/cfg/;classpath:/ext/配置的覆盖规则不同。例如,继续上面的prod、live示例,我们可能有以下文件:
/cfg
  application-live.properties
/ext
  application-live.properties
  application-prod.properties
spring.config.location的值为classpath:/cfg/,classpath:/ext/,程序会先处理/cfg下的所有文件,再处理/ext
/cfg/application-live.properties/ext/application-prod.properties/ext/application-live.properties如果值为
classpath:/cfg/;classpath:/ext/,程序视为同一级别
/ext/application-prod.properties/cfg/application-live.properties/ext/application-live.properties
Environment有一组默认配置文件(默认情况下为[default]),如果未设置活动配置文件,则使用这些配置文件。换句话说,如果没有显式激活配置文件,那么将考虑application-default。
配置文件只加载一次。如果您已经直接导入了特定配置文件的属性文件,则不会再次导入该文件。
导入附加数据
应用程序配置可以使用spring.config.import 属性从其他位置导入更多配置数据。
例如,classpath application.properties文件中可能包含以下内容:
spring.application.name=myapp
spring.config.import=optional:file:./dev.properties
这将触发当前目录中dev.properties文件的导入(如果存在这样的文件)。导入的dev.properties中的值将优先于触发导入的文件。在上面的示例中,dev.properties可以将spring.application.name重新定义为不同的值。
无论声明多少次,都只能导入一次。在导入properties/yaml的文件中定义的单个文档顺序是无关紧要的,比如,下面的两个例子产生相同的结果。
spring.config.import=my.properties
my.property=value
my.property=value
spring.config.import=my.properties
在上述两个示例中,my.properties文件中的值将优先于触发其导入的文件。可以在一个spring.config.import下指定多个位置,位置将按照定义的顺序进行处理,以后导入的配置优先。
适当时,特定配置文件的变体还会导入,上面的示例将导入
my.properties以及任何my-变体。.properties
Spring Boot包括可插拔API,允许支持各种不同的位置地址。默认情况下,您可以导入Java配置、YAML和“配置树”。
第三方jar可以提供对其他技术的支持(不要求文件是本地的)。例如,您可以想象配置数据来自Consul、Apache ZooKeeper或Netflix Archaius等外部存储。
如果要支持自定义位置,请参阅
org.springframework.boot.context.config包中的ConfigDataLocationResolver和ConfigDataLoader类。
导入无扩展名文件
某些云平台无法向卷装载的文件添加文件扩展名。要导入这些无扩展名文件,您需要给Spring Boot一个提示,以便它知道如何加载它们。您可以通过在方括号中放置扩展提示来完成此操作。
例如,假设您有一个/etc/config/myconfig文件,希望将其作为yaml导入。您可以使用以下命令从application.properties导入它:
spring.config.import=file:/etc/config/myconfig[.yaml]
使用配置树
在云平台(如Kubernetes)上运行应用程序时,通常需要读取平台提供的配置值。出于这种目的使用环境变量并不罕见,但这可能会有缺点,特别是如果值应该保密的话。
作为环境变量的替代方案,许多云平台现在允许您将配置映射到装载的数据卷中。例如,Kubernetes可以卷装载ConfigMaps和Secrets。
可以使用两种常见的卷装载模式:
- 单个文件包含一组完整的属性(通常写为 YAML)
- 多个文件被写入目录树,文件名成为“key”,内容成为“value”
对于第一种情况,可以上述配置使用spring.config.import导入YAML或Properties文件。
对于第二种情况,您需要使用configtree:前缀,以便Spring Boot知道它需要将所有文件公开为Properties。
例如,让我们假设Kubernetes安装了以下卷:
etc/
  config/
    myapp/
      username
      password
username 是一个配置的值,password是一个加密字符串
要导入这些配置,你可以将如下内容导入application.properties或者application.yaml
spring.config.import=optional:configtree:/etc/config/
然后,您可以用通常的方式从Environment中访问或注入myapp.username和myapp.password属性。
配置树下的文件夹构成属性名称。在上面的示例中,要以
username和password的形式访问属性,可以将spring.config.import设置为optional:configtree:/etc/config/myapp。
带有点符号的文件名也正确映射。例如,在上面的示例中,
/etc/config中名为myapp.username的文件将在Environment中生成myapp.username属性。
配置树值可以绑定到字符串
String和byte[]类型,具体取决于预期的内容。
如果要从同一父文件夹导入多个配置树,则可以使用通配符快捷方式。任何以/*/结尾的configtree:location都会将所有直接子级作为配置树导入。
etc/
  config/
    dbconfig/
      db/
        username
        password
    mqconfig/
      mq/
        username
        password
您可以使用configtree:/etc/config/*/作为导入位置:
spring.config.import=optional:configtree:/etc/config/*/
如上配置将导入 db.username, db.password, mq.username 和 mq.password 属性。
使用通配符加载的目录按字母顺序排序。如果您需要不同的排序,则应将每个位置列为单独的导入
配置树也可以用于Docker 保密数据。当Docker群服务被授权访问一个保密数据时,该保密数据被装入容器中。例如,如果名为db.password的保密数据安装在位置/run/secrets/,则可以使用以下变量db.passwords在Spring环境中:
spring.config.import=optional:configtree:/run/secrets/
属性占位符
application.properties和application.yml中的值在使用时会通过现有的Environment进行过滤,因此您可以引用以前定义的值(例如,从系统属性或环境变量)。标准的${name}属性占位符语法可以在值的任何位置使用,属性占位符还可以使用:指定默认值,将默认值与属性名称分开,例如${name:default}。
以下示例显示了带默认值和不带默认值的占位符的使用:
app.name=MyApp
app.description=${app.name} is a Spring Boot application written by ${username:Unknown}
您应该始终使用占位符中的规范形式(kebab-case仅使用小写字母)引用占位符中的属性名称。这将允许Spring Boot使用与
@ConfigurationProperties相同的宽松绑定逻辑。例如,
${demo.item-price}将从application.properties文件中获取demo.iterm-price和demo.itemPrice,并从系统环境中获取DEMO_ITEMPRICE。如果改用${demo.itemPrice},则不会考虑demo.item-price和DEMO_ITEMPRICE。
您还可以使用此技术创建现有SpringBoot属性的“短”变体。有关详细信息,请参阅使用“短”命令行参数的方法。
使用多文档文件
Spring Boot允许您将单个物理文件拆分为多个逻辑文档,每个逻辑文档都是独立添加的。文档按照从上到下的顺序进行处理。后续文档可以覆盖早期文档中定义的配置。
对于application.yml文件,使用标准的YAML多文档语法。三个连续的连字符表示一个文档的结尾和下一个文档开始。
例如,以下包含两个逻辑文档:
spring:
  application:
    name: "MyApp"
---
spring:
  application:
    name: "MyCloudApp"
  config:
    activate:
      on-cloud-platform: "kubernetes"
application.properties文件使用#---或者!--- 来分割文档
spring.application.name=MyApp
#---
spring.application.name=MyCloudApp
spring.config.activate.on-cloud-platform=kubernetes
配置文件分隔符不能有任何前导空格,必须正好有三个连字符。
多文档属性文件通常与激活配置(如
spring.config.activate.on-profile)结合使用。有关详细信息,请参阅下一节。无法使用@PropertySource或@TestPropertySource注解加载多文档属性文件。
激活属性
您可能具有仅在特定配置文件处于激活状态时才关联配置。
您可以使用spring.config.activate.*有条件地激活配置属性。
下面的激活配置可用:
| Property | Note |
|---|---|
on-profile |
必须匹配才能激活文档的配置文件表达式 |
on-cloud-platform |
要使文档处于活动状态,必须检测到“CloudPlatform” |
例如,下面指定第二个文档仅在Kubernetes上运行时有效,并且仅在“prod”或“staging”配置文件处于激活状态时有效:
myprop=always-set
#---
spring.config.activate.on-cloud-platform=kubernetes
spring.config.activate.on-profile=prod | staging
myotherprop=sometimes-set
5.2.4 加密属性
Spring Boot不提供任何加密属性的内置支持,但它提供了修改Spring环境中包含值所需的钩子点。EnvironmentPostProcessor允许你在应用程序启动的时候控制Environment,详细查看[启动时自定义环境变量](#15. “How-to” 指南)。
如果您需要一种安全的方式来存储凭据和密码,Spring Cloud Vault项目将支持在HashiCorp Vault中存储外部化配置。
5.2.5 使用YAML文件
YAML是JSON的超集,是指定分层配置数据的便捷格式。只要类路径上有SnakeYAML库,SpringApplication类就会自动支持YAML作为properties的替代。
YAML 映射到Properties
YAML文档需要从其分层格式转换为可用于Spring Environment的平面结构。
例如,如下的YAML文档:
environments:
  dev:
    url: "https://dev.example.com"
    name: "Developer Setup"
  prod:
    url: "https://another.example.com"
    name: "My Cool App"
为了从Environment中访问这些属性,它们将按以下方式展平:
environments.dev.url=https://dev.example.com
environments.dev.name=Developer Setup
environments.prod.url=https://another.example.com
environments.prod.name=My Cool App
同样,YAML列表也需要扁平化,使用[index]做为键,比如下面的YAML。
my:
 servers:
 - "dev.example.com"
 - "another.example.com"
上述示例转为properties后:
my.servers[0]=dev.example.com
my.servers[1]=another.example.com
使用[index]表示的properties能够绑定到Java的List或Set对象。有关更多详细信息,请参阅下面的“[类型安全配置属性](#5.2.8 类型安全配置属性)”部分。
无法使用@PropertySource或@TestPropertySource注解加载YAML文件。因此,如果需要以这种方式加载值,则需要使用properties文件。
直接加载YAML
Spring Framework提供了两个方便类,可用于加载YAML文档。YamlPropertiesFactoryBean将YAML作为Properties加载,YamlMapFactoryBean将YAML作为Map加载。
如果要将YAML作为Spring PropertySource加载,也可以使用YamlPropertySourceLoader类。
5.2.6 配置随机值
RandomValuePropertySource用于注入随机值(例如,注入加密字符或测试用例)。它可以生成integer、long、uuid或string,如下例所示:
my.secret=${random.value}
my.number=${random.int}
my.bignumber=${random.long}
my.uuid=${random.uuid}
my.number-less-than-ten=${random.int(10)}
my.number-in-range=${random.int[1024,65536]}
random.int*语法是OPEN value (,max) CLOSE,其中OPEN,CLOSE是任何字符,value、max是整数,如果提供了max,则value是最小值,max是最大值(不包括)。
5.2.7 配置系统环境属性
Spring Boot支持为环境属性设置前缀。如果系统环境由具有不同配置要求的多个Spring Boot应用程序共享,这将非常有用。系统环境属性的前缀可以直接在SpringApplication上设置。
例如,如果将前缀设置为input,则诸如remote.timeout之类的属性也将在系统环境中解析为input.remote.timeout。
5.2.8 类型安全的配置属性
使用@Value("${property}")注入配置属性有时会很麻烦,特别是当您有多个属性或数据本质上是分层的时候。SpringBoot提供了另一种使用properties的方法,该方法允许强类型bean管理和验证应用程序的配置。
也可以查看@Value 和 type-safe configuration properties的不同点
JavaBean 属性绑定
可以绑定到一个标准的JavaBean,如下例所示:
import java.net.InetAddress;
import java.util.ArrayList;
import java.util.Collections;
import java.util.List;

import org.springframework.boot.context.properties.ConfigurationProperties;

@ConfigurationProperties("my.service")
public class MyProperties {

    private boolean enabled;

    private InetAddress remoteAddress;

    private final Security security = new Security();

    public boolean isEnabled() {
        return this.enabled;
    }

    public void setEnabled(boolean enabled) {
        this.enabled = enabled;
    }

    public InetAddress getRemoteAddress() {
        return this.remoteAddress;
    }

    public void setRemoteAddress(InetAddress remoteAddress) {
        this.remoteAddress = remoteAddress;
    }

    public Security getSecurity() {
        return this.security;
    }

    public static class Security {

        private String username;

        private String password;

        private List<String> roles = new ArrayList<>(Collections.singleton("USER"));

        public String getUsername() {
            return this.username;
        }

        public void setUsername(String username) {
            this.username = username;
        }

        public String getPassword() {
            return this.password;
        }

        public void setPassword(String password) {
            this.password = password;
        }

        public List<String> getRoles() {
            return this.roles;
        }

        public void setRoles(List<String> roles) {
            this.roles = roles;
        }

    }

}
前面的POJO定义了以下属性:
- my.service.enabled,默认为false
- my.service.remote-address,能够强制转成
String - my.service.security.username
- my.service.security.password
- my.service.security.roles String类型的列表,默认是USER
映射到Spring Boot中可用的@ConfigurationProperties类的properties是公共API,这些类是通过properties文件、YAML文件、环境变量和其他机制配置的,但类本身的访问器(getters/setters)并不打算直接使用。
这种安排依赖于默认的空构造函数,getter和setter通常是强制性的,因为绑定是通过标准的JavaBeans属性描述符进行的,就像在SpringMVC中一样。在下列情况下,可以省略setter:
- Maps,只要它们被初始化,就需要getter,但不一定需要setter,因为它们可以被绑定器改变。
- 可以通过索引(通常使用 YAML)或使用单个逗号分隔值(属性)来访问集合和数组。在后一种情况下,setter 是强制性的。我们建议始终为此类类型添加一个 setter。如果您初始化一个集合,请确保它不是不可变的(如前例所示)。
- 如果嵌套的 POJO 属性被初始化(如
Security前面示例中的字段),则不需要 setter。如果希望绑定器使用其默认构造函数动态创建实例,则需要setter。有些人使用 Project Lombok 来自动添加 getter 和 setter。确保 Lombok 不会为此类类型生成任何特殊的构造函数,因为容器会自动使用它来实例化对象。
最后,只考虑标准 Java Bean 属性,不支持绑定静态属性。
构造函数绑定
上一节中的示例可以以不可变的方式重写,如以下示例所示:
import java.net.InetAddress;
import java.util.List;

import org.springframework.boot.context.properties.ConfigurationProperties;
import org.springframework.boot.context.properties.ConstructorBinding;
import org.springframework.boot.context.properties.bind.DefaultValue;

@ConstructorBinding
@ConfigurationProperties("my.service")
public class MyProperties {

    private final boolean enabled;

    private final InetAddress remoteAddress;

    private final Security security;

    public MyProperties(boolean enabled, InetAddress remoteAddress, Security security) {
        this.enabled = enabled;
        this.remoteAddress = remoteAddress;
        this.security = security;
    }

    public boolean isEnabled() {
        return this.enabled;
    }

    public InetAddress getRemoteAddress() {
        return this.remoteAddress;
    }

    public Security getSecurity() {
        return this.security;
    }

    public static class Security {

        private final String username;

        private final String password;

        private final List<String> roles;

        public Security(String username, String password, @DefaultValue("USER") List<String> roles) {
            this.username = username;
            this.password = password;
            this.roles = roles;
        }

        public String getUsername() {
            return this.username;
        }

        public String getPassword() {
            return this.password;
        }

        public List<String> getRoles() {
            return this.roles;
        }

    }

}
在此设置中,@ConstructorBinding注解用于指示应使用构造函数绑定。这意味着绑定器将期望找到一个带有您希望绑定的参数的构造函数。如果您使用的是 Java 16 或更高版本,构造函数绑定可以与记录一起使用。在这种情况下,除非您的记录有多个构造函数,否则没有必要使用@ConstructorBinding.
类的嵌套成员@ConstructorBinding(如上Security例)也将通过其构造函数进行绑定。
可以使用@DefaultValue构造函数参数指定默认值,或者在使用 Java 16 或更高版本时使用记录组件指定默认值。转换服务将用于将String值强制转换为缺失属性的目标类型。
参考前面的示例,如果没有属性绑定到Security,则该MyProperties实例将包含 一个null值的security。要使它包含一个非空的实例,Security即使没有属性绑定到它(使用 Kotlin 时,这将需要将 的username和password参数Security声明为可空的,因为它们没有默认值),使用空@DefaultValue注解:
public MyProperties(boolean enabled, InetAddress remoteAddress, @DefaultValue Security security) {
    this.enabled = enabled;
    this.remoteAddress = remoteAddress;
    this.security = security;
}
要使用构造函数绑定,必须使用
@EnableConfigurationProperties或@ConfigurationProperties来启用类。您不能对由常规 Spring 机制创建的 bean 使用构造函数绑定(例如@Componentbean、使用@Bean方法创建的 bean 或使用@Import加载的 bean)
如果您的类有多个构造函数,您也可以在应该绑定的构造函数上直接使用@ConstructorBinding
不建议将
java.util.Optional与@ConfigurationProperties一起使用,因为它主要用作返回类型。因此,它不太适合配置属性注入。为了与其他类型的属性保持一致,如果您确实声明了一个Optional属性并且它没有值,那么将绑定null一个空值。
启用@ConfigurationProperties注解类型
Spring Boot 提供基础设施来绑定@ConfigurationProperties类型并将它们注册为 beans。您可以逐个类地启用配置属性,也可以启用以类似于组件扫描的方式工作的配置属性扫描。
有时,带有注解的类@ConfigurationProperties可能不适合扫描,例如,如果您正在开发自己的自动配置或您希望有条件地启用它们。在这些情况下,使用@EnableConfigurationProperties注解指定要处理的类型列表。这可以在任何@Configuration类上完成,如以下示例所示:
import org.springframework.boot.context.properties.EnableConfigurationProperties;
import org.springframework.context.annotation.Configuration;

@Configuration(proxyBeanMethods = false)
@EnableConfigurationProperties(SomeProperties.class)
public class MyConfiguration {

}
要使用配置属性扫描,请将@ConfigurationPropertiesScan注解添加到您的应用程序。通常,它被添加到带有@SpringBootApplication的类中,但它可以添加到任何@Configuration类中。默认情况下,将从声明注解的类的包中进行扫描。如果要定义要扫描的指定包,可以按照以下示例所示进行操作:
import org.springframework.boot.autoconfigure.SpringBootApplication;
import org.springframework.boot.context.properties.ConfigurationPropertiesScan;

@SpringBootApplication
@ConfigurationPropertiesScan({ "com.example.app", "com.example.another" })
public class MyApplication {

}
当
@ConfigurationProperties使用配置属性扫描或通过@EnableConfigurationProperties注册 bean时,bean 有一个约定名称:,其中- 是@ConfigurationProperties中指定的环境键前缀,是 bean 的完全限定名称。如果不提供任何前缀,则仅使用 bean 的完全限定名称。上面示例中的 bean 名称是
com.example.app-com.example.app.SomeProperties.
我们建议@ConfigurationProperties只处理环境,特别是不要从上下文中注入其他 beans。对于极端情况,可以使用 setter 注入或*Aware框架提供的任何接口(例如,EnvironmentAware如果您需要访问Environment)。如果您仍想使用构造函数注入其他 bean,则配置属性 bean 必须注释@Component并使用基于 JavaBean 的属性绑定。
使用@ConfigurationProperties 注解类型
这种类型的配置在SpringApplication外部YAML配置中尤其适用,如下例所示:
my:
  service:
    remote-address: 192.168.1.1
    security:
      username: "admin"
      roles:
      - "USER"
      - "ADMIN"
要使用@ConfigurationProperties bean,可以与任何其他bean相同的方式注入,如下例所示:
import org.springframework.stereotype.Service;

@Service
public class MyService {

    private final MyProperties properties;

    public MyService(MyProperties properties) {
        this.properties = properties;
    }

    public void openConnection() {
        Server server = new Server(this.properties.getRemoteAddress());
        server.start();
        // ...
    }

    // ...

}
使用@ConfigurationProperties还可以生成元数据文件,IDE可以使用这些文件自动完成自己的密钥。详见附录。
三方配置
除了使用@ConfigurationProperties注解类之外,还可以在公共@Bean方法上使用它。当您想将属性绑定到不在您控制范围内的第三方组件时,这样做特别有用。
要从Environment中配置bean,请将@ConfigurationProperties添加到其bean注册中,如以下示例所示:
import org.springframework.boot.context.properties.ConfigurationProperties;
import org.springframework.context.annotation.Bean;
import org.springframework.context.annotation.Configuration;

@Configuration(proxyBeanMethods = false)
public class ThirdPartyConfiguration {

    @Bean
    @ConfigurationProperties(prefix = "another")
    public AnotherComponent anotherComponent() {
        return new AnotherComponent();
    }

}
使用another前缀定义的属性都以类似于前面的SomeProperties示例的方式映射到该AnotherComponent bean上。
宽松绑定
Spring Boot使用一些宽松的规则将Environment属性绑定到@ConfigurationProperties bean,因此,Environment属性名称和bean属性名称之间不需要完全匹配。这很有用的常见示例包括以破折号分隔的环境属性(例如,context-path绑定到contextPath),和大写的环境属性(例如,PORT绑定到port)。
例如,以下@ConfigurationProperties类:
import org.springframework.boot.context.properties.ConfigurationProperties;

@ConfigurationProperties(prefix = "my.main-project.person")
public class MyPersonProperties {

    private String firstName;

    public String getFirstName() {
        return this.firstName;
    }

    public void setFirstName(String firstName) {
        this.firstName = firstName;
    }

}
使用上述代码,可以使用以下属性名称:
| Property | Note |
|---|---|
my.main-project.person.first-name |
建议在.properties和.yml文件中使用 |
my.main-project.person.firstName |
标准的驼峰写法 |
my.main-project.person.first_name |
下划线表示法,建议在.properties和.yml文件中使用 |
MY_MAINPROJECT_PERSON_FIRSTNAME |
大写格式,建议在系统环境变量中使用 |
注解的前缀值必须是kebab大小写(小写并用
-分隔,例如my.main-project.person)。
| Property Source | Simple | List |
|---|---|---|
| Properties Files | 驼峰大小写、kebab小写或下划线符号 | 标准的使用[ ]或者逗号分割值 |
| YAML Files | 驼峰大小写、kebab小写或下划线符号 | 标准的YAML列表或者逗号分割值 |
| Environment Variables | 以下划线作为分隔符的大写格式( Binding From Environment Variables). | 用下划线包围的数值 (see Binding From Environment Variables) |
| System properties | 驼峰大小写、kebab小写或下划线符号 | 标准的使用[ ]或者逗号分割值 |
我们建议在可能的情况下,将属性存储为小写的kebab格式,例如my.person.first-name=Rod。
绑定 Maps
绑定到Map配置时,可能需要使用特殊的括号表示法,以便保留原始键值。如果键未被[]包围,则为非字母数字、-或.任何字符将被移除。
例如,以下示例绑定到Map:
my.map.[/key1]=value1
my.map.[/key2]=value2
my.map./key3=value3
对于YAML文件,括号需要用引号括起来,以便正确解析键。
上面的配置将以/key1、/key2和key3作为映射中的键绑定到Map。斜线已从key3中删除,因为它没有被方括号包围。
当绑定到标量值时,使用键.其中不需要被[]包围。标量值包括枚举和java.lang包中除Object之外的所有类型。将a.b=c绑定到Map将会保留.,并返回包含{"a.b"="c"}项的map。对于任何其他类型,如果键包含.,则需要使用括号表示法。比如,将a.b=c绑定到Map,将返回{"a"={"b"="c"}}项的map,而[a.b]=c将返回{"a.b"="c"}项的map。
绑定环境变量
大多数操作系统对可用于环境变量的名称施加严格的规则。例如,Linux shell变量只能包含字母(a到z或a到z)、数字(0到9)或下划线字符(_)。按照惯例,Unix shell变量的名称也将以大写字母表示。
Spring Boot的宽松绑定规则尽可能与这些命名限制兼容。
要将规范形式的属性名称转换为环境变量名称,可以遵循以下规则:
- 将
.替换为_ - 移除
- - 转换为大写
例如,一个spring.main.log-startup-info属性转换为环境变量后为SPRING_MAIN_LOGSTARTUPINFO。
绑定到对象列表时也可以使用环境变量。要绑定到List,元素编号应在变量名称中用下划线包围。
例如,一个my.service[0].other转换为环境变量后是MY_SERVICE_0_OTHER。
合并复杂类型
当在多个位置配置列表时,覆盖通过替换整个列表来工作。例如,假设MyPojo对象的名称和描述属性默认为null。以下示例显示MyProperties中的MyPojo对象列表:
import java.util.ArrayList;
import java.util.List;

import org.springframework.boot.context.properties.ConfigurationProperties;

@ConfigurationProperties("my")
public class MyProperties {

    private final List<MyPojo> list = new ArrayList<>();

    public List<MyPojo> getList() {
        return this.list;
    }

}
可以如下配置:
my.list[0].name=my name
my.list[0].description=my description
#---
spring.config.activate.on-profile=dev
my.list[0].name=my another name
如果dev未激活,MyProperties.list包含一个MyPojo项,如果dev激活,然而,列表仍然只包含一个条目(名称为my another name,description为null)。此配置不会向列表中添加第二个MyPojo实例,也不会合并项目。
当在多个配置文件中指定列表时,将使用优先级最高的配置文件(并且仅使用该配置文件)。
my.list[0].name=my name
my.list[0].description=my description
my.list[1].name=another name
my.list[1].description=another description
#---
spring.config.activate.on-profile=dev
my.list[0].name=my another name
在前面的示例中,dev激活,MyProperties.list包含一个MyPojo项,name为my another name和description为null。对于YAML,逗号分隔列表和YAML列表都可以用于完全覆盖列表的内容。
对于Map属性,可以使用从多个源绘制的属性值进行绑定。但是,对于多个源中的相同属性,将使用具有最高优先级的属性。以下示例,MyProperties公开了一个Map属性。
import java.util.LinkedHashMap;
import java.util.Map;

import org.springframework.boot.context.properties.ConfigurationProperties;

@ConfigurationProperties("my")
public class MyProperties {

    private final Map<String, MyPojo> map = new LinkedHashMap<>();

    public Map<String, MyPojo> getMap() {
        return this.map;
    }

}
以下示例配置:
my.map.key1.name=my name 1
my.map.key1.description=my description 1
#---
spring.config.activate.on-profile=dev
my.map.key1.name=dev name 1
my.map.key2.name=dev name 2
my.map.key2.description=dev description 2
如果dev未激活,MyProperties.map仅包含一个key为key1的项(name是my name 1,description是my description 1)。如果dev激活,将包含两个项目键为key1(name是dev name 1,description是my description 1),键为key2(name是dev name 2,description是my description 2)
上述合并规则适用于所有属性源的配置,而不仅仅是文件。
属性转换
当绑定到@ConfigurationProperties bean时,SpringBoot会尝试将外部应用程序属性强制为正确的类型。如果需要自定义类型转换,可以提供ConversionService bean(带有名为conversionService的bean)或自定义属性编辑器(通过CustomEditorConfigurer bean)或定制Converter(带有@ConfigurationPropertiesBinding注解的bean定义)。
由于此bean在应用程序生命周期的早期被请求,请确保限制
ConversionService正在使用的依赖关系。通常,您需要的任何依赖项在创建时都可能无法完全初始化。如果配置键不强制需要,并且仅依赖于用@ConfigurationPropertiesBinding限定的自定义转换器,则可能需要重命名自定义ConversionService。
转换 Durations
Spring Boot 支持Durations,如果你公开java.time.Duration,应用程序中可以用以下格式:
- 通常使用
long描述,如果没有指定@DurationUnit,默认是毫秒 java.time.Duration使用的标准ISO-8601格式- 一种更可读的格式,其中值和单位是耦合的(10s表示10秒)
import java.time.Duration;
import java.time.temporal.ChronoUnit;

import org.springframework.boot.context.properties.ConfigurationProperties;
import org.springframework.boot.convert.DurationUnit;

@ConfigurationProperties("my")
public class MyProperties {

    @DurationUnit(ChronoUnit.SECONDS)
    private Duration sessionTimeout = Duration.ofSeconds(30);

    private Duration readTimeout = Duration.ofMillis(1000);

    public Duration getSessionTimeout() {
        return this.sessionTimeout;
    }

    public void setSessionTimeout(Duration sessionTimeout) {
        this.sessionTimeout = sessionTimeout;
    }

    public Duration getReadTimeout() {
        return this.readTimeout;
    }

    public void setReadTimeout(Duration readTimeout) {
        this.readTimeout = readTimeout;
    }

}
指定会话超时时间30s,PT30S和30s等效,读取超时500ms可以以下列任意形式指定:500、PT0.5S和500ms。
您也可以使用任何支持的单位:
ns纳秒us微秒ms毫秒s秒m分h小时d天
默认单位为毫秒,可以使用@DurationUnit重写,如上面的示例所示。
如果您喜欢使用构造函数绑定,可以公开相同的属性,如以下示例所示:
import java.time.Duration;
import java.time.temporal.ChronoUnit;

import org.springframework.boot.context.properties.ConfigurationProperties;
import org.springframework.boot.context.properties.ConstructorBinding;
import org.springframework.boot.context.properties.bind.DefaultValue;
import org.springframework.boot.convert.DurationUnit;

@ConfigurationProperties("my")
@ConstructorBinding
public class MyProperties {

    private final Duration sessionTimeout;

    private final Duration readTimeout;

    public MyProperties(@DurationUnit(ChronoUnit.SECONDS) @DefaultValue("30s") Duration sessionTimeout,
            @DefaultValue("1000ms") Duration readTimeout) {
        this.sessionTimeout = sessionTimeout;
        this.readTimeout = readTimeout;
    }

    public Duration getSessionTimeout() {
        return this.sessionTimeout;
    }

    public Duration getReadTimeout() {
        return this.readTimeout;
    }

}
如果要升级Long属性,请确保定义单位(使用@DurationUnit)(如果不是毫秒)。这样做可以提供透明的升级路径,同时支持更丰富的格式。
转换 Periods
除了持续时间,Spring Boot还可以使用java.time.Period类型。应用程序配置中可以使用以下格式:
- 通常使用
int描述,默认使用天,除非指定了@PeriodUnit java.time.Period使用标准的ISO-8601- 一种更简单的格式,其中值和单位对是耦合的(1y3d表示1年3天)
简单格式支持以下单位:
y年m月w周d天
java.time.Period类型实际上从未存储周数,它是一个表示“7天”的快捷方式。
转换 Data Sizes
Spring Framework具有以字节表示大小的DataSize值类型,如果你要公开DataSize,以下格式可以使用:
- 通常是
long格式,默认使用bytes,除非指定了@DataSizeUnit - 一种更可读的格式,其中值和单位是耦合的(10MB表示10兆字节)
如下示例:
import org.springframework.boot.context.properties.ConfigurationProperties;
import org.springframework.boot.convert.DataSizeUnit;
import org.springframework.util.unit.DataSize;
import org.springframework.util.unit.DataUnit;

@ConfigurationProperties("my")
public class MyProperties {

    @DataSizeUnit(DataUnit.MEGABYTES)
    private DataSize bufferSize = DataSize.ofMegabytes(2);

    private DataSize sizeThreshold = DataSize.ofBytes(512);

    public DataSize getBufferSize() {
        return this.bufferSize;
    }

    public void setBufferSize(DataSize bufferSize) {
        this.bufferSize = bufferSize;
    }

    public DataSize getSizeThreshold() {
        return this.sizeThreshold;
    }

    public void setSizeThreshold(DataSize sizeThreshold) {
        this.sizeThreshold = sizeThreshold;
    }

}
要指定10兆字节的缓冲区大小,10和10MB同等。256字节的大小阈值可以指定为256或256B。您也可以使用任何支持的单位。这些是:
BbytesKBkilobytesMBmegabytesGBgigabytesTBterabytes
默认单位是字节,可以使用@DataSizeUnit重写,如上面的示例所示。
如果您喜欢使用构造函数绑定,可以公开相同的属性,如以下示例所示:
import org.springframework.boot.context.properties.ConfigurationProperties;
import org.springframework.boot.context.properties.ConstructorBinding;
import org.springframework.boot.context.properties.bind.DefaultValue;
import org.springframework.boot.convert.DataSizeUnit;
import org.springframework.util.unit.DataSize;
import org.springframework.util.unit.DataUnit;

@ConfigurationProperties("my")
@ConstructorBinding
public class MyProperties {

    private final DataSize bufferSize;

    private final DataSize sizeThreshold;

    public MyProperties(@DataSizeUnit(DataUnit.MEGABYTES) @DefaultValue("2MB") DataSize bufferSize,
            @DefaultValue("512B") DataSize sizeThreshold) {
        this.bufferSize = bufferSize;
        this.sizeThreshold = sizeThreshold;
    }

    public DataSize getBufferSize() {
        return this.bufferSize;
    }

    public DataSize getSizeThreshold() {
        return this.sizeThreshold;
    }

}
如果要升级Long属性,请确保定义单位(使用@DataSizeUnit)(如果不是字节)。这样做可以提供透明的升级路径,同时支持更丰富的格式。
@ConfigurationProperties 验证
当@ConfigurationProperties类被Spring的@Validated注解注释时,Spring Boot会尝试验证它们。您可以直接在配置类上使用JSR-303 javax.validation约束注释。要做到这一点,请确保类路径上有一个兼容的JSR-303实现,然后向字段添加约束注解,如下例所示:
import java.net.InetAddress;

import javax.validation.constraints.NotNull;

import org.springframework.boot.context.properties.ConfigurationProperties;
import org.springframework.validation.annotation.Validated;

@ConfigurationProperties("my.service")
@Validated
public class MyProperties {

    @NotNull
    private InetAddress remoteAddress;

    public InetAddress getRemoteAddress() {
        return this.remoteAddress;
    }

    public void setRemoteAddress(InetAddress remoteAddress) {
        this.remoteAddress = remoteAddress;
    }

}
您还可以通过注释@Bean方法来触发验证,该方法使用@Validated创建配置属性。
为了确保始终为嵌套属性触发验证,即使找不到,也必须用@Valid注解相关字段。以下示例基于前面的MyProperties示例:
import java.net.InetAddress;

import javax.validation.Valid;
import javax.validation.constraints.NotEmpty;
import javax.validation.constraints.NotNull;

import org.springframework.boot.context.properties.ConfigurationProperties;
import org.springframework.validation.annotation.Validated;

@ConfigurationProperties("my.service")
@Validated
public class MyProperties {

    @NotNull
    private InetAddress remoteAddress;

    @Valid
    private final Security security = new Security();

    public InetAddress getRemoteAddress() {
        return this.remoteAddress;
    }

    public void setRemoteAddress(InetAddress remoteAddress) {
        this.remoteAddress = remoteAddress;
    }

    public Security getSecurity() {
        return this.security;
    }

    public static class Security {

        @NotEmpty
        private String username;

        public String getUsername() {
            return this.username;
        }

        public void setUsername(String username) {
            this.username = username;
        }

    }

}
您还可以通过创建名为configurationPropertiesValidator的bean定义来添加自定义Spring Validator。@Bean方法应声明为静态。配置属性验证器是在应用程序生命周期的早期创建的,将@Bean方法声明为static创建Bean,而无需实例化@configuration类。这样做可以避免早期实例化可能导致的任何问题。
spring-boot-actuator包括一个端点,它公开所有
@ConfigurationPropertiesbean。将web浏览器指向/actuator/configprops或使用等效的JMX端点。有关详细信息,请参阅“[生产就绪功能](#11. 生产就绪功能)”部分。
@ConfigurationProperties vs. @Value
@Value注解是一个核心容器功能,它提供的功能与类型安全配置属性不同。下表总结了@ConfigurationProperties和@Value支持的功能:
| Feature | @ConfigurationProperties |
@Value |
|---|---|---|
| 宽松绑定 | Yes | Limited (see note below) |
| 元数据支持 | Yes | No |
SpEL 表达式 |
No | Yes |
如果您确实想使用
@Value,我们建议您使用规范形式引用属性名称(kebab-case仅使用小写字母)。这将允许Spring Boot与使用宽松绑定的@ConfigurationProperties相同的逻辑。例如,@Value(“${demo.item-price}”)将从application.properties文件中获取demo.iitem-price和demo.itermPrice表单,并从系统环境中获取DEMO_ITEMPRICE。如果改用@Value(“${demo.itemPrice}”),则不会考虑demo.item-price和DEMO_ITEMPRICE。
如果您为自己的组件定义了一组配置键,我们建议您将它们分组到带有@ConfigurationProperties注释的POJO中。这样做将为您提供结构化的类型安全对象,您可以将其注入到自己的bean中。
在解析这些文件并填充环境时,不会处理应用程序属性文件中的SpEL表达式。但是,可以在@Value中编写SpEL表达式。如果应用程序属性文件中的属性值是SpEL表达式,则在通过@value使用时将对其求值。
5.3 Profiles
Spring profiels 提供了一种隔离应用程序配置部分的方法,使其仅在特定环境中可用。任何@Component、@Configuration或@ConfigurationProperties都可以用@Profile标记加以限制,如下例所示:
import org.springframework.context.annotation.Configuration;
import org.springframework.context.annotation.Profile;

@Configuration(proxyBeanMethods = false)
@Profile("production")
public class ProductionConfiguration {

    // ...

}
如果@ConfigurationProperties bean是通过@EnableConfigurationProperties而不是自动扫描注册的,则需要在具有@EnableConfigurationProperty注解的@Configuration类上指定@Profile注解。在扫描@ConfigurationProperties的情况下,可以在@ConfigurationProperties类本身上指定@Profile。
可以使用spring.profiles.active Environment属性来指定哪些配置文件处于活动状态。您可以用本章前面描述的任何方式指定属性,例如,您可以将其包含在application.properties中,如下例所示:
spring.profiles.active=dev,hsqldb
也可以使用以下开关在命令行上指定它:--spring.profiles.active=dev,hsqldb。
如果没有激活配置文件,则启用默认配置文件。默认配置文件的名称是默认的,可以使用spring.profile.default Environment属性对其进行调整,如下例所示:
spring.profiles.default=none
spring.profiles.active和spring.profiles.default只能在非配置文件特定的文档中使用。这意味着它们不能包含在spring.config.activate.on-profile激活的特定配置文件的文件或激活属性中。
例如,如下配置无效:
# this document is valid
spring.profiles.active=prod
#---
# this document is invalid
spring.config.activate.on-profile=prod
spring.profiles.active=metrics
5.3.1 添加活动配置文件
spring.profiles.active属性遵循与其他属性相同的排序规则。PropertySource优先级最高,这意味着您可以在application.properties中指定活动配置文件,然后使用命令行开关替换它们。
有时,将配置添加到活动配置文件而不是替换它们是很有用的。spring.profiles.include属性可用于在spring.profiles.active属性激活的配置文件之上添加活动配置文件。
SpringApplication入口点还具有用于设置其他配置文件的Java API,请参阅SpringApplication中的setAdditionalProfiles()方法。
例如,当运行以下配置的应用程序时,即使使用-spring.profiles.active 开关运行,也会激活common和local配置文件:
spring.profiles.include[0]=common
spring.profiles.include[1]=local
与spring.profile.active类似,
spring.profile.include只能用于非配置文件特定的文档。
如果给定的配置文件处于活动状态,则也可以使用配置文件组(在下一节中介绍)添加活动的配置文件。
5.3.2 配置文件组
有时,您在应用程序中定义和使用的配置文件过于细粒度,使用起来很麻烦。例如,您可以使用proddb和prodmq配置文件来独立启用数据库和消息传递功能。
为了帮助实现这一点,Spring Boot允许您定义配置文件组。配置文件组允许您定义相关配置文件组的逻辑名称。
例如,我们可以创建一个由prodb和prodmq配置文件组成的生产组。
spring.profiles.group.production[0]=proddb
spring.profiles.group.production[1]=prodmq
我们的应用程序现在可以使用--spring.profiles.active=production启动,一次激活production、proddb和prodmq配置文件。
5.3.3 以编程方式设置配置文件
您可以在应用程序运行之前通过调用SpringApplication.setAdditionalProfiles(...),还可以使用Spring的ConfigurationEnvironment接口激活配置文件。
5.3.4 指定配置文件
application.properties(或application.yml)和通过@ConfigurationProperties引用的文件的特定配置文件的变体都被视为文件并被加载。有关详细信息,请参阅“Profile特定文件”。
5.4 日志
Spring Boot使用Commons Logging进行所有内部日志记录,但底层日志实现保持打开状态。默认配置提供了Java Util Logging, Log4J2, 和 Logback。在每种情况下,记录器都预先配置为使用控制台输出,也可以使用可选的文件输出。
默认情况下,如果使用“Starters”,则使用Logback进行日志记录。还包括适当的Logback路由,以确保使用Java Util Logging、Commons Logging、Log4J或SLF4J的依赖库都能正常工作。
Java有很多可用的日志框架。如果上面的列表看起来令人困惑,请不要担心。通常,您不需要更改日志依赖关系,Spring Boot默认值也可以正常工作。
当您将应用程序部署到servlet容器或应用程序服务器时,使用JavaUtil Logging API执行的日志记录不会路由到应用程序的日志中。这将防止容器或已部署到容器的其他应用程序执行的日志记录出现在应用程序的日志中。
5.4.1 日志格式化
Spring Boot的默认日志输出类似于以下示例:
2023-01-19 14:18:28.678  INFO 16676 --- [           main] o.s.b.d.f.s.MyApplication                : Starting MyApplication using Java 1.8.0_362 on myhost with PID 16676 (/opt/apps/myapp.jar started by myuser in /opt/apps/)
2023-01-19 14:18:28.686  INFO 16676 --- [           main] o.s.b.d.f.s.MyApplication                : No active profile set, falling back to 1 default profile: "default"
2023-01-19 14:18:30.656  INFO 16676 --- [           main] o.s.b.w.embedded.tomcat.TomcatWebServer  : Tomcat initialized with port(s): 8080 (http)
2023-01-19 14:18:30.672  INFO 16676 --- [           main] o.apache.catalina.core.StandardService   : Starting service [Tomcat]
2023-01-19 14:18:30.672  INFO 16676 --- [           main] org.apache.catalina.core.StandardEngine  : Starting Servlet engine: [Apache Tomcat/9.0.71]
2023-01-19 14:18:30.756  INFO 16676 --- [           main] o.a.c.c.C.[Tomcat].[localhost].[/]       : Initializing Spring embedded WebApplicationContext
2023-01-19 14:18:30.757  INFO 16676 --- [           main] w.s.c.ServletWebServerApplicationContext : Root WebApplicationContext: initialization completed in 1977 ms
2023-01-19 14:18:31.328  INFO 16676 --- [           main] o.s.b.w.embedded.tomcat.TomcatWebServer  : Tomcat started on port(s): 8080 (http) with context path ''
2023-01-19 14:18:31.339  INFO 16676 --- [           main] o.s.b.d.f.s.MyApplication                : Started MyApplication in 3.552 seconds (JVM running for 4.101)
输出以下项目:
- 日期和时间:毫秒级精度和易于排序的
- Log级别:
ERROR,WARN,INFO,DEBUG, 或者TRACE - 进程ID
- — 分隔符,用于区分实际的日志消息开头
- 线程名称:用方括号括起来(可能会被控制台输出截断)
- Logger 名称:通常是源类名(通常是缩写)
- 日志消息
Logback没有
FATAL级别。它被映射到ERROR。
5.4.2 Console 输出
默认日志配置在写入消息时将消息回显到控制台。默认情况下,记录ERROR级别、WARN级别和INFO级别消息。您还可以通过使用--debug标志启动应用程序来启用“调试”模式。
$ java -jar myapp.jar --debug
您还可以在
application.properties中指定debug=true。
启用调试模式后,将配置一组核心记录器(嵌入式容器、Hibernate和Spring Boot)以输出更多信息。启用调试模式使用debug级别不会将应用程序配置为记录所有消息。
或者,您可以通过使用--trace标志(或应用程序配置中的trace=true)来启动应用程序“trace”模式,这样做可以为一些核心记录器(嵌入式容器、Hibernate模式生成和整个Spring组合)启用跟踪日志记录。
彩色输出
如果您的终端支持ANSI,则使用颜色输出来提高可读性。您可以将spring.output.ansi.enabled设置为支持的值,以覆盖自动检测。
通过使用%clr转换字配置颜色编码。在最简单的形式中,转换器根据日志级别为输出着色,如下例所示:
%clr(%5p)
下表描述了日志级别到颜色的映射:
| Level | Color |
|---|---|
FATAL |
Red |
ERROR |
Red |
WARN |
Yellow |
INFO |
Green |
DEBUG |
Green |
TRACE |
Green |
或者,您可以通过将其作为转换选项来指定应使用的颜色或样式。例如,要使文本变为黄色,请使用以下设置:
%clr(%d{yyyy-MM-dd HH:mm:ss.SSS}){yellow}
支持以下颜色和样式:
bluecyanfaintgreenmagentaredyellow
5.4.3 文件输出
默认情况下,Spring Boot只记录到控制台,不写入日志文件。如果要在控制台输出之外写入日志文件,你需要设置logging.file.name或者logging.file.path。
下表显示了logging.*如何一起使用:
logging.file.name |
logging.file.path |
Example | Description |
|---|---|---|---|
| (none) | (none) | 仅仅在控制台输出 | |
| Specific file | (none) | my.log |
写入指定的日志文件。名称可以是确切的位置或相对于当前目录。 |
| (none) | Specific directory | /var/log |
将spring.log写入指定目录。名称可以是确切的位置或相对于当前目录。 |
日志文件在达到10MB时会重新开始写入,与控制台输出一样,默认情况下会记录ERROR级别、WARN级别和INFO级别的消息。
日志记录配置独立于实际的日志记录基础结构。因此,特定的配置键(如
logback.configurationFilefor logback)不会由springBoot管理。
5.4.4 文件周期
如果使用Logback,则可以使用application.properties或application.yaml文件微调日志周期设置。对于所有其他日志记录系统,您需要自己直接配置周期设置(例如,如果使用Log4j2,则可以添加Log4j2.xml或Log4j2-pring.xml文件)。
支持以下周期性配置:
| Name | Description |
|---|---|
logging.logback.rollingpolicy.file-name-pattern |
用于创建日志存档的文件名模式。 |
logging.logback.rollingpolicy.clean-history-on-start |
应用程序启动时应进行日志存档清理。 |
logging.logback.rollingpolicy.max-file-size |
存档前日志文件的最大大小。 |
logging.logback.rollingpolicy.total-size-cap |
删除日志存档文件之前可以使用的最大大小。 |
logging.logback.rollingpolicy.max-history |
要保留的存档日志文件的最大数量(默认为7)。 |
5.4.5 日志级别
所有支持的日志记录系统都可以在Spring环境中设置日志记录程序级别(例如,在application.properties中),通过使用logging.level.,其中级别是TRACE、DEBUG、INFO、WARN、ERROR、FATAL或OFF之一。root日志记录程序可以通过使用logging.level.root进行配置。
如下是application.properties中的日志配置:
logging.level.root=warn
logging.level.org.springframework.web=debug
logging.level.org.hibernate=error
还可以使用环境变量设置日志记录级别。例如,LOGGING_LEVEL_ORG_SPRINGFRAMEWORK_WEB=DEBUG将设置org.springframework.web为DEBUG。
上述方法仅适用于包级日志记录。由于宽松绑定总是将环境变量转换为小写,因此不可能以这种方式为单个类配置日志记录。如果需要给类配置日志,你可以使用
SPRING_APPLICATION_JSON。
5.4.6 日志组
能够将相关的记录器分组在一起,以便可以同时配置它们,这通常很有用。例如,您可能通常会更改所有Tomcat相关记录器的日志记录级别,但您不容易记住顶级包。
为了帮助实现这一点,Spring Boot允许您在Spring环境中定义日志组。例如,以下是如何通过将“tomcat”组添加到application.properties:
logging.group.tomcat=org.apache.catalina,org.apache.coyote,org.apache.tomcat
定义后,您可以使用单行更改组中所有记录器的级别:
logging.level.tomcat=trace
Spring Boot包括以下预定义的日志记录组,可以立即使用:
| Name | Loggers |
|---|---|
| web | org.springframework.core.codec, org.springframework.http, org.springframework.web, org.springframework.boot.actuate.endpoint.web, org.springframework.boot.web.servlet.ServletContextInitializerBeans |
| sql | org.springframework.jdbc.core, org.hibernate.SQL, org.jooq.tools.LoggerListener |
5.4.7 使用日志 ShutDown 钩子
为了在应用程序终止时释放日志记录资源,提供了在JVM退出时触发日志系统清理的关闭挂钩。除非将应用程序部署为war文件,否则会自动注册此关闭挂钩。如果应用程序具有复杂的上下文层次结构,则关闭挂钩可能无法满足您的需要。如果没有,请禁用关闭挂钩并调查底层日志系统直接提供的选项。例如,Logback提供了上下文选择器,允许在自己的上下文中创建每个Logger。你可以使用logging.register-shutdown-hook关闭钩子,设置false关闭注册。
logging.register-shutdown-hook=false
5.4.8 自定义日志配置
可以通过在类路径中包含适当的库来激活各种日志记录系统,并且可以通过在路径的根目录中或在以下Spring Environment属性指定的位置提供适当的配置文件来进一步定制:logging.config。
您可以强制Spring Boot使用特定的日志记录系统,使用org.springframework.boot.logging.LoggingSystem。该值应该是LoggingSystem实现的完全限定类名。您还可以使用值none完全禁用Spring Boot的日志记录配置。
由于日志记录是在创建ApplicationContext之前初始化的,因此无法从Spring
@Configuration文件中的@PropertySources控制日志记录。更改日志记录系统或完全禁用日志记录系统的唯一方法是通过系统配置。
根据您的日志记录系统,将加载以下文件:
| Logging System | Customization |
|---|---|
| Logback | logback-spring.xml, logback-spring.groovy, logback.xml, or logback.groovy |
| Log4j2 | log4j2-spring.xml or log4j2.xml |
| JDK (Java Util Logging) | logging.properties |
如果可能,我们建议您在日志配置中使用
-spring变量(例如,logback-spring.xml而不是logback.xml)。如果您使用标准配置位置,spring无法完全控制日志初始化。
Java Util Logging存在已知的类加载问题,在从“可执行jar”运行时会导致问题。我们建议您在从“可执行jar”运行时尽可能避免使用它。
为了帮助定制,提供了一些其他配置从Spring环境传输到系统配置,如下表所述:
| Spring Environment | System Property | Comments |
|---|---|---|
logging.exception-conversion-word |
LOG_EXCEPTION_CONVERSION_WORD |
记录异常时使用的转换字。 |
logging.file.name |
LOG_FILE |
如果已定义,则在默认日志配置中使用。 |
logging.file.path |
LOG_PATH |
如果已定义,则在默认日志配置中使用。 |
logging.pattern.console |
CONSOLE_LOG_PATTERN |
要在控制台上使用的日志模式(stdout)。 |
logging.pattern.dateformat |
LOG_DATEFORMAT_PATTERN |
日志日期格式的追加模式。 |
logging.charset.console |
CONSOLE_LOG_CHARSET |
用于控制台日志记录的字符集。 |
logging.pattern.file |
FILE_LOG_PATTERN |
要在文件中使用的日志模式(如果启用了“LOG_FILE”)。 |
logging.charset.file |
FILE_LOG_CHARSET |
用于文件日志记录的字符集(如果启用了“LOG_FILE”)。 |
logging.pattern.level |
LOG_LEVEL_PATTERN |
呈现日志级别时使用的格式(默认为“%5p”)。 |
PID |
PID |
当前进程ID(如果可能,并且尚未定义为操作系统环境变量时发现)。 |
如果使用Logback,还将传输以下配置:
| Spring Environment | System Property | Comments |
|---|---|---|
logging.logback.rollingpolicy.file-name-pattern |
LOGBACK_ROLLINGPOLICY_FILE_NAME_PATTERN |
滚动的日志文件名模式 (默认${LOG_FILE}.%d{yyyy-MM-dd}.%i.gz). |
logging.logback.rollingpolicy.clean-history-on-start |
LOGBACK_ROLLINGPOLICY_CLEAN_HISTORY_ON_START |
是否在启动时清除存档日志文件。 |
logging.logback.rollingpolicy.max-file-size |
LOGBACK_ROLLINGPOLICY_MAX_FILE_SIZE |
最大日志文件大小。 |
logging.logback.rollingpolicy.total-size-cap |
LOGBACK_ROLLINGPOLICY_TOTAL_SIZE_CAP |
要保留的日志备份的总大小。 |
logging.logback.rollingpolicy.max-history |
LOGBACK_ROLLINGPOLICY_MAX_HISTORY |
要保留的存档日志文件的最大数量。 |
所有受支持的日志记录系统在解析其配置文件时都可以参考系统配置。有关示例,请参见spring-bot.jar中的默认配置:
- Logback
- Log4j 2
- Java Util logging
如果要在日志属性中使用占位符,则应使用Spring Boot的语法,而不是底层框架的语法。值得注意的是,如果使用Logback,则应使用:作为属性名称与其默认值之间的分隔符,而不要使用:-。
通过仅覆盖
LOG_LEVEL_PATTERN(或Logback 的logging.pattern.level),可以将MDC和其他特殊内容添加到日志行。如你使用logging.pattern.level=user:%X{user} %5p,那么默认日志格式包含“user”的MDC条目(如果存在),如下例所示。2019-08-30 12:30:04.031 user:someone INFO 22174 --- [ nio-8080-exec-0] demo.Controller Handling authenticated request
5.4.9 Logback扩展
Spring Boot包括许多Logback扩展,可以帮助进行高级配置。您可以在logback-spring.xml配置文件中使用这些扩展名。
因为标准
logback.xml配置文件很早就加载,您需要使用logback-spring.xml或定义logging.config属性
扩展不能用于Logback的配置扫描。如果尝试这样做,则对配置文件进行更改会导致类似以下错误会被记录:
ERROR in ch.qos.logback.core.joran.spi.Interpreter@4:71 - no applicable action for [springProperty], current ElementPath is [[configuration][springProperty]]
ERROR in ch.qos.logback.core.joran.spi.Interpreter@4:71 - no applicable action for [springProfile], current ElementPath is [[configuration][springProfile]]
Profile指定配置
name属性指定哪个配置文件接受配置。staging)或profile文件表达式。profile表达式允许表达更复杂的逻辑,例如,production & (eu-central | eu-west),查看 Spring Framework指南查看详细信息。以下列表显示了三个示例配置文件:
<springProfile name="staging">

springProfile>

<springProfile name="dev | staging">

springProfile>

<springProfile name="!production">

springProfile>
环境属性配置
source(从环境中),而不是指定直接值。如果您需要将属性存储在local范围以外的其他位置,你可以使用scope属性。如果需要回退值(为在Environment环境中设置),你可以使用defaultValue属性,以下示例显示如何公开配置以在Logback中使用:
<springProperty scope="context" name="fluentHost" source="myapp.fluentd.host"
        defaultValue="localhost"/>
<appender name="FLUENT" class="ch.qos.logback.more.appenders.DataFluentAppender">
    <remoteHost>${fluentHost}remoteHost>
    ...
appender>
source必须使用kebab格式指定(例如my.property-name)。然而,可以使用宽松的规则将属性添加到Environment环境中。
5.4.10 Log4j2 扩展
Spring Boot包括对Log4j2的许多扩展,可以帮助进行高级配置,您可以在任何log4j2-spring.xml配置文件中使用这些扩展。
由于标准
log4j2.xml配置文件加载得太早,因此不能在其中使用扩展。您需要使用log4j2-spring.xml或定义logging.config属性。这些扩展取代了Log4J提供的Spring Boot支持。您应该确保在构建中不包含
org.apache.logging.log4j:log4j-spring-boot模块。
Profile 指定配置
name属性指定哪个配置文件接受配置。staging)或profile文件表达式。profile表达式允许表达更复杂的逻辑,例如,production & (eu-central | eu-west),查看 Spring Framework指南查看详细信息。以下列表显示了三个示例配置文件:
<SpringProfile name="staging">

SpringProfile>

<SpringProfile name="dev | staging">

SpringProfile>

<SpringProfile name="!production">

SpringProfile>
环境属性查找
如果您想在Log4j2配置中引用Spring环境中的属性,可以使用spring:前缀查找。如果您想访问Log4j2配置中application.properties文件中的值,那么这样做很有用。
以下示例显示如何设置名为applicationName的Log4j2属性,该属性从spring环境中读取spring.application.name:
<Properties>
    <Property name="applicationName">${spring:spring.application.name}Property>
Properties>
查找关键字应该以kebab 格式(例如 my.property-name)。
Log4j2 系统配置
Log4j2支持许多可用于配置各种项目的系统配置。log4j2.skipJansi系统属性可用于配置ConsoleAppender是否将尝试在Windows上使用Jansi输出流。
Log4j2初始化后加载的所有系统配置都可以从Spring环境中获得。例如,可以将log4j2.skipJansi=false添加到application.properties文件中,以便ConsoleAppender在Windows上使用Jansi。
只有当系统配置和操作系统环境变量不包含加载的值时,才考虑Spring
Environment环境。
5.5 国际化
Spring Boot支持本地化消息,以便您的应用程序能够迎合不同语言需求的用户。默认情况下,Spring Boot会在类路径的根位置查找messages资源包。
当配置的资源束的默认配置文件可用时(默认情况下为messages.properties),将应用自动配置。如果资源包只包含特定于语言的配置文件,则需要添加默认值。如果没有找到与任何配置的基本名称匹配的配置文件,则不会有自动配置的
MessageSource。
可以使用spring.messages命名空间配置资源包的基本名称以及其他几个属性,如下例所示:
spring.messages.basename=messages,config.i18n.messages
spring.messages.fallback-to-system-locale=false
spring.messages.basename支持逗号分隔的位置列表,可以是包限定符,也可以是从类路径根解析的资源。
有关更多支持的选项,请参阅MessageSourceProperties。
5.6 JSON
Spring Boot提供了与三个JSON映射库的集成:
- Gson
- Jackson
- JSON-B
Jackson是首选和默认库。
5.6.1 Jackson
提供了Jackson的自动配置,Jackson是spring-boot-starter-json的一部分。当Jackson在类路径上时,会自动配置ObjectMapper bean。提供了几个配置,用于自定义ObjectMapper的配置。
自定义序列化和反序列化
如果使用Jackson序列化和反序列化JSON数据,您可能需要编写自己的JsonSerializer和JsonDeserializer类。自定义序列化,通常使用模块化注册。Spring Boot提供了另一种@JsonComponent注解,使直接注册Spring Beans变得更容易。
你能使用@JsonComponent注解在JsonSerializer, JsonDeserializer 或KeyDeserializer 实现上。您还可以在包含序列化程序/反序列化程序作为内部类的类上使用它,如下例所示:
import java.io.IOException;

import com.fasterxml.jackson.core.JsonGenerator;
import com.fasterxml.jackson.core.JsonParser;
import com.fasterxml.jackson.core.ObjectCodec;
import com.fasterxml.jackson.databind.DeserializationContext;
import com.fasterxml.jackson.databind.JsonDeserializer;
import com.fasterxml.jackson.databind.JsonNode;
import com.fasterxml.jackson.databind.JsonSerializer;
import com.fasterxml.jackson.databind.SerializerProvider;

import org.springframework.boot.jackson.JsonComponent;

@JsonComponent
public class MyJsonComponent {

    public static class Serializer extends JsonSerializer<MyObject> {

        @Override
        public void serialize(MyObject value, JsonGenerator jgen, SerializerProvider serializers) throws IOException {
            jgen.writeStartObject();
            jgen.writeStringField("name", value.getName());
            jgen.writeNumberField("age", value.getAge());
            jgen.writeEndObject();
        }

    }

    public static class Deserializer extends JsonDeserializer<MyObject> {

        @Override
        public MyObject deserialize(JsonParser jsonParser, DeserializationContext ctxt) throws IOException {
            ObjectCodec codec = jsonParser.getCodec();
            JsonNode tree = codec.readTree(jsonParser);
            String name = tree.get("name").textValue();
            int age = tree.get("age").intValue();
            return new MyObject(name, age);
        }

    }

}
ApplicationContext中的所有@JsonComponent bean都会自动向Jackson注册。因为@JsonComponent是用@Component元注释的,所以通常的组件扫描规则适用。
Spring Boot还提供了JsonObjectSerializer和JsonObjectDeserializer基类,这些基类在序列化对象时为标准Jackson版本提供了有用的替代方案。有关详细信息,请参阅Javadoc中的JsonObjectSerializer和JsonObjectDeserializer。
上面的示例可以重写为使用JsonObjectSerializer/JsonObjectDeserializer,如下所示:
import java.io.IOException;

import com.fasterxml.jackson.core.JsonGenerator;
import com.fasterxml.jackson.core.JsonParser;
import com.fasterxml.jackson.core.ObjectCodec;
import com.fasterxml.jackson.databind.DeserializationContext;
import com.fasterxml.jackson.databind.JsonNode;
import com.fasterxml.jackson.databind.SerializerProvider;

import org.springframework.boot.jackson.JsonComponent;
import org.springframework.boot.jackson.JsonObjectDeserializer;
import org.springframework.boot.jackson.JsonObjectSerializer;

@JsonComponent
public class MyJsonComponent {

    public static class Serializer extends JsonObjectSerializer<MyObject> {

        @Override
        protected void serializeObject(MyObject value, JsonGenerator jgen, SerializerProvider provider)
                throws IOException {
            jgen.writeStringField("name", value.getName());
            jgen.writeNumberField("age", value.getAge());
        }

    }

    public static class Deserializer extends JsonObjectDeserializer<MyObject> {

        @Override
        protected MyObject deserializeObject(JsonParser jsonParser, DeserializationContext context, ObjectCodec codec,
                JsonNode tree) throws IOException {
            String name = nullSafeValue(tree.get("name"), String.class);
            int age = nullSafeValue(tree.get("age"), Integer.class);
            return new MyObject(name, age);
        }

    }

}
混合
Jackson支持混合可以用于将附加注释混合到目标类上已经声明的注释中。Spring Boot的Jackson自动配置将扫描应用程序的包,查找用@JsonMixin注释的类,并将它们注册到自动配置的ObjectMapper中。注册由Spring Boot的JsonMixinModule执行。
5.6.2 Gson
提供了Gson的自动配置。当Gson在类路径上时,会自动配置Gson bean。提供了几个spring.gson.*配置来定制配置。要获得更多控制,可以使用一个或多个GsonBuilderCustomizer bean。
5.6.3 JSON-B
提供JSON-B的自动配置。当JSON-B API和实现位于类路径上时,将自动配置Jsonb bean。首选的JSON-B实现是Eclipse Yasson,它提供了依赖性管理。
5.7 任务执行和调度
在上下文中缺少Executor bean的情况下,Spring Boot 自动配置ThreadPoolTaskExecutor,并使用可自动关联到异步任务执行(@EnableAsync)和Spring MVC异步请求处理的合理默认值。
常规任务执行(即
@EnableAsync)将透明地使用它,但不会配置Spring MVC支持,因为它需要AsyncTaskExecutor实现(名为applicationTaskExecutor)。根据您的目标安排,您可以将Executor更改为ThreadPoolTaskExecutor,或者同时定义ThreadPoolTaskExecutor和AsyncConfigurer来包装自定义Executor。自动配置的
TaskExecutorBuilder允许您轻松创建复制默认情况下自动配置的实例。
线程池使用8个核心线程,可以根据负载增长和收缩。可以使用spring.task.execution命名空间对这些默认设置进行微调,如下例所示:
spring.task.execution.pool.max-size=16
spring.task.execution.pool.queue-capacity=100
spring.task.execution.pool.keep-alive=10s
这将更改线程池以使用有界队列,这样当队列已满(100个任务)时,线程池将增加到最多16个线程。当线程空闲10秒(而不是默认情况下的60秒)时,会回收线程,因此池的收缩更为积极。
如果需要将ThreadPoolTaskScheduler与计划的任务执行相关联(例如使用@EnableScheduling),也可以自动配置ThreadPoolTaskScheduler。线程池默认使用一个线程,其设置可以使用spring.task.scheduling进行微调,如下例所示:
spring.task.scheduling.thread-name-prefix=scheduling-
spring.task.scheduling.pool.size=2
如果需要创建自定义执行器或调度程序,则在上下文中可以使用TaskExecutorBuilder bean和TaskSchedulerBuilder bean。
笔者注:TaskExecutorBuilder 和 TaskSchedulerBuilder 能通过Bean 注入,最终创建的Bean 为 ThreadPoolTaskExecutor
5.8 测试
Spring Boot提供了许多实用程序和注解,以帮助测试应用程序。测试支持由两个模块提供:spring-boot-test包含核心项目,spring-boot-test-autoconfigure支持自动配置。
大多数开发者使用spring-boot-starter-test开始,它导入了两个Spring Boot测试模块以及JUnit Jupiter、AssertJ、Hamcrest和许多其他有用的库。
如果您有使用JUnit4的测试,可以使用JUnit5引擎来运行它们,按以下示例添加
junit-vintage-engine依赖<dependency> <groupId>org.junit.vintagegroupId> <artifactId>junit-vintage-engineartifactId> <scope>testscope> <exclusions> <exclusion> <groupId>org.hamcrestgroupId> <artifactId>hamcrest-coreartifactId> exclusion> exclusions> dependency>
5.8.1 测试范围依赖
spring-boot-starter-test 的Starter(test scope)包含如下库:
- JUnit 5: Java单元测试的实际标准
- Spring Test & Spring Boot Test: Spring Boot应用程序的实用程序和集成测试支持
- AssertJ: 断言库
- Hamcrest: 匹配器对象库(也称为约束或谓词
- Mockito: Java模拟框架.
- JSONassert: JSON断言库
- JsonPath: JSON适用的XPath
我们通常发现这些公共库在编写测试时很有用。如果这些库不符合您的需要,您可以添加自己的附加测试依赖项。
5.8.2 测试Spring 应用程序
依赖注入的一个主要优点是它应该使代码更容易进行单元测试。您可以使用new操作符实例化对象,而不需要使用Spring,也可是使用mock对象。
通常需要集成测试而不是单元测试(在Spring ApplicationContext中)。Spring 框架包括这样的集成测试模块,你可以直接依赖org.springframework:spring-test或者使用spring-boot-starter-test。
如果您以前没有使用过spring测试模块,那么应该首先阅读spring Framework参考文档的相关部分。
5.8.3 测试Spring Boot 应用程序
Spring Boot应用程序是一个Spring ApplicationContext,因此除了使用普通的Spring上下文进行测试外,无需进行任何特殊的测试。
Spring Boot 提供 @SpringBootTest注解,当您需要Spring Boot特性时,它可以作为标准spring test @ContextConfiguration注释的替代。注释的工作原理是通过SpringApplication创建测试中使用的ApplicationContext。除了@SpringBootTest之外,还提供了许多其他注解来测试应用程序的更具体的切片。
检测Web应用程序类型
默认的,@SpringBootTest不会启动一个服务,您可以使用@SpringBootTest的webEnvironment属性来进一步优化测试的运行方式:
MOCK(Default) : 加载一个webApplicationContext并提供一个模拟的web环境。使用该注解时不会启动一个容器。如果在类路径上web 环境不可用,将创建一个非web环境的ApplicationContext。它可以与@AutoConfigureMockMvc或者@AutoConfigureWebTestClient一起使用,用来对web应用程序进行模拟测试。RANDOM_PORT:加载WebServerApplicationContext并提供真实的web环境。嵌入服务器将启动和监听基于随机端口。DEFINED_PORT: 加载WebServerApplicationContext并提供真实的web环境。嵌入式服务器启动并在定义的端口(基于application.properties)或默认端口8080上侦听。NONE:使用SpringApplication加载ApplicationContext,但不提供任何web环境(模拟或其他)。
如果您的测试是@Transactional,默认情况下,它会在每个测试方法结束时回滚事务。然而,当
RANDOM_PORT或DEFINED_PORT一起使用时,实际会提供了一个真实的servlet环境,HTTP客户端和服务器在单独的线程中运行,在这种情况下,在服务器上启动的任何事务都不会回滚。
检测测试配置
如果使用Spring 框架,你可以使用@ContextConfiguration(classes=…)指定要加载的@Configuration,或者在测试用使用的嵌套@Configuration。
使用Spring Boot测试,这些不是必须的,Spring Boot 的@*Test注解会自动搜索primary 配置,只要没有显示指定配置。
从当前的测试包开始搜索,直到搜索到@SpringBootApplication或@SpringBootConfiguration为止,只要以合理的方式构造代码,总是可以找到。
如果需要自定义主配置,可以使用嵌套的@TestConfiguration类,不同于嵌套的@Configuration类,嵌套的@TestConfiguration使用在应用程序的主配置之外。
Spring 测试框架会缓存上下文,因此只要你的测试共享配置,这些耗时操作都只会加载一次。
笔者注:
@TestConfiguration用来对@Configuration做补充,用来指定专门用来测试的bean
排除测试配置
如果你的应用使用了组件扫描(比如,使用了@SpringBootApplication 或 @ComponentScan),你可能会发现对于一些特定测试创建的配置类也被加载。
@TestConfiguration能够使用在测试的内部类中,以自定义配置。如果你定义在顶级类,则表示src/test/java中的类不通过扫描获取,这个时候可以通过Import显式导入。
import org.junit.jupiter.api.Test;

import org.springframework.boot.test.context.SpringBootTest;
import org.springframework.context.annotation.Import;

@SpringBootTest
@Import(MyTestsConfiguration.class)
class MyTests {

    @Test
    void exampleTest() {
        // ...
    }

}
如果不使用
@SpringBootApplication,而是使用的@ComponentScan,则应该注册TypeExcludeFilter,用来排除配置
使用应用程序参数
如果你的应用需要参数,那么可以使用@SpringBootTest的args属性。
import org.junit.jupiter.api.Test;

import org.springframework.beans.factory.annotation.Autowired;
import org.springframework.boot.ApplicationArguments;
import org.springframework.boot.test.context.SpringBootTest;

import static org.assertj.core.api.Assertions.assertThat;

@SpringBootTest(args = "--app.test=one")
class MyApplicationArgumentTests {

    @Test
    void applicationArgumentsPopulated(@Autowired ApplicationArguments args) {
        assertThat(args.getOptionNames()).containsOnly("app.test");
        assertThat(args.getOptionValues("app.test")).containsOnly("one");
    }

}
使用Mock环境测试
使用Spring MVC,我们可以使用MockMvc或WebTestClient查询web端点,如下例所示:
import org.junit.jupiter.api.Test;

import org.springframework.beans.factory.annotation.Autowired;
import org.springframework.boot.test.autoconfigure.web.servlet.AutoConfigureMockMvc;
import org.springframework.boot.test.context.SpringBootTest;
import org.springframework.test.web.reactive.server.WebTestClient;
import org.springframework.test.web.servlet.MockMvc;

import static org.springframework.test.web.servlet.request.MockMvcRequestBuilders.get;
import static org.springframework.test.web.servlet.result.MockMvcResultMatchers.content;
import static org.springframework.test.web.servlet.result.MockMvcResultMatchers.status;

@SpringBootTest
@AutoConfigureMockMvc
class MyMockMvcTests {

    @Test
    void testWithMockMvc(@Autowired MockMvc mvc) throws Exception {
        mvc.perform(get("/")).andExpect(status().isOk()).andExpect(content().string("Hello World"));
    }

    // 如果WebFlux存在,也可以使用WebTestClient测试
    @Test
    void testWithWebTestClient(@Autowired WebTestClient webClient) {
        webClient
                .get().uri("/")
                .exchange()
                .expectStatus().isOk()
                .expectBody(String.class).isEqualTo("Hello World");
    }

}
如果希望只关注web层而不启动完整的ApplicationContext,请考虑使用@WebMvcTest。
对于Spring WebFlux,可以使用WebTestClient,如下示例:
import org.junit.jupiter.api.Test;

import org.springframework.beans.factory.annotation.Autowired;
import org.springframework.boot.test.autoconfigure.web.reactive.AutoConfigureWebTestClient;
import org.springframework.boot.test.context.SpringBootTest;
import org.springframework.test.web.reactive.server.WebTestClient;

@SpringBootTest
@AutoConfigureWebTestClient
class MyMockWebTestClientTests {

    @Test
    void exampleTest(@Autowired WebTestClient webClient) {
        webClient
            .get().uri("/")
            .exchange()
            .expectStatus().isOk()
            .expectBody(String.class).isEqualTo("Hello World");
    }

}
在模拟环境中进行测试通常比使用完整的servlet容器运行更快。然而,由于模拟发生在SpringMVC层,依赖于较低级别servlet容器行为的代码不能直接使用MockMvc进行测试。
例如,Spring Boot的错误处理基于servlet容器提供的“错误页”支持。这意味着,虽然可以按预期测试MVC层抛出和处理异常,但不能直接测试是否呈现了特定的自定义错误页面。如果需要测试这些较低级别的问题,可以启动一个完全运行的服务器,如下一节所述。
使用运行服务器测试
如果需要启动一个完整的运行服务器,建议使用随机端口。使用@SpringBootTest(webEnvironment=WebEnvironment.RANDOM_PORT),将在每次运行测试的时候获取一个随机的可用端口。
@LocalServerPort注解能在测试中注入实际使用的端口。为了方便,在参数中使用@Autowired注入WebTestClient。
import org.junit.jupiter.api.Test;

import org.springframework.beans.factory.annotation.Autowired;
import org.springframework.boot.test.context.SpringBootTest;
import org.springframework.boot.test.context.SpringBootTest.WebEnvironment;
import org.springframework.test.web.reactive.server.WebTestClient;

@SpringBootTest(webEnvironment = WebEnvironment.RANDOM_PORT)
class MyRandomPortWebTestClientTests {

    @Test
    void exampleTest(@Autowired WebTestClient webClient) {
        webClient
            .get().uri("/")
            .exchange()
            .expectStatus().isOk()
            .expectBody(String.class).isEqualTo("Hello World");
    }

}
WebTestClient 能使用在实时服务和模拟环境中
这种方式要求类路径中存在spring-webflux,如果你不添加webflux,Spring Boot提供了TestRestTemplate。
import org.junit.jupiter.api.Test;

import org.springframework.beans.factory.annotation.Autowired;
import org.springframework.boot.test.context.SpringBootTest;
import org.springframework.boot.test.context.SpringBootTest.WebEnvironment;
import org.springframework.boot.test.web.client.TestRestTemplate;

import static org.assertj.core.api.Assertions.assertThat;

@SpringBootTest(webEnvironment = WebEnvironment.RANDOM_PORT)
class MyRandomPortTestRestTemplateTests {

    @Test
    void exampleTest(@Autowired TestRestTemplate restTemplate) {
        String body = restTemplate.getForObject("/", String.class);
        assertThat(body).isEqualTo("Hello World");
    }

}
自定义WebTestClient
需要自定义WebTestClient,配置一个WebTestClientBuilderCustomizer bean。使用WebTestClient.Builder会调用此类创建的bean。
笔者注:
源码如下:
	@Configuration(proxyBeanMethods = false)
	@ConditionalOnClass({ WebClient.class, WebTestClient.class })
	static class WebTestClientMockMvcConfiguration {

		@Bean
		@ConditionalOnMissingBean
		WebTestClient webTestClient(MockMvc mockMvc, List<WebTestClientBuilderCustomizer> customizers) {
			WebTestClient.Builder builder = MockMvcWebTestClient.bindTo(mockMvc);
			for (WebTestClientBuilderCustomizer customizer : customizers) {
				customizer.customize(builder);
			}
			return builder.build();
		}

	}
使用JMX
因为测试上下文框架缓存上下文的缘故,默认情况下禁用JMX以防止相同的组件注册在同一域上。如果此类需要访问MBeanServer,请标记dirty。
import javax.management.MBeanServer;

import org.junit.jupiter.api.Test;

import org.springframework.beans.factory.annotation.Autowired;
import org.springframework.boot.test.context.SpringBootTest;
import org.springframework.test.annotation.DirtiesContext;

import static org.assertj.core.api.Assertions.assertThat;

@SpringBootTest(properties = "spring.jmx.enabled=true")
@DirtiesContext
class MyJmxTests {

    @Autowired
    private MBeanServer mBeanServer;

    @Test
    void exampleTest() {
        assertThat(this.mBeanServer.getDomains()).contains("java.lang");
        // ...
    }

}
查看更多介绍,@DirtiesContext
使用Metrics
不论类路径是怎么样的,使用@SpringBootTest时都不会自动配置,除了内存中支持的注册表。
如果需要将度量导出到其他后端作为集成测试的一部分,请使用@AutoConfigureMetrics对其进行注释。
Mocking and Spying Beans
运行测试时,有时需要模拟应用程序上下文中的某些组件。例如,您可能有一个在开发期间不可用的远程服务的facade。当您想要模拟在真实环境中很难触发的故障时,模拟也很有用。
Spring Boot包含一个@MockBean注解,可用于为ApplicationContext中的bean定义Mockito mock。您可以使用注解添加新bean或替换单个现有bean定义。注解可以直接用于测试类、测试中的字段或@Configuration类和字段。当在字段上使用时,创建的mock的实例也会被注入。模拟bean在每个测试方法之后都会自动重置。
如果您的测试使用SpringBoot的一个测试注释(例如
@SpringBootTest),则会自动启用此功能。要将此功能用于不同的排列,必须显式添加监听器,如下例所示:import org.springframework.boot.test.mock.mockito.MockitoTestExecutionListener; import org.springframework.boot.test.mock.mockito.ResetMocksTestExecutionListener; import org.springframework.test.context.ContextConfiguration; import org.springframework.test.context.TestExecutionListeners; @ContextConfiguration(classes = MyConfig.class) @TestExecutionListeners({ MockitoTestExecutionListener.class, ResetMocksTestExecutionListener.class }) class MyTests { // ... }
以下示例使用模拟实现替换现有的RemoteService bean:
import org.junit.jupiter.api.Test;

import org.springframework.beans.factory.annotation.Autowired;
import org.springframework.boot.test.context.SpringBootTest;
import org.springframework.boot.test.mock.mockito.MockBean;

import static org.assertj.core.api.Assertions.assertThat;
import static org.mockito.BDDMockito.given;

@SpringBootTest
class MyTests {

    @Autowired
    private Reverser reverser;

    @MockBean
    private RemoteService remoteService;

    @Test
    void exampleTest() {
        given(this.remoteService.getValue()).willReturn("spring");
        String reverse = this.reverser.getReverseValue(); // Calls injected RemoteService
        assertThat(reverse).isEqualTo("gnirps");
    }

}
@MockBean不能用于模拟在应用程序上下文刷新期间执行的bean的行为。执行测试时,应用程序上下文刷新已完成,此时配置模拟行为已经晚了。建议在这种情况下使用@Bean方法来创建和配置模拟。
此外,您可以使用@SpyBean用Mockito spy包装任何现有的bean。有关详细信息,请参阅Javadoc。
笔者注:
@SpyBean 可以用在类上,或者@Configuration类型、测试类和@RunWith类中的字段上。
@SpyBean 示例:
@RunWith(SpringRunner.class)
 public class ExampleTests {

     @SpyBean
     private ExampleService service;

     @Autowired
     private UserOfService userOfService;

     @Test
     public void testUserOfService() {
         String actual = this.userOfService.makeUse();
         assertEquals("Was: Hello", actual);
         verify(this.service).greet();
     }

     @Configuration
     @Import(UserOfService.class) // A @Component injected with ExampleService
     static class Config {
     }


 }
CGLib代理,例如为作用域bean创建的代理,将代理的方法声明为final。这会阻止Mockito正常运行,因为它无法在默认配置中模拟或监视最终方法。如果您想模拟或监视这样的bean,请通过将org.Mockito:Mockito-inline添加到应用程序的测试依赖项中,将Mockito配置为使用其内联模拟生成器。这允许Mockito模拟和监视最终方法。
虽然Spring的测试框架在测试之间缓存应用程序上下文,并为共享相同配置的测试重用上下文,但使用@MockBean或@SpyBean会影响缓存键,这很可能会增加上下文的数量。
如果您使用@SpyBean监视带有@Cacheable方法的bean,这些方法按名称引用参数,则必须使用-parameters编译应用程序。这确保一旦监视到bean,缓存基础结构就可以使用参数名称。
当您使用@SpyBean监视由Spring代理的bean时,在某些情况下,您可能需要删除Spring的代理,例如,在使用given或when设置期望值时。使用AopTestUtils.getTargetObject(yourProxiedSpy)执行此操作。
Auto-configured 测试
Spring Boot 自动配置系统对于应用程序能够运行的很好,但有时对测试来讲还是太多了。在测试的时候只加载测试“片段”是非常有帮助的。比如,您可能希望测试Spring MVC控制器是否正确映射URL,并且不希望在这些测试中涉及数据库调用,或者您可能希望对JPA实体进行测试,并且当这些测试运行时,您不关心web层。
spring-boot-test-autoconfigure模块有许多注解,能够用来配置这些"片段"。他们中的每个都以相似的方式工作,提供了@…Test注解用来加载ApplicationContext,一个或多个@AutoConfigure…用来自定义自动化配置。
每个片段将组件扫描限制到适当的组件,并加载一组非常有限的自动配置类。如果您需要排除其中一个,大多数
@…Test批注提供excludeAutoConfiguration属性。或者,您可以使用@ImportAutoConfiguration#exclude。
不支持一个测试中使用多个@...Test来包含多个“片段”。如果您需要多个“片段”,请选择一个@…Test注解并包括其他片段的@AutoConfiguration… 注解。
如果你对应用的测试片段不关心,但需要一些自动配置的测试bean,可以使用@AutoConfigure…和@SpringBootTest注解的组合。
Auto-configured JSON 测试
要测试对象JSON序列化和反序列化是否按预期工作,可以使用@JsonTest注解。@JsonTest自动配置可用的受支持的JSON映射器,它可以是以下库之一:
- Jackson
ObjectMapper, 任何@JsonComponentbean 和任何 JacksonModule GsonJsonb
@JsonTest 启用的自动配置列表可在附录中找到。
如果需要自动配置的元素,你可以使用@AutoConfigureJsonTesters注解。
Spring Boot 包括基于AssertJ的辅助程序,他们与JSONAssert 和 JsonPath库一起工作,以检查JSON是否按预期工作。JacksonTester、GsonTester、JsonbTester和BasicJsonTester类能够分别用于Jackson, Gson, Jsonb和字符串。使用@JsonTest时,测试类上的任何辅助字段都可以使用@Autowired。以下示例显示了Jackson的测试类。
import org.junit.jupiter.api.Test;

import org.springframework.beans.factory.annotation.Autowired;
import org.springframework.boot.test.autoconfigure.json.JsonTest;
import org.springframework.boot.test.json.JacksonTester;

import static org.assertj.core.api.Assertions.assertThat;

@JsonTest
class MyJsonTests {

    @Autowired
    private JacksonTester<VehicleDetails> json;

    @Test
    void serialize() throws Exception {
        VehicleDetails details = new VehicleDetails("Honda", "Civic");
        // Assert against a `.json` file in the same package as the test
        assertThat(this.json.write(details)).isEqualToJson("expected.json");
        // Or use JSON path based assertions
        assertThat(this.json.write(details)).hasJsonPathStringValue("@.make");
        assertThat(this.json.write(details)).extractingJsonPathStringValue("@.make").isEqualTo("Honda");
    }

    @Test
    void deserialize() throws Exception {
        String content = "{\"make\":\"Ford\",\"model\":\"Focus\"}";
        assertThat(this.json.parse(content)).isEqualTo(new VehicleDetails("Ford", "Focus"));
        assertThat(this.json.parseObject(content).getMake()).isEqualTo("Ford");
    }

}
JSON 辅助类也可以直接用于单元测试。如果不使用@JsonTest,请在@Before中调用helper的initFields方法
如果是用Spring Boot 基于AssertJ的辅助程序来断言给定JSON路径上的数值,则可能没法根据类型使用isEqualTo。相反,可使用AssertJ的satisfies来断言该值与给定条件是否匹配。例如,下面示例断言实际数字是一个接近0.15的浮点值,偏移量为0.01
@Test
void someTest() throws Exception {
    SomeObject value = new SomeObject(0.152f);
    assertThat(this.json.write(value)).extractingJsonPathNumberValue("@.test.numberValue")
            .satisfies((number) -> assertThat(number.floatValue()).isCloseTo(0.15f, within(0.01f)));
}
Auto-configured Spring MVC 测试
要测试Spring MVC 控制器是否按预期工作,使用@WebMvcTest注解。@WebMvcTest自动配置Spring MVC 基础结构,并将扫描到的bean限制为@Controller, @ControllerAdvice, @JsonComponent, Converter, GenericConverter, Filter, HandlerInterceptor, WebMvcConfigurer, WebMvcRegistrations, 和 HandlerMethodArgumentResolver。使用@WebMvcTest注解时,不会扫描常规@Component和@ConfigurationProperties bean。@EnableConfigurationProperties可用于包含@ConfigurationProperties bean。
可以在附录中查看@WebMvcTest启用的自动配置列表
如果需要注册额外的组件,比如Jackson Module,你能使用@Import导入额外的配置类。
一般的@WebMvcTest只能用于一个控制器,并与@MockBean结合使用,提供模拟实现。
@WebMvcTest也自动配置MockMvc,Mock MVC 提供一个强大快速测试Mvc控制器的方法,而不需要启动整个HTTP 服务器。
还能够在非@WebMvcTest(如@SpringBootTest)中使用@AutoConfigureMockMvc对MockMVC 进行自动配置。如下是MockMvc的示例:
import org.junit.jupiter.api.Test;

import org.springframework.beans.factory.annotation.Autowired;
import org.springframework.boot.test.autoconfigure.web.servlet.WebMvcTest;
import org.springframework.boot.test.mock.mockito.MockBean;
import org.springframework.http.MediaType;
import org.springframework.test.web.servlet.MockMvc;

import static org.mockito.BDDMockito.given;
import static org.springframework.test.web.servlet.request.MockMvcRequestBuilders.get;
import static org.springframework.test.web.servlet.result.MockMvcResultMatchers.content;
import static org.springframework.test.web.servlet.result.MockMvcResultMatchers.status;

@WebMvcTest(UserVehicleController.class)
class MyControllerTests {

    @Autowired
    private MockMvc mvc;

    @MockBean
    private UserVehicleService userVehicleService;

    @Test
    void testExample() throws Exception {
        given(this.userVehicleService.getVehicleDetails("sboot"))
            .willReturn(new VehicleDetails("Honda", "Civic"));
        this.mvc.perform(get("/sboot/vehicle").accept(MediaType.TEXT_PLAIN))
            .andExpect(status().isOk())
            .andExpect(content().string("Honda Civic"));
    }

}
如果需要配置自动配置的元素(例如,当应用servlet过滤器时),可以使用@AutoConfigureMockMvc注解中的属性。
如果使用HtmlUnit和Selenium,自动配置还提供HtmlUnit WebClient bean或Selenium WebDriver bean。以下示例使用HtmlUnit:
import com.gargoylesoftware.htmlunit.WebClient;
import com.gargoylesoftware.htmlunit.html.HtmlPage;
import org.junit.jupiter.api.Test;

import org.springframework.beans.factory.annotation.Autowired;
import org.springframework.boot.test.autoconfigure.web.servlet.WebMvcTest;
import org.springframework.boot.test.mock.mockito.MockBean;

import static org.assertj.core.api.Assertions.assertThat;
import static org.mockito.BDDMockito.given;

@WebMvcTest(UserVehicleController.class)
class MyHtmlUnitTests {

    @Autowired
    private WebClient webClient;

    @MockBean
    private UserVehicleService userVehicleService;

    @Test
    void testExample() throws Exception {
        given(this.userVehicleService.getVehicleDetails("sboot")).willReturn(new VehicleDetails("Honda", "Civic"));
        HtmlPage page = this.webClient.getPage("/sboot/vehicle.html");
        assertThat(page.getBody().getTextContent()).isEqualTo("Honda Civic");
    }

}
默认情况下,Spring Boot 将WebDriver bean 放置在一个特殊的 scope中,以确保每次测试以后驱动程序退出,并注入新的实例。
Spring Boot 创建的 webDriver 作用域将替换任何用户定义的同名作用域。若是定义了本身的webDriver作用域,则在使用@WebMvcTest时可能会发现他停止工作。
如果类路径上有Spring Security,@WebMvcTest还将扫描WebSecurityConfigurer bean。您可以使用SpringSecurity的测试支持,而不是完全禁用此类测试的安全性。有关如何使用Spring Security的MockMvc支持的更多详细信息,请参阅本节的Testing With Spring Security操作指南。
有时编写SpringMVC测试是不够的;Spring Boot可以帮助您在实际服务器上运行完整的端到端测试。
Auto-configured Spring WebFlux 测试
要测试Spring WebFlux 控制器是否按预期工作,你能够使用@WebFluxTest注解。@WebFluxTest自动配置Spring WebFlux 基础设施,并将扫描的bean限制为@Controller、@ControllerAdvice、@JsonComponent、Converter、GenericConverter、WebFilter和WebFluxConfigurer。使用@WebFluxTest 注解时,不会扫描常规的@Component和@ConfigurationProperties。
@WebFluxTest启用的自动配置列表可在附录中找到
如果您需要注册额外的组件,例如Jackson Module,您可以在测试中使用@import导入其他配置类。
通常,@WebFluxTest仅限于一个控制器,并与@MockBean注解结合使用,为所需的合作者提供模拟实现。
@WebFluxTest还自动配置WebTestClient,它提供了一种快速测试WebFlux控制器的强大方法,无需启动完整的HTTP服务器。
您还可以在非@WebFluxTest(例如@SpringBootTest)使用@AutoConfigureWebTestClient注解,以自动配置web测试客户端。以下示例显示了一个同时使用@WebFluxTest和WebTestClient的类:
import org.junit.jupiter.api.Test;

import org.springframework.beans.factory.annotation.Autowired;
import org.springframework.boot.test.autoconfigure.web.reactive.WebFluxTest;
import org.springframework.boot.test.mock.mockito.MockBean;
import org.springframework.http.MediaType;
import org.springframework.test.web.reactive.server.WebTestClient;

import static org.mockito.BDDMockito.given;

@WebFluxTest(UserVehicleController.class)
class MyControllerTests {

    @Autowired
    private WebTestClient webClient;

    @MockBean
    private UserVehicleService userVehicleService;

    @Test
    void testExample() {
        given(this.userVehicleService.getVehicleDetails("sboot"))
            .willReturn(new VehicleDetails("Honda", "Civic"));
        this.webClient.get().uri("/sboot/vehicle").accept(MediaType.TEXT_PLAIN).exchange()
            .expectStatus().isOk()
            .expectBody(String.class).isEqualTo("Honda Civic");
    }

}
此设置仅受WebFlux应用程序支持,因为在模拟的web应用程序中使用WebTestClient目前仅适用于WebFlux。
@WebFluxTest无法检测通过功能web框架注册的路由。要在上下文中测试RouterFunction bean,请考虑使用@Import或@SpringBootTest自己导入RouterFunction。
@WebFluxTest无法检测注册为SecurityWebFilterChain类型的@Bean的自定义安全配置。要将其包含在测试中,您需要使用@import或@SpringBootTest导入注册bean的配置。
有时编写SpringWebFlux测试是不够的;Spring Boot可以帮助您在实际服务器上运行完整的端到端测试。
Auto-configured Spring GraphQL 测试
略
Auto-configured Data Cassandra 测试
略
Auto-configured Data Couchbase 测试
略
Auto-configured Data Elasticsearch 测试
您可以使用@DataElasticsearchTest测试Elasticsearch应用程序。默认情况下,它配置ElasticsearchRestTemplate,扫描@Document类,并配置SpringDataElasticSearch存储库。使用@DataElasticsearchTest注解时,不会扫描常规@Component和@ConfigurationProperties bean。@EnableConfigurationProperties可用于包含@ConfigurationProperties bean。(有关在Spring Boot中使用Elasticsearch的更多信息,请参阅本章前面的“Elasticsearch”。)
更多
@DataElasticsearchTest列表在这里查看
以下示例显示了在Spring Boot中使用Elasticsearch测试的典型示例:
import org.springframework.beans.factory.annotation.Autowired;
import org.springframework.boot.test.autoconfigure.data.elasticsearch.DataElasticsearchTest;

@DataElasticsearchTest
class MyDataElasticsearchTests {

    @Autowired
    private SomeRepository repository;

    // ...

}
Auto-configured Data JPA 测试
略
Auto-configured JDBC 测试
略
Auto-configured Data JDBC 测试
略
Auto-configured jOOQ 测试
略
Auto-configured Data MongoDB 测试
您可以使用@DataMongoTest测试MongoDB应用程序。默认情况下,它配置内存中嵌入的MongoDB(如果可用),配置MongoTemplate,扫描@Document类,并配置Spring Data MongoDB存储库。使用@DataMongoTest注解时,不会扫描常规@Component和@ConfigurationProperties bean。@EnableConfigurationProperties可用于包含@ConfigurationProperties bean。(有关在Spring Boot中使用MongoDB的更多信息,请参阅“MongoDB”。)
@DataMongoTest 自动配置列表查看。
下面是典型的使用@DataMongoTest的示例:
import org.springframework.beans.factory.annotation.Autowired;
import org.springframework.boot.test.autoconfigure.data.mongo.DataMongoTest;
import org.springframework.data.mongodb.core.MongoTemplate;

@DataMongoTest
class MyDataMongoDbTests {

    @Autowired
    private MongoTemplate mongoTemplate;

    // ...

}
内存嵌入式MongoDB通常很适合测试,因为它速度快,不需要任何开发人员安装。但是,如果您希望对真实的MongoDB服务器运行测试,则应排除嵌入式MongoDB自动配置,如下例所示:
import org.springframework.boot.autoconfigure.mongo.embedded.EmbeddedMongoAutoConfiguration;
import org.springframework.boot.test.autoconfigure.data.mongo.DataMongoTest;

@DataMongoTest(excludeAutoConfiguration = EmbeddedMongoAutoConfiguration.class)
class MyDataMongoDbTests {

    // ...

}
Auto-configured Data Neo4j 测试
略
Auto-configured Data Redis 测试
您可以使用@DataRedisTest测试Redis应用程序。默认情况下,它扫描@RedisHash类并配置Spring Data Redis存储库。使用@DataRedisTest注解时,不会扫描常规@Component和@ConfigurationProperties bean。@EnableConfigurationProperties可用于包含@ConfigurationProperties bean。(有关在Spring Boot中使用Redis的更多信息,请参阅“Redis”。)
@DataRedisTest 更多自动配置列表查看附录
@DataRedisTest注解使用示例:
import org.springframework.beans.factory.annotation.Autowired;
import org.springframework.boot.test.autoconfigure.data.redis.DataRedisTest;

@DataRedisTest
class MyDataRedisTests {

    @Autowired
    private SomeRepository repository;

    // ...

}
Auto-configured Data LDAP 测试
Auto-configured REST Clients
您可以使用@RestClientTest注解来测试REST客户端。默认情况下,它自动配置Jackson、GSON和Jsonb支持,配置RestTemplateBuilder,并添加对MockRestServiceServer的支持。使用@RestClientTest注解时,不会扫描常规@Component和@ConfigurationProperties bean。@EnableConfigurationProperties可用于包含@ConfigurationProperties bean。
@RestClientTest 更多自动配置设置查看附录
应使用@RestClientTest的value或components属性指定要测试的特定bean,如下例所示:
import org.junit.jupiter.api.Test;

import org.springframework.beans.factory.annotation.Autowired;
import org.springframework.boot.test.autoconfigure.web.client.RestClientTest;
import org.springframework.http.MediaType;
import org.springframework.test.web.client.MockRestServiceServer;

import static org.assertj.core.api.Assertions.assertThat;
import static org.springframework.test.web.client.match.MockRestRequestMatchers.requestTo;
import static org.springframework.test.web.client.response.MockRestResponseCreators.withSuccess;

@RestClientTest(RemoteVehicleDetailsService.class)
class MyRestClientTests {

    @Autowired
    private RemoteVehicleDetailsService service;

    @Autowired
    private MockRestServiceServer server;

    @Test
    void getVehicleDetailsWhenResultIsSuccessShouldReturnDetails() {
        this.server.expect(requestTo("/greet/details")).andRespond(withSuccess("hello", MediaType.TEXT_PLAIN));
        String greeting = this.service.callRestService();
        assertThat(greeting).isEqualTo("hello");
    }

}
Auto-configured Spring REST Docs Tests
你可以使用@AutoConfigureRestDocs注解在Mock MVC,REST Assured,或者 WebTestClient的测试中来使用Spring REST Docs。
@AutoConfigureRestDocs可以覆盖默认的输出目录(如果使用Maven,则为target/generated-snippets,如果是Gradle,则为build/generated-snippets)。
使用Mock MVC 测试 Auto-configured Spring REST Docs
基于servlet的Web应用程序@AutoConfigureRestDocs支持自定义MockMvc bean,以便在测试中使用Spring REST Docs,在单元测试中使用@Autowired注入。
import org.junit.jupiter.api.Test;

import org.springframework.beans.factory.annotation.Autowired;
import org.springframework.boot.test.autoconfigure.restdocs.AutoConfigureRestDocs;
import org.springframework.boot.test.autoconfigure.web.servlet.WebMvcTest;
import org.springframework.http.MediaType;
import org.springframework.test.web.servlet.MockMvc;

import static org.springframework.restdocs.mockmvc.MockMvcRestDocumentation.document;
import static org.springframework.test.web.servlet.request.MockMvcRequestBuilders.get;
import static org.springframework.test.web.servlet.result.MockMvcResultMatchers.status;

@WebMvcTest(UserController.class)
@AutoConfigureRestDocs
class MyUserDocumentationTests {

    @Autowired
    private MockMvc mvc;

    @Test
    void listUsers() throws Exception {
        this.mvc.perform(get("/users").accept(MediaType.TEXT_PLAIN))
            .andExpect(status().isOk())
            .andDo(document("list-users"));
    }

}
如果要比@AutoConfigureRestDocs更多的控制Spring REST Docs的配置,可以使用RestDocsMockMvcConfigurationCustomizer。
import org.springframework.boot.test.autoconfigure.restdocs.RestDocsMockMvcConfigurationCustomizer;
import org.springframework.boot.test.context.TestConfiguration;
import org.springframework.restdocs.mockmvc.MockMvcRestDocumentationConfigurer;
import org.springframework.restdocs.templates.TemplateFormats;

@TestConfiguration(proxyBeanMethods = false)
public class MyRestDocsConfiguration implements RestDocsMockMvcConfigurationCustomizer {

    @Override
    public void customize(MockMvcRestDocumentationConfigurer configurer) {
        configurer.snippets().withTemplateFormat(TemplateFormats.markdown());
    }

}
如果要让Spring REST Docs支持参数化输出目录,可以创建一个RestDocumentationResultHandler bean。自动配置使用此结果处理程序调用alwaysDo,从而使每个MockMvc调用自动生成默认代码段。以下示例显示了正在定义的RestDocumentationResultHandler:
import org.springframework.boot.test.context.TestConfiguration;
import org.springframework.context.annotation.Bean;
import org.springframework.restdocs.mockmvc.MockMvcRestDocumentation;
import org.springframework.restdocs.mockmvc.RestDocumentationResultHandler;

@TestConfiguration(proxyBeanMethods = false)
public class MyResultHandlerConfiguration {

    @Bean
    public RestDocumentationResultHandler restDocumentation() {
        return MockMvcRestDocumentation.document("{method-name}");
    }

}
使用WebTestClient测试Auto-configured Spring REST Docs
在reactive环境的Web应用程序,@AutoConfigureRestDocs可以使用WebTestClient进行测试。可以使用@Autowired注入,并在测试中使用@WebFluxTest和Spring REST Docs。
import org.junit.jupiter.api.Test;

import org.springframework.beans.factory.annotation.Autowired;
import org.springframework.boot.test.autoconfigure.restdocs.AutoConfigureRestDocs;
import org.springframework.boot.test.autoconfigure.web.reactive.WebFluxTest;
import org.springframework.test.web.reactive.server.WebTestClient;

import static org.springframework.restdocs.webtestclient.WebTestClientRestDocumentation.document;

@WebFluxTest
@AutoConfigureRestDocs
class MyUsersDocumentationTests {

    @Autowired
    private WebTestClient webTestClient;

    @Test
    void listUsers() {
        this.webTestClient
            .get().uri("/")
        .exchange()
        .expectStatus()
            .isOk()
        .expectBody()
            .consumeWith(document("list-users"));
    }

}
同样,可以自定义RestDocsWebTestClientConfigurationCustomizer bean,提供更多的Spring REST Docs配置控制。
import org.springframework.boot.test.autoconfigure.restdocs.RestDocsWebTestClientConfigurationCustomizer;
import org.springframework.boot.test.context.TestConfiguration;
import org.springframework.restdocs.webtestclient.WebTestClientRestDocumentationConfigurer;

@TestConfiguration(proxyBeanMethods = false)
public class MyRestDocsConfiguration implements RestDocsWebTestClientConfigurationCustomizer {

    @Override
    public void customize(WebTestClientRestDocumentationConfigurer configurer) {
        configurer.snippets().withEncoding("UTF-8");
    }

}
使用WebTestClientBuilderCustomizer配置让Spring REST Docs提供对参数化输出目录的支持。
import org.springframework.boot.test.context.TestConfiguration;
import org.springframework.boot.test.web.reactive.server.WebTestClientBuilderCustomizer;
import org.springframework.context.annotation.Bean;

import static org.springframework.restdocs.webtestclient.WebTestClientRestDocumentation.document;

@TestConfiguration(proxyBeanMethods = false)
public class MyWebTestClientBuilderCustomizerConfiguration {

    @Bean
    public WebTestClientBuilderCustomizer restDocumentation() {
        return (builder) -> builder.entityExchangeResultConsumer(document("{method-name}"));
    }

}
使用REST Assured 测试Auto-configured Spring REST Docs
@AutoConfigureRestDocs使用一个RequestSpecification bean(预配置为使用Spring REST Docs)在单元测试中,使用@Autowired注入。
import io.restassured.specification.RequestSpecification;
import org.junit.jupiter.api.Test;

import org.springframework.beans.factory.annotation.Autowired;
import org.springframework.boot.test.autoconfigure.restdocs.AutoConfigureRestDocs;
import org.springframework.boot.test.context.SpringBootTest;
import org.springframework.boot.test.context.SpringBootTest.WebEnvironment;
import org.springframework.boot.test.web.server.LocalServerPort;

import static io.restassured.RestAssured.given;
import static org.hamcrest.Matchers.is;
import static org.springframework.restdocs.restassured3.RestAssuredRestDocumentation.document;

@SpringBootTest(webEnvironment = WebEnvironment.RANDOM_PORT)
@AutoConfigureRestDocs
class MyUserDocumentationTests {

    @Test
    void listUsers(@Autowired RequestSpecification documentationSpec, @LocalServerPort int port) {
        given(documentationSpec)
            .filter(document("list-users"))
        .when()
            .port(port)
            .get("/")
        .then().assertThat()
            .statusCode(is(200));
    }

}
使用RestDocsRestAssuredConfigurationCustomizer自定义配置提供更多的配置控制。
import org.springframework.boot.test.autoconfigure.restdocs.RestDocsRestAssuredConfigurationCustomizer;
import org.springframework.boot.test.context.TestConfiguration;
import org.springframework.restdocs.restassured3.RestAssuredRestDocumentationConfigurer;
import org.springframework.restdocs.templates.TemplateFormats;

@TestConfiguration(proxyBeanMethods = false)
public class MyRestDocsConfiguration implements RestDocsRestAssuredConfigurationCustomizer {

    @Override
    public void customize(RestAssuredRestDocumentationConfigurer configurer) {
        configurer.snippets().withTemplateFormat(TemplateFormats.markdown());
    }

}
Auto-configured Spring Web Services测试
使用@WebServiceClientTest测试使用了Spring Web Services的项目。默认情况下,它配置一个模拟WebServiceServerbean 并自动定义WebServiceTemplateBuilder。(更多Spring Boot使用 Web Service 查看 “Web Services”)
附录列出了
@WebServiceClientTest支持的自动化配置列表
import org.junit.jupiter.api.Test;
import org.springframework.beans.factory.annotation.Autowired;
import org.springframework.boot.test.autoconfigure.webservices.client.WebServiceClientTest;
import org.springframework.ws.test.client.MockWebServiceServer;
import org.springframework.xml.transform.StringSource;
import static org.assertj.core.api.Assertions.assertThat;
import static org.springframework.ws.test.client.RequestMatchers.payload;
import static org.springframework.ws.test.client.ResponseCreators.withPayload;
@WebServiceClientTest(SomeWebService.class)
class MyWebServiceClientTests {
@Autowired
private MockWebServiceServer server;
@Autowired
private SomeWebService someWebService;
@Test
void mockServerCall() {
this.server
.expect(payload(new StringSource("200 Auto-configured Spring Web Services Client 测试
使用@WebServiceClientTest测试使用了Spring Web Services 项目的应用程序。默认的,它会配置一个模拟的WebServiceServer bean 和自动自定义WebServiceTemplateBuilder。
import org.junit.jupiter.api.Test;
import org.springframework.beans.factory.annotation.Autowired;
import org.springframework.boot.test.autoconfigure.webservices.client.WebServiceClientTest;
import org.springframework.ws.test.client.MockWebServiceServer;
import org.springframework.xml.transform.StringSource;
import static org.assertj.core.api.Assertions.assertThat;
import static org.springframework.ws.test.client.RequestMatchers.payload;
import static org.springframework.ws.test.client.ResponseCreators.withPayload;
@WebServiceClientTest(SomeWebService.class)
class MyWebServiceClientTests {
@Autowired
private MockWebServiceServer server;
@Autowired
private SomeWebService someWebService;
@Test
void mockServerCall() {
this.server
.expect(payload(new StringSource("200 Auto-configured Spring Web Services Server 测试
使用@WebServiceServerTest测试Spring Web Services 的项目。默认它配置一个MockWebServiceClient bean ,用于调用 web Service 端点。
import org.junit.jupiter.api.Test;
import org.springframework.beans.factory.annotation.Autowired;
import org.springframework.boot.test.autoconfigure.webservices.server.WebServiceServerTest;
import org.springframework.ws.test.server.MockWebServiceClient;
import org.springframework.ws.test.server.RequestCreators;
import org.springframework.ws.test.server.ResponseMatchers;
import org.springframework.xml.transform.StringSource;
@WebServiceServerTest(ExampleEndpoint.class)
class MyWebServiceServerTests {
@Autowired
private MockWebServiceClient client;
@Test
void mockServerCall() {
this.client
.sendRequest(RequestCreators.withPayload(new StringSource("42 ")));
}
}
其他 自动配置 和片段
每个片段提供一个或多个@AutoConfigure…注解,即定义一部分包含自动配置。可以通过创建自定义@AutoConfigure…逐个添加自动化配置或者使用@ImportAutoConfiguration添加到测试中。
import org.springframework.boot.autoconfigure.ImportAutoConfiguration;
import org.springframework.boot.autoconfigure.integration.IntegrationAutoConfiguration;
import org.springframework.boot.test.autoconfigure.jdbc.JdbcTest;

@JdbcTest
@ImportAutoConfiguration(IntegrationAutoConfiguration.class)
class MyJdbcTests {

}
不要使用@Import注解来导入自动配置,由于他们由Spring Boot以特定方式处理。
笔者注:
@Import和@ImportAutoConfiguration的区别:https://www.cnblogs.com/imyjy/p/16092825.html
另外,可以通过META-INF/spring中添加自动配置文件
META-INF/spring/org.springframework.boot.test.autoconfigure.jdbc.JdbcTest.imports
com.example.IntegrationAutoConfiguration
在这个例子中,com.example.IntegrationAutoConfiguration会在每个@JdbcTest注解中开启。
可以在文件中使用
#注释
使用 Configuration 和 片段
略
使用Spock 测试 Spring Boot 应用程序
Spock 2.x 能用于测试Spring Boot 应用程序,只要添加 spock-spring模块依赖,详细查看Spock 的文档。
5.8.4 测试实用程序
ConfigDataApplicationContextInitializer
ConfigDataApplicationContextInitializer是一个ApplicationContextInitializer,可以用于测试加载Spring Boot application.properties文件。当不需要@SpringBootTest提供的全部功能时,可以使用。
import org.springframework.boot.test.context.ConfigDataApplicationContextInitializer;
import org.springframework.test.context.ContextConfiguration;

@ContextConfiguration(classes = Config.class, initializers = ConfigDataApplicationContextInitializer.class)
class MyConfigFileTests {

    // ...

}
ConfigDataApplicationContextInitializer不提供@Value("${…}")注入支持,它仅用于将application.properties文件加载到Spring 的Environment中。要支持@Value,你需要另外配置PropertySourcesPlaceholderConfigurer或者使用@SpringBootTest。
TestPropertyValues
TestPropertyValues允许你可以快速添加配置到ConfigurableEnvironment或者ConfigurableApplicationContext中,使用key=value形式。
import org.junit.jupiter.api.Test;

import org.springframework.boot.test.util.TestPropertyValues;
import org.springframework.mock.env.MockEnvironment;

import static org.assertj.core.api.Assertions.assertThat;

class MyEnvironmentTests {

    @Test
    void testPropertySources() {
        MockEnvironment environment = new MockEnvironment();
        TestPropertyValues.of("org=Spring", "name=Boot").applyTo(environment);
        assertThat(environment.getProperty("name")).isEqualTo("Boot");
    }

}
OutputCapture
OutputCapture是一个Junit 扩展,用于捕获System.out 和 System.err输出。添加@ExtendWith(OutputCaptureExtension.class),并将CapturedOutput作为参数注入测试类或构造函数中。
import org.junit.jupiter.api.Test;
import org.junit.jupiter.api.extension.ExtendWith;

import org.springframework.boot.test.system.CapturedOutput;
import org.springframework.boot.test.system.OutputCaptureExtension;

import static org.assertj.core.api.Assertions.assertThat;

@ExtendWith(OutputCaptureExtension.class)
class MyOutputCaptureTests {

    @Test
    void testName(CapturedOutput output) {
        System.out.println("Hello World!");
        assertThat(output).contains("World");
    }

}
TestRestTemplate
TestRestTemplate是 Spring RestTemplate的有用替代方式。它以测试友好的方式运行,可以通过返回的ResponseEntity检测出错误。
Spring Framework 5.0提供了一个新的WebTestClient,用于WebFlux集成测试。
建议使用高于4.3.2 的Apache HTTP Client 版本,但不是强制的。如果你的类路径中存在该类,TestRestTemplate将配置合适的客户端来响应,如果没有,将使用其他的友好方式:
- 不遵循重定向规则(因此可以断言响应的位置)
- Cookies被忽略(因此模板是无状态的)
TestRestTemplate可以在集成测试中实例化,如下示例:
import org.junit.jupiter.api.Test;

import org.springframework.boot.test.web.client.TestRestTemplate;
import org.springframework.http.ResponseEntity;

import static org.assertj.core.api.Assertions.assertThat;

class MyTests {

    private final TestRestTemplate template = new TestRestTemplate();

    @Test
    void testRequest() {
        ResponseEntity<String> headers = this.template.getForEntity("https://myhost.example.com/example", String.class);
        assertThat(headers.getHeaders().getLocation()).hasHost("other.example.com");
    }

}
或者,如果将 WebEnvironment.RANDOM_PORT 或者 WebEnvironment.DEFINED_PORT与@SpringBootTest注解一起使用,你能注入一个TestRestTemplate并可以开始使用。如果有需要可以使用RestTemplateBuilder bean 自定义配置。host 和端口 将自动配置连接到容器。
import java.time.Duration;

import org.junit.jupiter.api.Test;

import org.springframework.beans.factory.annotation.Autowired;
import org.springframework.boot.test.context.SpringBootTest;
import org.springframework.boot.test.context.SpringBootTest.WebEnvironment;
import org.springframework.boot.test.context.TestConfiguration;
import org.springframework.boot.test.web.client.TestRestTemplate;
import org.springframework.boot.web.client.RestTemplateBuilder;
import org.springframework.context.annotation.Bean;
import org.springframework.http.HttpHeaders;

import static org.assertj.core.api.Assertions.assertThat;

@SpringBootTest(webEnvironment = WebEnvironment.RANDOM_PORT)
class MySpringBootTests {

    @Autowired
    private TestRestTemplate template;

    @Test
    void testRequest() {
        HttpHeaders headers = this.template.getForEntity("/example", String.class).getHeaders();
        assertThat(headers.getLocation()).hasHost("other.example.com");
    }

    @TestConfiguration(proxyBeanMethods = false)
    static class RestTemplateBuilderConfiguration {

        @Bean
        RestTemplateBuilder restTemplateBuilder() {
            return new RestTemplateBuilder().setConnectTimeout(Duration.ofSeconds(1))
                    .setReadTimeout(Duration.ofSeconds(1));
        }

    }

}
5.9 创建自己的自动化配置
自动化配置可以跟"starter"相关联,该启动器提供自动化配置代码以及使用的库。
5.9.1 了解自动配置的Bean
实现自动配置的类使用@AutoConfiguration注解,这个注解使用@Configuration标注,使的自动配置称为标注的@Configuration类。@Conditional注解用于约束何时应用自动配置。通常自动配置类使用@ConditionalOnClass和@ConditionalOnMissingBean注解。这确保自动配置仅在找到相关类且尚未声明你自己的@Configuration时适用。
可以查看Spring Boot源码浏览提供的自动配置类,或者查看文件META-INF/spring/org.springframework.boot.autoconfigure.AutoConfiguration.imports
5.9.2 查找候选的自动配置
Spring Boot检查发布的jar中是否存在META-INF/Spring/org.springframework.Boot.autoconfig.AutoConfiguration.imports文件,该文件每行列出你的配置类。
com.mycorp.libx.autoconfigure.LibXAutoConfiguration
com.mycorp.libx.autoconfigure.LibXWebAutoConfiguration
可以在文件中使用
#字符注释
如果需要按指定顺序应用配置,则可以使用 @AutoConfiguration 注解上的 before, beforeName, after 和 afterName 属性,或者使用专用的 @AutoConfigureBefore 和 @AutoConfigureAfter 注解。比如,如果你提供特定于web的配置,你的类可能需要在WebMvcAutoConfiguration后应用。
如果你想要对一些不互相了解的类进行排序,也可以使用@AutoConfigureOrder。该注解跟@Order有相同的语义,但专门用于自动配置类。
与标准@Configuration类一样,自动配置类的应用顺序只影响其bean的定义顺序。随后创建的这些bean的顺序不受影响,并由每个bean的依赖关系和任何@DependsOn关系决定。
5.9.3 条件注解
如果想要在自动配置类上,始终配置一个或多个@Conditional,那么最常用的是@ConditionalOnMissingBean注解。
Spring Boot 包含许多的@Conditional注解,包括如下注解:
-
Class Conditions
-
Bean Conditions
-
Property Conditions
-
Resource Conditions
-
Web Application Conditions
-
SpEL Expression Conditions
Class Conditions
@ConditionalOnClass 和 @ConditionOnMissingClass 注解允许根据指定类是否存在来加载@Configuration类。
该机制不适用于@Bean方法,其中返回类型通常是condition 的target:在方法的condition应用之前,JVM将加载类和可能处理的方法引用,如果类不存在,这些方法引用将失败。
为了处理这种情况,可以使用单独的@Configuration类来隔离condition,如下所示:
import org.springframework.boot.autoconfigure.AutoConfiguration;
import org.springframework.boot.autoconfigure.condition.ConditionalOnClass;
import org.springframework.boot.autoconfigure.condition.ConditionalOnMissingBean;
import org.springframework.context.annotation.Bean;
import org.springframework.context.annotation.Configuration;

@AutoConfiguration
// Some conditions ...
public class MyAutoConfiguration {

    // Auto-configured beans ...

    @Configuration(proxyBeanMethods = false)
    @ConditionalOnClass(SomeService.class)
    public static class SomeServiceConfiguration {

        @Bean
        @ConditionalOnMissingBean
        public SomeService someService() {
            return new SomeService();
        }

    }

}
如果使用@ConditionalOnClass或者@ConditionalOnMissingClass作为元注解的一部分来编写自己的组合注解,则必须使用name引用类。
Bean Conditions
@ConditionalOnBean 和 @ConditionalOnMissingBean 注解会根据是否存在指定bean来判断是否加载 bean,使用value指定bean 的类型或者name指定bean 的名称,search属性允许你限制搜索bean时要考虑的ApplicationContext层次结构。
当放置于@Bean上事,目标类型默认为方法的返回类型,如下所示:
import org.springframework.boot.autoconfigure.AutoConfiguration;
import org.springframework.boot.autoconfigure.condition.ConditionalOnMissingBean;
import org.springframework.context.annotation.Bean;

@AutoConfiguration
public class MyAutoConfiguration {

    @Bean
    @ConditionalOnMissingBean
    public SomeService someService() {
        return new SomeService();
    }

}
这个例子中,someService将在SomeService 类型的Bean 不在ApplicationContext中时创建。
建议在自动配置类上只使用@ConditionalOnBean 和 @ConditionalOnMissingBean注解,因为这些注解能够保证是在 任何用户自定义bean 后加载的。
在声明@Bean方法时,在方法的返回类型中提供尽可能多的类型信息,例如,如果您的bean的具体类实现了接口,那么bean 方法返回的类型应该是具体类而不是接口。
Property Conditions
@ConditionalOnProperty 注解根据Spring Environment 是否包含指定配置进行加载。使用prefix和name指定要检查的属性,默认情况下匹配任何存在且不等于false的属性。另外可以使用havingValue和matchIfMissing属性创建高级检查。
笔者注:
havingValue配置预期值(字符串形式),如果未指定,则属性不能等于false
matchIfMissing表示如果未设置属性,条件是否匹配,默认为false
Resource Conditions
@ConditionalOnResource注解仅在指定资源存在时才加载配置。可以使用常用的Spring 约定指定资源,比如file:/home/user/test.dat。
Web Application Conditions
@ConditionalOnWebApplication 和 @ConditionalOnNotWebApplication注解根据应用是否是一个"web应用"来判断是否加载配置。基于servlet 的 web 应用使用了Spring WebApplicationContext,定义了一个session生命周期或者有一个ConfigurableWebEnvironment,反应式的 web 应用程序使用ReactiveWebApplicationContext或者存在ConfigurableReactiveWebEnvironment。
@ConditionalOnWarDeployment注解根据应用是否是传统的WAR应用来判断是否加载配置。对于使用嵌入式应用程序,该条件不会匹配。
SpEL Expression Conditions
@ConditionalOnWarDeployment注解根据SpEL表达式结果来判断是否加载配置。
在表达式中引用bean将导致bean在上下文刷新处理中过早初始化,这将导致bean无法进行post-processing处理(比如配置绑定)并且状态可能是不完整的。
5.9.4 测试自动配置
自动配置可能会受到许多因素的影响:用户配置(@Bean定义和自定义的Environment)、评估条件和其他的。每个测试都应该创建一个良好的ApplicationContext,表示这些自定义的组合,ApplicationContextRunner提供了实现这一点的好方法。
ApplicationContextRunner通常定义为测试类的一个字段,用来收集基础的、公共配置。以下示例确保了MyServiceAutoConfiguration始终被调用。
private final ApplicationContextRunner contextRunner = new ApplicationContextRunner()
        .withConfiguration(AutoConfigurations.of(MyServiceAutoConfiguration.class));
如果定义了多个自动配置,则不需要对其声明排序,因为它们的调用顺序与应用程序的顺序完全相同。
每个测试都可以使用runner来表示特定的用例。例如,下面的示例调用用户配置(UserConfiguration)并检查自动配置是否正确退出。run提供的回调上下文可以在AssertJ中使用。
@Test
void defaultServiceBacksOff() {
    this.contextRunner.withUserConfiguration(UserConfiguration.class).run((context) -> {
        assertThat(context).hasSingleBean(MyService.class);
        assertThat(context).getBean("myCustomService").isSameAs(context.getBean(MyService.class));
    });
}

@Configuration(proxyBeanMethods = false)
static class UserConfiguration {

    @Bean
    MyService myCustomService() {
        return new MyService("mine");
    }

}
还可以轻松自定义Environment,如下所示:
@Test
void serviceNameCanBeConfigured() {
    this.contextRunner.withPropertyValues("user.name=test123").run((context) -> {
        assertThat(context).hasSingleBean(MyService.class);
        assertThat(context.getBean(MyService.class).getName()).isEqualTo("test123");
    });
}
runner 也能够用于显示ConditionEvaluationReport,这个报告可以在INFO 或 DEBUG级别打印。如下示例展示如何使用ConditionEvaluationReportLoggingListener在自动化测试中打印报告。
import org.junit.jupiter.api.Test;

import org.springframework.boot.autoconfigure.logging.ConditionEvaluationReportLoggingListener;
import org.springframework.boot.logging.LogLevel;
import org.springframework.boot.test.context.runner.ApplicationContextRunner;

class MyConditionEvaluationReportingTests {

    @Test
    void autoConfigTest() {
        new ApplicationContextRunner()
            .withInitializer(new ConditionEvaluationReportLoggingListener(LogLevel.INFO))
            .run((context) -> {
                    // Test something...
            });
    }

}
模拟Web上下文
如果你仅需要在servlet 或者 reactive 上下文测试自动化配置,你可以使用WebApplicationContextRunner或者ReactiveWebApplicationContextRunner。
覆盖类路径
还可以在运行时测试特定的包或类是否存在,Spring Boot 附带了一个FilteredClassLoader,以下示例断言MyService不存在时,自动配置将禁用。
@Test
void serviceIsIgnoredIfLibraryIsNotPresent() {
    this.contextRunner.withClassLoader(new FilteredClassLoader(MyService.class))
            .run((context) -> assertThat(context).doesNotHaveBean("myService"));
}
5.9.5 创建自己的Starter
命名
给starter提供一个合适的命名空间,不要以spring-boot开头,即使使用不同的maven groupId。
配置键
如果你的启动器提供配置键,请使用唯一的命名空间。不要使用Spring Boot 使用的键(如server、management、spring等),根据经验,应该在所有键上加上独有的命名空间,比如acme。
import java.time.Duration;

import org.springframework.boot.context.properties.ConfigurationProperties;

@ConfigurationProperties("acme")
public class AcmeProperties {

    /**
     * Whether to check the location of acme resources.
     */
    private boolean checkLocation = true;

    /**
     * Timeout for establishing a connection to the acme server.
     */
    private Duration loginTimeout = Duration.ofSeconds(3);

    public boolean isCheckLocation() {
        return this.checkLocation;
    }

    public void setCheckLocation(boolean checkLocation) {
        this.checkLocation = checkLocation;
    }

    public Duration getLoginTimeout() {
        return this.loginTimeout;
    }

    public void setLoginTimeout(Duration loginTimeout) {
        this.loginTimeout = loginTimeout;
    }

}
这里是一些遵循的规则:
- 不要以
The或A开始 boolean类型,以Whether或者Enable开始- 列表类型,以“逗号分隔列表”开始(原文 Comma-separated list)
- 使用
java.time.Duration而不是long - 除非在运行时确认,否则不要提供默认值
确保你生成了Annotation Processor以便IDE的提示可用,可以在META-INF/spring-configuration-metadata.json查看生成的metadata,确保键已经被正确生成,然后在IDE中进行验证。
自动配置模块
autoconfigure模块包含任何必要的启动库,可能也包含配置键定义(比如ConfigurationProperties)。
你应该将对库的依赖标记为可选,这样就可以更容易地将自动配置模块包含在你的项目中。
Spring Boot 使用注释处理器从META-INF/spring-autoconfigure-metadata.properties中收集自动配置条件。如果存在该文件,则可以在早期过滤不匹配的自动配置,这有助于提高启动时间。
当用maven构建的时候,推荐添加如下的依赖到模块中:
<dependency>
    <groupId>org.springframework.bootgroupId>
    <artifactId>spring-boot-autoconfigure-processorartifactId>
    <optional>trueoptional>
dependency>
如果已经在应用程序中直接定义了自动配置,确保spring-boot-maven-plugin已经配置,防止repackage 将依赖重新打包到fat jar中。
<project>
    <build>
        <plugins>
            <plugin>
                <groupId>org.springframework.bootgroupId>
                <artifactId>spring-boot-maven-pluginartifactId>
                <configuration>
                    <excludes>
                        <exclude>
                            <groupId>org.springframework.bootgroupId>
                            <artifactId>spring-boot-autoconfigure-processorartifactId>
                        exclude>
                    excludes>
                configuration>
            plugin>
        plugins>
    build>
project>
使用Gradle,应该添加annotationProcessor配置,如下所示:
dependencies {
    annotationProcessor "org.springframework.boot:spring-boot-autoconfigure-processor"
}
Starter模块
starter确实是一个空jar,它只提供一些必要的依赖项。
5.10 Kotlin Support
略
作者其他文章:
Prometheus 系列文章
- Prometheus 的介绍和安装
- 直观感受PromQL及其数据类型
- PromQL之选择器和运算符
- PromQL之函数
- Prometheus 告警机制介绍及命令解读
- Prometheus 告警模块配置深度解析
- Prometheus 配置身份认证
- Prometheus 动态拉取监控服务
- Prometheus 监控云Mysql和自建Mysql
Grafana 系列文章,版本:OOS v9.3.1
- Grafana 的介绍和安装
- Grafana监控大屏配置参数介绍(一)
- Grafana监控大屏配置参数介绍(二)
- Grafana监控大屏可视化图表
- Grafana 查询数据和转换数据
- Grafana 告警模块介绍
- Grafana 告警接入飞书通知
Spring Boot Admin 系列
- Spring Boot Admin 参考指南
- SpringBoot Admin服务离线、不显示健康信息的问题
- Spring Boot Admin2 @EnableAdminServer的加载
- Spring Boot Admin2 AdminServerAutoConfiguration详解
- Spring Boot Admin2 实例状态监控详解
- Spring Boot Admin2 自定义JVM监控通知
- Spring Boot Admin2 自定义异常监控
- Spring Boot Admin 监控指标接入Grafana可视化