自动化测试之Pytest框架(万字详解)
Pytest测试框架
- 一、前言
- 二、安装
-
- 2.1 命令行安装
- 2.2 验证安装
- 三、pytest设计测试用例注意点
-
- 3.1 命名规范
- 3.2 断言清晰
- 3.3 fixture
- 3.4 参数化设置
- 3.5 测试隔离
- 3.6 异常处理
- 3.7 跳过或者预期失败
- 3.8 mocking
- 3.9 标记测试
- 四、以案例初入pytest
-
- 4.1 第一个pytest测试
- 4.2 多个测试分组一个类里面
- 4.3 将多个测试用例分组
- 4.4 pytest运行中命令行运行可选参数
- 五、配置文件pytest.ini
- 六、conftest文件
-
- 6.1 conftest的关键点
- 6.2 conftest案例
- 七、mark属性标记
-
- 7.1 内置/自定义标记
- 7.2 @pytest.mark.parametrize:参数化测试函数
- 八、Fixture装饰器
-
- 8.1 基本概念
- 8.2 Fixture方法解析
- 8.3 Fixture的创建和使用
- 8.4 调用Fixture的方式
- 九 、pytest跳过测试用例方法
-
- 9.1 skip -- 跳过测试用例
- 9.2 skipif -- 有条件跳过测试用例
- 十、失败重跑
-
- 10.1 使用 --last-failed 选项
- 10.2 使用 --failed-first 选项
- 10.3 使用 pytest-rerunfailures 插件
- 十一、pytest执行顺序
- 十二、hooks(钩子函数)
-
- 12.1 钩子函数的四个阶段
-
- 12.1.1 配置阶段 (Configuration)
- 12.2 收集阶段 (Collection)
- 12.3 运行阶段 (Running)
- 12.4 总结阶段 (Summary)
- 12.2 钩子函数关键点
- 十三、Allure测试报告
-
- 13.1 前言
- 13.2 安装 Allure
- 13.3 配置 pytest 以使用 Allure
- 13.4 Allure装饰器函数
- 13.5 执行自动化用例 生成allure报告所需文件
- 13.6 查看测试报告的两种方式
-
- 13.6.1 直接打开默认浏览器展示报告
- 13.6.2 从结果生成报告
- 十四、pytest中管理日志
-
- 14.1 日志级别
- 14.2 使用logging模块
- 14.3 将日志保存到文件
- 14.4 控制日志捕获的行为
- 14.5 示例
一、前言
pytest 是一个功能强大且易于使用的Python测试框架,它允许开发者编写简单或复杂的函数式测试。pytest 的设计理念是让测试过程尽可能的简单和直观,同时提供丰富的插件生态系统来扩展其功能。
-
介绍:
- 易用性:pytest 不需要额外的导入语句来标记测试函数(如unittest中的test_前缀),你可以直接使用标准的断言语句(assert)来进行测试,这使得测试代码更加简洁、可读
- 自动发现测试:pytest 能够自动找到并运行测试。默认情况下,它会查找文件名以test_开头或结尾的模块,以及任何以Test开头的类(无需继承自特定的父类)。在这些模块或类中,它会执行所有以test_开头的方法或函数
- 参数化测试:pytest 支持参数化测试,这意味着你可以用不同的输入数据多次运行同一个测试函数,而不需要为每个数据点编写单独的测试函数
- 详细的报告和输出:当测试失败时,pytest 提供了清晰的错误信息和追踪,帮助你快速定位问题所在
- 丰富的插件生态:pytest 拥有一个活跃的社区和大量的第三方插件,可以用来增强测试的功能,例如集成覆盖率报告、与CI/CD工具对接、支持异步测试等
- 兼容其他测试框架:pytest 可以运行unittest和nose风格的测试,所以如果你有旧的测试代码,通常可以直接使用pytest来运行它们,而不需要重写
- 内置的fixture机制:pytest 引入了fixture的概念,这是一个非常强大的特性,用于设置前置条件(比如创建数据库连接、初始化对象等),并且可以在多个测试之间共享
- 命令行选项:pytest 提供了许多有用的命令行选项,让你能够灵活地控制测试行为,比如选择运行特定的测试、跳过某些测试、根据关键字筛选测试等等
二、安装
2.1 命令行安装
pip install pytest
2.2 验证安装
pytest --version
三、pytest设计测试用例注意点
3.1 命名规范
- 文件名:文件名要以test_开头或结尾 例如:test_login.py
- 函数名:函数名要以test_开头,这样子有助与python自动取搜索他
- 如果使用类来组织测试,类名应以 Test 开头,并且不应继承自任何特定的基类(除非是为了使用某些特性)
3.2 断言清晰
- 使用 Python 内置的 assert 语句来进行断言。pytest 会提供详细的失败信息,因此尽量让断言语句尽可能直接明了
3.3 fixture
- fixture是pytest中非常重要的概念,用于设置测试环境,我们要合理的使用fixture,减少代码的重复使用,提高测试效率
3.4 参数化设置
- 利用 @pytest.mark.parametrize 装饰器可以为同一个测试函数提供多组输入数据,从而避免编写多个类似的测试函数
3.5 测试隔离
- 使用setup和teardowm来准备测试环境
3.6 异常处理
- 如果你的测试预期某个操作会抛出异常,可以使用 pytest.raises 上下文管理器来检查是否确实发生了预期的异常
3.7 跳过或者预期失败
- 对于暂时无法通过的测试,可以使用 @pytest.mark.skip 或 @pytest.mark.xfail 标记,以便在不影响整体测试结果的情况下继续开发
3.8 mocking
- 当测试需要依赖外部系统(如数据库、网络服务等)时,考虑使用 unittest.mock 或者第三方库如 pytest-mock 来模拟这些依赖,确保测试的快速性和稳定性
3.9 标记测试
- 使用 @pytest.mark 可以为测试添加标签,比如 slow, network, database 等,然后可以根据这些标签选择性地运行测试
四、以案例初入pytest
4.1 第一个pytest测试
创建一个名为test_demo的文件名,其中有一个函数 一个测试
def func(x):
    return x + 1

def test_answer():
    assert func(3) == 5  # 断言
在命令行输入pytest运行,以下是输出结果
$ pytest
=========================== test session starts ============================
platform linux -- Python 3.x.y, pytest-8.x.y, pluggy-1.x.y
rootdir: /home/sweet/project
collected 1 item

test_sample.py F                                                     [100%]

================================= FAILURES =================================
_______________________________ test_answer ________________________________

    def test_answer():
>       assert func(3) == 5
E       assert 4 == 5
E        +  where 4 = func(3)

test_sample.py:6: AssertionError
========================= short test summary info ==========================
FAILED test_sample.py::test_answer - assert 4 == 5
============================ 1 failed in 0.12s =============================
4.2 多个测试分组一个类里面
创建一个名为test_demo的文件名,创建一个类 其中有两个函数
class TestClass:
    def test_one(self):
        x = "this"
        assert "h" in x

    def test_two(self):
        x = "hello"
        assert hasattr(x, "check") # 断言x是否具有名为check的属性或方法
在命令行输入pytest运行,以下是输出结果
$ pytest -q test_class.py
.F                                                                   [100%]
================================= FAILURES =================================
____________________________ TestClass.test_two ____________________________

self = <test_class.TestClass object at 0xdeadbeef0001>

    def test_two(self):
        x = "hello"
>       assert hasattr(x, "check")
E       AssertionError: assert False
E        +  where False = hasattr('hello', 'check')

test_class.py:8: AssertionError
========================= short test summary info ==========================
FAILED test_class.py::TestClass::test_two - AssertionError: assert False
1 failed, 1 passed in 0.12s
其中第一条是成功 第二条是失败 失败原因就是在x不具有check的属性 观察失败原因主要看断言中的中间值
4.3 将多个测试用例分组
好处:
测试组织
仅在特定类中共享用于测试的装置
在班级层面上应用标记,并让它们隐式地应用于所有测试
class TestClassDemoInstance:
    value = 0

    def test_one(self):
        self.value = 1
        assert self.value == 1

    def test_two(self):
        assert self.value == 1
$ pytest -k TestClassDemoInstance -q
.F                                                                   [100%]
================================= FAILURES =================================
______________________ TestClassDemoInstance.test_two ______________________

self = <test_class_demo.TestClassDemoInstance object at 0xdeadbeef0002>

    def test_two(self):
>       assert self.value == 1
E       assert 0 == 1
E        +  where 0 = <test_class_demo.TestClassDemoInstance object at 0xdeadbeef0002>.value

test_class_demo.py:9: AssertionError
========================= short test summary info ==========================
FAILED test_class_demo.py::TestClassDemoInstance::test_two - assert 0 == 1
1 failed, 1 passed in 0.12s
4.4 pytest运行中命令行运行可选参数
| 参数 | 功能 |
|---|---|
| -v | 增加输出的详细程度 |
| -q | 减少输出信息 |
| -k EXPRESSION | 根据表达式选择运行哪些测试,例如 -k ‘not slow’ 可以跳过标记为 slow 的测试 |
| -x | 遇到第一个失败就退出 |
| –html=REPORT.html | 生成HTML格式的测试报告,需要安装 pytest-html 插件 |
| –maxfail=NUM | 在达到指定数量的失败后停止测试 |
| -m MARKEXPR | 只运行带有指定标记的测试,例如 -m slow |
| -n NUM 或 --numprocesses=NUM | 使用多个进程并行运行测试,需要安装 pytest-xdist 插件 |
| -s | 不捕获标准输出和错误输出,允许直接看到 print 调用的结果 |
| –ignore=path | 忽略指定路径下的测试文件 |
五、配置文件pytest.ini
pytest.ini 文件是 pytest 的配置文件之一,用于定义项目的全局设置和选项。通过这个文件,你可以定制化测试行为,指定插件、命令行选项以及其他配置项,而无需每次都手动在命令行中输入这些参数
[pytest]
# 基本配置选项
addopts = -ra -q --tb=short
testpaths = tests/
markers =
    slow: marks tests as slow (deselect with '-m "not slow"')
    serial: marks tests that should run in serial
python_files = test_*.py *_test.py
python_classes = Test* *Tests
python_functions = test_*

# 插件配置
plugins = myplugin, otherplugin

# 环境变量
env =
     ENV_VAR=value1
     OTHER_ENV_VAR=value2

# 代码覆盖率配置(需要安装 pytest-cov)
addopts += --cov=myproject --cov-report=term-missing

# 并行测试配置(需要安装 pytest-xdist)
addopts += -n auto

# 设置默认的编码为 utf-8
console_output_encoding = utf-8
file_system_encoding = utf-8

# 设置收集器忽略某些路径
norecursedirs = .git .tox dist build

# 自定义日志格式(需要安装 pytest-log-clerk 或类似插件)
log_cli = True
log_cli_level = INFO
log_cli_format = %(asctime)s [%(levelname)8s] %(message)s (%(filename)s:%(lineno)s)
log_cli_date_format = %Y-%m-%d %H:%M:%S
关键配置项解释
- addopts:添加默认的命令行选项。这可以包含任何有效的 pytest 命令行参数。例如,-ra 表示显示所有错误摘要,–tb=short 设置回溯输出风格
- testpaths:指定要搜索测试的目录,默认情况下 pytest 会递归搜索当前目录及其子目录中的所有匹配文件
- markers:定义自定义标记的帮助信息,使得其他开发者更容易理解标记的意义
- python_files:指定哪些文件名模式被视为测试文件
- python_classes:指定哪些类名模式被视为测试类
- python_functions:指定哪些函数名模式被视为测试函数
- plugins:加载额外的插件。通常不需要显式声明,因为大多数插件会自动注册
- norecursedirs:排除不希望递归搜索的目录
- log_cli 和相关日志配置:控制命令行日志输出的行为(需要适当的插件支持)
- coverage 和并行测试配置:可以通过 addopts 添加与 pytest-cov 或 pytest-xdist 相关的选项
六、conftest文件
conftest.py 文件是 Pytest 框架中的一个特殊文件,用于包含 fixture(固定装置)和其他配置代码。Pytest 会自动加载名为 conftest.py 的文件中定义的 fixtures 和插件,而不需要在测试模块中显式导入它们。这个文件通常用来存放那些被多个测试文件共享的配置和设置
6.1 conftest的关键点
- 位置:conftest.py 文件应当放置在你的测试文件所在的目录或其父目录中。Pytest 会递归地查找这些文件
- 作用域:定义在 conftest.py 中的 fixture 可以被该文件所在目录及其子目录下的所有测试文件使用
- 内容:可以包含 fixtures、hooks(钩子函数)和其他配置选项。它不应该包含实际的测试代码
- 命名:文件名必须严格为 conftest.py,否则 Pytest 将不会识别它
- 初始化代码:如果需要执行一些一次性的初始化代码(比如设置日志记录、数据库连接等),可以在 conftest.py 中定义
6.2 conftest案例
例如,在 conftest.py 中定义一个 fixture,用来作为登录模块用例的前置操作
import pytest
from seleium import webdirver

@pytest.fixture(scope='class')
def login():
	driver = webdriver.Chrome()
	driver.get('http://127.0.0.1')
	driver.maximzie_window()
	driver.implicitly_wait(10)
	yield driver
	driver quit()
七、mark属性标记
通过使用pytest.mark帮助程序,您可以轻松地在测试函数上设置元数据
7.1 内置/自定义标记
-
usefixtures - 在测试函数或类上使用fixture
-
filterwarnings-过滤测试函数的某些警告
-
skip-总是跳过测试函数
-
skipif - 如果满足某个条件,则跳过测试函数
-
xfail - 如果满足某个条件,则产生“预期失败”结果
-
参数化-对同一个测试函数执行多次调用
自定义标记
自定义标记就如上述pytest.ini文件,自定义标记
[pytest]
markers =
    slow: marks tests as slow (deselect with '-m "not slow"')
    serial
7.2 @pytest.mark.parametrize:参数化测试函数
pytest.mark.parametrize 是 pytest 框架提供的一个装饰器,用于参数化测试函数。它允许你定义多个参数集,然后针对每个参数集运行测试函数,这样可以有效地减少代码重复,并且使得测试更加灵活和易于维护
使用 @pytest.mark.parametrize 装饰器时,你需要提供两个参数:
- 第一个参数是一个字符串,其中包含逗号分隔的参数名列表
- 第二个参数是一个元组列表(或者可迭代的对象),每个元组代表一组测试数据,这些数据会依次传递给测试函数的相应参数
示例
import pytest

def add(x, y):
    return x + y

@pytest.mark.parametrize("x, y, expected", [
    (1, 2, 3),
    (0, 5, 5),
    (-1, -1, -2),
    (3.2, 4.8, 8.0),
])
def test_add(x, y, expected):
    assert add(x, y) == expected
在这里parametrize 装饰器定义了四组x, y, expected元组,以便teat_add依次运行得出四组结果
test_example.py::test_add[1-2-3] PASSED
test_example.py::test_add[0-5-5] PASSED
test_example.py::test_add[-1--1--2] PASSED
test_example.py::test_add[3.2-4.8-8.0] FAILED
八、Fixture装饰器
8.1 基本概念
在 pytest 中,fixture 是一种用于设置测试环境的机制。它们可以用来执行一些前置或后置操作(例如:准备数据、启动服务、清理状态等),并且可以在多个测试之间共享。fixture 的设计使得代码复用和测试之间的依赖关系更加清晰,同时也让测试函数本身保持简洁
8.2 Fixture方法解析
fixture方法:
fixture(callable_or_scope=None, *args, scope="function", params=None, autouse=False, ids=None, name=None)
- scope:fixture的作用域,默认为function;
- autouse:默认:False,需要用例手动调用该fixture;如果是True,所有作用域内的测试用例都会自动调用该fixture;
- name:装饰器的名称,同一模块的fixture相互调用建议写不同的name
作用域(scope):
- (scope):决定了 fixture 的生命周期
- function (默认):每个测试函数调用一次
- class:每个测试类调用一次
- module:每个模块加载时调用一次
- session:整个测试会话期间只调用一次
参数化(params):
- 可以为 fixture 提供参数,类似于参数化测试
自动应用(autouse):
- 如果一个测试函数需要某个 fixture,pytest 会自动调用它,无需显式地传递
依赖注入(request ):
- 一个 fixture 可以依赖于另一个 fixture,并通过参数传递来实现这种依赖关系
8.3 Fixture的创建和使用
你可以通过装饰器 @pytest.fixture 来定义一个 fixture 函数。下面是一个简单的例子
import pytest

@pytest.fixture
def sample_data():
    # 前置操作,比如初始化数据
    data = {"value": 42}
    yield data
    # 后置操作,比如清理资源
    print("Cleanup after test")
要使用fixture,只需要将其作为参数传递给测试函数
def test_with_fixture(sample_data):
    assert sample_data["value"] == 42
在这个例子中,sample_data 是一个 fixture 函数,它会在测试 test_with_fixture 运行之前被调用,提供了一个包含特定数据的字典给测试函数。yield 关键字之后的代码是后置操作,在测试完成后执行
8.4 调用Fixture的方式
方式一:直接作为测试函数的参数
这是最常见和推荐的方式。你只需要将 fixture 名称作为参数传递给测试函数或类的方法,pytest 就会自动为你调用该 fixture
import pytest

@pytest.fixture
def sample_data():
    print("Setting up fixture")
    return {"value": 42}

def test_with_fixture(sample_data):
    print(f"Testing with data: {sample_data}")
    assert sample_data["value"] == 42
执行结果
============================= test session starts ==============================
platform linux -- Python 3.x.y, pytest-7.x.y, pluggy-1.x.y
rootdir: /path/to/your/project
collected 1 item

test_example.py::test_with_fixture Setting up fixture
Testing with data: {'value': 42}
PASSED

============================== 1 passed in X.XX seconds ===============================
对于类中的方法,也可以同样地使用
class TestClass:
    def test_method(self, sample_data):
        assert sample_data["value"] == 42
方式二:使用 pytest.mark.usefixtures 标记
如果你不想在每个测试函数中都列出所有的 fixtures,或者你需要为多个测试函数应用同一个 fixture,可以使用 pytest.mark.usefixtures 来标记这些测试函数或整个测试类
import pytest

@pytest.fixture
def setup():
    print("Setup fixture called")
    yield
    print("Teardown fixture called")


@pytest.fixture
def another_setup():
    print("\nAnother setup fixture called")
    yield
    print("Teardown another setup fixture called")


@pytest.mark.usefixtures("setup")
def test_one():
    print("Test one running")

@pytest.mark.usefixtures("setup")
def test_two():
    print("Test two running")
执行结果
============================= test session starts ==============================
platform linux -- Python 3.x.y, pytest-7.x.y, pluggy-1.x.y
rootdir: /path/to/your/project
collected 2 items

test_example.py::test_one Setup fixture called
Test one running
PASSED
Teardown fixture called

test_example.py::test_two Setup fixture called
Test two running
PASSED
Teardown fixture called

============================== 2 passed in X.XX seconds ===============================
你也可以一次性为多个测试函数或整个测试类添加多个 fixtures
@pytest.mark.usefixtures("setup", "another_setup")
class TestClass:
    def test_method(self):
        pass

    def test_another_method(self):
        pass
执行结果
============================= test session starts ==============================
platform linux -- Python 3.x.y, pytest-7.x.y, pluggy-1.x.y
rootdir: /path/to/your/project
collected 2 items

test_example.py::TestClass::test_method
Setup fixture called

Another setup fixture called

Test method running
PASSED
Teardown another setup fixture called
Teardown setup fixture called

test_example.py::TestClass::test_another_method
Setup fixture called

Another setup fixture called

Test another method running
PASSED
Teardown another setup fixture called
Teardown setup fixture called

============================== 2 passed in X.XX seconds ===============================
方式三:自动应用 (autouse=True)
当你定义一个 fixture 时,可以通过设置 autouse=True 参数使其自动应用于所有测试函数,而不需要显式地将其作为参数传递或使用 pytest.mark.usefixtures 标记
import pytest

@pytest.fixture(autouse=True)
def always_used_fixture():
    print("This fixture is automatically applied to all tests.")

def test_without_explicit_dependency():
    print("Running a test without explicitly depending on the fixture.")
执行结果
============================= test session starts ==============================
platform linux -- Python 3.x.y, pytest-7.x.y, pluggy-1.x.y
rootdir: /path/to/your/project
collected 1 item

test_example.py::test_with_autouse Setting up autouse fixture
Setting up sample_data fixture
Testing with autouse and sample_data fixture data: {'value': 42}
PASSED

============================== 1 passed in X.XX seconds ===============================
九 、pytest跳过测试用例方法
9.1 skip – 跳过测试用例
-
您可以标记无法在某些平台上运行或预计会失败的测试功能,以便 pytest 可以相应地处理它们并提供测试会话的摘要,同时保持测试套件为绿色
-
跳过意味着您仅希望测试在满足某些条件时才能通过,否则 pytest 应完全跳过运行测试。常见示例是在非 Windows 平台上跳过仅限 Windows 的测试,或跳过依赖于当前不可用的外部资源(例如数据库)的测试
使用 pytest.mark.skip 装饰器
pytest.mark.skip() 通常用于在定义测试函数时标记该函数应该被跳过,而不是在函数内部使用
如果你想在定义测试函数时提供跳过的原因,可以使用带有 reason 参数的 pytest.mark.skip 装饰器
import pytest

@pytest.mark.skip(reason="This test is skipped because it's not ready yet.")
def test_skip_with_reason():
    print("This test should be skipped and you should see the reason why.")
使用 pytest.skip() 在函数内部跳过
如果你需要根据某些运行时条件来决定是否跳过测试,可以在测试函数内部使用 pytest.skip() 函数
import pytest

def test_skip_inside_function():
    condition = False  # 这里可以是任何条件判断
    if not condition:
        pytest.skip("Skipping this test based on a runtime condition.")
    print("This part of the test will only run if the condition is True.")
结合两种方法
下面是一个完整的例子,展示了如何使用 pytest.mark.skip 和 pytest.skip():
import pytest

# 使用装饰器跳过测试并提供原因
@pytest.mark.skip(reason="This test is not implemented yet.")
def test_skip_with_reason():
    print("This test should be skipped.")

# 根据条件在函数内部跳过测试
def test_skip_inside_function():
    condition = False  # 这里可以是任何条件判断
    if not condition:
        pytest.skip("Skipping this test based on a runtime condition.")
    print("This part of the test will only run if the condition is True.")

# 正常测试用例作为对比
def test_normal_case():
    print("Running a normal test case.")
    assert True
执行结果
# 输入
pytest -v -s test_example.py

# 结果
============================= test session starts ==============================
platform linux -- Python 3.x.y, pytest-7.x.y, pluggy-1.x.y
rootdir: /path/to/your/project
collected 3 items

test_example.py::test_skip_with_reason SKIPPED (This test is not implemented yet.)
test_example.py::test_skip_inside_function
Skipping this test based on a runtime condition.
SKIPPED
test_example.py::test_normal_case Running a normal test case.
PASSED

============================== 1 passed, 2 skipped in X.XX seconds ===============================
9.2 skipif – 有条件跳过测试用例
- pytest.mark.skipif 是 pytest 提供的一个装饰器,用于根据给定条件跳过测试用例。如果提供的条件为 True,则该测试将被跳过;如果条件为 False,则测试会正常运行。你可以通过传递一个布尔表达式和一个可选的 reason 参数来解释为什么跳过测试
使用 pytest.mark.skipif
import pytest

# 如果条件为 True,则跳过测试
@pytest.mark.skipif(True, reason="This test is skipped because the condition is True.")
def test_skipif_with_true_condition():
    print("This test should be skipped.")

# 如果条件为 False,则测试不会被跳过
@pytest.mark.skipif(False, reason="This test will not be skipped because the condition is False.")
def test_skipif_with_false_condition():
    print("This test should run.")
依赖外部条件
通常,你会使用 skipif 来检查一些外部条件,比如环境变量、操作系统类型或第三方库的存在等
以下是在 Python3.8 之前的解释器上运行时标记要跳过的测试函数的示例
import sys
import pytest

# 根据 Python 版本跳过测试
@pytest.mark.skipif(sys.version_info < (3, 8), reason="Requires Python 3.8 or higher")
def test_requires_python_38():
    print("Running a test that requires Python 3.8 or higher.")
结合多个条件
你还可以将多个条件组合起来,或者在 fixture 中使用 skipif
import pytest

# 定义一个 fixture,它可以根据条件跳过所有使用它的测试
@pytest.fixture
def check_environment():
    if some_condition:  # 替换为实际条件判断
        pytest.skip("Skipping due to environment configuration.")

# 使用 fixture 的测试函数
def test_with_check_environment(check_environment):
    print("This test runs only if the environment check passes.")

# 结合多个条件
@pytest.mark.skipif(
    sys.platform == "win32" and sys.version_info < (3, 8),
    reason="This test requires Python 3.8 or higher on Windows."
)
def test_combined_conditions():
    print("Running a test with combined conditions.")
输出结果
============================= test session starts ==============================
platform linux -- Python 3.x.y, pytest-7.x.y, pluggy-1.x.y
rootdir: /path/to/your/project
collected 3 items

test_example.py::test_with_check_environment
This test runs only if the environment check passes.
PASSED
test_example.py::test_combined_conditions
Running a test with combined conditions.
PASSED
test_example.py::test_normal_case
Running a normal test case.
PASSED

============================== 3 passed in X.XX seconds ===============================
十、失败重跑
10.1 使用 --last-failed 选项
- 这个选项会只运行上一次测试会话中失败的测试用例,而跳过所有通过的测试用例。这对于快速重新运行失败的测试非常有用
案例:
首先,让我们创建 50 个测试调用,其中只有 2 个失败
# content of test_50.py
import pytest


@pytest.mark.parametrize("i", range(50))
def test_num(i):
    if i in (17, 25):
        pytest.fail("bad luck")
如果您第一次运行该程序,您将看到两个失败:
$ pytest -q
.................F.......F........................                   [100%]
================================= FAILURES =================================
_______________________________ test_num[17] _______________________________

i = 17

    @pytest.mark.parametrize("i", range(50))
    def test_num(i):
        if i in (17, 25):
>           pytest.fail("bad luck")
E           Failed: bad luck

test_50.py:7: Failed
_______________________________ test_num[25] _______________________________

i = 25

    @pytest.mark.parametrize("i", range(50))
    def test_num(i):
        if i in (17, 25):
>           pytest.fail("bad luck")
E           Failed: bad luck

test_50.py:7: Failed
========================= short test summary info ==========================
FAILED test_50.py::test_num[17] - Failed: bad luck
FAILED test_50.py::test_num[25] - Failed: bad luck
2 failed, 48 passed in 0.12s
如果你使用以下命令运行它–lf:
$ pytest --lf
=========================== test session starts ============================
platform linux -- Python 3.x.y, pytest-8.x.y, pluggy-1.x.y
rootdir: /home/sweet/project
collected 2 items
run-last-failure: rerun previous 2 failures

test_50.py FF                                                        [100%]

================================= FAILURES =================================
_______________________________ test_num[17] _______________________________

i = 17

    @pytest.mark.parametrize("i", range(50))
    def test_num(i):
        if i in (17, 25):
>           pytest.fail("bad luck")
E           Failed: bad luck

test_50.py:7: Failed
_______________________________ test_num[25] _______________________________

i = 25

    @pytest.mark.parametrize("i", range(50))
    def test_num(i):
        if i in (17, 25):
>           pytest.fail("bad luck")
E           Failed: bad luck

test_50.py:7: Failed
========================= short test summary info ==========================
FAILED test_50.py::test_num[17] - Failed: bad luck
FAILED test_50.py::test_num[25] - Failed: bad luck
============================ 2 failed in 0.12s =============================
10.2 使用 --failed-first 选项
- 这个选项会在测试会话开始时首先运行上次失败的测试用例,然后再运行其他的测试用例。这有助于尽早发现问题,并且可以继续运行其他测试以确保没有引入新的问题
案例:
我们将编写三个测试函数:两个会成功,一个会失败。然后我们将运行这些测试,并在修复失败的测试后再次运行它们,以显示 --failed-first 的效果
import pytest

def test_success_one():
    print("Running test_success_one")
    assert True

def test_success_two():
    print("Running test_success_two")
    assert True

def test_failure():
    print("Running test_failure")
    assert False, "This test is supposed to fail."
第一步:初次运行测试
首先,我们运行所有测试来确定哪些测试失败了
============================= test session starts ==============================
platform linux -- Python 3.x.y, pytest-7.x.y, pluggy-1.x.y
rootdir: /path/to/your/project
collected 3 items

test_example.py::test_success_one Running test_success_one
PASSED
test_example.py::test_success_two Running test_success_two
PASSED
test_example.py::test_failure Running test_failure
FAILED

=================================== FAILURES ===================================
_______________________________ test_failure _________________________________

    def test_failure():
        print("Running test_failure")
>       assert False, "This test is supposed to fail."
E       AssertionError: This test is supposed to fail.
E       assert False

test_example.py:10: AssertionError
============================== short test summary info ===============================
FAILED test_example.py::test_failure - AssertionError: This test is supposed to fail.
============================== 2 passed, 1 failed in X.XX seconds ===============================
第二步:修复失败的测试
现在我们修复 test_failure 函数中的错误:
def test_failure():
    print("Running test_failure (fixed)")
    assert True, "This test has been fixed."
第三步:使用 --failed-first 重新运行测试
接下来,我们使用 --failed-first 选项来确保上次失败的测试优先运行。这有助于尽早发现问题是否已经被解决
============================= test session starts ==============================
platform linux -- Python 3.x.y, pytest-7.x.y, pluggy-1.x.y
rootdir: /path/to/your/project
collected 3 items

test_example.py::test_failure Running test_failure (fixed)
PASSED
test_example.py::test_success_one Running test_success_one
PASSED
test_example.py::test_success_two Running test_success_two
PASSED

============================== 3 passed in X.XX seconds ===============================
10.3 使用 pytest-rerunfailures 插件
- 如果你需要在同一个测试会话中多次重试失败的测试,可以安装并使用 pytest-rerunfailures 插件。这个插件允许你指定一个次数,当测试失败时它会自动重试指定的次数
安装插件
pip install pytest-rerunfailures
安装前提
pytest(>=5.3) and python>=3.6
查看安装版本
pip show pytest-rerunfailures
pytest-rerunfailures方法使用
- 命令行参数:-reruns n(重新运行次数) - rerruns -delay m (等待运行次数)
使用装饰器
@pytest.mark.flaky(reruns=5,reruns_delay=2)
命令行案例:
我们将编写三个测试函数:两个会成功,一个会失败。然后我们将运行这些测试,并在修复失败的测试后再次运行它们,以显示 pytest-rerunfailures 如何工作
import pytest

def test_success_one():
    print("Running test_success_one")
    assert True

def test_success_two():
    print("Running test_success_two")
    assert True

def test_failure():
    print("Running test_failure")
    # 这个断言会在第一次执行时失败,但在后续重试中通过
    if not hasattr(test_failure, "retry_count"):
        test_failure.retry_count = 0
    test_failure.retry_count += 1
    if test_failure.retry_count < 3:
        assert False, f"This test is supposed to fail on retry {test_failure.retry_count}"
    else:
        print("This test has been fixed and now passes.")
        assert True
第一步:初次运行测试
首先,我们运行所有测试来确定哪些测试失败了,并查看重试机制是否按预期工作
执行命令
pytest --reruns 3 --reruns-delay 1 -v -s test_example.py
这里,–reruns 3 表示每个失败的测试最多重试 3 次,–reruns-delay 1 表示每次重试之间等待 1 秒
预期结果
============================= test session starts ==============================
platform linux -- Python 3.x.y, pytest-7.x.y, pluggy-1.x.y
rootdir: /path/to/your/project
collected 3 items

test_example.py::test_success_one Running test_success_one
PASSED
test_example.py::test_success_two Running test_success_two
PASSED
test_example.py::test_failure Running test_failure
FAILED

---------------------------------- Captured stdout call ----------------------------------
Running test_failure

=================================== FAILURES ===================================
_______________________________ test_failure _________________________________

    def test_failure():
        print("Running test_failure")
        if not hasattr(test_failure, "retry_count"):
            test_failure.retry_count = 0
        test_failure.retry_count += 1
        if test_failure.retry_count < 3:
>           assert False, f"This test is supposed to fail on retry {test_failure.retry_count}"
E           AssertionError: This test is supposed to fail on retry 1
E           assert False

test_example.py:16: AssertionError
----------------------------- RERUN test_failure ------------------------------
test_example.py::test_failure (re-run 1) Running test_failure
FAILED

---------------------------------- Captured stdout call ----------------------------------
Running test_failure

=================================== FAILURES ===================================
_______________________________ test_failure _________________________________

    def test_failure():
        print("Running test_failure")
        if not hasattr(test_failure, "retry_count"):
            test_failure.retry_count = 0
        test_failure.retry_count += 1
        if test_failure.retry_count < 3:
>           assert False, f"This test is supposed to fail on retry {test_failure.retry_count}"
E           AssertionError: This test is supposed to fail on retry 2
E           assert False

test_example.py:16: AssertionError
----------------------------- RERUN test_failure ------------------------------
test_example.py::test_failure (re-run 2) Running test_failure
PASSED

---------------------------------- Captured stdout call ----------------------------------
Running test_failure
This test has been fixed and now passes.

============================== short test summary info ===============================
FAILED test_example.py::test_failure - AssertionError: This test is supposed to fail on retry 1
FAILED test_example.py::test_failure (re-run 1) - AssertionError: This test is supposed to fail on retry 2
PASSED test_example.py::test_failure (re-run 2)
============================== 2 passed, 1 failed in X.XX seconds ===============================
在这个输出中,我们可以看到 test_failure 在前两次重试中失败了,但在第三次重试中通过了。
总结
- 初次运行:展示了哪些测试通过了,哪些失败了,并且展示了重试机制
- 重试机制:test_failure 测试在前两次重试中失败,但在第三次重试中通过了
- 使用 pytest-rerunfailures 插件:确保失败的测试可以在同一个测试会话中多次重试,从而减少由于环境或其他不稳定因素导致的假阳性失败
十一、pytest执行顺序
在 pytest 中,测试函数的执行顺序默认是按照它们在文件中的定义顺序。然而,有时候你可能希望控制测试的执行顺序,例如确保某些依赖关系得以满足或优化测试运行时间。pytest 提供了多种方式来控制测试执行顺序,包括使用 @pytest.mark.order 装饰器(需要安装 pytest-ordering 插件)和内置的 pytest-order 插件
安装插件
pip install pytest-order
案例:
我们将创建几个测试函数,并使用 @pytest.mark.order 来指定它们的执行顺序
import pytest

@pytest.mark.order(2)
def test_second():
    print("Running second test")
    assert True

@pytest.mark.order(1)
def test_first():
    print("Running first test")
    assert True

@pytest.mark.order(3)
def test_third():
    print("Running third test")
    assert True

def test_unordered():
    print("Running unordered test")
    assert True
在这个例子中,我们指定了三个测试的执行顺序:test_first 会最先运行,然后是 test_second,最后是 test_third。test_unordered 没有指定顺序,因此它将根据其在文件中的位置决定执行顺序,通常是在所有有序测试之后执行
预期结果
============================= test session starts ==============================
platform linux -- Python 3.x.y, pytest-7.x.y, pluggy-1.x.y
rootdir: /path/to/your/project
collected 4 items

test_example.py::test_first Running first test
PASSED
test_example.py::test_second Running second test
PASSED
test_example.py::test_third Running third test
PASSED
test_example.py::test_unordered Running unordered test
PASSED

============================== 4 passed in X.XX seconds ===============================
在这个输出中,可以看到测试按照我们指定的顺序执行:test_first -> test_second -> test_third,而 test_unordered 在最后执行
不同的排序策略
- 除了使用数字来指定顺序外,pytest-order 还支持其他排序策略,比如按字母顺序、反向顺序等。你还可以结合多个装饰器来实现更复杂的排序逻辑。
示例:按字母顺序执行
- 如果你想要按字母顺序执行测试,可以使用 @pytest.mark.order(“alphabetical”):
@pytest.mark.order("alphabetical")
def test_a():
    print("Running test_a")
    assert True

@pytest.mark.order("alphabetical")
def test_b():
    print("Running test_b")
    assert True
十二、hooks(钩子函数)
12.1 钩子函数的四个阶段
12.1.1 配置阶段 (Configuration)
描述:
- 在这个阶段,pytest 解析命令行参数、读取配置文件,并进行必要的初始化工作。你可以通过这个阶段的钩子函数来添加自定义选项或修改全局配置
常用钩子函数:
- pytest_addoption(parser):
- 用途:向命令行接口添加自定义选项
- 示例:
def pytest_addoption(parser):
    parser.addoption("--runslow", action="store_true", help="run slow tests")
- pytest_configure(config):
- 用途:在所有测试开始前进行全局配置,比如注册 markers 或设置其他全局状态。
- 示例:
def pytest_configure(config):
    config.addinivalue_line("markers", "slow: mark test as slow to run")
12.2 收集阶段 (Collection)
描述:
- pytest 在此阶段会搜索并收集所有符合标准的测试项(test items)。你可以在这一阶段修改哪些测试会被收集,或者改变它们的属性。
常用钩子函数:
- pytest_collect_file(path, parent):
- 用途:自定义文件收集器,允许 pytest 收集非标准测试文件
- 示例:
def pytest_collect_file(parent, path):
    if path.ext == ".yaml" and path.basename.startswith("test_"):
        return YamlFile.from_parent(parent, fspath=path)
- pytest_collection_modifyitems(session, config, items):
- 用途:修改收集到的测试项列表,例如根据条件过滤或重新排序测试项。
- 示例:
def pytest_collection_modifyitems(items):
    items.sort(key=lambda item: item.name)  # 按名称排序
12.3 运行阶段 (Running)
描述:
- 这是实际执行测试的阶段。pytest 会依次调用每个测试项的 setup、call 和 teardown 方法。你可以在这些方法中插入额外的逻辑,如日志记录、性能监控等
常用钩子函数:
- pytest_runtest_protocol(item, nextitem):
- 用途:控制整个测试协议,包括 setup、call 和 teardown。
- pytest_runtest_setup(item):
- 用途:在每个测试项执行之前调用,用于设置测试环境。
- 示例:
def pytest_runtest_setup(item):
    print(f"Setting up {item.name}")
- pytest_runtest_call(item):
- 用途:在每个测试项的实际执行过程中调用。
- 示例:
def pytest_runtest_call(item):
    print(f"Calling {item.name}")
- pytest_runtest_teardown(item, nextitem):
- 用途:在每个测试项执行之后调用,用于清理测试环境。
- 示例:
def pytest_runtest_teardown(item, nextitem):
    print(f"Tearing down {item.name}")
- pytest_report_teststatus(report, config):
- 用途:自定义测试状态报告,改变测试通过、失败或跳过的显示方式。
- 示例:
def pytest_report_teststatus(report, config):
    if report.when == 'call' and report.failed:
        return "failed", "F", "FAILED"
12.4 总结阶段 (Summary)
描述:
- 在所有测试完成后,pytest 会生成一个总结报告,显示测试结果。你可以在此阶段添加自定义的总结信息,或者修改默认的输出格式。
常用钩子函数:
- pytest_terminal_summary(terminalreporter, exitstatus, config):
- 用途:在终端输出总结信息。
- 示例:
def pytest_terminal_summary(terminalreporter, exitstatus, config):
    print("Custom summary information")
- 四个阶段的关系
- 配置阶段:为测试会话准备环境,确保一切就绪
- 收集阶段:确定哪些测试需要运行,并构建测试项列表
- 运行阶段:依次执行测试项,并处理每个测试的 setup、call 和 teardown
- 总结阶段:提供测试结果的汇总信息,并结束测试会话
12.2 钩子函数关键点
1. 调用顺序:了解各个阶段的钩子函数调用顺序,以便在适当的时间点插入逻辑
2. 常见钩子函数:熟悉关键的钩子函数及其用途,以实现所需的定制化功能
3. request 对象:利用 request 对象提供的上下文信息来增强灵活性
许多钩子函数接收一个 request 对象作为参数,该对象提供了访问当前测试上下文的能力。request 对象非常强大,因为它包含了关于测试会话、节点、配置等方面的信息
- request.config: 访问全局配置
- request.node: 获取当前测试项的信息
- request.addfinalizer(): 注册一个函数,在测试结束时调用
4. 插件兼容性:确保自定义插件与现有插件良好协作
5.文档和社区支持:充分利用官方文档和社区资源来解决问题和学习最佳实践
结合案例
- 假设你想确保一些测试总是最先运行,而另一些则在最后运行。你可以结合 pytest_collection_modifyitems 和 @pytest.mark.order 来实现这一点
import pytest

def pytest_collection_modifyitems(items):
    # 定义一个排序键,确保带有 'order' 标记的测试按照指定顺序执行
    items.sort(key=lambda item: (getattr(item.get_closest_marker('order'), 'args', [0])[0], item.name))

@pytest.mark.order(1)
def test_first():
    print("Running first test")
    assert True

@pytest.mark.order(2)
def test_second():
    print("Running second test")
    assert True

def test_unordered():
    print("Running unordered test")
    assert True
在这个例子中,pytest_collection_modifyitems 确保了标记为 @pytest.mark.order 的测试按照指定顺序执行,而未标记的测试则排在其后
十三、Allure测试报告
13.1 前言
Allure 是一个灵活且功能强大的测试报告工具,支持多种编程语言和测试框架,包括 Python 的 pytest。它能够生成详细且美观的测试报告,帮助团队更好地理解和分析测试结果。以下是关于如何在 pytest 中集成 Allure 测试报告的关键点和步骤
13.2 安装 Allure
首先,你需要安装 Allure 和相关插件:
- 安装 Allure 命令行工具:
- 使用 Homebrew(MacOS):brew install allure
- 使用 Chocolatey(Windows):choco install allure
- 或者从 下载并手动安装。
- 安装 pytest-allure-adaptor 插件:
- 使用 pip 安装:pip install pytest-allure-adaptor
13.3 配置 pytest 以使用 Allure
1. 在命令行中启用 Allure
你可以直接在命令行中通过添加 --alluredir 参数来指定保存 Allure 结果的目录:
pytest --alluredir=/path/to/result/dir
2. 使用 pytest.ini 或 tox.ini 配置文件
你也可以将 Allure 配置添加到 pytest.ini 或 tox.ini 文件中,以便每次运行测试时自动应用:
[pytest]
addopts = --alluredir=allure-results
13.4 Allure装饰器函数
装饰器函数
| 方法 | 参数 | 参数说明 |
|---|---|---|
| @allure.epic() | epic描述 | 定义项目、当有多个项目是使用。往下是feature |
| @allure.feature() | 模块名称 | 用例按照模块区分,有多个模块时给每个起名字 |
| @allure.story() | 用例名称 | 一个用例的描述 |
| @allure.title(用例的标题) | 用例标题 | 一个用例的标题 |
| @allure.testcase() | 测试用例连接的地址 | 自动化用例对应的功能用例存放系统的地址 |
| @allure.issue() | 缺陷地址 | 对应缺陷管理系统里边的缺陷地址 |
| @allure.description() | 用例描述 | 对应测试用例的描述 |
| @allure.step() | 测试步骤 | 测试用例的操作步骤 |
| @allure.severity() | 用例等级 | blocker 、critical 、normal 、minor 、trivial |
| @allure.link() | 定义连接 | 用于定义一个需要在测试报告中展示的连接 |
| @allure.attachment() | 附件 | 添加测试报告附件 |
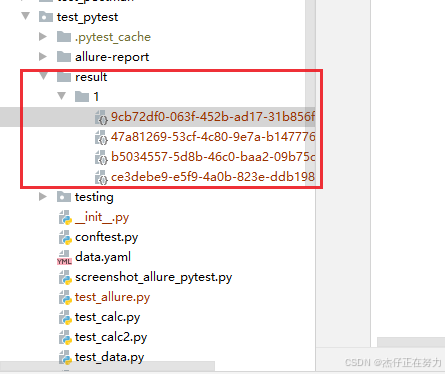
13.5 执行自动化用例 生成allure报告所需文件
测试代码
import pytest

def test_success():
    """this test succeeds"""
    assert True

def test_failure():
    """this test fails"""
    assert False

def test_skip():
    """this test is skipped"""
    pytest.skip('for a reason!')

def test_broken():
    raise Exception('oops')
运行
pytest --alluredir=./results
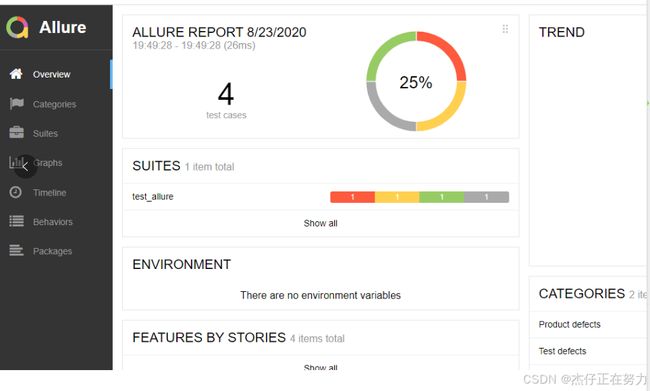
13.6 查看测试报告的两种方式
13.6.1 直接打开默认浏览器展示报告
allure serve ./result/
13.6.2 从结果生成报告
-
生成报告
- allure generate ./result/ -o ./report/ --clean (覆盖路径加–clean)
-
打开报告
- allure open -h 127.0.0.1 -p 8883 ./report/
十四、pytest中管理日志
14.1 日志级别
debug:打印全部日志,详细信息
info:打印info、warning、error、critical级别的日志,确认一切按预期运行
warning:打印warning、error、critical级别的日志
error:打印error、critical级别日志,或者一些更为严重,软件没能执行一些功能
critical:打印critical日志,一个严重的错误,表明程序可能无法正常的执行
等级顺序:
debug–》info–》warning–》error–》critical
14.2 使用logging模块
你可以直接在测试代码中使用 logging 模块来记录信息。pytest 会自动捕获这些日志并根据上述配置进行处理
import logging

def test_example():
    logger = logging.getLogger(__name__)
    logger.info("This is an info message")
    logger.debug("This is a debug message")
    assert True
14.3 将日志保存到文件
有时你可能希望将日志保存到文件而不是仅限于终端输出。你可以通过配置 logging 模块来实现这一点
import logging

# 配置日志记录器以写入文件
logging.basicConfig(filename='test.log', filemode='w', level=logging.INFO)

def test_logging_to_file():
    logger = logging.getLogger(__name__)
    logger.info("Logging to file")
    assert True
此外,你也可以在 pytest.ini 中配置日志输出到文件:
[pytest]
log_file = test.log
log_file_level = INFO
14.4 控制日志捕获的行为
有时候你可能不想捕获某些特定的日志输出,或者想完全禁用日志捕获。你可以通过 caplog fixture 来控制日志捕获的行为
def test_control_log_capture(caplog):
    caplog.set_level(logging.WARNING)  # 只捕获 WARNING 级别及以上的日志
    logging.info("This will not be captured")
    logging.warning("This will be captured")
    assert "captured" in caplog.text
14.5 示例
import logging
import os
import time

from config.conf import BASE_DIR
import colorlog

log_color_config = {
        'DEBUG': 'cyan',
        'INFO': 'green',
        'WARNING': 'yellow',
        'ERROR': 'red',
        'CRITICAL': 'bold_red'}

log = logging.getLogger('log_name')

consloe_handler = logging.StreamHandler()
daytime = time.strftime("%Y-%m-%d")
path = BASE_DIR + 'log/'if not os.path.exists(path):
    os.makedirs(path)

filename = path + f'/run_log_{daytime}.log'file_handle = logging.FileHandler(filename=filename, mode='a', encoding="utf-8")

log.setLevel(logging.DEBUG)
consloe_handler.setLevel(logging.DEBUG)
file_handle.setLevel(logging.INFO)

file_formatter = logging.Formatter(
    fmt='%(asctime)s - %(levelname)s - %(name)s - %(module)s:%(funcName)s:%(lineno)d - %(message)s',
    datefmt='%Y-%m-%d %H:%M:%S')

console_formatter = colorlog.ColoredFormatter(
    fmt='%(log_color)s%(levelname)-8s%(reset)s | %(log_color)s%(message)s%(reset)s | %(white)s%(asctime)s | %(blue)s%(name)s:%(filename)s:%(lineno)d%(reset)s',
    datefmt='%Y-%m-%d %H:%M:%S',  # 设置日期/时间格式    reset=True,  # 自动重置颜色到默认值    log_colors=log_color_config,  # 使用上面定义的日志等级颜色配置    secondary_log_colors={},  # 可选:为特定字段添加颜色    style='%'  # 使)
consloe_handler.setFormatter(console_formatter)
file_handle.setFormatter(file_formatter)


if not log.handlers:
    log.addHandler(consloe_handler)
    log.addHandler(file_handle)


consloe_handler.close()
file_handle.close()

if __name__ == '__main__':
    log.debug("debug")
    log.info("info")
    log.warning("warning")
    log.critical("critical")