超详细RabbitMq入门教程
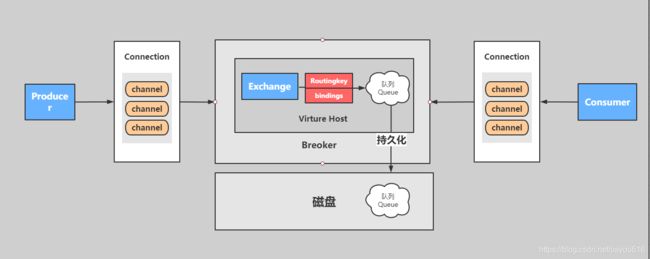
RabbitMq入门教程
准备工作:安装rabbit参照
https://blog.csdn.net/jiayou516/article/details/119183297?spm=1001.2014.3001.5501
一.RabbitMQ-SpringBoot案例 -fanout模式
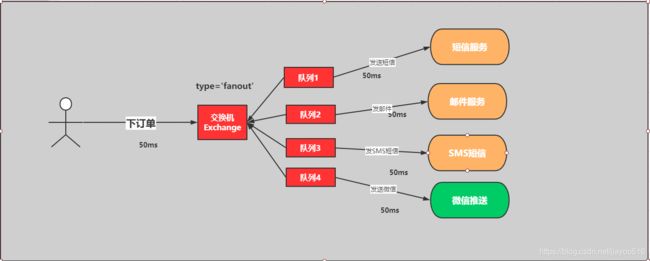
实现步骤
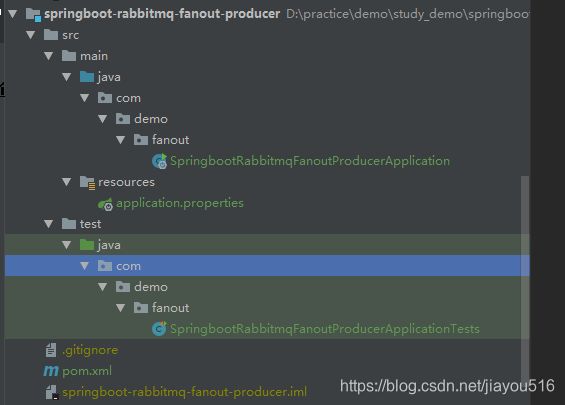
1:创建生产者工程:sspringboot-rabbitmq-fanout-producer
2:创建消费者工程:springboot-rabbitmq-fanout-consumer
3:引入spring-boot-rabbitmq的依赖
4:进行消息的分发和测试
5:查看和观察web控制台的状况
具体实现
定义生产者
1:创建生产者工程:springboot-rabbitmq-fanout-producer
2:在pom.xml中引入依赖
<dependency>
    <groupId>org.springframework.bootgroupId>
    <artifactId>spring-boot-starter-amqpartifactId>
dependency>
<dependency>
    <groupId>org.springframework.bootgroupId>
    <artifactId>spring-boot-starter-webartifactId>
dependency>
3:在application.yml进行配置
# 服务端口
server:
  port: 10086
# 配置rabbitmq服务
spring:
  rabbitmq:
    username: admin
    password: admin
    virtual-host: /root
    host: localhost
    port: 5672
4:定义订单的生产者
package com.demo.fanout.service;
import org.springframework.amqp.rabbit.core.RabbitTemplate;
import org.springframework.beans.factory.annotation.Autowired;
import org.springframework.stereotype.Component;
import java.util.UUID;
/**
* @className: OrderService
* @description: 订单
* @author: penghailan
* @create: 2021-07-26 10:14
**/
@Component
public class OrderService {
@Autowired
private RabbitTemplate rabbitTemplate;
//定义交换机
private String exchangeName = "fanout_order_exchange";
//路由key
private String routeKey = "";
public void saveOrder(Long userId,Long productId,int num){
//1.生成订单号
String orderNumber = UUID.randomUUID().toString();
//2.根据商品id productId查询商品库存
// int numstore = productSerivce.getProductNum(productId);
// 3:判断库存是否充足
// if(num > numstore ){ return "商品库存不足..."; }
// 4: 下单逻辑
// orderService.saveOrder(order);
// 5: 下单成功要扣减库存
// 6: 下单完成以后
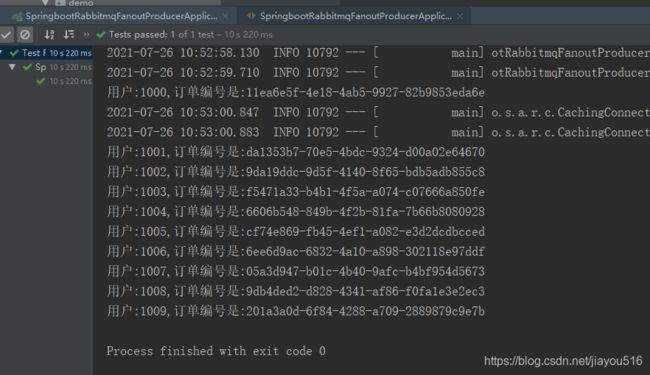
System.out.println("用户:"+userId+",订单编号是:"+orderNumber);
//发送订单信息给rabbitMQ fanout
rabbitTemplate.convertAndSend(exchangeName,routeKey,orderNumber);
}
}
5:绑定关系
package com.demo.fanout.config;

import org.springframework.amqp.core.*;
import org.springframework.context.annotation.Bean;
import org.springframework.context.annotation.Configuration;

/**
 * @className: DirectRabbitConfig
 * @description: 配置类
 * @author: penghailan
 * @create: 2021-07-26 10:23
 **/
@Configuration
public class DirectRabbitConfig {

    //声明email队列
    @Bean
    public Queue emailQueue(){

        // durable:是否持久化,默认是false,持久化队列:会被存储在磁盘上,当消息代理重启时仍然存在,暂存队列:当前连接有效
        // exclusive:默认也是false,只能被当前创建的连接使用,而且当连接关闭后队列即被删除。此参考优先级高于durable
        // autoDelete:是否自动删除,当没有生产者或者消费者使用此队列,该队列会自动删除。
        //一般设置一下队列的持久化就好,其余两个就是默认false
        return new Queue("email.fanout.queue",true);
    }
    //声明sms队列
    @Bean
    public Queue smsQueue(){

        return new Queue("sms.fanout.queue",true);
    }
    //声明微信队列
    @Bean
    public Queue weixinQueue(){

        return new Queue("weixin.fanout.queue",true);
    }
    //声明交换机
    @Bean
    public FanoutExchange fanoutOrderExchange(){

        return new FanoutExchange("fanout_order_exchange",true,false);
    }
    //将队列和交换机进行绑定
    @Bean
   public Binding bingingFanout1(){

       return BindingBuilder.bind(emailQueue()).to(fanoutOrderExchange());
   }

    @Bean
    public Binding bingingFanout2(){

        return BindingBuilder.bind(smsQueue()).to(fanoutOrderExchange());
    }
    @Bean
    public Binding bingingFanout3(){

        return BindingBuilder.bind(weixinQueue()).to(fanoutOrderExchange());
    }

}
6.编写测试
package com.demo.fanout;

import com.demo.fanout.service.OrderService;
import org.junit.jupiter.api.Test;
import org.springframework.beans.factory.annotation.Autowired;
import org.springframework.boot.test.context.SpringBootTest;

@SpringBootTest
class SpringbootRabbitmqFanoutProducerApplicationTests {


    @Autowired
    private OrderService orderService;

    @Test
    void contextLoads() throws InterruptedException {

        for (int i = 0; i < 10; i++) {

            Thread.sleep(1000);
            Long userId = 1000L + i;
            Long productId = 1000L + i;
            int num = 10;
            orderService.saveOrder(userId,productId,num);
        }
    }

}
控制台输出
管理界面
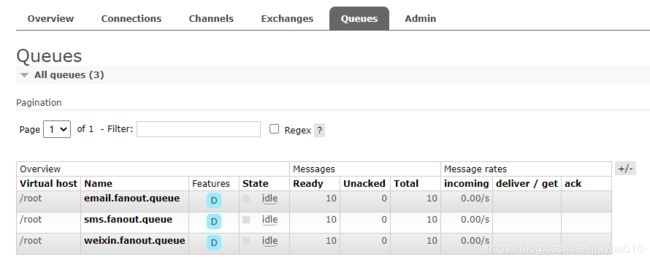
定义消费者
1、创建消费者工程:springboot-rabbitmq-fanout-consumer
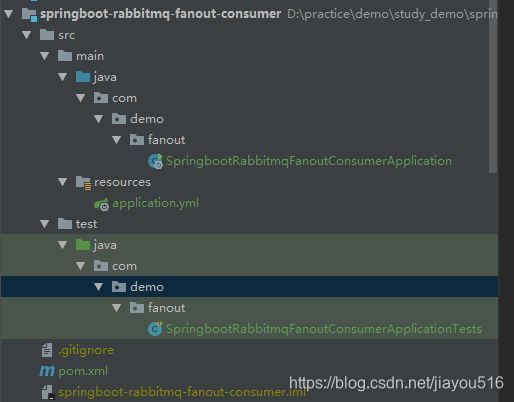
2、引入依赖pom.xml
<dependency>
    <groupId>org.springframework.bootgroupId>
    <artifactId>spring-boot-starter-amqpartifactId>
dependency>
<dependency>
    <groupId>org.springframework.bootgroupId>
    <artifactId>spring-boot-starter-webartifactId>
dependency>
3、在application.yml进行配置
# 服务端口
server:
  port: 10088
# 配置rabbitmq服务
spring:
  rabbitmq:
    username: admin
    password: admin
    virtual-host: /root
    host: localhost
    port: 5672
4、消费者 - 邮件服务
package com.demo.fanout.consumer;

import org.springframework.amqp.core.ExchangeTypes;
import org.springframework.amqp.rabbit.annotation.*;
import org.springframework.stereotype.Component;

/**
 * @className: EmailService
 * @description: email服务
 * @author: penghailan
 * @create: 2021-07-26 11:22
 **/
@Component
@RabbitListener(bindings = @QueueBinding(value = @Queue(value = "email.fanout.queue"),
                                exchange = @Exchange(value = "fanout_order_exchange",type = ExchangeTypes.FANOUT)))
public class EmailService {

    @RabbitHandler
    public void emailService(String message){

        //具体的发邮件业务逻辑代码
        System.out.println("email-------------->" + message);
    }
}
5、消费者 - 短信服务
package com.demo.fanout.consumer;

import org.springframework.amqp.core.ExchangeTypes;
import org.springframework.amqp.rabbit.annotation.*;
import org.springframework.stereotype.Component;

/**
 * @className: SMSService
 * @description: 短信服务
 * @author: penghailan
 * @create: 2021-07-26 11:07
 **/
@Component
@RabbitListener(bindings = @QueueBinding(value = @Queue(value = "sms.fanout.queue"),
                                        exchange = @Exchange(value = "fanout_order_exchange",type = ExchangeTypes.FANOUT)))
public class SMSService {

    @RabbitHandler
    public void messageService(String message){

        //发短信的逻辑
        System.out.println("sms---------->"+message);
    }

}
6、消费者 - 微信服务
package com.demo.fanout.consumer;

import org.springframework.amqp.core.ExchangeTypes;
import org.springframework.amqp.rabbit.annotation.*;
import org.springframework.stereotype.Component;

/**
 * @className: WeixinService
 * @description: 微信服务
 * @author: penghailan
 * @create: 2021-07-26 11:15
 **/
@Component
@RabbitListener(bindings = @QueueBinding(value = @Queue(value = "weixin.fanout.queue",durable = "true"),
                                        exchange = @Exchange(value = "fanout_order_exchange",type = ExchangeTypes.FANOUT)))
public class WeixinService {

    @RabbitHandler
    public void messageService(String message){

        //省略微信发邮件的具体业务代码
        System.out.println("weixin-------------->" + message);
    }
}
7、启动服务SpringbootRabbitmqFanoutConsumerApplication,查看效果

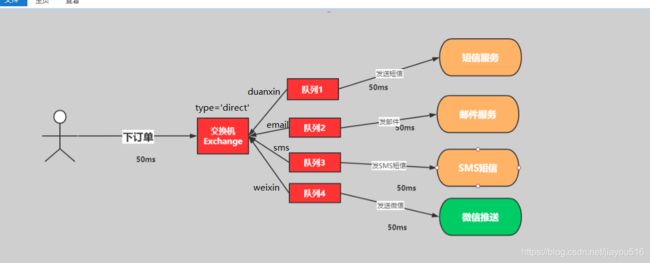
二.RabbitMQ-SpringBoot案例 -direct模式
Direct模式是fanout模式上的一种叠加,增加了路由RoutingKey的模式。
实现步骤
1:创建生产者工程:sspringboot-rabbitmq-direct-producer
2:创建消费者工程:springboot-rabbitmq-direct-consumer
3:引入spring-boot-rabbitmq的依赖
4:进行消息的分发和测试
5:查看和观察web控制台的状况
具体实现
定义生成者
1、创建生产者工程:springboot-rabbitmq-direct-producer
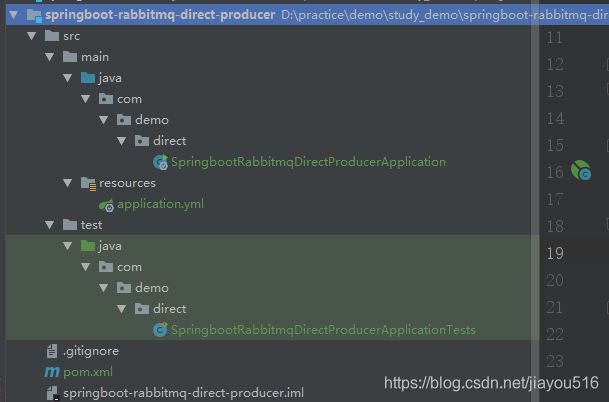
2、在pom.xml中引入依赖
<dependency>
    <groupId>org.springframework.boot</groupId>
    <artifactId>spring-boot-starter-amqp</artifactId>
</dependency>
<dependency>
    <groupId>org.springframework.boot</groupId>
    <artifactId>spring-boot-starter-web</artifactId>
</dependency>
3、在application.yml进行配置
# 服务端口
server:
  port: 10096
# 配置rabbitmq服务
spring:
  rabbitmq:
    username: admin
    password: admin
    virtual-host: /root
    host: localhost
    port: 5672
4、定义订单的生产者
package com.demo.direct.service;
import org.springframework.amqp.rabbit.core.RabbitTemplate;
import org.springframework.beans.factory.annotation.Autowired;
import org.springframework.stereotype.Component;
import java.util.UUID;
/**
* @className: OrderService
* @description: 订单服务
* @author: penghailan
* @create: 2021-07-26 13:54
**/
@Component
public class OrderService {
@Autowired
private RabbitTemplate rabbitTemplate;
//定义交换机
private String exchangeName = "dire_order_exchange";
private String routeKey="";
private String routeKey1="sms";
private String routeKey2="email";
private String routeKey3="weixin";
public void saveOrder(Long userId,Long productId,int num){
// 1: 模拟用户下单
String orderNumer = UUID.randomUUID().toString();
// 2: 根据商品id productId 去查询商品的库存
// int numstore = productSerivce.getProductNum(productId);
// 3:判断库存是否充足
// if(num > numstore ){ return "商品库存不足..."; }
// 4: 下单逻辑
// orderService.saveOrder(order);
// 5: 下单成功要扣减库存
// 6: 下单完成以后
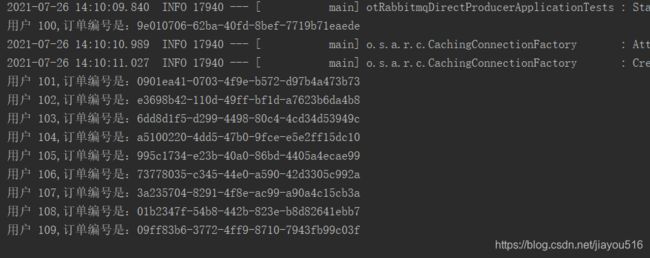
System.out.println("用户 " + userId + ",订单编号是:" + orderNumer);
// 发送订单信息给RabbitMQ fanout
// rabbitTemplate.convertAndSend(exchangeName, routeKey, orderNumer);//不指定routeKey,则三个队列都会收到消息
rabbitTemplate.convertAndSend(exchangeName, routeKey1, orderNumer);//指定routeKey,给指定的队列发消息
rabbitTemplate.convertAndSend(exchangeName, routeKey2, orderNumer);
rabbitTemplate.convertAndSend(exchangeName, routeKey3, orderNumer);
}
}
5、绑定关系
package com.demo.direct.config;

import org.springframework.amqp.core.*;
import org.springframework.context.annotation.Bean;
import org.springframework.context.annotation.Configuration;


/**
 * @className: DirectRabbitConfig
 * @description: 配置类
 * @author: penghailan
 * @create: 2021-07-26 13:58
 **/
@Configuration
public class DirectRabbitConfig {


    //声明队列
    @Bean
    public Queue emailQueue(){

        return new Queue("email.dire.queue",true);
    }
    //声明队列
    @Bean
    public Queue smsQueue(){

        return new Queue("sms.dire.queue",true);
    }
    //声明队列
    @Bean
    public Queue weixinQueue(){

        return new Queue("weixin.dire.queue",true);
    }
    //声明交换机
    @Bean
    public DirectExchange direExchange(){

        return new DirectExchange("dire_order_exchange",true,false);
    }
    //将队列与交换机进行绑定,并设置用于匹配的routeKey
    @Bean
    public Binding bindingDirect1(){

        return BindingBuilder.bind(emailQueue()).to(direExchange()).with("");
    }
    @Bean
    public Binding bindingDirect3(){

        return BindingBuilder.bind(smsQueue()).to(direExchange()).with("");
    }
    @Bean
    public Binding bindingDirect2(){

        return BindingBuilder.bind(weixinQueue()).to(direExchange()).with("");
    }

}
6、进行测试
package com.demo.fanout;

import com.demo.fanout.service.OrderService;
import org.junit.jupiter.api.Test;
import org.springframework.beans.factory.annotation.Autowired;
import org.springframework.boot.test.context.SpringBootTest;

@SpringBootTest
class SpringbootRabbitmqFanoutProducerApplicationTests {


    @Autowired
    private OrderService orderService;

    @Test
    void contextLoads() throws InterruptedException {

        for (int i = 0; i < 10; i++) {

            Thread.sleep(1000);
            Long userId = 1000L + i;
            Long productId = 1000L + i;
            int num = 10;
            orderService.saveOrder(userId,productId,num);
        }
    }

}
定义消费者
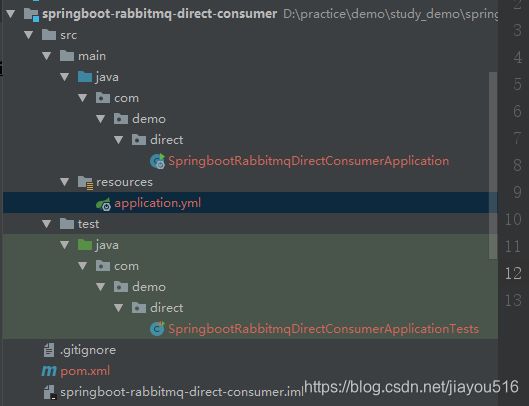
1、创建生产者工程:springboot-rabbitmq-direct-consumer
2、在pom.xml中引入依赖
<dependency>
    <groupId>org.springframework.bootgroupId>
    <artifactId>spring-boot-starter-amqpartifactId>
dependency>
<dependency>
    <groupId>org.springframework.bootgroupId>
    <artifactId>spring-boot-starter-webartifactId>
dependency>
3、在application.yml进行配置
# 服务端口
server