Threejs实现极坐标和平滑过渡特效
大家好!我是 [数擎 AI],一位热爱探索新技术的前端开发者,在这里分享前端和 Web3D、AI 技术的干货与实战经验。如果你对技术有热情,欢迎关注我的文章,我们一起成长、进步!
开发领域:前端开发 | AI 应用 | Web3D | 元宇宙
技术栈:JavaScript、React、ThreeJs、WebGL、Go
经验经验:6 年+ 前端开发经验,专注于图形渲染和 AI 技术
开源项目:AI 简历、元宇宙、数字孪生
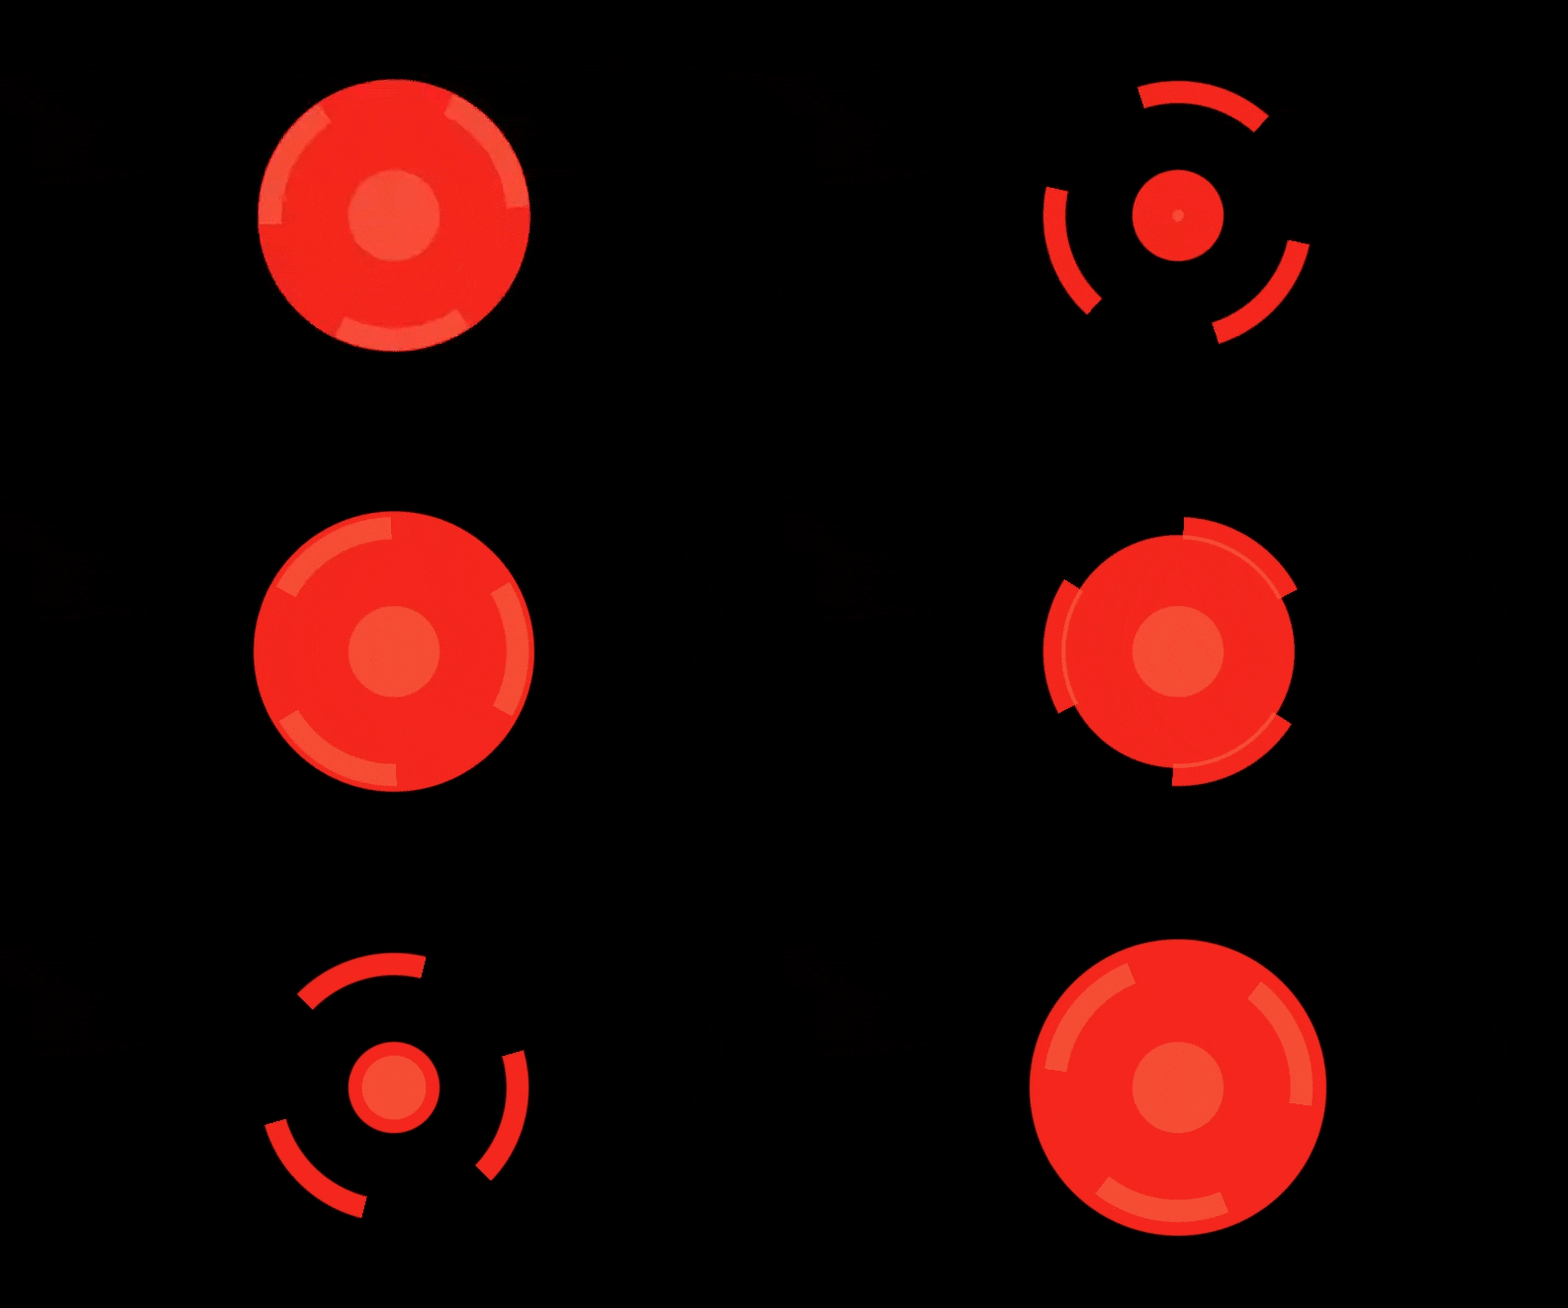
在这篇博客中,我们将探讨一个有趣的 WebGL 片段着色器代码,使用极坐标、平滑过渡以及一些基本的颜色处理来生成动态圆形效果。这个着色器使用了几个技术,包括反走样(AA)来获得更平滑的边缘、正弦变换来进行动画处理,以及条件颜色过滤
2. 圆形函数
circle 函数根据给定的半径和圆心生成一个圆形。它计算圆心和当前像素(uv)之间的距离,并使用平滑过渡函数(smoothstep)创建一个反走样的圆形。
float circle(float radius, vec2 center, vec2 uv) {
    float d = distance(center, uv);
    return 1.0 - smoothstep(radius - 1.0 / iResolution.y, radius + 1.0 / iResolution.y, d);
}
这种方法有助于平滑圆形的边缘,避免了在边界处出现严重的像素化问题。
3. 角度和半径计算
angleRadius 函数将 UV 坐标转换为极坐标,计算出当前像素的角度和半径。角度通过 atan 函数计算,半径则是向量的长度。
vec2 angleRadius(vec2 uv) {
    float anglePixel = atan(uv.y, uv.x);
    float lengthPixel = length(uv);

    return vec2(anglePixel, lengthPixel);
}
4. 正值过滤函数
filterPositive 函数使用 smoothstep 平滑过渡函数来过滤掉低于某个阈值的值,从而提供更加平滑的过渡效果。
float filterPositive(float n) {
    return smoothstep(0.0, 0.005, n);
}
这个函数将返回一个平滑过渡的值,非常适合用来处理噪声或小细节。
5. 主着色器逻辑:mainImage
着色器的核心逻辑位于 mainImage 函数中。在这里,所有的视觉元素将被组合在一起,生成最终的输出。
void mainImage(out vec4 fragColor, in vec2 fragCoord) {
    vec2 uv = (fragCoord - 0.5 * iResolution.xy) / iResolution.y;

    float radius = 0.3;
    float ringThick = 0.05;

    vec2 stPolar = angleRadius(uv);

    float sPolar = stPolar.x * 3.0 + iTime * 10.0;
    float cosSPolarTemp = cos(sPolar);
    float cosSPolar = filterPositive(cosSPolarTemp);

    vec3 color = vec3(cosSPolar);
坐标系设置:
着色器首先调整片段坐标(fragCoord),将其居中并根据屏幕的高度进行归一化。
角度和基于时间的动画:
角度 stPolar.x 被缩放并根据时间(iTime)进行动画处理,从而生成动态的圆形模式。
颜色过滤:
动画角度的余弦值通过 filterPositive 函数,生成平滑的颜色过渡效果。
6. 反走样和圆环效果
着色器使用平滑过渡函数来创建主要圆形和较小圆环的反走样效果。这些圆环的生成基于它们距离中心的距离。
    float inCircleAA = smoothstep(radius, radius + 0.005, angleRadius(uv).y);
    float smallCircleAA = smoothstep(radius - ringThick, radius - ringThick + 0.005, angleRadius(uv).y);

    vec3 col = 1.0 - vec3(inCircleAA);
    vec3 col_2 = 1.0 - vec3(smallCircleAA);
    vec3 colorGap = col - col_2;
    vec3 finalColor = color * colorGap;
    vec3 colorMask = vec3(10, 1.5, 1.0);
    finalColor /= 10.0;
    finalColor *= colorMask;
这部分代码计算了两个圆形:一个较大的圆形和一个较小的圆形。使用 smoothstep 函数平滑地调整它们的颜色,使得两个圆环之间的过渡更加自然。
7. 中心圆和泡泡效果
着色器还包含了一个随着时间脉动的中心圆,以及一个基于正弦函数动态变化的“泡泡”效果,其半径会随着时间的变化而变化。
    float centerCircleAA = smoothstep(0.1, 0.1 + 0.005, angleRadius(uv).y);
    vec3 centerCircleColor = 1.0 - vec3(centerCircleAA);
    centerCircleColor /= 10.0;
    centerCircleColor *= colorMask;

    vec2 centerC = vec2(0.0, 0.0);
    float bubbleRadius = abs(sin(iTime * 3.0)) / 3.0;
    float bubbleCircleColor = circle(bubbleRadius, centerC, uv);
    vec4 bubbleColor = vec4(vec3(bubbleCircleColor) / 10.0 * colorMask, 1.0);
中心圆和泡泡效果都使用了 smoothstep 函数来平滑它们的边缘,并根据 iTime 的变化来实现动画效果。
8. 最终颜色计算
最后,着色器将所有组件的颜色组合起来,包括圆环颜色、中心圆颜色和泡泡效果,生成最终的输出。
    fragColor = vec4(finalColor + centerCircleColor, 1.0);
    fragColor += bubbleColor;
这段代码使得最终的效果包含了动态圆环、脉动的中心圆和不断变化的泡泡效果。
完整代码
import * as THREE from 'three';

// 初始化场景
const scene = new THREE.Scene();
const camera = new THREE.PerspectiveCamera(
  75,
  window.innerWidth / window.innerHeight,
  0.1,
  1000,
);
const renderer = new THREE.WebGLRenderer();
renderer.setSize(window.innerWidth, window.innerHeight);
document.body.appendChild(renderer.domElement);

// 创建着色器材质
const shaderMaterial = new THREE.ShaderMaterial({
  uniforms: {
    iResolution: {
      value: new THREE.Vector2(window.innerWidth, window.innerHeight),
    },
    iTime: { value: 0 },
  },
  vertexShader: `
		varying vec2 vUv;
		void main() {
			vUv = uv;
			gl_Position = projectionMatrix * modelViewMatrix * vec4(position, 1.0);
		}
	`,
  fragmentShader: `
		#define PI 3.1415926
		uniform vec2 iResolution;
		uniform float iTime;
		varying vec2 vUv;

		float circle(float radius, vec2 center, vec2 uv) {
			float d = distance(center, uv);
			return 1.0 - smoothstep(radius-1./iResolution.y, radius+1./iResolution.y, d);
		}

		vec2 angleRadius(vec2 uv) {
			float anglePixel = atan(uv.y, uv.x);
			float lengthPixel = length(uv);
			return vec2(anglePixel, lengthPixel);
		}

		float filterPositive(float n) {
			return smoothstep(0.0, 0.005, n);
		}

		void main() {
			// 坐标系转换
			vec2 uv = (vUv - 0.5) * vec2(iResolution.x/iResolution.y, 1.0)*2.0;

			float radius = 0.3;
			float ringThick = 0.05;

			vec2 stPolar = angleRadius(uv);

			float sPolar = stPolar.x * 3.0 + iTime * 10.0;
			float cosSPolarTemp = cos(sPolar);
			float cosSPolar = filterPositive(cosSPolarTemp);

			vec3 color = vec3(cosSPolar);

			float inCircleAA = smoothstep(radius, radius + 0.005, stPolar.y);
			float smallCircleAA = smoothstep(radius - ringThick, radius - ringThick + 0.005, stPolar.y);
			vec3 col = 1.0 - vec3(inCircleAA);
			vec3 col_2 = 1.0 - vec3(smallCircleAA);
			vec3 colorGap = col - col_2;
			vec3 finalColor = color * colorGap;
			vec3 colorMask = vec3(10.0, 1.5, 1.0);
			finalColor /= 10.0;
			finalColor *= colorMask;

			float centerCircleAA = smoothstep(0.1, 0.1 + 0.005, stPolar.y);
			vec3 centerCircleColor = 1.0 - vec3(centerCircleAA);
			centerCircleColor /= 10.0;
			centerCircleColor *= colorMask;

			vec2 centerC = vec2(0.0);
			float bubbleRadius = abs(sin(iTime * 3.0)) / 3.0;
			float bubbleCircleColor = circle(bubbleRadius, centerC, uv);
			vec4 bubbleColor = vec4(vec3(bubbleCircleColor) / 10.0 * colorMask, 1.0);

			gl_FragColor = vec4(finalColor + centerCircleColor, 1.0);
			gl_FragColor += bubbleColor;
		}
	`,
});

// 创建平面几何体
const geometry = new THREE.PlaneGeometry(2, 2);
const mesh = new THREE.Mesh(geometry, shaderMaterial);
scene.add(mesh);

// 设置相机位置
camera.position.z = 1;

// 处理窗口大小变化
window.addEventListener('resize', onWindowResize, false);

function onWindowResize() {
  camera.aspect = window.innerWidth / window.innerHeight;
  camera.updateProjectionMatrix();
  renderer.setSize(window.innerWidth, window.innerHeight);
  shaderMaterial.uniforms.iResolution.value.set(
    window.innerWidth,
    window.innerHeight,
  );
}

// 动画循环
function animate() {
  requestAnimationFrame(animate);
  shaderMaterial.uniforms.iTime.value = performance.now() / 1000;
  renderer.render(scene, camera);
}

animate();
结论
这个着色器展示了如何使用极坐标和平滑过渡函数来创建具有视觉冲击力的动态效果。通过结合这些技术并利用基于时间的动画处理和反走样,我们能够实现平滑且高质量的视觉效果。
