媒体层图形技术之Core Animation 学习笔记
1.CADisplayLink
//自行定義的函式,用來設定使用CADisplayLink的相關參數

-(void)initializeTimer {


    //theTimer是CADisplayLink型態的指標,用來存放當前的設定狀態

    theTimer = [CADisplayLink displayLinkWithTarget:self selector:@selector(countTotalFrames)];


    //CADisplayLink內定值就是每秒60張(參數=1),參數=2就是每秒30張,以此類推

    double fps = 60 / theTimer.frameInterval;

    fpsLabel.text = [NSString stringWithFormat:@"%0.1f" , fps];


    //設定執行狀態並啟動theTimer

    [theTimer addToRunLoop:[NSRunLoop currentRunLoop] forMode:NSDefaultRunLoopMode];

}


如同 Timer / 計時器一樣,selector 是設定每次觸發時所需要呼叫的函式,其寫法如下。


-(void)countTotalFrames {

    frameCount ++;

    framesLabel.text = [NSString stringWithFormat:@"%d", frameCount];

}
2.CAScrollLayer
使用cascrolllayer可以实现:通过改变一个layer的origin坐标,显示它的一部分内容.它的maskstobounds属性一般设为yes,这样就只能看见它的bounds内的内容.可以通过调用cascrolllayer本身的函数或者调用它的sublayer函数实现layer的滚动功能
3.CATextLayer可以直接支持NSAttributedString!
CATextLayer代码:

CATextLayer *lary = [CATextLayer layer];

    lary.string = @"dasfasa";

    lary.bounds = CGRectMake(0, 0, 320, 20);

       lary.font = @"HiraKakuProN-W3"; //字体的名字 不是 UIFont

    lary.fontSize = 12.f; //字体的大小

       lary.alignmentMode = kCAAlignmentCenter;//字体的对齐方式

    lary.position = CGPointMake(160, 410);

       lary.foregroundColor = [UIColor redColor].CGColor;//字体的颜色

    [self.view.layer addSublayer:lary];
4.CATiledLayer
demon:http://www.cocoachina.com/bbs/read.php?tid=31132
levelsOfDetail是指,从UIScrollView的1倍zoomScale开始,能够支持细节刷新的缩小级数。每一级是上一级的1/2,所以假设levelsOfDetail = n,levelsOfDetailBias不指定的话,CATiledLayer将会在UIScrollView的zoomScale为以下数字时重新drawLayer
2^-1 -> 2^-2 -> ... -> 2^-n
也就是
1/2, 1/4, 1/8, 1/16, ... , 1/2^n
在levelsOfDetailBias不指定的情况下,zoomScale大于0.5后就不会再drawLayer,所以若继续放大UIScrollView的话,画面将越来越模糊。
这个时候levelsOfDetailBias就有用了。
levelsOfDetailBias = m表示,将原来的1/2,移到2^m倍的位置。
假设levelsOfDetail = n,levelsOfDetailBias = m的话,会有如下队列:
2^m * 2^-1 -> 2^m * 2^-2 -> ... -> 2^m * 2^-n
简化一下即
2^(m - 1) -> 2^(m - 2) -> 2^(m - 3) ->... -> 2^(m - n)
举例,levelsOfDetail = 3,levelsOfDetailBias = 3,则你的UIScrollView将会在以下zoomScale时drawLayer
2^(3 - 1) -> 2^(3 - 2) -> 2^(3 - 3)
即4 -> 2 -> 1
特例是,levelsOfDetailBias > levelsOfDetail时,则每相差2倍就会drawLayer一下。
可以简单理解成:
levelsOfDetail表示一共有多少个drawLayer的位置
levelsOfDetailBias表示比1大的位置里有多少个drawLayer的位置(包括1)
CAShapeLayer
利用CAShapeLayer可以制作出任意的几何图形,其一是把它作为UIImageView的遮罩,达到把图片做成圆形效果。
 //创建个人主页头部的用户头像


        self.userHead = [[UIImageView alloc]initWithFrame:CGRectMake(10, 35, 80, 80)];

        self.userHead.image = [UIImage imageNamed:@"start.jpg"];


        //创建圆形遮罩,把用户头像变成圆形

        UIBezierPath* path = [UIBezierPath bezierPathWithArcCenter:CGPointMake(40, 40) radius:40 startAngle:0 endAngle:2*M_PI clockwise:YES];

        CAShapeLayer* shape = [CAShapeLayer layer];

        shape.path = path.CGPath;

        self.userHead.layer.mask = shape;

        [self addSubview:self.userHead];
6.CAReplicatorLayer
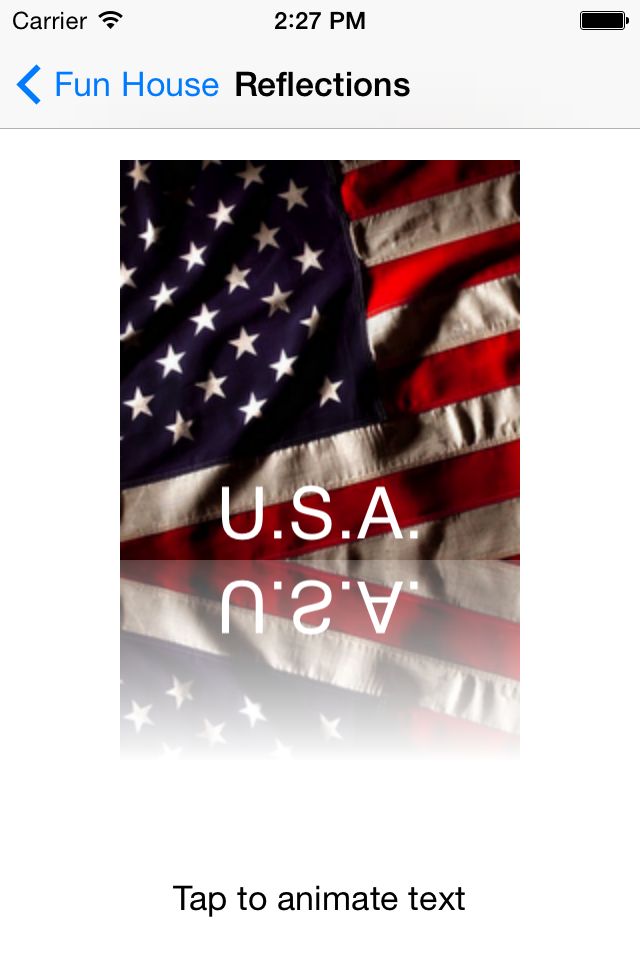
它 自己能够重建包括自己在内的n个copies,这些copies是原layer中的所有sublayers,并且任何对原layer的sublayers 设置的transform是可以积累的(accumulative). 基本上这样的一个关系:我们首先会重建一个CAReplicatorLayer实例,作为我们的sourceLayer, 这个sourceLayer我们需要一份copy,那包括自己在内就是2; 所以我们设置了它的instantCount = 2;这个是包括自己在内总共为2. 然后我们将SourceLayer的宽度设置为image的宽度,但是将其高度设置为image.size.height * 1.5; 并且在sourcelayer上加上masksToBounds为true的属性,这样一来我们可以保证超出的倒影部分会cut调一半,加上 sourceLayer上正常的image,刚刚好组成了我们的完整的倒影。我们sourceLayer的sublayer就是 _imageLayer,。但是我们只是单纯设置instantCount = 2的话, 那个_imageReplicatorLayer(这个就指代的是copy过来的第一个变量)是会继承sourceLayers中_imagelayer 的Geometry,所以它两是重合的。那么我们必须做出transform, CARepliatorLayer有一个属性叫做instantTransform,这个属性指定了除了原来copy之外所有replication layer的trasnform规则,重要的是它是递增的。比如我们这里需要将imageReplicatorLayer应该往下移动image的高度, 这一样来可以保证它是刚刚好在原来imagelayer的正下方,就跟倒影一样。 但是不一样的地方是:这个复制的imageReplicatorLayer它不是正常的,它是需要倒过来的,所以我们在transform上使用了 transform = CATransform3DScale(transform, 1.0, -1.0, 1.0); 这一个的意思是大小不变,但是y轴倒过来,这个应用到imageReplicatorLayer的坐标系是y轴朝上。 这样以来你就不能单纯是向原来一样移动image.height了, 因为y轴反了过来,所以你应该是 -2 * image.size.height 这样以来就搞定了。 最后我们给它加了一个渐变层,让它看起来更接近倒影的感觉。
- (void)viewDidLoad

{

    [super viewDidLoad];


    UIView *view = [self view];


    //

    // Yes, this is a very long method. I find it easier to explain what is happening by

    // keeping the code in a single location (instead of breaking it up over multiple methods).

    //


    // Load the image to "reflect"

    UIImage *image = [UIImage imageNamed:@"american-flag"];


    // The replicator layer is where all of the magic happens

    CAReplicatorLayer *replicatorLayer = [CAReplicatorLayer layer];

    [replicatorLayer setContentsScale:[[UIScreen mainScreen] scale]];


    // The replicator layer's height is 1.5 times the size of the image. This means that

    // we will effectively clip/ fade out our "reflection".

    //

    // ********    <- any y-flipping is performed along this plane

    // *  %%  *

    // *      *    image height

    // *  ^^  *

    // ********

    // ========

    // =  ^^  =  + half height (mask to bounds effectively clips the reflected image)

    // =      =

    //

    //           = total height of layer

    [replicatorLayer setBounds:CGRectMake(0.0, 0.0, [image size].width, [image size].height * 1.5)];


    // This ensures that the replicated image is clipped to the replicator's height

    [replicatorLayer setMasksToBounds:YES];


    // Position the replicator layer at the top of the view

    // - use the x center point to make the math easy (place in center of view)

    // - use the y upper point to position the layer 10 points below the top of the view (just a little bit of padding)

    [replicatorLayer setAnchorPoint:CGPointMake(0.5, 0.0)];


    [replicatorLayer setPosition:CGPointMake(view.frame.size.width / 2.0, 80.0)];


    // We need two instances:

    //   1) the main image layer

    //   2) a replicated layer for the reflection

    [replicatorLayer setInstanceCount:2];


    // Create a transform used by the replicator layer to "flip" and position our reflected layer below the original image

    //

    // I will see if I can explain this.

    // For clarity... we start with an identity

    CATransform3D transform = CATransform3DIdentity;


    //

    // @*******    <- this is the top of the replicator layer (the X,Y origin is at the @, with Y going down)

    // *  %%  *

    // *      *

    // *  ^^  *

    // ********

    //

    //

    // Apply a negative scale to y (effectively flips)

    //

    // For example, hold your right hand in front of your face (knuckles facing you, thumb down). Now flip your

    // hand up keeping your pinky finger in place (i.e. your pinky is a hinge).

    //

    // ========    <- will draw a flipped version up here

    // =  ^^  =

    // =      =

    // =  %%  =

    // ========

    // ********    <- the "flip" is performed along here

    // *  %%  *

    // *      *    image height

    // *  ^^  *

    // ********

    transform = CATransform3DScale(transform, 1.0, -1.0, 1.0);


    // translate down by 2x height to position the "flipped" layer below the main layer

    // - 2x moves the flipped image under the main image giving us the "reflection"

    //

    // ********    <- y plane (any flipping is performed along this plane)

    // *  %%  *

    // *      *    image height

    // *  ^^  *

    // ********

    // ========

    // =  ^^  =

    // =      =    <-- Remember: only half of the "relection" layer renders because the replicator layer clips to bounds.

    // =  %%  =

    // ========

    transform = CATransform3DTranslate(transform, 0.0, -[image size].height * 2, 1.0);


    [replicatorLayer setInstanceTransform:transform];


    // Next we create a layer that displays the American flag image.

    _imageLayer = [CALayer layer];

    [_imageLayer setContentsScale:[[UIScreen mainScreen] scale]];

    [_imageLayer setContents:(__bridge id)[image CGImage]];

    [_imageLayer setBounds:CGRectMake(0.0, 0.0, [image size].width, [image size].height)];

    [_imageLayer setAnchorPoint:CGPointMake(0.0, 0.0)];


    [replicatorLayer addSublayer:_imageLayer];


    // Finally overlay a gradient layer on top of the "reflection" layer.

    CAGradientLayer *gradientLayer = [CAGradientLayer layer];

    [gradientLayer setContentsScale:[[UIScreen mainScreen] scale]];

    [gradientLayer setColors:@[

        (__bridge id)[[[UIColor whiteColor] colorWithAlphaComponent:0.25] CGColor],

        (__bridge id)[[UIColor whiteColor] CGColor]

    ]];


    // Remember that the reflected layer is half the size, which is why the height of the gradient layer is cut in half.

    [gradientLayer setBounds:CGRectMake(0.0, 0.0, replicatorLayer.frame.size.width, [image size].height * 0.5 + 1.0)];

    [gradientLayer setAnchorPoint:CGPointMake(0.5, 0.0)];

    [gradientLayer setPosition:CGPointMake(view.frame.size.width / 2, [image size].height + 80.0)];

    [gradientLayer setZPosition:1]; // make sure the gradient is placed on top of the reflection.


    [[view layer] addSublayer:replicatorLayer];

    [[view layer] addSublayer:gradientLayer];


    // One final (and fun step):

    //   Create a text layer that is a sublayer of the image layer.

    //   Core Animation will animate the text in all replicated layers. VERY COOL!!

    CATextLayer *textLayer = [CATextLayer layer];

    [textLayer setContentsScale:[[UIScreen mainScreen] scale]];

    [textLayer setString:@"U.S.A."];

    [textLayer setAlignmentMode:kCAAlignmentCenter];


    CGFloat height = [(UIFont *)[textLayer font] lineHeight];

    [textLayer setBounds:CGRectMake(0.0, 0.0, [_imageLayer frame].size.width, height)];

    [textLayer setPosition:CGPointMake([_imageLayer frame].size.width / 2.0, [_imageLayer frame].size.height - 25.0)];

    [textLayer setAnchorPoint:CGPointMake(0.5, 0.5)];

    [_imageLayer addSublayer:textLayer];


    // When the user taps, start _animating the image's text layer up and down.

    [view setUserInteractionEnabled:YES];

    [view setMultipleTouchEnabled:YES];

    [view addGestureRecognizer:[[UITapGestureRecognizer alloc] initWithTarget:self action:@selector(animateTextLayer:)]];

}


- (void)animateTextLayer:(UIGestureRecognizer *)recognizer

{

    CALayer *textLayer = (CALayer *)[[_imageLayer sublayers] objectAtIndex:0];


    CABasicAnimation *animation = [CABasicAnimation animationWithKeyPath:@"position.y"];


    CGFloat halfBoxHeight = [textLayer frame].size.height / 2.0;

    [animation setFromValue:@([textLayer frame].origin.y + halfBoxHeight)];

    [animation setToValue:@(halfBoxHeight)];

    [animation setDuration:3.0];

    [animation setRepeatCount:MAXFLOAT];

    [animation setAutoreverses:YES];


    [textLayer addAnimation:animation forKey:nil];

}

7. 区分隐式动画和隐式事务:隐式动画通过隐式事务实现动画 。
区分显式动画和显式事务:显式动画有多种实现方式,显式事务是一种实现显式动画的方式。
->隐式事务
除显式事务外,任何对于CALayer属性的修改,都是隐式事务.这样的事务会在run-loop中被提交.
- (void)viewDidLoad {

    //初始化一个layer,添加到主视图

    layer=[CALayer layer];

    layer.bounds = CGRectMake(0, 0, 200, 200);

    layer.position = CGPointMake(160, 250);

    layer.backgroundColor = [UIColor redColor].CGColor;

    layer.borderColor = [UIColor blackColor].CGColor;

    layer.opacity = 1.0f;

    [self.view.layer addSublayer:layer];

    [super viewDidLoad];

}


-(IBAction)changeLayerProperty

{

    //设置变化动画过程是否显示,默认为YES不显示

    [CATransaction setDisableActions:NO];

    //设置圆角

    layer.cornerRadius = (layer.cornerRadius == 0.0f) ? 30.0f : 0.0f;

    //设置透明度

    layer.opacity = (layer.opacity == 1.0f) ? 0.5f : 1.0f;

}
->显式事务
通过明确的调用begin,commit来提交动画
修改执行时间


 [CATransaction begin];


//显式事务默认开启动画效果,kCFBooleanTrue关闭


[CATransaction setValue:(id)kCFBooleanFalse


forKey:kCATransactionDisableActions];


//动画执行时间


[CATransaction setValue:[NSNumber numberWithFloat:5.0f] forKey:kCATransactionAnimationDuration];


    //[CATransaction setAnimationDuration:[NSNumber numberWithFloat:5.0f]];


anotherLayer.cornerRadius = (anotherLayer.cornerRadius == 0.0f) ? 30.0f : 0.0f;


layer.opacity = (layer.opacity == 1.0f) ? 0.5f : 1.0f;


[CATransaction commit];
->事物嵌套
事务嵌套

        [CATransaction begin];

     [CATransaction begin];

    [CATransaction setDisableActions:YES];

     layer.cornerRadius = (layer.cornerRadius == 0.0f) ? 30.0f : 0.0f;

    [CATransaction commit];

    //上面的动画并不会立即执行,需要等最外层的commit

    [NSThread sleepForTimeInterval:10];

    //显式事务默认开启动画效果,kCFBooleanTrue关闭

    [CATransaction setValue:(id)kCFBooleanFalse

                     forKey:kCATransactionDisableActions];

    //动画执行时间

    [CATransaction setValue:[NSNumber numberWithFloat:10.0f] forKey:kCATransactionAnimationDuration];

    //[CATransaction setAnimationDuration:[NSNumber numberWithFloat:5.0f]];

    anotherLayer.cornerRadius = (anotherLayer.cornerRadius == 0.0f) ? 30.0f : 0.0f;


    [CATransaction commit];
8.CATransform3D
-
;
- CGFloat m21(x切变), m22(y缩放), m23(), m24();
-
;
- CGFloat m41(x平移), m42(y平移), m43(z平移), m44();
-
} ;
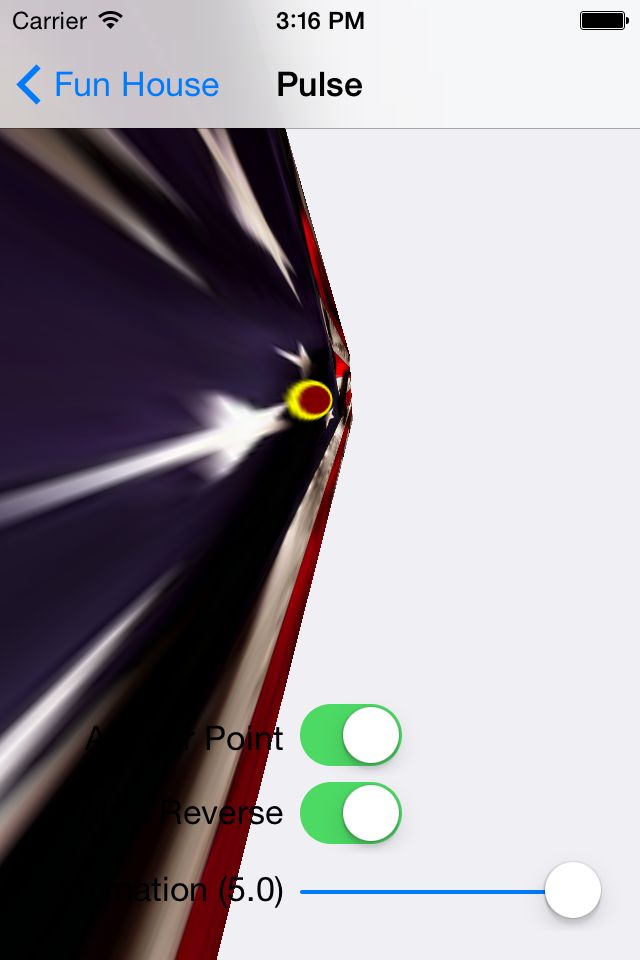
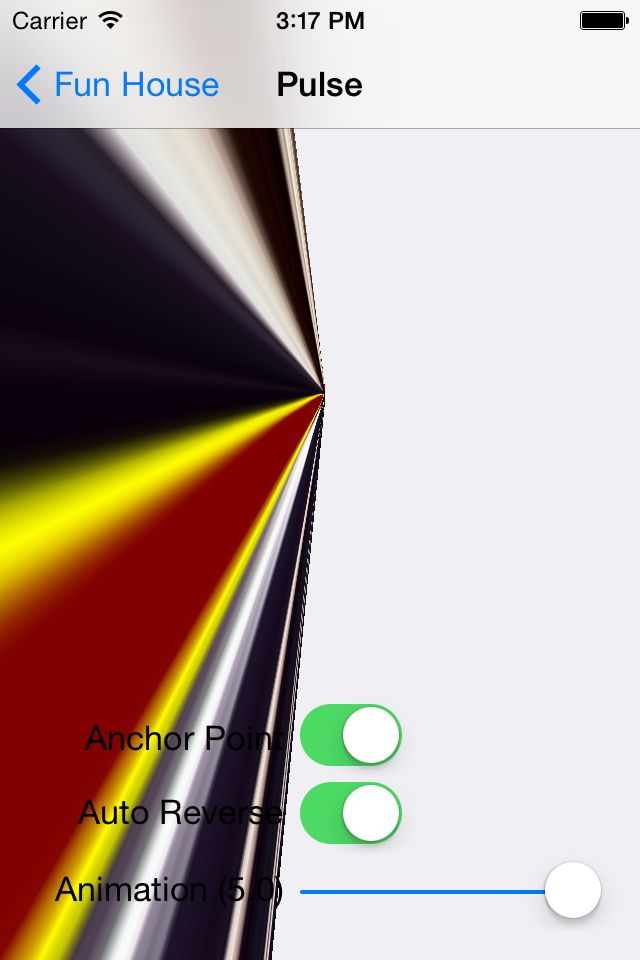
首先要实现view(layer)的透视效果(就是近大远小),是通过设置m34的:
CABasicAnimation *pulseAnimation = [CABasicAnimation animationWithKeyPath:@"transform"];

    [pulseAnimation setDuration:_animationDuration];

    [pulseAnimation setRepeatCount:MAXFLOAT];


    // The built-in ease in/ ease out timing function is used to make the animation look smooth as the layer

    // animates between the two scaling transformations.

    [pulseAnimation setTimingFunction:[CAMediaTimingFunction functionWithName:kCAMediaTimingFunctionEaseInEaseOut]];


    // Scale the layer to half the size

    //CATransform3D transform_1 = CATransform3DIdentity;//CATransform3DMakeScale(1.5, 1.5, 1.0);


    CATransform3D transform = CATransform3DMakeRotation((M_PI/180*180), 1, 0, 1);


    transform.m34 = 0.5;


    // Tell CA to interpolate to this transformation matrix

    [pulseAnimation setToValue:[NSValue valueWithCATransform3D:transform]];


    // Tells CA to reverse the animation (e.g. animate back to the layer's transform)

    [pulseAnimation setAutoreverses:_autoreverses];


    // Finally... add the explicit animation to the layer... the animation automatically starts.

    [_layer addAnimation:pulseAnimation forKey:kBTSPulseAnimation];


9.CAValueFunction
动画类型:平移、缩放、旋转
如把一个对象旋转180度可以使用一下方式:
CABasicAnimation * rotationAni = [CAAnimation animation];

    CAValueFunction * valuFunction = [CAValueFunction functionWithName:kCAValueFunctionRotateZ];

    [rotationAni setFromValue:0];

    [rotationAni setToValue:@(M_PI)];

    [rotationAni setValueFunction:valuFunction];
10.CAEmitterCell、CAEmitterLayer 实现粒子效果
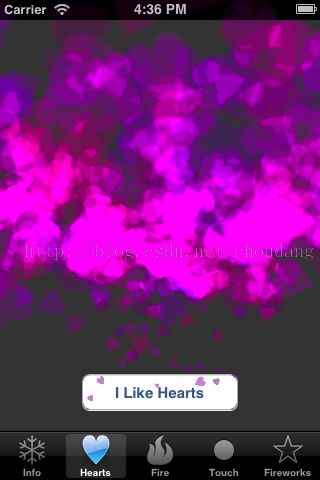
利用Core Animation、CAEmitterCell 以及 CAEmitterLayer在iOS5中实现各种粒子动画效果,包括雪花、火焰、烟雾、飘动的花瓣、爆炸等效果。
属性详解请参考:http://guxiaojje.blog.163.com/blog/static/1409422912012813104917788/
- (void) viewDidLoad

{

    [super viewDidLoad];


	// Configure the particle emitter

	self.heartsEmitter = [CAEmitterLayer layer];

	self.heartsEmitter.emitterPosition = CGPointMake(likeButton.frame.origin.x + likeButton.frame.size.width/2.0,

													 likeButton.frame.origin.y + likeButton.frame.size.height/2.0);//放射源的位置

	self.heartsEmitter.emitterSize = likeButton.bounds.size;//放射源的大小


	// Spawn points for the hearts are within the area defined by the button frame

	self.heartsEmitter.emitterMode = kCAEmitterLayerVolume;//放射源的模式

	self.heartsEmitter.emitterShape = kCAEmitterLayerRectangle;//放射源的形状

	self.heartsEmitter.renderMode = kCAEmitterLayerAdditive;//放射源的渲染模式


	// Configure the emitter cell

	CAEmitterCell *heart = [CAEmitterCell emitterCell];//发射的粒子

	heart.name = @"heart";


	heart.emissionLongitude = M_PI/2.0; // up 粒子在xy平面内发射的方向

	heart.emissionRange = 0.55 * M_PI;  // in a wide spread 发射的水平方向的范围

	heart.birthRate		= 0.0;			// emitter is deactivated for now 粒子再生的速度,0就是不会再生

	heart.lifetime		= 10.0;			// hearts vanish after 10 seconds


	heart.velocity		= -120;			// particles get fired up fast 初始速度是-120 向上

	heart.velocityRange = 60;			// with some variation

	heart.yAcceleration = 20;			// but fall eventually


	heart.contents		= (id) [[UIImage imageNamed:@"DazHeart"] CGImage];

	heart.color			= [[UIColor colorWithRed:0.5 green:0.0 blue:0.5 alpha:0.5] CGColor];

	heart.redRange		= 0.3;			// some variation in the color

	heart.blueRange		= 0.3;

	heart.alphaSpeed	= -0.5 / heart.lifetime;  // fade over the lifetime


	heart.scale			= 0.15;			// let them start small

	heart.scaleSpeed	= 0.5;			// but then 'explode' in size

	heart.spinRange		= 2.0 * M_PI;	// and send them spinning from -180 to +180 deg/s


	// Add everything to our backing layer

	self.heartsEmitter.emitterCells = [NSArray arrayWithObject:heart];

	[self.view.layer addSublayer:heartsEmitter];

}


- (void) viewWillUnload

{

	[super viewWillUnload];

	[self.heartsEmitter removeFromSuperlayer];

	self.heartsEmitter = nil;

}


- (BOOL) shouldAutorotateToInterfaceOrientation:(UIInterfaceOrientation)interfaceOrientation

{

	return (interfaceOrientation == UIDeviceOrientationPortrait);

}


// ---------------------------------------------------------------------------------------------------------------

#pragma mark -

#pragma mark Interaction

// ---------------------------------------------------------------------------------------------------------------


- (IBAction) likeButtonPressed:(id)sender

{

	// Fires up some hearts to rain on the view

	CABasicAnimation *heartsBurst = [CABasicAnimation animationWithKeyPath:@"emitterCells.heart.birthRate"];

	heartsBurst.fromValue		= [NSNumber numberWithFloat:150.0];//喷出的粒子的数量

	heartsBurst.toValue			= [NSNumber numberWithFloat:  0.0];

	heartsBurst.duration		= 5.0;

	heartsBurst.timingFunction	= [CAMediaTimingFunction functionWithName:kCAMediaTimingFunctionLinear];


	[self.heartsEmitter addAnimation:heartsBurst forKey:@"heartsBurst"];

}

