Spring.NET企业架构实践之 NHibernate + Spring.NET + WCF + Windows服务 + Silverlight 中小企业应用架构完整Demo
最近由于工作忙的原因,博客更新的比较慢,在此给园子里的朋友说声抱歉。于是,我利用周末的时间写了一份Spring.NET架构的综合应用,希望这样的实用型架构能受到大家的欢迎。
一、概括
此Demo使用的开发工具是:VS2010,数据库任意,Silvelright版本是4.0。
Demo分为三层(Tier),数据库,服务器端,客户端。其中,服务器端又分为三层(Layer),持久层,服务层,门面层。
WCF以Windows服务作为宿主,客户端使用Silverlight运行浏览器之外。
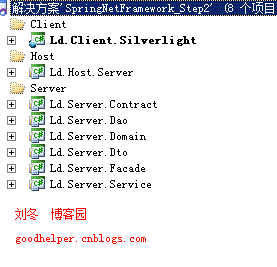
图1
图1是解决方案中包含的项目。其中,Server文件夹下是服务器端的代码,Host文件夹下是服务器端的Windows服务宿主,Client文件夹下是Silverlight应用程序。
二、技术点
WCF的Binding配置使用NetTcpBinding,是为了实现“回调”。
其中,服务器端中,添加,修改,删除数据时调用客户端的回调:
{
try
{
Parallel.ForEach(callBackList, (item) =>
{
try
{
item.ReceiveProduct(entity);
}
catch (Exception ex)
{
System.Console.WriteLine(ex.ToString());
}
});
}
catch (Exception ex)
{
System.Console.WriteLine(ex.ToString());
}
}
public void DeleteProduct(Guid id)
{
var entity = this .ProductManager.Get(id);
if (entity == null )
{
return ;
}
this .ProductManager.Delete(entity);
try
{
Parallel.ForEach(callBackList, (item) =>
{
try
{
item.ClearProduct(id);
}
catch (Exception ex)
{
System.Console.WriteLine(ex.ToString());
}
});
}
catch (Exception ex)
{
System.Console.WriteLine(ex.ToString());
}
}
客户端收到回调时处理该请求:
{
var list = this .grid.ItemsSource as ObservableCollection < Product > ;
if (list == null )
{
return ;
}
var entity = list.FirstOrDefault(f => f.ID == e.entity.ID);
if (entity == null )
{
list.Add(e.entity);
}
else
{
entity.Code = e.entity.Code;
entity.Name = e.entity.Name;
entity.BuyPrice = e.entity.BuyPrice;
entity.SellPrice = e.entity.SellPrice;
entity.QuantityPerUnit = e.entity.QuantityPerUnit;
entity.Remark = e.entity.Remark;
entity.Unit = e.entity.Unit;
}
}
public void Proxy_ClearProductReceived( object sender, ClearProductReceivedEventArgs e)
{
var list = this .grid.ItemsSource as ObservableCollection < Product > ;
if (list == null )
{
return ;
}
var entity = list.FirstOrDefault(f => f.ID == e.id);
if (entity == null )
{
return ;
}
list.Remove(entity);
}
这样多个客户端的数据就保持一致了。
由于目前Spring.NET的OpenSessionInView仅适用于Web,所以我使用AOP拦截WCF的Contract接口实现类,在调用前打开SessionScope,调用后关闭SessionScope。这样在同一请求中就实现了NHibernate的Session同步。
{
private static log4net.ILog logger = log4net.LogManager.GetLogger( typeof (OpenSessionInViewModule));
public object Invoke(IMethodInvocation invocation)
{
SessionScope sessionScope = new SessionScope( " appSettings " , typeof (SessionScope), false );
try
{
sessionScope.Open();
object obj = invocation.Proceed();
return obj;
}
catch (Exception ex)
{
System.Console.WriteLine(ex.ToString());
logger.Error(ex);
return null ;
}
finally
{
sessionScope.Close();
}
}
}
Windows服务的部署。
Host文件夹下有两个批处理(.bat)文件:Install.bat和UnInstall.bat。分别为安装和卸载Windows服务的命令。如图2.1所示。
Silverlight 4的跨越需要在http服务器的80端口放置clientaccesspolicy.xml的跨域文件,如图2.2所示。
这里的http服务器可以不为IIS,但是输入域名+clientaccesspolicy.xml的时候必须能够访问到clientaccesspolicy.xml页面。
< access-policy >
< cross-domain-access >
< policy >
< allow-from http-request-headers ="*" >
< domain uri ="*" />
</ allow-from >
< grant-to >
< socket-resource port ="4502-4534" protocol ="tcp" />
< resource path ="/" include-subpaths ="true" />
</ grant-to >
</ policy >
</ cross-domain-access >
</ access-policy >
三,运行效果
图3.1是NHibernate自动表后的数据库。
图3.2
图3.2是Silverlight应用程序的运行效果。
运行多个客户端的效果,如图3.3所示。
图3.3
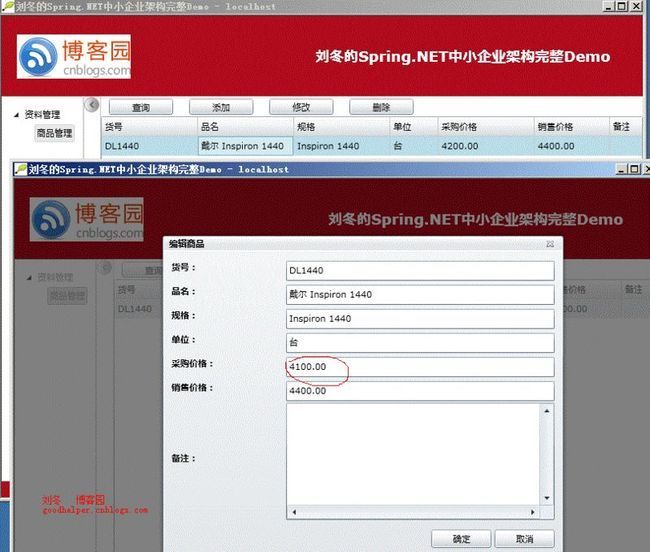
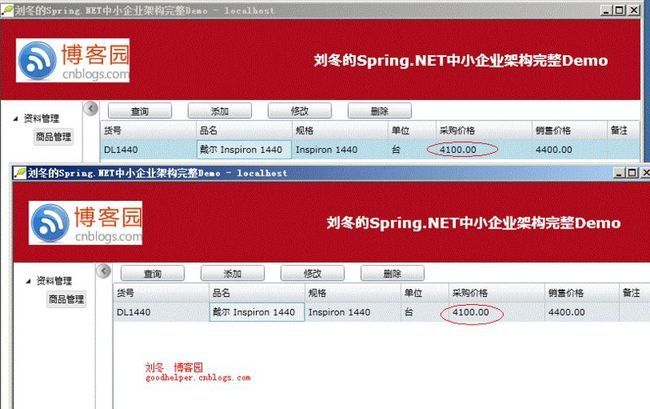
点击添加或者修改按钮,弹出修改页面(如图3.4所示)。然后点击确定按钮保持数据,由于是双向通行,则两个客户端的数据保持一致(如图3.5所示)。
图3.4
图3.5
四、总结
该Demo是一个Spring.NET和NHibernate框架的综合应用,实用于小型项目的企业应用。此架构有较强的实用性,并在项目开发中达到“快速开发”的目的。希望爱好钻研的朋友能够下载我的代码,并和我一起讨论。
出处:http://www.cnblogs.com/GoodHelper/archive/2010/10/16/SpringNetFramework_Step2.html
欢迎转载,但需保留版权。


