cacti监控 nginx mysql
cacti 添加nginx模版!
一、在安装nginx的时候,./configure时候加参数:http_stub_status_module,不然会监控不到nginx状态
二、编辑配置文件nginx.conf添加如下行:
location /NginxStatus {
stub_status on;
allow 192.168.1.223 #允许哪个网段的主机可以访问
}
二,重启nginx
server nginx restart
重启之后可以访问 http://192.168.1.223/NginxStatus 来检测NginxStatus的状态
三下载cact监控nginx的模块
wget http://www.oschina.net/uploads/code/cacti-nginx.tar.gz
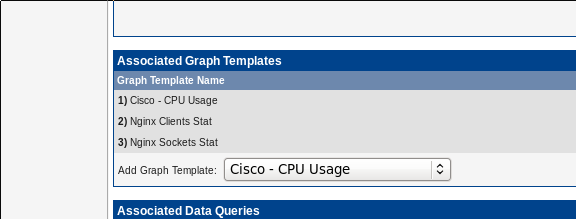
四.把模板中以.pl的两文件拷贝到你的cacti目录下的scripts/目录下,然后把以.xml的文件导入到cacti中,导入方法,
登陆cacti,在Console——>Import/Export———>Import Templates中导入;
chmod 755 cacti/scripts/get_nginx*
执行下面命令看看是否能返回数据 : [root@cacti cacti]# scripts/get_nginx_socket_status.pl http://192.168.1.223/NginxStatus
nginx_accepts:11 nginx_handled:11 nginx_requests:31
这样就可以!数据必须于http://192.168.10.14/NginxStatus 相同!
如果没有数据 提示:no (LWP::UserAgent not found)
安装perl组件直接yum安装即可!! yum -y install perl-libwww-perl

在url中写入监控主机的url格式如下: 注意:这个地址写不对会没数据的,我就老范这样的错误!
http://192.168.10.14/NginxStatus #这个地址于nginx的配置文件里面的nginxstatus名字必须保持一致!
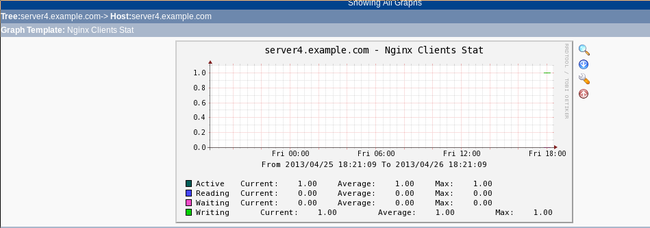
这样就ok了,到这边等数据了!五分钟会抓取一次数据!耐心等待哦!
cacti 添加mysql模版!!
1 下载cacti监控mysql的模板 http://code.google.com/p/mysql-cacti-templates/
2 解压模板
#tar xvf better-cacti-templates-1.1.7.tar
3 把相应的php脚本拷贝到cacti的家目录下面scripts/目录下面
#cd better-cacti-templates-1.1.7/scripts
#cp ss_get_mysql_stats.php ss_get_by_ssh.php /var/www/html/cacti/scripts
4 修改关于监控mysql 相应的php脚本
#cd /var/www/html/cacti/scripts
# vim ss_get_mysql_stats.php
$mysql_user = 'cacti';
$mysql_pass = 'cacti';
注:上面mysql_user mysql_pass 对应的是cacti能够访问所有被监控mysql的共同的用户和密码,并且该用户是在别监控mysql服务器上是授权用户
$mysql_port = 3306;
$cache_dir = '/var/www/html/cacti/cache';默认情况下是保存在/tmp下面
5 创建cache目录
6 导入监控mysql的模板
选择您要导入的模板cacti_host_template_x_mysql_server_ht_0.8.6i-sver1.1.7.xml
7 然后就能给对应的设备添加mysql服务的监控了!

