基于CentOS平台安装Graphite搭建监控平台
文章阐述了在CentOS 6.5平台上安装Graphite,目的是搭建一个运维监控系统。
Graphite的安装(以下代码均以root权限执行)
1、安装主要依赖关系
配置yum,创建/etc/yum.repos.d/epel.repo 并编辑内容如下:
[epel]name=Extra Packages for Enterprise Linux 6 - $basearch
baseurl=http://download.fedoraproject.org/pub/epel/6/$basearch
#mirrorlist=https://mirrors.fedoraproject.org/metalink?repo=epel-6&arch=$basearch
failovermethod=priority
enabled=1
gpgcheck=0
gpgkey=file:///etc/pki/rpm-gpg/RPM-GPG-KEY-EPEL-6
安装主要依赖:
yum install bitmap bitmap-fonts-compat Django django-tagging fontconfig cairo python-devel python-memcached python-twisted pycairo mod_python python-ldap python-simplejson memcached python-zope-interface mod_wsgi python-sqlite2 bitmap Django django-tagging mod_python python-sqlite2 -y
2、下载源代码包
Graphite主要由三个部分组成:carbon,graphite-web,whisper。下载源代码数据包并解压缩如下:
下载并解压Graphite-web:
    wget https://launchpadlibrarian.net/106575888/graphite-web-0.9.10.tar.gz
    tar -axf graphite-web-0.9.10.tar.gz -C /usr/local/src/
PS:在解压缩了graphite-web-0.9.10数据包之后,利用其中的“check-dependencies.py”文件已经依赖关系的检查,再执行完该python脚本后,从其输出结果中可以看到有哪些额外的程序需要安装,缺少什么则利用yum程序在线安装即可,直到最后检测的结果提示如:All necessary dependencies are met.与 All optional dependencies are met. 则代表所有依赖关系均已解决。
下载并解压Whisper :
   wget https://launchpadlibrarian.net/106575859/whisper-0.9.10.tar.gz
   tar -axf whisper-0.9.10.tar.gz -C /usr/local/src/
下载并解压carbon:
  wget https://launchpadlibrarian.net/106575865/carbon-0.9.10.tar.gz
  tar -axf carbon-0.9.10.tar.gz -C /usr/local/src/
在下载与解压以上三部分代码包之后,分别进入各自解压后的数据包,并执行各自的python setup.py install,则完成Graphite三部分基本安装。
3、配置httpd相关文件
在/etc/httpd/conf.d/graphite.conf文件,执行 vim /etc/httpd/conf.d/graphite.conf 并写入如下类容:
Listen 8080
# You may need to manually edit this file   to fit your needs.
# This configuration assumes the default   installation prefix
# of /opt/graphite/, if you installed   graphite somewhere else
# you will need to change all the   occurances of /opt/graphite/
# in this file to your chosen install   location.
<VirtualHost *:8080>
 ServerName graphite
 DocumentRoot   "/opt/graphite/webapp"
 #   I've found that an equal number of processes & threads tends
 #   to show the best performance for Graphite (ymmv).
 WSGIDaemonProcess graphite processes=5   threads=5 display-name='%{GROUP}' inactivity-timeout=120
 WSGIProcessGroup graphite

 #   You will need to create this file! There is a graphite.wsgi.example
 #   file in this directory that you can safely use, just copy it to graphite.wgsi
 WSGIScriptAlias /   /opt/graphite/conf/graphite.wsgi
 Alias /content/   /opt/graphite/webapp/content/
 <Location "/content/">
 SetHandler None
 </Location>

 #   NOTE: In order for the django admin site media to work you
 #   must change @DJANGO_ROOT@ to be the path to your django
 #   installation, which is probably something like:
 #   /usr/lib/python2.6/site-packages/django
 Alias   /media/   "/usr/lib/python2.4/site-packages/django/contrib/admin/media/"
 <Location "/media/">
 SetHandler None
 </Location>

 #   The graphite.wsgi file has to be accessible by apache. It won't
 #   be visible to clients because of the DocumentRoot though.
 <Directory /opt/graphite/conf/>
 Order deny,allow
 Allow from all
 </Directory>
</VirtualHost>
vim /etc/httpd/conf.d/wsgi.conf 并写入如下内容:
LoadModule wsgi_module   modules/mod_wsgi.so
WSGISocketPrefix /var/run/wsg
4、配置Graphite:
分别执行如下命令,创建Graphite所必要的配置文件,一般来说就是将 /opt/graphite/conf/下的多个文件后缀中的example除去而生成可用的配置文件,这里最好是保留原有的*example 文件,以其出去后缀example的复件作为其配置文件使用。
  cd /opt/graphite/conf/
  cp graphite.wsgi.example graphite.wsgi
  cp carbon.conf.example carbon.conf
  cp storage-schemas.conf.example storage-schemas.conf

  cd /opt/graphite/webapp/
  cp local_settings.py.example local_setting.py
打开Django部分的settings.py文件,并作如下修改:
vim /opt/graphite/webapp/graphite/settings.py
以下是settings.py原有的关于数据库配置选项:
DATABASE_ENGINE = 'django.db.backends.sqlite3'
                            # 'postgresql', 'mysql', 'sqlite3' or   'ado_mssql'.
#DATABASE_NAME = ''         # Or path to   database file if using sqlite3.
#DATABASE_USER = ''         # Not used with   sqlite3.
#DATABASE_PASSWORD = ''     # Not used with   sqlite3.
#DATABASE_HOST = ''         # Set to empty   string for localhost. Not used with sqlite3.
#DATABASE_PORT = ''         # Set to empty   string for default. Not used with sqlite3.
在以上原有的基础上添加如下:
DATABASES = {
      'default': {
          'ENGINE': 'django.db.backends.sqlite3',

          'NAME': '/opt/graphite/storage/graphite',

          'USER': '',

          'PASSWORD': '',

          'HOST': '',

          'PORT': '',
      }
}
PS:这里为了方便,所以只用了sqlite数据库,如需使用例如MySQL数据库,则可以在此处填入相应数据库的配置选项即可。
5、数据库初始化
Graphite执行数据库初始化的过程与Django类似,cd /opt/graphite/webapp 进入该目录后执行 python manage.py syncdb 则执行数据库的初始化过程,并根据输出提示填入用户名、密码以及电子邮件等内容即可完成初始化过程。
        [root@localhost ~]# python   /opt/graphite/webapp/graphite/manage.py syncdb
/usr/lib/python2.6/site-packages/django/conf/__init__.py:75:   DeprecationWarning: The ADMIN_MEDIA_PREFIX setting has been removed; use   STATIC_URL instead.
    "use STATIC_URL instead.", DeprecationWarning)
/usr/lib/python2.6/site-packages/django/conf/__init__.py:110:   DeprecationWarning: The SECRET_KEY setting must not be empty.
    warnings.warn("The SECRET_KEY setting must not be empty.",   DeprecationWarning)
/usr/lib/python2.6/site-packages/django/core/cache/__init__.py:82:   DeprecationWarning: settings.CACHE_* is deprecated; use settings.CACHES   instead.
    DeprecationWarning
Creating tables ...
Creating table account_profile
Creating table account_variable
Creating table account_view
Creating table account_window
Creating table account_mygraph
Creating table dashboard_dashboard_owners
Creating table dashboard_dashboard
Creating table events_event
Creating table auth_permission
Creating table auth_group_permissions
Creating table auth_group
Creating table auth_user_user_permissions
Creating table auth_user_groups
Creating table auth_user
Creating table django_session
Creating table django_admin_log
Creating table django_content_type
Creating table tagging_tag
Creating table tagging_taggeditem

You just installed Django's auth system,   which means you don't have any superusers defined.
Would you like to create one now?   (yes/no): y
Please enter either "yes" or   "no": yes
Username (leave blank to use 'root'): root
E-mail address: [email protected]
Password:
Password (again):
Superuser created successfully.
Installing custom SQL ...
Installing indexes ...
Installed 0 object(s) from 0 fixture(s)
并在最后修改/opt/graphite目录的所有者属性:
chown -R apache.apache /opt/graphite
PS:在开启Graphite之前最好检查一下Graphite目录以及目录中的各项文件或者目录文件的所有者是否是apache。
执行完以上步骤之后重启httpd服务并且开启graphite:
    service httpd restart
    python /opt/graphite/bin/carbon-cache.py start
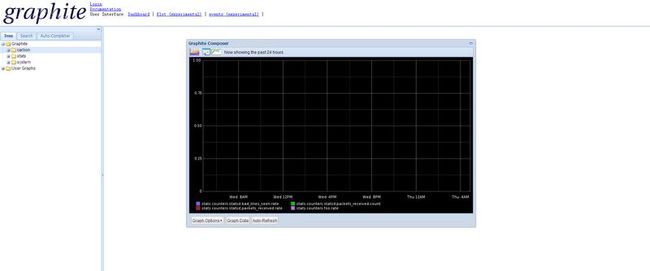
6、访问Graphite主页
http://ip:8080
此处的ip代表本地的127.0.0.1(可用localhost替代),其他主机可利用Graphite宿主机的以太网接口ip地址访问,例如:http://192.168.1.100:8080
如下图:
7、问题分析
在安装的过程中建议关闭iptables和selinux,不然较容易出现例如打不开网页以及apache访问权限的问题。关闭iptables以及selinux的方法如下:
关闭iptables:
service iptables stop (立即生效,重启后无效)
chkconfig iptables off (仅重启后生效)
关闭selinux:
setenforce 0 (立即生效,重启无效)
修改 /etc/selinux/config文件中的 SELINUX项值为disable。(仅重启有效)