Mac安装MySQL(搭建简单的PHP开发环境MAMP)
一、如何检查自带的PHP、Apache已安装并启动?
输入apachectl -v,可以查看apache当前的版本号;
输入apachectl start,可以启动apache(sudo可以使普通用户执行一些系统管理员才可以执行的命令)。
以下就可以看到apache正常启动。
[xxxx@mac ~]$ apachectl -v
Server version: Apache/2.4.9 (Unix)
Server built:   Sep  9 2014 14:48:20
[xxxx@mac ~]$ apachectl start
This operation requires root.
[xxxx@mac ~]$ sudo apachectl start
/System/Library/LaunchDaemons/org.apache.httpd.plist: Operation already in progress
输入php -v,可以查看php当前版本号;
[xxxx@mac ~]$ php -v
PHP 5.5.14 (cli) (built: Sep  9 2014 19:09:25)
Copyright (c) 1997-2014 The PHP Group
Zend Engine v2.5.0, Copyright (c) 1998-2014 Zend Technologies
浏览器输入http://localhost/,会看到网页上显示It works!说明apche+php是正常的。
二、如何安装MySQL
MySQL官网 http://dev.mysql.com/downloads/mysql,下载我们需要的版本Mac OS X 10.9 (x86, 64-bit), DMG Archive。
按照步骤安装,安装完成后不在应用程序列表很正常,可以在“系统偏好设置”,最下面看到“MySQL”,说明已经安装完成。
双击该图标,再点击“Start MySQL Server”按钮,MySQL就启动了。
三、PHP、Apache、MySQL的配置文件目录
通过修改配置文件,才能使网站朝着我们期望的方向发展。
如:Apache的配置文件 /etc/apache2/httpd.conf
PHP的配置文件 /etc/php.ini
MySQL默认没有my.cnf,所以复制my-default.cnf到/etc目录下。
[xxxx@mac ~]$ sudo vi /etc/apache2/httpd.conf
Password:
[xxxx@mac ~]$ sudo cp /etc/php.ini.default /etc/php.ini
[xxxx@mac ~]$ vi /etc/php.ini
[xxxx@mac support-files]$ sudo cp /usr/local/mysql/support-files/my-default.cnf /etc/my.cnf
修改完httpd.conf,记得重启Apache服务器。sudo apachectl restart。
修改完php.ini,记得重启
修改完my.cnf,记得重启
四、输出第一个php文件
sudo vi /etc/apache2/httpd.conf修改配置文件。去掉#,开启php5的模块功能。
# LoadModule php5_module libexec/httpd/libphp5.so
顺便我们可以看到网站的默认代码位置为:/Library/WebServer/Documents
DocumentRoot "/Library/WebServer/Documents"
<Directory "/Library/WebServer/Documents">Ω
    # Possible values for the Options directive are "None", "All",
    # or any combination of:
    #   Indexes Includes FollowSymLinks SymLinksifOwnerMatch ExecCGI MultiViews
    #
    # Note that "MultiViews" must be named *explicitly* --- "Options All"
    # doesn't give it to you.
    #
    # The Options directive is both complicated and important.  Please see
    # http://httpd.apache.org/docs/2.4/mod/core.html#options
    # for more information.
    #
    Options FollowSymLinks Multiviews
    MultiviewsMatch Any
    #
    # AllowOverride controls what directives may be placed in .htaccess files.
    # It can be "All", "None", or any combination of the keywords:
    #   AllowOverride FileInfo AuthConfig Limit
    #
    AllowOverride None
    #
    # Controls who can get stuff from this server.
    #
    Require all granted
</Directory>
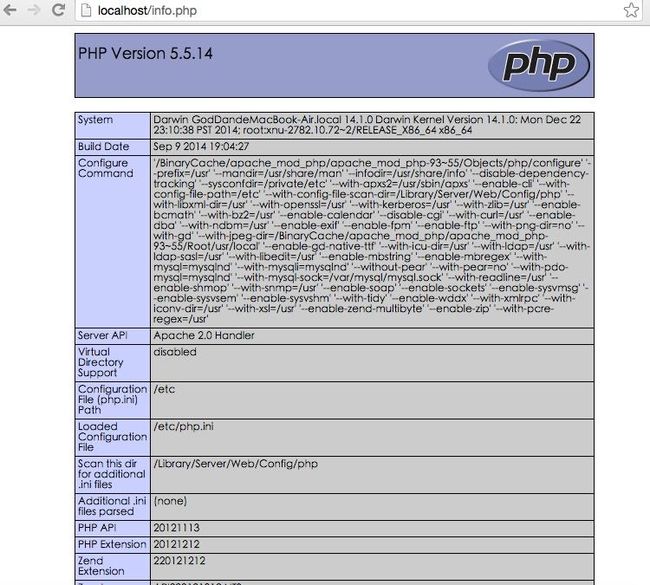
在该目录下,创建info.php,内容为<?php phpinfo();?>,访问http://localhost/info.php
五、创建第一个数据库、第一张表
设置MySQL的用户名秘密
[xxxx@mac bin]$ mysql -u root -p
-bash: mysql: command not found
因为mysql的命令在/usr/local/mysql/bin/mysql,系统默认会查找/usr/bin下的命令,所以我们需要加环境变量、软链接、配置文件都可以
ln -s /usr/local/mysql/bin/mysql /usr/bin(软链接)
sudo vi /etc/bashrc”,在bash的配置文件中加入mysql和mysqladmin的别名(配置文件)
alias mysql='/usr/local/mysql/bin/mysql'
alias mysqladmin='/usr/local/mysql/bin/mysqladmin'
在用户home目录下的.profile文件(10.10以上系统在usr目录下创建.bash_profile文件)
[xxxx@mac usr]$ sudo vi .bash_profile
内容为:export PATH=$PATH:/usr/local/mysql/bin
[xxxx@mac usr]$ source ./.bash_profile
[xxxx@mac usr]$ mysql -u root -p
Enter password:
Welcome to the MySQL monitor.  Commands end with ; or \g.
Your MySQL connection id is 2
Server version: 5.6.27 MySQL Community Server (GPL)
进入mysql命令行后,我们就可以创建第一个数据库、第一个数据表了。
后面还需要修改httpd.conf增加虚拟主机(方便管理各个开发项目),增加phpMyadmin(方便管理mysql),今天就开启Mac下的编程之路吧~