solrcloud+tomcat+zookeeper环境搭建
环境说明
操作系统:Ubuntu
Solr:solr-4.7.2.tgz
Tomcat:apache-tomcat-7.0.50.tar.gz
Zookeeper:zookeeper-3.4.6.tar.gz
三台机器ip:192.168.239.135
192.168.239.136
192.168.239.137
3个tomcat,3个zookeeper
目录结构
/home/sun/solrcloud
--tomcat //tomcat目录
--solrhome //solrhome
--lib
--solr-lib //zkcli 需要的jar包
--config //solr配置文件
--zookeeper-3.4.6 //zookeeper目录
--solr-4.7.2 //solr解压目录
--data
--zookeeper
--data //zk 数据存放目录
操作步骤
1. 配置etc/hosts,如果都用下面都用ip,可以不配置
2. 将zookeeper-3.4.6.tar.gz, apache-tomcat-7.0.50.tar.gz, solr-4.7.2.tgz,解压到/home/sun/solrcloud,解压后apache-tomcat-7.0.50被重命名为tomcat
3. Zookeeper配置
1)修改配置文件
cp /home/sun/solrcloud/zookeeper-3.4.6/conf/zoo_sample.cfg zoo.cfg
vi /home/sun/solrcloud/zookeeper-3.4.6/conf/zoo.cfg
The number of milliseconds of each tick
tickTime=2000
# The number of ticks that the initial
# synchronization phase can take
initLimit=10
# The number of ticks that can pass between
# sending a request and getting an acknowledgement
syncLimit=5
# the directory where the snapshot is stored.
# do not use /tmp for storage, /tmp here is just
# example sakes.
dataDir=/home/sun/solrcloud/data/zookeeper/data
# the port at which the clients will connect
clientPort=2181
# the maximum number of client connections.
# increase this if you need to handle more clients
#maxClientCnxns=60
#
# Be sure to read the maintenance section of the
# administrator guide before turning on autopurge.
#
# http://zookeeper.apache.org/doc/current/zookeeperAdmin.html#sc_maintenance
#
# The number of snapshots to retain in dataDir
#autopurge.snapRetainCount=3
# Purge task interval in hours
# Set to "0" to disable auto purge feature
#autopurge.purgeInterval=1

server.1=192.168.239.135:2888:3888
server.2=192.168.239.136:2888:3888
server.3=192.168.239.137:2888:3888
3) 每个zookeeper创建id
135:cat 1>/home/sun/solrcloud/data/zookeeper/data/myid
136: cat 2>/home/sun/solrcloud/data/zookeeper/data/myid
137: cat 3>/home/sun/solrcloud/data/zookeeper/data/myid
4)启动zookeeper
zookeeper-3.4.6/bin/zkServer.sh start
5)验证zookeeper状态
zookeeper-3.4.6/bin/zkServer.sh status
4. Solr配置
1)将solr部署到tomcat
cp /home/sun/solrcloud/solr-4.7.2/example/webapps/solr.war /home/sun/solrcloud/tomcat/webapps/solr/
jar –xvf /home/sun/solrcloud/tomcat/webapps/solr.war
rm –f /home/sun/solrcloud/tomcat/webapps/solr.war
cp /home/sun/solrcloud/solr-4.7.2/example/lib/ext/* /home/sun/solrcloud/tomcat/webapps/solr/WEB-INF/lib/
cp /home/sun/solrcloud/solr-4.7.2/example/resources/log4j.properties /home/sun/solrcloud/tomcat/lib/
2)设置solrcloud配置文件,ZkCLI使用jar包
cp /home/sun/solrcloud/tomcat/webapps/solr/WEB-INF/lib/* /home/sun/solrcloud/lib/solr-lib/
cp -r /home/sun/solrcloud/solr-4.7.2/example/solr/collections/conf /home/sun/solrcloud/lib/config
3) 通过 bootstrap 设置 solrhome
java -classpath .:/home/sun/solrcloud/lib/solr-lib/* org.apache.solr.cloud.ZkCLI -zkhost 192.168.239.135:2181,192.168.239.136:2181,192.168.239.137:2181 -cmd bootstrap -solrhome /home/sun/solrcloud/solrhome
4)上传配置文件
java -classpath .:/home/sun/solrcloud/lib/solr-lib/* org.apache.solr.cloud.ZkCLI -cmd upconfig -zkhost 192.168.239.135:2181,192.168.239.136:2181,192.168.239.137:2181 -confdir /home/sun/solrcloud/lib/config/ -confname myconf
java -classpath .:/home/sun/solrcloud/lib/solr-lib/* org.apache.solr.cloud.ZkCLI -zkhost 192.168.239.135:2181,192.168.239.136:2181,192.168.239.137:2181 -cmd linkconfig -collection mycollection -confname myconf
6)tomcat设置
catalina.sh添加这句:
JAVA_OPTS="-Dsolr.solr.home=/home/sun/solrcloud/solrhome -DzkHost=192.168.239.135:2181,192.168.239.136:2181,192.168.239.137:2181"
<?xml version="1.0" encoding="UTF-8" ?>
<solr persistent="true" sharedLib="lib">
   <cores adminPath="/admin/cores" zkClientTimeout="20000" hostPort="8080" hostContext="solr">
   </cores>
</solr>
<?xml version="1.0" encoding="UTF-8"?>
<Context docBase="/home/sun/solrcloud/tomcat/webapps/solr" debug="0" crossContext="true">
<Environment name="solr/home" type="java.lang.String" value="/home/sun/solrcloud/solrhome" override="true"/>
</Context>
10)启动tomcat
5.创建collection
1)新建一个三个shard的collection,replicationFactor为1,即每个shard一个副本
curl 'http://192.168.239.135:8080/solr/admin/collections?action=CREATE&name=mycollection&numShards=3&replicationFactor=1'

2)手动为每个shard建立2个副本
shard1在135,136上建立副本
curl 'http://192.168.239.135:8080/solr/admin/cores?action=CREATE&collection=mycollection&name=mycollection_shard1_replication2&shard=shard1'
curl 'http://192.168.239.136:8080/solr/admin/cores?action=CREATE&collection=mycollection&name=mycollection_shard1_replication3&shard=shard1'

shard2,shard3类似
最后结果如图:
6.创建过程遇到的错误
1) curl 'http://192.168.239.135:8080/solr/admin/collections?action=CREATE&name=mycollection&numShards=5&replicationFactor=1'
错误信息:
org.apache.solr.common.SolrException:
Cannot create collection mycollection. Value of maxShardsPerNode is 1, and the number of live nodes is 3. This allows a maximum of 3 to be created.
Value of numShards is 5 and value of replicationFactor is 1. This requires 5 shards to be created (higher than the allowed number)
原因:当前节点数为3,每个节点上默认最大shard数为1,可以再链接中加入参数,maxShardsPerNode指定每个节点上的shard数量。2)新建collection报错
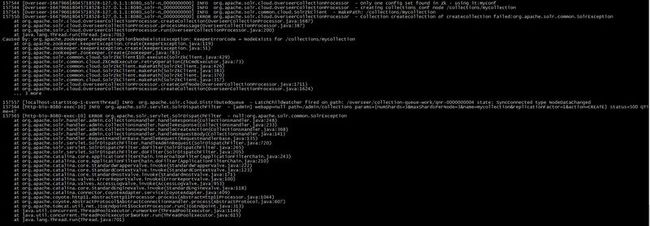
错误信息:
解决方法:不执行linkconfig操作。

