EClipse + Jdk + ApacheAnt + jetty + GWT + MySQL(Navicat)
阅读: 47 评论: 0 作者: blackcore 发表于 2009-11-25 11:22 原文链接
1. JDK6
安装的jdk.exe已经已经包含了jre.
JDK里面的三个变量path,JAVA_HOME和CLASSPATH的变量值
设置运行环境参数:
a.如果是Win95/98(应该没人用了吧),在\autoexec.bat的最后面添加如下3行语句:
set JAVA_HOME=F:\Setupfiles\JavaPlatform\jdk1.6.0_12
set PATH=%JAVA_HOME%\bin;%PATH%
set CLASSPATH=.;%JAVA_HOME%\lib
注意:可用dos命令notepad c:\autoexec.bat打开记事本,加入上面的3行语句。
b.如果是Win2000,xp使用鼠标右击“我的电脑”->属性->高级->环境变量
系统变量->新建->变量名:JAVA_HOME 变量值:F:\Setupfiles\JavaPlatform\jdk1.6.0_12 (你的具体情况)
系统变量->新建->变量名:CLASSPATH 变量值:.;%JAVA_HOME%\lib
系统变量->编辑->变量名:Path 在变量值的最前面加上:%JAVA_HOME%\bin;
run ->cmd -> javac 可以运行表示正确.
可以写如下程序
public class helloworld{
public static void main(String[] args){
System.out.println("Hello,blackCore!");
}
}
并且保存文件为helloworld.java,注意类名和文件名要一致,区分大小写的.
然后在cmd 执行如下:
C:\Documents and Setting\blackcore>javac helloworld.java
C:\Documents and Setting\blackcore>java helloworld.java
Hello,blackCore!
注意helloworld.java文件需要保存当当前用户文件夹下使用;
c:\documents and setting\blackcore\helloworld.java
javac helloworld.java后会生成hellword.class文件,
java helloworld后输出hello,blackcore!
表示编译成功,JDK算是安装成功了!
2. Apache_ant-1.7.1 安装配置
解压Apache_ant-1.7.1后放置相应的文件夹下就OK,设置相应的环境变量,如下:
ANT_HOME F:\Setupfiles\JavaPlatform\apache_ant_1.7.1
PATH %ANT_HOME%\bin;
在cmd后执行:
C:\Documents and Setting\blackcore>ant
Buildfile build.xml does not exits!
build faild.
说明已经配置成功,因为build.xml是需要自己配置的.
以下代码在:F:\Setupfiles\JavaPlatform\apache_ant_1.7.1\hello-ant
可以写如下程序:
A: 自己在F:\Setupfiles\JavaPlatform\apache_ant_1.7.1下新建以下目录:
hello-ant (项目名称)
--build
--classes
--src
--main
--hello
--ant
B: 在hello-ant/src/main/hello/ant/下新建HelloAnt.java文件
package hello.ant;
public class HelloAnt{
public static void main(String[] args){
System.out.println("hello ant,BlackCore人生中的 ant 的第一次接触,好棒!");
}
}
C: 在hello-ant/下新建build.xml文件
D: 运行ant
进入build.xml所在目录,执行以下操作:
执行: %ant_home%/bin/ant -file build.xml 用ant工具执行当前目录下的配置文件build.xml
或 :ant -file build.xml 你如果设置%ant_home%/bin到path中
E: 结果显示

F: 此时可以发现,在build/classes目录下,出现了编译过的文件HelloAnt.class:
build/classes/hello/ant/HelloAnt.class.
3. jetty_6.1.22
将文件解压放置相应文件夹就OK。
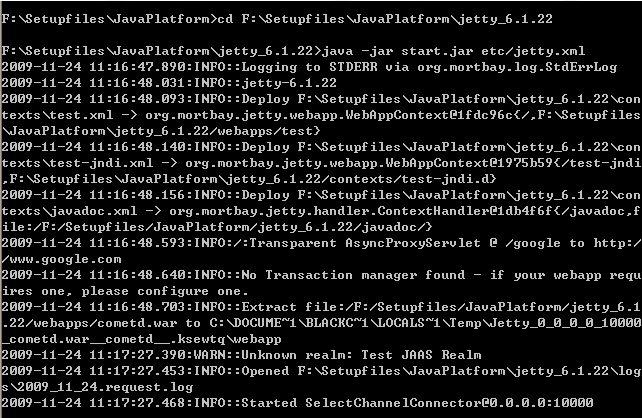
在cmd中更改相应的目录后输入 F:\Setupfiles\JavaPlatform\jetty_6.1.22
然后执行java -jar start.jar etc/jetty.xml命令就可以,前提就是要保证
jdk已经安装正确.如:
在这里可以修改jetty.xml的端口号,我改成了10000.
代码大约在50行:
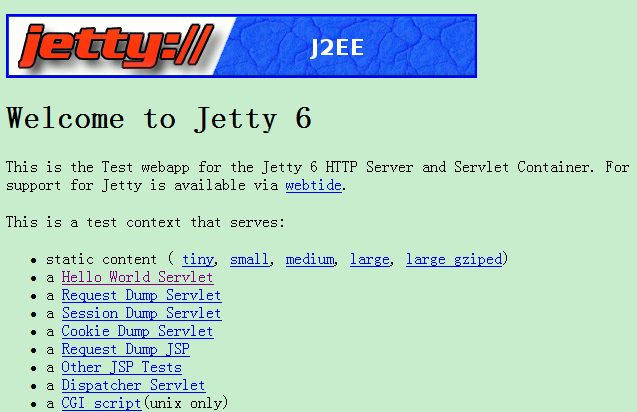
然后输入http://localhost:10000/后即可进入jetty的欢迎界面
界面如下:
安装成功!
4. 安装Eclipse 3.5
http://www.eclipse.org/downloads/上面下了一个就装了.
5. 安装Google Plugin for Eclipse 3.5 (Galileo)
URL:http://dl.google.com/eclipse/plugin/3.5
可参考:http://code.google.com/intl/zh-CN/eclipse/docs/install-eclipse-3.5.html
GWT学习资料可参考:http://code.google.com/intl/zh-CN/webtoolkit/doc/1.6/DevGuideUserInterface.html
装好后,GWT也就有了。
6. 安装MyEclipse 8 插件
懒得找,直接装了一个MyEclipse8,然后把Genuitec\Common\plugins下的所有jar全部移动eclipse\plugins下了,然后把MyEclipse8卸载了。
发表评论
新闻频道:CNTV已启动融资和上市计划
推荐链接:Windows 7专题发布
网站导航:博客园首页 个人主页 新闻 社区 博问 闪存 知识库
