从UI开始
虚拟化平台cloudstack(8)——从UI开始
UI
ucloudstack采用的是前后端分离的架构,就是说前端可以选择使用web、swing甚至其它的界面,都可以。
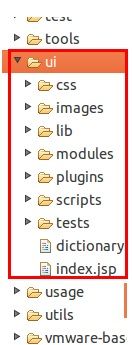
我们来看cloudstack的UI信息吧,所有的cloudstack的UI都在{cloudstack_home}/cloudstack/ui目录下。
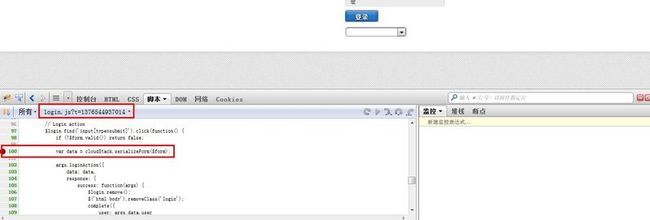
用firefox打开工程,打开firebug,找到login.js,在100行加上断点。
执行登录,这时就会触发断点,让我们看看发生了什么:
最终是使用jquery的ajax来提交post请求给服务器端,也就是说,manager server提供给我们的是一组API,我们可以通过http的请求方式提交请求。
处理http请求
看完了前端,我们继续看一下后端处理。
在web.xml中,我们看到所有的api/请求都会到ApiServlet中处理。
    <servlet>
        <servlet-name>apiServlet</servlet-name>
        <servlet-class>com.cloud.api.ApiServlet</servlet-class>
        <load-on-startup>5</load-on-startup>
    </servlet>

    <servlet-mapping>
         <servlet-name>apiServlet</servlet-name>
         <url-pattern>/api/*</url-pattern>
    </servlet-mapping>
在ApiServlet中,重点看下
    @Override
    public void init(ServletConfig config) throws ServletException {
        SpringBeanAutowiringSupport.processInjectionBasedOnServletContext(this, config.getServletContext());
    }
这样在web容器中就可以查看spring中使用注解的接口了。
说实话这块感觉设计的挺一般的,一个servlet里边承担了太多的任务,我打了个断点在
processRequest(req, resp);
这个方法中,但是一个登录的操作就走了四次断点,一个退出操作又走了两次,不清楚这块为什么这样设计。
而且很多业务代码都在这个类中操作,感觉很冗余。但这个不是我们重点关心的问题。
CloudStack API提供的三种角色
- 管理员。获得云的所有功能,包括虚拟和物理资源管理。
- 域管理员。进入到虚拟资源的云属于管理员的域。
- 用户。只访问允许用户管理的功能,虚拟实例,存储,和网络。
API文档的地址
http://cloudstack.apache.org/docs/api/
可以看到不同角色的API的地址,进去之后,可以看到每个API的详细描述。
处理简单列举一下4.1中API的新特性
在VM中重新配置物理网络
支持IPV6
扩展VMX设置
重新设置SSH密钥来访问虚拟机
在4.1中改变的API命令:
|
API Commands
|
Description
|
|---|---|
|
createNetworkOffering
|
The following request parameters have been added:
|
|
listNetworkOfferings
listNetworks
|
The following request parameters have been added:
|
|
createVlanIpRange
|
The following request parameters have been added:
|
|
deployVirtualMachine
|
The following parameter has been added: ip6Address.
The following parameter is updated to accept the IPv6 address: iptonetworklist.
|
|
CreateZoneCmd
|
The following parameter have been added: ip6dns1, ip6dns2.
|
|
listRouters
listVirtualMachines
|
For nic responses, the following fields have been added.
|
|
listVlanIpRanges
|
For nic responses, the following fields have been added.
|
|
listRouters
listZones
|
For DomainRouter and DataCenter response, the following fields have been added.
|
|
addF5LoadBalancer
configureNetscalerLoadBalancer
addNetscalerLoadBalancer
listF5LoadBalancers
configureF5LoadBalancer
listNetscalerLoadBalancers
|
The following response parameter is removed: inline.
|
|
listFirewallRules
createFirewallRule
|
The following request parameter is added: traffictype (optional).
|
|
listUsageRecords
|
The following response parameter is added: virtualsize.
|
|
deleteIso
|
The following request parameter is added: forced (optional).
|
|
createStoragePool
|
The following request parameters are made mandatory:
|
|
createAccount
|
The following new request parameters are added: accountid, userid
|
|
createUser
|
The following new request parameter is added: userid
|
|
createDomain
|
The following new request parameter is added: domainid
|
|
listZones
|
The following request parameters is added: securitygroupenabled
|
同时添加了一些新的API
-
createEgressFirewallRules (creates an egress firewall rule on the guest network.)
-
deleteEgressFirewallRules (deletes a egress firewall rule on the guest network.)
-
listEgressFirewallRules (lists the egress firewall rules configured for a guest network.)
-
resetSSHKeyForVirtualMachine (Resets the SSHkey for virtual machine.)
-
addBaremetalHost (Adds a new host.)
-
addNicToVirtualMachine (Adds a new NIC to the specified VM on a selected network.)
-
removeNicFromVirtualMachine (Removes the specified NIC from a selected VM.)
-
updateDefaultNicForVirtualMachine (Updates the specified NIC to be the default one for a selected VM.)
-
addRegion (Registers a Region into another Region.)
-
updateRegion (Updates Region details: ID, Name, Endpoint, User API Key, and User Secret Key.)
-
removeRegion (Removes a Region from current Region.)
-
listRegions (List all the Regions. Filter them by using the ID or Name.)
-
getUser (This API can only be used by the Admin. Get user details by using the API Key.)
配置8096端口
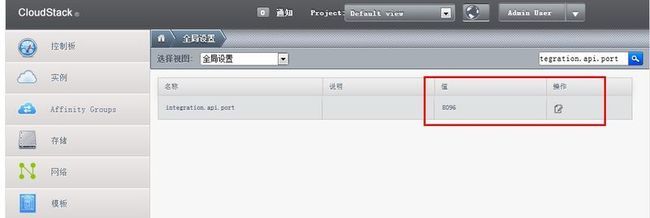
8096端口, 不需要验证即可进行API调用. 在所有的3.0.1版本全新安装时, 这个端口都是默认被禁用的. 你可以通过下面的设置启用8096(或使用其它端口号):
-
确保第一个管理服务器安装并运行.
-
设置你期望的端口号到全局配置参数 integration.api.port.
-
重启管理服务器.
-
在管理服务器的节点上, 创建一个防火墙规则以便允许访问这个端口.
使用API请求
所有CloudStack API请求都是以HTTP GET/POST形式提交, 同时附上相关的命令和参数. 无论是HTTP或HTTPS, 一个请求都有以下内容组成:
-
CloudStack API URL: 这是Web服务API入口(例如, http://www.cloud.com:8080/client/api)
-
命令: 你想要执行的Web服务命令, 比如开启一个虚拟机或创建一个磁盘卷
-
参数: 命令所需的任何必要或可选的参数
一个API GET请求的样例看起来像这样:
http://localhost:8080/client/api?command=deployVirtualMachine&serviceOfferingId=1&diskOfferingId=1&templateId=2&zoneId=4&apiKey=miVr6X7u6bN_sdahOBpjNejPgEsT35eXq-jB8CG20YI3yaxXcgpyuaIRmFI_EJTVwZ0nUkkJbPmY3y2bciKwFQ&signature=Lxx1DM40AjcXU%2FcaiK8RAP0O1hU%3D
更容易读的方式:
http://localhost:8080/client/api
?command=deployVirtualMachine
&serviceOfferingId=1
&diskOfferingId=1
&templateId=2
&zoneId=4 &apiKey=miVr6X7u6bN_sdahOBpjNejPgEsT35eXqjB8CG20YI3yaxXcgpyuaIRmFI_EJTVwZ0nUkkJbPmY3y2bciKwFQ
&signature=Lxx1DM40AjcXU%2FcaiK8RAP0O1hU%3D


