maven3 jetty jrebel 搭建可调式的开发环境
信息:maven3 jetty7.2 jrebel3.6.1
jetty是一个轻量级的container,一般和maven搭配使用,关于jrebel的作用,到网络查一查就知道了,绝对是好东西。
下面开始搭建环境,一个JSF2.0的web 应用为例
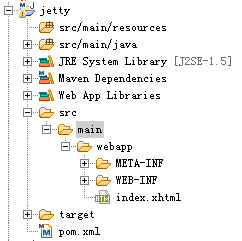
1首先使用eclipse建立一个web 接口的maven项目(不要告诉我你不知道怎么建)
j建好之后目录如下
接下来开始编辑pom.xml文件,文件内容如下<project xmlns="http://maven.apache.org/POM/4.0.0" xmlns:xsi="http://www.w3.org/2001/XMLSchema-instance"
	xsi:schemaLocation="http://maven.apache.org/POM/4.0.0 http://maven.apache.org/maven-v4_0_0.xsd">
	<modelVersion>4.0.0</modelVersion>
	<groupId>com.study</groupId>
	<artifactId>jetty</artifactId>
	<packaging>war</packaging>
	<version>0.0.1-SNAPSHOT</version>
	<name>jetty Maven Webapp</name>
	<url>http://maven.apache.org</url>
	<repositories>
	<!-- 配置下载JSF2.0 类库的maven仓库 -->
		<repository>
			<id>java.net</id>
			<name>java.net</name>
			<url>http://download.java.net/maven/2</url>
		</repository>
	</repositories>
	<!-- JSF2.0的依赖 -->
	<dependencies>
		<dependency>
			<groupId>com.sun.faces</groupId>
			<artifactId>jsf-api</artifactId>
			<version>2.0.4-b09</version>
			<scope>compile</scope>
		</dependency>

		<dependency>
			<groupId>com.sun.faces</groupId>
			<artifactId>jsf-impl</artifactId>
			<version>2.0.4-b09</version>
			<scope>compile</scope>
		</dependency>

		<dependency>
			<groupId>junit</groupId>
			<artifactId>junit</artifactId>
			<version>3.8.1</version>
			<scope>test</scope>
		</dependency>
	</dependencies>

	<build>
		<finalName>jetty</finalName>
		<plugins>
		<!-- 配置 maven 的 jetty 插件 -->
			<plugin>
				<groupId>org.mortbay.jetty</groupId>
				<artifactId>jetty-maven-plugin</artifactId>
				<version>7.2.2.v20101205</version>
				<configuration>
					<webAppConfig>
						<contextPath> /${project.artifactId}</contextPath>				<!--  指定 root context 在这里指定为${project.artifactId} 即 jetty,
						那么访问时就用http://localized:8080/jetty 访问,
						如果指定梶为test 就用http://localized:8080/test访问,更多信息,请查看jetty 插件官方文档-->
					</webAppConfig>
					<!-- 指定额外需要监控变化的文件或文件夹,主要用于热部署中的识别文件更新 -->
					<scanTargetPatterns>
						<scanTargetPattern>
							<directory>src</directory>
							<includes>
								<include>**/*.java</include>
								<include>**/*.properties</include>
							</includes>
							<!-- <excludes> <exclude>**/*.xml</exclude> <exclude>**/myspecial.properties</exclude>
								</excludes> -->
						</scanTargetPattern>
					</scanTargetPatterns>
					<scanIntervalSeconds>0</scanIntervalSeconds><!-- 指定监控的扫描时间间隔,0为关闭jetty自身的热部署,主要是为了使用jrebel -->
					<webAppSourceDirectory>${basedir}/src/main/webapp</webAppSourceDirectory><!-- 指定web页面的文件夹 -->
				</configuration>
			</plugin>

<!-- jerebel maven 插件,用于生成jrebel.xml -->
			<plugin>
				<groupId>org.zeroturnaround</groupId>
				<artifactId>jrebel-maven-plugin</artifactId>
				<executions>
					<execution>
						<id>generate-rebel-xml</id>
						<phase>process-resources</phase>
						<goals>
							<goal>generate</goal>
						</goals>
					</execution>
				</executions>
				<configuration>
				<rebelXmlDirectory>${basedir}/src/main/webapp/WEB-INF/classes</rebelXmlDirectory><!-- 指定生成的jrebel.xml放在哪里,
				要求放在web应用的 classpath下 -->
				</configuration>
			</plugin>
		</plugins>
		<outputDirectory>${basedir}/src/main/webapp/WEB-INF/classes</outputDirectory><!-- 指定编译后文件的存放路径,因为jetty默认src/main/webapp为
		web应用的根目录而 maven compile 目标后的默认classpath 在target文件夹下,就造成jrebel.xml无法兼顾 jetty 默认的是webapp中的classes为 web 应用的根目录,
		而maven 默认是target 目录所以需要修改该maven的默认classes目录。 -->
	</build>
</project>
配置好后,就剩下加入jrebel的参数了。要在eclipse里加入jrebel参数,需要装jrebel for eclipse 插件,装好之后,对pom.xml点右键,选择run->run configurations,在弹出的对话框中选择标签jrebel,勾选enable jrebel agent
确定,然后run就行了。如果要调试,就右键点击pom文件,选择debug就行。整个maven 项目已经上传,可以下载自己试试