在CodeBlocks中用wxWidgets创建不规则窗口
我在学习CodeBlocks(10.05,中文)中用wxWidgets(wxWidgets-2.8.12)来创建不规则窗口时,发现图片不能打包到exe文件里面,这样在发布exe程序是必须要带上相应的图片,甚是不方便,经过苦思和辛苦的查阅,终于找到解决办法,现记录下这个过程作为被查,也对与我一样痛苦挣扎的小虾们一点启示吧。
一、准备工作:
1、环境的搭建,不讲了,我的配置是:CodeBlocks(10.05,中文)和wxWidgets(wxWidgets-2.8.12)
2、准备一张图片,本例中的图片为shape.png,见附件。
二、将图片转换成*.h文件:
这里就要使用wxWidgets自带的wxrc.exe(项目在wxWidgets的安装目录中的utils文件夹里面)了。不过wxrc.exe不是现成的,需要自己编译。本例中已包含编译好的wxrc.exe,具体怎么编译就不讲了。现讲讲图片的转换过程:
1、写一个shape.xml的文件,内容如下:
<?xml version="1.0"?>
<resource version="2.3.0.1">
   <object class="wxBitmap" name="shape">shape.png</object>
</resource>
2、转换图片:
点击“开始”菜单-“运行”,输入“cmd”,将当前目录设定为wxrc.exe所在目录,并将shape.png图片拷贝到wxrc.exe所在目录内(这样是为了方便)。
在dos窗口输入wxrc -c shape.xrc -v -o shape.h并回车,即可看到shap.h的文件了。
三、开始不规则窗口项目
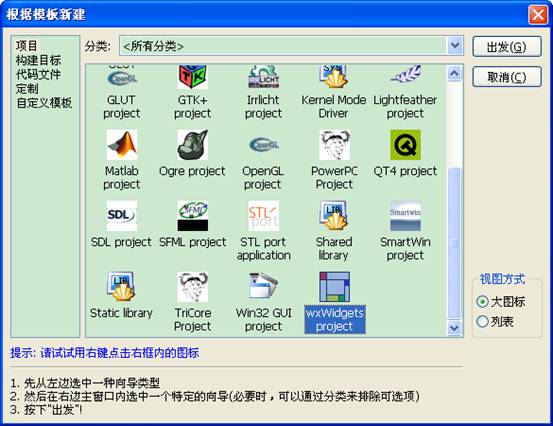
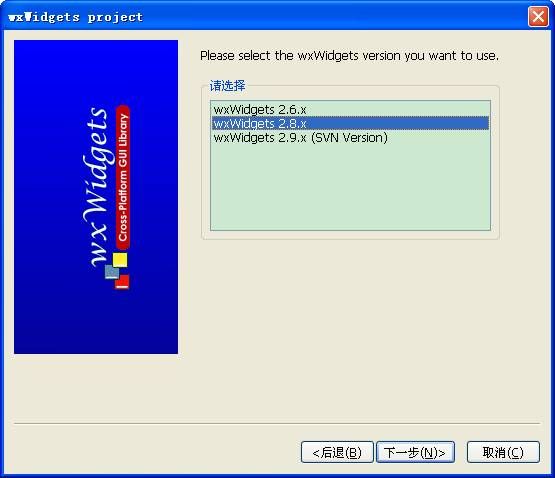
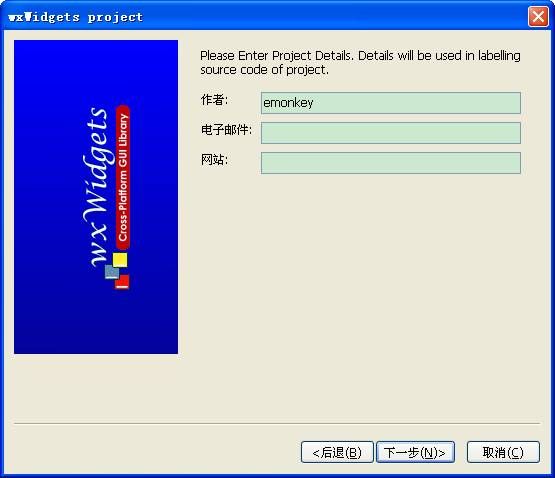
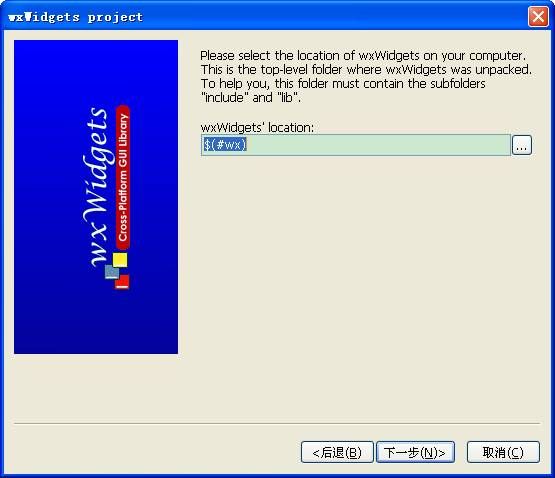
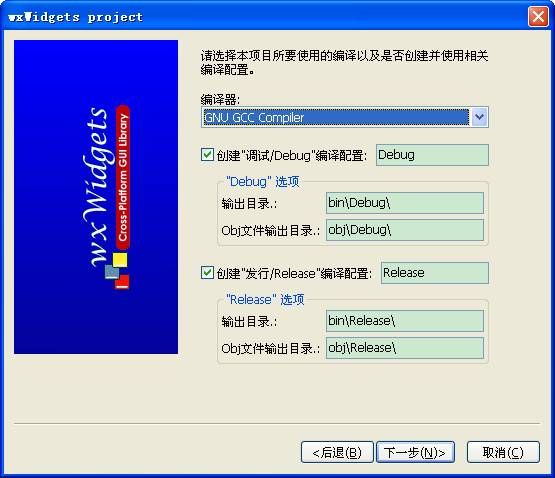
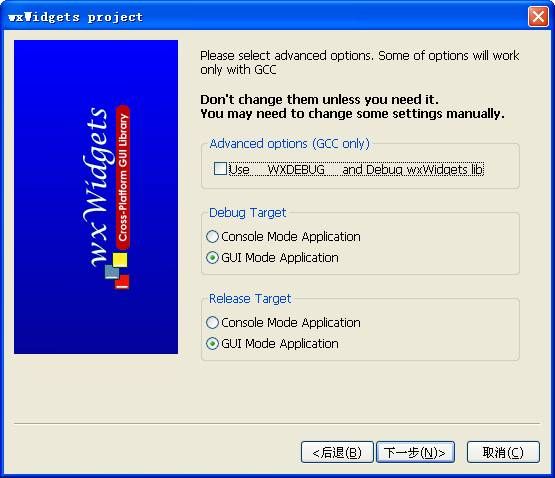
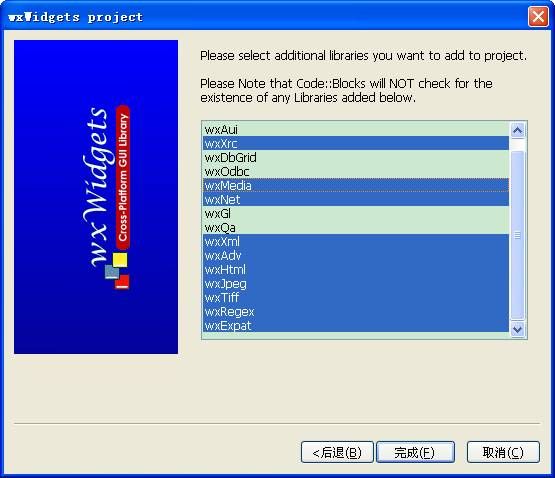
1、新建一wxWidgets project项目,具体设置看图。
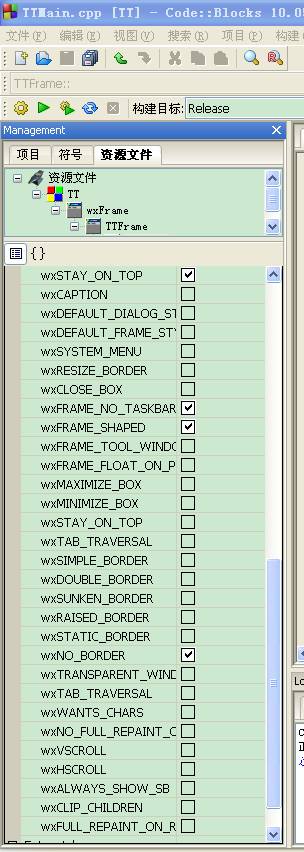
2、设置窗口属性
3、将shap.h拷贝到TT项目目录中,在TTApp.cpp中包含shap.h头文件,并将添加如下代码:
 =====文件名:TTApp.cpp=====
/***************************************************************
 * Name:      TTApp.cpp
 * Purpose:   Code for Application Class
 * Author:    代启发 ()
 * Created:   2012-08-04
 * Copyright: 代启发 ()
 * License:
 **************************************************************/

#include "TTApp.h"

//(*AppHeaders
#include "TTMain.h"
#include <wx/image.h>
#include "shape.h"
//*)

IMPLEMENT_APP(TTApp);

bool TTApp::OnInit()
{
    //(*AppInitialize
    bool wxsOK = true;
// wxInitAllImageHandlers();
    wxImage::AddHandler(new wxPNGHandler);  // 必须的
    wxXmlResource::Get()->InitAllHandlers(); // 必须的
    InitXmlResource();
   if ( wxsOK )
    {
        TTFrame* Frame = new TTFrame(0);
        Frame->Show();
        SetTopWindow(Frame);
    }
    //*)
    return wxsOK;

}
4、在TTMain.h和TTMain.cpp中添加相应的变量和函数,OnLeftDown(wxMouseEvent& event),OnLeftUp(wxMouseEvent& event),OnLeftDClick(wxMouseEvent& event),OnMouseMove(wxMouseEvent& event),OnRightUp(wxMouseEvent& event)和OnPaint(wxPaintEvent& event)函数是自动生成的,其它的需要手动添加。
/***************************************************************
* Name: TTMain.h
* Purpose: Defines Application Frame
* Author:
* Created: 2012-08-04
* Copyright:
* License:
**************************************************************/
#ifndef TTMAIN_H
#define TTMAIN_H
//(*Headers(TTFrame)
#include <wx/wx.h>
//*)
class TTFrame: public wxFrame
{
public:
TTFrame(wxWindow* parent,wxWindowID id = -1);
virtual ~TTFrame();
private:
//(*Handlers(TTFrame)
void OnQuit(wxCommandEvent& event);
void OnAbout(wxCommandEvent& event);
void OnLeftDown(wxMouseEvent& event);
void OnLeftUp(wxMouseEvent& event);
void OnLeftDClick(wxMouseEvent& event);
void OnMouseMove(wxMouseEvent& event);
void OnRightUp(wxMouseEvent& event);
void OnPaint(wxPaintEvent& event);
void OnWindowCreate(wxWindowCreateEvent& event);
virtual void SetWindowShape();
wxPoint m_delta; // 鼠标拖动窗口时的屏幕坐标 - 窗口左上角的屏幕坐标
bool m_hasShape;
wxBitmap m_bitmap;
//*)
//(*Identifiers(TTFrame)
//*)
//(*Declarations(TTFrame)
//*)
DECLARE_EVENT_TABLE()
};
#endif // TTMAIN_H
/***************************************************************
* Name: TTMain.cpp
* Purpose: Code for Application Frame
* Author:
* Created: 2012-08-04
* Copyright:
* License:
**************************************************************/
#include "TTMain.h"
#include <wx/msgdlg.h>
//(*InternalHeaders(TTFrame)
#include <wx/intl.h>
#include <wx/string.h>
#include <wx/xrc/xmlres.h>
//*)
//helper functions
enum wxbuildinfoformat
{
short_f, long_f
};
wxString wxbuildinfo(wxbuildinfoformat format)
{
wxString wxbuild(wxVERSION_STRING);
if (format == long_f )
{
#if defined(__WXMSW__)
wxbuild << _T("-Windows");
#elif defined(__UNIX__)
wxbuild << _T("-Linux");
#endif
#if wxUSE_UNICODE
wxbuild << _T("-Unicode build");
#else
wxbuild << _T("-ANSI build");
#endif // wxUSE_UNICODE
}
return wxbuild;
}
//(*IdInit(TTFrame)
//*)
BEGIN_EVENT_TABLE(TTFrame,wxFrame)
//(*EventTable(TTFrame)
//*)
#ifdef __WXGTK__
EVT_WINDOW_CREATE(OnWindowCreate)
#endif
END_EVENT_TABLE()
TTFrame::TTFrame(wxWindow* parent,wxWindowID id)
{
//(*Initialize(TTFrame)
Create(parent, id, wxEmptyString, wxDefaultPosition, wxDefaultSize, wxSTAY_ON_TOP|wxFRAME_NO_TASKBAR|wxFRAME_SHAPED|wxNO_BORDER, _T("id"));
Center();
m_hasShape = false;
m_bitmap = wxXmlResource::Get()->LoadBitmap(wxT("shape"));
SetSize(wxSize(m_bitmap.GetWidth(), m_bitmap.GetHeight()));
SetToolTip(wxT("Right-click to exit"));
// 此处的处理有些不同
// 如果是GTK界面,如Gnome,那么此时窗口还没有创建,
// 只能在wxEVT_CREATE事件发生之后,调用wxTopLevelWindow::SetShape
// 如果是Windows界面,此时窗口已创建完毕,
// 可以直接调用wxTopLevelWindow::SetShape
#ifndef __WXGTK__
SetWindowShape();
#endif
Connect(wxEVT_PAINT,(wxObjectEventFunction)&TTFrame::OnPaint);
Connect(wxEVT_LEFT_DOWN,(wxObjectEventFunction)&TTFrame::OnLeftDown);
Connect(wxEVT_LEFT_UP,(wxObjectEventFunction)&TTFrame::OnLeftUp);
Connect(wxEVT_LEFT_DCLICK,(wxObjectEventFunction)&TTFrame::OnLeftDClick);
Connect(wxEVT_RIGHT_UP,(wxObjectEventFunction)&TTFrame::OnRightUp);
Connect(wxEVT_MOTION,(wxObjectEventFunction)&TTFrame::OnMouseMove);
//*)
}
TTFrame::~TTFrame()
{
//(*Destroy(TTFrame)
//*)
}
void TTFrame::OnQuit(wxCommandEvent& event)
{
Close();
}
void TTFrame::OnAbout(wxCommandEvent& event)
{
wxString msg = wxbuildinfo(long_f);
wxMessageBox(msg, _("Welcome to..."));
}
void TTFrame::OnLeftDown(wxMouseEvent& event)
{
CaptureMouse();
wxPoint mouseOnScreen = ClientToScreen(event.GetPosition());
wxPoint upleftOnScreen = GetPosition();
m_delta = wxPoint(mouseOnScreen.x - upleftOnScreen.x,mouseOnScreen.y - upleftOnScreen.y);
}
void TTFrame::OnLeftUp(wxMouseEvent& event)
{
if(HasCapture())
ReleaseMouse();
}
void TTFrame::OnLeftDClick(wxMouseEvent& event)
{
if(m_hasShape)
{
wxRegion region;
SetShape(region);
m_hasShape = false;
}
else
{
SetWindowShape();
}
}
void TTFrame::OnMouseMove(wxMouseEvent& event)
{
if(event.Dragging() && event.LeftIsDown())
{
wxPoint mouseOnScreen = ClientToScreen(event.GetPosition());
Move(wxPoint(mouseOnScreen.x - m_delta.x, mouseOnScreen.y - m_delta.y));
}
}
void TTFrame::OnRightUp(wxMouseEvent& event)
{
Close();
}
void TTFrame::OnPaint(wxPaintEvent& event)
{
wxPaintDC dc(this);
dc.DrawBitmap(m_bitmap, 0, 0, true);
}
void TTFrame::SetWindowShape()
{
wxRegion region(m_bitmap, *wxBLUE);
m_hasShape = SetShape(region);
}
参考:
1、 http://blog.chinaunix.net/uid-1693970-id-110252.html
2、 http://blog.csdn.net/joliny/article/details/3510335
