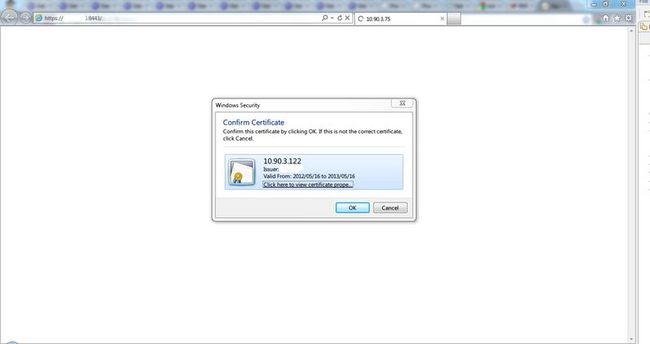
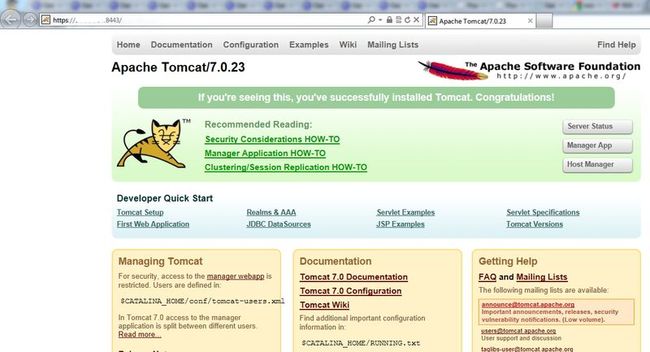
Tomcat 7 配置 SSL.
Tomcat 配置 SSL
说明:
配置的是Tomcat 7 的JSSE Connector,对于配置APR请继续Google.
配置流程:
一.Tomcat 服务端SSL认证配置.
1.配置一个CA证书(如果直接使用授权认证机构本步骤可以跳过)
1.)生成CA私有密钥 (红色标记为CA 私有密钥的验证密码下面很多地方会用到)
openssl genrsa -des3 -out private/ca.key 1024
Generating RSA private key, 1024bit long modulus
...............................++++++ ......++++++ e is 65537 (0x10001)
Enter pass phrase for private/ca.key:123456
Verifying - Enter pass phrase for private/ca.key:123456
2.)生成CA证书 (ca.key 的密码为上一步骤输入的密码)
生成的ca.crt 就是 CA的认证证书,可以导入到浏览器的受信任机构中区.而那些由这个CA证书签名的
的客户端证书就可以被浏览器认证通过.
openssl req -new -x509 -key private/ca.key -out public/ca.crt -days 3650
Enter pass phrase for private/ca.key:123456
You are about to be asked to enter information that will be incorporated
into your certificate request.
What you are about to enter is what is called a Distinguished Name or a DN.
There are quite a few fields but you can leave some blank
For some fields there will be a default value,
If you enter '.', the field will be left blank.
-----
Country Name (2 letter code) [AU]:CN
State or Province Name (full name) [Some-State]:ZJ
Locality Name (eg, city) []:HZ
Organization Name (eg, company) [Internet Widgits Pty Ltd]:orgnation
Organizational Unit Name (eg, section) []:orgnation
Common Name (e.g. server FQDN or YOUR name) []:orgnation
Email Address []:xxx@mail.com
2. 使用CA证书签名服务端证书
1.)生成服务端私钥
openssl genrsa -des3 -out private/server.key
1024 Generating RSA private key, 1024 bit long modulus
......................................................++++++ .....++++++ e is 65537 (0x10001)
Enter pass phrase for private/server.key:s123456
Verifying - Enter pass phrase for private/server.key:s123456
2.)创建服务端证书签名请求
Common Name 配置很重要,可以配置tomcat 所在服务器的IP地址或域名.
如果是本地测试的话可以配置localhost.
openssl req -new -key private/server.key -out server.csr
Enter pass phrase for private/server.key:
You are about to be asked to enter information that will be incorporated
into your certificate request.
What you are about to enter is what is called a Distinguished Name or a DN.
There are quite a few fields but you can leave some blank
For some fields there will be a default value,
If you enter '.', the field will be left blank.
-----
Country Name (2 letter code) [AU]:CN
State or Province Name (full name) [Some-State]:ZJ
Locality Name (eg, city) []:HZ
Organization Name (eg, company) [Internet Widgits Pty Ltd]:XXX
Organizational Unit Name (eg, section) []:Development
Common Name (e.g. server FQDN or YOUR name) []:xxx.xxx.xxx.xxx (这里很重要重要)
Email Address []:xxxx@mail.com
Please enter the following 'extra' attributes
to be sent with your certificate request
A challenge password []:csr123456
An optional company name []:xxx
3.) 使用 CA证书和CA私钥给服务端证书请求签名
生成的server.crt 为服务端证书.
openssl x509 -req -days 360 -in server.csr -CA public/ca.crt -CAkey private/ca.key -CAcreateserial -out public/server.crt
Signature ok
subject=/C=CN/ST=ZJ/L=HZ/O= XXX/OU=Development/CN= xxx.xxx.xxx.xxx /emailAddress=xxxx@mail.com
Getting CA Private Key
Enter pass phrase for 123456
private/ca.key:123456
4.)把服务端代码转换浏览器可以识别的PCS12 格式
服务端证书密码暂时无用.
$ openssl pkcs12 -export -in public/server.crt -inkey private/server.key -out server.p12
Enter pass phrase for private/server.key:s123456
Enter Export Password: e123456
Verifying - Enter Export Password:e123456
5.)生成信任库中
使用jetty 中的PKCS12Import 工具类完成转换.(jetty-5.1.10.jar 可在附件中下载)
java -cp jetty-5.1.10.jar org.mortbay.util.PKCS12Import server.p12 server.jks
Enter input keystore passphrase: e123456
Enter output keystore passphrase: e123456
Alias 0: 1
Adding key for alias 1
6.)使用下面命令查看jks文件中包含的证书信息.
keytool -v -list -keystore server.jks
7.)配置Tomcat SSL Connector.
在server.xml文件中配置下面内容
<Connector port="8443" protocol="HTTP/1.1"  SSLEnabled="true"
               maxThreads="150" scheme="https" secure="true"
               clientAuth="false"
			   keystoreFile="F:/temps/ca3/server.jks"
			   keystorePass="e123456"
			   sslProtocol="TLS" />
8.)导入CA 证书(ca.crt)到客户端浏览器的受信任认证机构的证书列表中
9.)使用客户端浏览器访问: https://xxx.xxx.xxx.xxx:8443 .访问成功的话表示服务端SSL配置成功.
二 配置客户端证书实现客户端和服务端双向认证
1. 创建private key 和证书签名请求
$ openssl req -new -newkey rsa:1024 -nodes -out client/client.req -keyout
Generating a 1024 bit RSA private key
.................++++++
................................................++++++
writing new private key to 'client/client.key'
-----
You are about to be asked to enter information that will be incorporated
into your certificate request.
What you are about to enter is what is called a Distinguished Name or a DN.
There are quite a few fields but you can leave some blank
For some fields there will be a default value,
If you enter '.', the field will be left blank.
-----
Country Name (2 letter code) [AU]:CN
State or Province Name (full name) [Some-State]:ZJ
Locality Name (eg, city) []:HZ
Organization Name (eg, company) [Internet Widgits Pty Ltd]:XXXX
Organizational Unit Name (eg, section) []:XXXX
Common Name (e.g. server FQDN or YOUR name) []:XXXXX
Email Address []:xxxx@mail.com
Please enter the following 'extra' attributes
to be sent with your certificate request
A challenge password []:c123456
An optional company name []:XXX
2.使用CA证书签名客户端证书签名请求.
$ openssl x509 -CA public/ca.crt -CAkey private/ca.key -CAserial public/ca.srl -req -in client/client.req -out client/client.pem -days 365
Signature ok
subject=/C=CN/ST=ZJ/L=HZ/O=XXXX/OU=XXXX/CN=XXX.XXX.XXX.XXX/emailAddress=xxxx@mail.com
Getting CA Private Key
Enter pass phrase for private/ca.key:123456
3.把客户端证书client.pem 转换成 浏览器可以识别的PKCS12 格式
openssl pkcs12 -export -clcerts -in client/client.pem -inkey client/client.key -out client/client.p12 -name 10.90.3.122
Enter Export Password:c123456
Verifying - Enter Export Password:c123456
4.服务端配置支持客户端证书认证.
1).创建和填充trust-store
依次执行下面命令.
keytool -genkey -alias dummy -keyalg RSA -keystore truststore.jks
keytool -delete -alias dummy -keystore truststore.jks
keytool -import -v -trustcacerts -alias my_ca -file public/ca.crt -keystore truststore.jks
2.).使tomcat 加载信任库.
配置下面环境变量
CATALINA_OPTS="-Djavax.net.ssl.trustStore=your_path_to/truststore.jks -Djavax.net.ssl.trustStorePassword=your_password"
3.)配置tomcat server.xml 文件启用客户端认证.
<Connector port="8443" protocol="HTTP/1.1"  SSLEnabled="true"
               maxThreads="150" scheme="https" secure="true"
               clientAuth="true"
			   keystoreFile="F:/temps/ca3/server.jks"
			   keystorePass="e123456"
			   sslProtocol="TLS" />
4.)导入客户端证书.
导入client.p12 到客户端浏览器测试.

