Spring_MVC(5)业务层处理
这里将用到以下几个包:
aopalliance-1.0.jar
commons-collections.jar
commons-dbcp.jar
commons-logging-1.1.1.jar
commons-pool.jar
jstl.jar
log4j-1.2.15.jar
mysql-connector-java-5.1.6-bin.jar
spring-aop-2.5.6.jar
spring-beans-2.5.6.jar
spring-context-2.5.6.jar
spring-context-support-2.5.6.jar
spring-core-2.5.6.jar
spring-jdbc-2.5.6.jar
spring-tx-2.5.6.jar
spring-web-2.5.6.jar
spring-webmvc-2.5.6.jar
standard.jar
主要增加了spring-aop-2.5.6.jar的AOP支持包!
之前我们在AccountService中加入了注解@Transactional标签,但是要想要真正发挥事务作用,还需要一些配置。
主要需要调整dao.xml文件
dao.xml-事务管理
- <bean
- id="transactionManager"
- class="org.springframework.jdbc.datasource.DataSourceTransactionManager"
- p:dataSource-ref="dataSource" />
- <tx:annotation-driven
- transaction-manager="transactionManager" />
	<bean
		id="transactionManager"
		class="org.springframework.jdbc.datasource.DataSourceTransactionManager"
		p:dataSource-ref="dataSource" />
	<tx:annotation-driven
		transaction-manager="transactionManager" />
细化一下AccountService接口方法
AccountService.java
- /**
- * 2010-1-23
- */
- package org.zlex.spring.service;
- import org.springframework.dao.DataAccessException;
- import org.springframework.transaction.annotation.Transactional;
- import org.zlex.spring.domain.Account;
- /**
- * 账户业务接口
- *
- * @author <a href="mailto:[email protected]">梁栋</a>
- * @version 1.0
- * @since 1.0
- */
- public interface AccountService {
- /**
- * 获得账户
- *
- * @param username
- * @param password
- * @return
- */
- @Transactional(readOnly = true)
- Account read(String username, String password);
- /**
- * 获得账户
- *
- * @param id
- * @return
- */
- @Transactional(readOnly = true)
- Account read(int id);
- /**
- * 注册用户
- *
- * @param account
- * @return
- */
- @Transactional(readOnly = false, rollbackFor = DataAccessException.class)
- Account register(Account account);
- }
/**
 * 2010-1-23
 */
package org.zlex.spring.service;

import org.springframework.dao.DataAccessException;
import org.springframework.transaction.annotation.Transactional;
import org.zlex.spring.domain.Account;

/**
 * 账户业务接口
 *
 * @author <a href="mailto:[email protected]">梁栋</a>
 * @version 1.0
 * @since 1.0
 */
public interface AccountService {

	/**
	 * 获得账户
	 *
	 * @param username
	 * @param password
	 * @return
	 */
	@Transactional(readOnly = true)
	Account read(String username, String password);

	/**
	 * 获得账户
	 *
	 * @param id
	 * @return
	 */
	@Transactional(readOnly = true)
	Account read(int id);

	/**
	 * 注册用户
	 *
	 * @param account
	 * @return
	 */
	@Transactional(readOnly = false, rollbackFor = DataAccessException.class)
	Account register(Account account);
}
这里我把注解@Transactional调整到了具体的方法上,也就是说这样写的话,凡是加入注解的标注的方法都属于事务配置!
Account register(Account account);用做用户注册作用!![]()
@Transactional(readOnly = true)只读属性
@Transactional(readOnly = false, rollbackFor = DataAccessException.class)只读关闭,遇到DataAccessException异常回滚!如果不对异常进行处理,该异常将一直向上层抛出,直至抛出到页面!
如果你的Eclipse集成了SpringIDE,你可以观察一下这时的xml配置文件和AccoutServiceImpl.java的变化!![]()


这次,来个用户注册功能演示,故意在某个位置制造一个异常,看看是否正常回滚!![]()
先看注册控制器
RegisterController.java
- /**
- * 2010-2-4
- */
- package org.zlex.spring.controller;
- import java.text.DateFormat;
- import java.text.SimpleDateFormat;
- import java.util.Date;
- import org.springframework.beans.factory.annotation.Autowired;
- import org.springframework.beans.propertyeditors.CustomDateEditor;
- import org.springframework.stereotype.Controller;
- import org.springframework.ui.ModelMap;
- import org.springframework.web.bind.WebDataBinder;
- import org.springframework.web.bind.annotation.InitBinder;
- import org.springframework.web.bind.annotation.ModelAttribute;
- import org.springframework.web.bind.annotation.RequestMapping;
- import org.springframework.web.bind.annotation.RequestMethod;
- import org.zlex.spring.domain.Account;
- import org.zlex.spring.service.AccountService;
- /**
- * 用户注册控制器
- *
- * @author <a href="mailto:[email protected]">梁栋</a>
- * @version 1.0
- * @since 1.0
- */
- @Controller
- @RequestMapping(value = "/register.do")
- public class RegisterController {
- @Autowired
- private AccountService accountService;
- @InitBinder
- public void initBinder(WebDataBinder binder) {
- DateFormat format = new SimpleDateFormat("yyyy-MM-dd");
- binder.registerCustomEditor(Date.class, "birthday",
- new CustomDateEditor(format, true));
- }
- @RequestMapping(method = RequestMethod.GET)
- public String initForm(ModelMap model) {
- Account account = new Account();
- model.addAttribute("account", account);
- // 直接跳转到登录页面
- return "account/register";
- }
- @RequestMapping(method = RequestMethod.POST)
- protected String submit(@ModelAttribute("account") Account account) {
- int id = accountService.register(account).getId();
- // 跳转到用户信息页面
- return "redirect:profile.do?id=" + id;
- }
- }
/**
 * 2010-2-4
 */
package org.zlex.spring.controller;

import java.text.DateFormat;
import java.text.SimpleDateFormat;
import java.util.Date;

import org.springframework.beans.factory.annotation.Autowired;
import org.springframework.beans.propertyeditors.CustomDateEditor;
import org.springframework.stereotype.Controller;
import org.springframework.ui.ModelMap;
import org.springframework.web.bind.WebDataBinder;
import org.springframework.web.bind.annotation.InitBinder;
import org.springframework.web.bind.annotation.ModelAttribute;
import org.springframework.web.bind.annotation.RequestMapping;
import org.springframework.web.bind.annotation.RequestMethod;
import org.zlex.spring.domain.Account;
import org.zlex.spring.service.AccountService;

/**
 * 用户注册控制器
 *
 * @author <a href="mailto:[email protected]">梁栋</a>
 * @version 1.0
 * @since 1.0
 */
@Controller
@RequestMapping(value = "/register.do")
public class RegisterController {

	@Autowired
	private AccountService accountService;

	@InitBinder
	public void initBinder(WebDataBinder binder) {
		DateFormat format = new SimpleDateFormat("yyyy-MM-dd");
		binder.registerCustomEditor(Date.class, "birthday",
				new CustomDateEditor(format, true));
	}

	@RequestMapping(method = RequestMethod.GET)
	public String initForm(ModelMap model) {
		Account account = new Account();
		model.addAttribute("account", account);
		// 直接跳转到登录页面
		return "account/register";
	}

	@RequestMapping(method = RequestMethod.POST)
	protected String submit(@ModelAttribute("account") Account account) {
		int id = accountService.register(account).getId();
		// 跳转到用户信息页面
		return "redirect:profile.do?id=" + id;
	}
}
@InitBinder用于表单自定义属性绑定。这里我们要求输入一个日期格式的生日。
@RequestMapping(method = RequestMethod.GET)用于初始化页面。
@RequestMapping(method = RequestMethod.POST)用于提交页面。
再看注册页面
register.jsp
- <html>
- <head>
- <meta http-equiv="Content-Type" content="text/html; charset=UTF-8">
- <title>注册</title>
- <link rel="stylesheet" type="text/css" href="css/style.css" />
- <script type="text/javascript" src="js/calendar.js"></script>
- </head>
- <body>
- <fieldset><legend>用户注册</legend><form:form
- commandName="account">
- <ul>
- <li><form:label path="username">用户名:</form:label><form:input
- path="username" /></li>
- <li><form:label path="password">密码:</form:label><form:password
- path="password" /></li>
- <li><form:label path="birthday">生日:</form:label><form:input
- path="birthday" onfocus="showDate(this);" /></li>
- <li><form:label path="email">Email:</form:label><form:input
- path="email" /></li>
- <li>
- <button type="submit">注册</button>
- <button type="reset">重置</button>
- </li>
- </ul>
- </form:form></fieldset>
- </body>
- </html>
<html>
<head>
<meta http-equiv="Content-Type" content="text/html; charset=UTF-8">
<title>注册</title>
<link rel="stylesheet" type="text/css" href="css/style.css" />
<script type="text/javascript" src="js/calendar.js"></script>
</head>
<body>
<fieldset><legend>用户注册</legend><form:form
	commandName="account">
	<ul>
		<li><form:label path="username">用户名:</form:label><form:input
			path="username" /></li>
		<li><form:label path="password">密码:</form:label><form:password
			path="password" /></li>
		<li><form:label path="birthday">生日:</form:label><form:input
			path="birthday" onfocus="showDate(this);" /></li>
		<li><form:label path="email">Email:</form:label><form:input
			path="email" /></li>
		<li>
		<button type="submit">注册</button>
		<button type="reset">重置</button>
		</li>
	</ul>
</form:form></fieldset>
</body>
</html>
这里我用了一个JavaScript日期控制标签:
- <script type="text/javascript" src="js/calendar.js"></script>
<script type="text/javascript" src="js/calendar.js"></script>
使用起来就像是这样: 
非常好用!!!![]() 当然,你完全可以使用JE上的那个JS控件!
当然,你完全可以使用JE上的那个JS控件!
接下来稍微调整一下AccountService接口及其实现AccountServiceImpl
AccountService.java
- public interface AccountService {
- // 省略
- /**
- * 注册用户
- *
- * @param account
- * @return
- */
- @Transactional(readOnly = false, rollbackFor = DataAccessException.class)
- Account register(Account account);
- // 省略
- }
public interface AccountService {
	// 省略
	/**
	 * 注册用户
	 *
	 * @param account
	 * @return
	 */
	@Transactional(readOnly = false, rollbackFor = DataAccessException.class)
	Account register(Account account);
	// 省略
}
- @Service
- public class AccountServiceImpl implements AccountService {
- @Autowired
- private AccountDao accountDao;
- // 省略
- @Override
- public Account register(Account account) {
- accountDao.create(account);
- return accountDao.read(account.getUsername());
- }
- }
@Service
public class AccountServiceImpl implements AccountService {

	@Autowired
	private AccountDao accountDao;

	// 省略

	@Override
	public Account register(Account account) {
		accountDao.create(account);
		return accountDao.read(account.getUsername());
	}
}
为了在插入一条记录后获得当前用户的主键,我们还得这么玩!![]() 的确有点雷人~
的确有点雷人~
从架构考虑,这是符合业务要求的实现!如果用iBatis或者Hibernate,这个问题就有数据库一次IO处理完成了!![]()
再看看AccountDao接口及其实现AccountDaoImpl
AccountDao.java
- public interface AccountDao {
- // 省略
- /**
- * 构建用户记录
- *
- * @param account
- * @return
- */
- void create(Account account);
- }
public interface AccountDao {
        // 省略
	/**
	 * 构建用户记录
	 *
	 * @param account
	 * @return
	 */
	void create(Account account);
}
AccountDaoImpl.java
- @Repository
- public class AccountDaoImpl implements AccountDao {
- // 省略
- @Override
- public void create(Account account) {
- String sql = "INSERT INTO account(username, password, birthday, email) VALUES(?,?,?,?)";
- jdbcTemplate.update(sql, new Object[] { account.getUsername(),
- account.getPassword(), account.getBirthday(),
- account.getEmail() });
- }
- }
@Repository
public class AccountDaoImpl implements AccountDao {
        // 省略

	@Override
	public void create(Account account) {
		String sql = "INSERT INTO account(username, password, birthday, email) VALUES(?,?,?,?)";

		jdbcTemplate.update(sql, new Object[] { account.getUsername(),
				account.getPassword(), account.getBirthday(),
				account.getEmail() });
	}
}
来个注册演示!![]()
注册: 
信息展示: 
来制造一起事故!![]()
先看看数据库目前的状况! 
在AccountDaoImpl中来个破坏!![]()
- @Override
- public void create(Account account) {
- String sql = "INSERT INTO account(username, password, birthday, email) VALUES(?,?,?,?)";
- jdbcTemplate.update(sql, new Object[] { account.getUsername(),
- account.getPassword(), account.getBirthday(),
- account.getEmail() });
- [color=red]throw new RecoverableDataAccessException("TEST");[/color]
- }
@Override
	public void create(Account account) {
		String sql = "INSERT INTO account(username, password, birthday, email) VALUES(?,?,?,?)";

		jdbcTemplate.update(sql, new Object[] { account.getUsername(),
				account.getPassword(), account.getBirthday(),
				account.getEmail() });

		[color=red]throw new RecoverableDataAccessException("TEST");[/color]
	}
我们强行在执行完Insert语句后抛出DataAccessException异常(RecoverableDataAccessException)!![]()
来个注册试试! 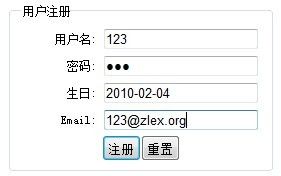
点击提交看看返回的异常!![]()

异常回滚生效!![]()
数据库中当然是什么都没有,我就不废话了!![]()