Android 缩略图工具类(Android 2.2新特性)
在Android 2.2版本中,新增了一个ThumbnailUtils工具类来是实现缩略图,此工具类的功能是强大的,使用是简单,它提供了一个常量和三个方法。利用这些常数和方法,可以轻松快捷的实现图片和视频的缩略图功能。(亲,你没有看错,还包括生成视频的缩略图哦)
下面将依次说明一下这些常数和方法。
常数:
OPTIONS_RECYCLE_INPUT: 从此常量用于表示应该回收extractThumbnail(Bitmap, int, int, int)输入源图片(第一个参数),除非输出图片就是输入图片。
方法:
Bitmap createVideoThumbnail(String filePath, int kind)
从方法名称即可看出,这个方法用于生成视频缩略图。
参数:
filePath: 视频文件路径
kind: 文件种类,可以是 MINI_KIND 或 MICRO_KIND
Bitmap extractThumbnail(Bitmap source, int width, int height, int options)
此方法用于生成一个指定大小的图片缩略图。
参数:
source: 需要被创造缩略图的源位图对象
width: 生成目标的宽度
height: 生成目标的高度
options:在缩略图抽取时提供的选项
Bitmap extractThumbnail(Bitmap source, int width, int height)
此方法用于生成一个指定大小的图片缩略图。
参数:
source: 需要被创造缩略图的源位图对象
width: 生成目标的宽度
height: 生成目标的高度
简单的方法,简单的常数,看完这些后,就可以开始创建缩略图了。下面以创建一个美女图片的缩略图为例,展示一下创建缩略图的步骤:
布局文件 main.xml:
1 <?xml version="1.0" encoding="utf-8"?>
2 <LinearLayout xmlns:android="http://schemas.android.com/apk/res/android" android:orientation="vertical" android:background="#999999" android:layout_width="fill_parent" android:layout_height="fill_parent">
3     <ImageView  android:layout_width="wrap_content" android:layout_height="wrap_content" android:layout_gravity="center" android:src="@drawable/girl"/>
4     <TextView  android:layout_width="wrap_content" android:layout_height="wrap_content" android:layout_marginLeft="10dp" android:text="缩略图:" android:textColor="#000000"/>
5     <ImageView android:id="@+id/image" android:layout_width="wrap_content" android:layout_height="wrap_content" android:layout_marginLeft="20dp" android:layout_marginTop="10dp"/>
6 </LinearLayout>
Activity代码:
 1 public class MainActivity extends Activity {
 2
 3     @Override
 4     public void onCreate(Bundle savedInstanceState) {
 5        super.onCreate(savedInstanceState);
 6        setContentView(R.layout.main);
 7
 8        ImageView humbnail = (ImageView) findViewById(R.id.image);
 9
10        //获得一个Drawable对象
11        Drawable girl = getResources().getDrawable(R.drawable.girl);
12        //将Drawable对象强转为Bitmap位图对象
13        Bitmap bitmap = ((BitmapDrawable)girl).getBitmap();
14        //利用Bitmap位图对象生成缩略图
15        bitmap = ThumbnailUtils.extractThumbnail(bitmap, 51, 108);
16
17        humbnail.setImageBitmap(bitmap);
18     }
19 }
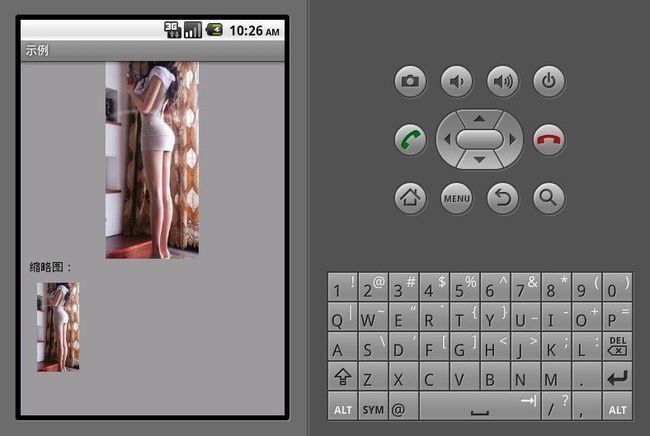
运行结果:
好了,运行结果出来了,如图所示,运行结果如预想一样,创建了一个美女图片的缩略图,并且显示了出来。这样的结果看上去丝毫问题没有,但是在这里,需要指出的是,虽然结果正确,但是过程却是不正确的。
“过程不正确,那作者你为什么要这么写呢?”,这样的问题可能会出现在各位读者的脑海中。别急,接下来我就解释一下我为什么要这么写,另外再重写一个正确的代码给大家。大家注意下面这两行代码:
1        //获得一个Drawable对象
2        Drawable girl = getResources().getDrawable(R.drawable.girl);
3        //将Drawable对象强转为Bitmap位图对象
4        Bitmap bitmap = ((BitmapDrawable)girl).getBitmap();
我相信绝大部分人都会通过这么一种强制转换的方法来实现从Drawable到BitmapDrawable的转换,这也是网上疯狂流传并误导大家的。首先,利用强制转换的方法来实现类型转换这种方式,从代码的角度看,它是不优雅的,是简单粗暴的,缺乏代码的美感;其次,因为BitmapDrawable是Drawable的子类,所以无法保证没一个Drawable对象都能正确的强制转换为BitmapDrawable,这就给代码增加了安全的因素。
其实Google的工程师们提供了从资源文件优雅获取BitmapDrawable对象的方式。下面,我将贴出真正正确的写法。
 1 public class MainActivity extends Activity {
 2
 3     @Override
 4     public void onCreate(Bundle savedInstanceState) {
 5        super.onCreate(savedInstanceState);
 6        setContentView(R.layout.main);
 7
 8        ImageView humbnail = (ImageView) findViewById(R.id.image);
 9
10        //通过openRawResource获取一个InputStream对象
11        InputStream input = getResources().openRawResource(R.drawable.girl);
12        //通过InputStream创建BitmapDrawable对象
13        BitmapDrawable girl = new BitmapDrawable(input);
14        //通过BitmapDrawable对象获取Bitmap对象
15        Bitmap bitmap = girl.getBitmap();
16        //利用Bitmpa对象创建缩略图
17        bitmap = ThumbnailUtils.extractThumbnail(bitmap, 51, 108);
18
19        humbnail.setImageBitmap(bitmap);
20     }
21 }
这样获取BitmapDrawable对象的方式,是否比前面的代码优雅并且安全了呢?
