Qt 截取屏幕的小demo
无代码无真相。我不啰嗦。
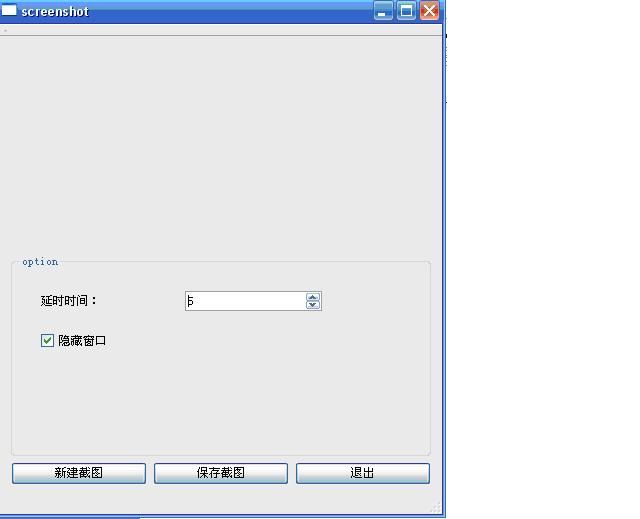
demo效果图:
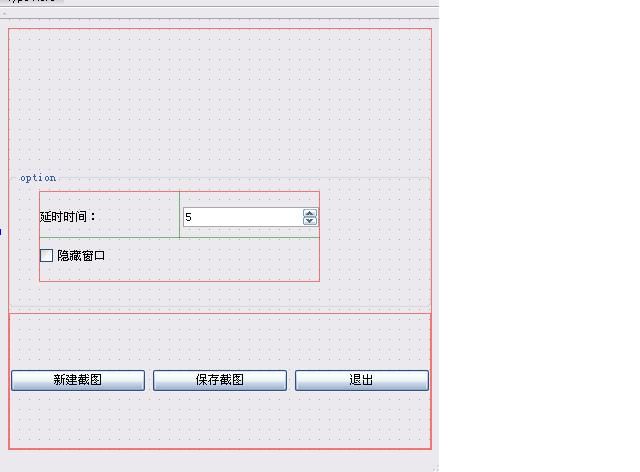
布局:
创建一个图形工程,创建以下布局:,分别使用了网状布局,横向布局, 垂直布局。 界面的主布局为垂直布局。
右键点击 新建截图 按钮,选择clicked() 信号, 跳转到相对应的槽填写以下代码
void screenshot::on_newScreenshot_clicked()
{
if(ui->checkBox->isChecked())
{
this->hide();
this->timer =new QTimer;
QObject::connect(timer,SIGNAL(timeout()),this,SLOT(shotScreen()));
timer->start(ui->spinBox->value()*1000);
//如果当前复选框为选中,那么通过定时器来触发截屏信号
}
else
{
qApp->beep();
}
}
以上代码使用了一个自定义的槽, 所以要在头文件中声明
private slots:
void shotScreen();
在源文件中实现槽:
void screenshot::shotScreen()
{
pixmap=QPixmap::grabWindow(QApplication::desktop()->winId());
ui->screenLabel->setPixmap(pixmap.scaled(ui->screenLabel->size()));
this->timer->stop();
this->show();
}
每一个窗口都有自己的私有的id, 如同进程号一样, 当访问一个窗口后, 获得当前桌面的id , 通过grabWindow()函数抓取图片并赋给pixmap。 当前定时器撤销, 让窗口再次显示出来。
将当前的图片保存到一个指定的目录下,右键单击 保存截图 按钮, 选择clicked()信号,填写以下代码:
void screenshot::on_saveScrenshot_clicked()
{
QString format = "png";
QString initialPath = QDir::currentPath() + tr("/untitled.") + format;
QString fileName = QFileDialog::getSaveFileName(this, tr("Save As"),
initialPath,
tr("%1 Files (*.%2);;All Files (*)")
.arg(format.toUpper())
.arg(format));
if (!fileName.isEmpty())
pixmap.save(fileName, format.toAscii());
}
screenshot.cpp

