Shopify 入门 (英文)
关联:
Themeforest recently opened a new section where you can buy or sell themes for Shopify ! Shopify is a hosted e-commerce solution that makes it easy to get started with an online business. You can have a shop up and running in minutes.
To kick-start ThemeForest’s Shopify catalog, the authors of each accepted template will receive a $100 bonus – until there are ten templates in the category.
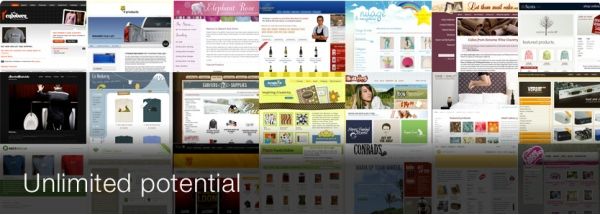
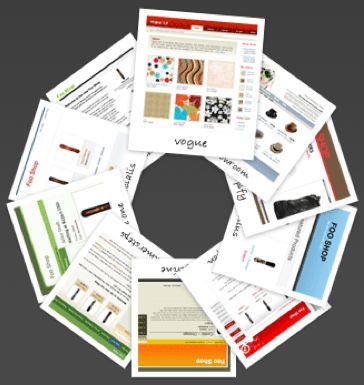
Shopify is well known for its flexibility of design. See some examples . Shopify created (and later released as open source) the Liquid Templating Engine . Liquid allows complete design freedom for designers.
In this tutorial I will show how to design a Shopify theme using Liquid. Once you have the basics, you can design a theme, and submit it to Themeforest .
Let’s Design a Shopify Theme
What is Liquid?
Liquid is the templating engine developed for and used by Shopify. It processes Liquid template files, which have the “.liquid” extension. Liquid files are simply HTML files with embedded code. Since Liquid allows full customization of your HTML , you can literally design a shop to look like anything.
Liquid was originally developed in Ruby for use with Shopify and was released as an open source project. Since then, it has been used in other Ruby on Rails projects , and has been ported to PHP and javascript .
A Quick Preview of Liquid
Let’s look at what it takes to get started with liquid.
  <ul id="products">
    {% for product in products %}
      <li>
        <h2>{{ product.title }}</h2>
        Only {{ product.price | money_with_currency }}

        <p>{{ product.description | prettyprint | truncate: 200 }}</p>

      </li>
    {% endfor %}
  </ul>
As you can see, Liquid is just HTML with some embedded code. This is why Liquid is so powerful, it gives you full power over your code and makes it easy to work with the variables you have available.
What is going on above?
In Liquid, there are two types of markup: Output and Tags . Liquid Tags are surrounded by curly brackets and percent signs; output is surrounded by two curly brackets.
In the above snippet, the first line of Liquid is: {% for product in products %} .... {% endfor %} This is an example of a Liquid Tag. The for Tag loops over a collection of items and allows you to work with each one. If you have ever used for loops in PHP , Ruby, javascript, or (insert any programming language here), it works the same way in Liquid.
The next line of Liquid in the above snippet is {{ product.title }} . This is an example of a Liquid Output. This will ask for a product’s title and display the result to the screen.
The next line of Liquid introduces something new: {{ product.price | money_with_currency }} Here we have an example of a Liquid Filter. They allow you to process a given string or variable. Filters take the value to the left of themselves and do something with it. This particular Filter is called format_as_money ; it takes a number, prepends it with a dollar sign and wraps it with the correct currency symbol.
A simple example:
<span class="money">{{ product.price | money_with_currency }}</span>
could generate the following HTML
<span class="money">$45.00 <span class="caps">USD</span></span>
The last line of Liquid above: {{ product.description | prettyprint | truncate: 200 }} shows how you can chain filters together. Filters act on the value that is to the left of them, even if that value happens to be the result of another filter. So the snippet in question will apply the prettyprint filter to product.description , and then will apply the truncate filter to the results of prettyprint . In this way, you can chain together as many Liquid filters as you need!
What Else Does Liquid Offer?
In terms of Liquid Tags, besides the for tag, there are several others. Th most common ones are:
Comment:
{% comment %} This text will not be rendered {% endcomment %}
If/Else:
    {% if product.description == "" %}
      This product has no description!
    {% else %}
      This product is described!
    {% endif %}
Case:
    {% case template %}
      {% when 'product' %}
        This is a product.liquid
      {% when 'cart' %}
        This is a cart.liquid
    {% endcase %}
Check out the full list of Tags.
Liquid also offers plenty of filters you can use to massage your data. Some common ones are:
Capitalize:
{{ “monday” | capitalize }} #=> Monday
Join:
{{ product.tags | join: ’, ’ }} #=> wooden, deep snow, 2009 season
Date:
Posted on {{ article.created_at | date: “%B %d, ’%y” }} #=> Posted on January 26, ’09
Check out the full list of filters available .
Anatomy of a Shopify Theme
Shopify themes all have a simple directory structure. It consists of an assets, layout, and templates folder. Let’s look at what goes where:
- assets folder : In the assets folder you store all of the files that you want to use with your theme. This includes all stylesheets, scripts, images, audio files, etc. that you will be using. In your templates you can access these files with the
asset_urlFilter.{{ "logo.gif" | asset_url | img_tag: "Main Logo" }} #=> <img src="/files/shops/random_number/assets/logo.gif" alt="Main Logo" /> - layout folder : This folder should contain just one file called theme.liquid. The theme.liquid holds the global elements for your Shopify theme. This code will be wrapped around all of the other templates in your shop. Here is an example of a very basic theme.liquid:
  <!DOCTYPE html PUBLIC "-//W3C//DTD XHTML 1.0 Transitional//EN"
    "http://www.w3.org/TR/xhtml1/DTD/xhtml1-transitional.dtd">

  <html xmlns="http://www.w3.org/1999/xhtml" xml:lang="en" lang="en">
    <head>
      <title>{{shop.name}}</title>
      {{ 'layout.css' | asset_url | stylesheet_tag }}

      {{ content_for_header }}
    </head>

    <body>
      <div id="header">
        <h1 id="logo"><a href="/">{{ shop.name }}</a></h1>
      </div>

      <div id="content">
        {{ content_for_layout }}
      </div>

      <div id="footer">
        All prices are in {{ shop.currency }} |
        Powered by <a href="http://www.shopify.com" title="Shopify, Hosted E-Commerce">Shopify</a>
      </div>
    </body>
  </html>
Required Elements
There are two VERY important elements that must be present in a theme.liquid file. The first is
{{ content_for_header }}. This variable must be placed in the head of your theme.liquid. It allows Shopify to insert any necessary code in the document head, such as a script for statistics tracking. For thsoe familiar with WordPress, this is quite similar to the wp_head() function.The other VERY important element is
{{ content_for_layout }}. This variable must be placed in the body of your theme.liquid; it’s the place where all of your other Liquid templates will be rendered. - templates folder : This folder holds the rest of your Shopify templates. It consists of:
- index.liquid: Displayed as the main index page of your shop.
- product.liquid: Each product will use this template to display itself.
- cart.liquid: Displays the current user’s shopping cart.
- collection.liquid: Displayed for collections of products.
- page.liquid: Displayed for any static pages that the shop may have created.
- blog.liquid: Displayed for any Shopify blogs for the shop.
- article.liquid: Displayed for any blog articles and includes a form for submitting comments.
- 404.liquid: Displayed for anytime the shop returns a 404.
- search.liquid: Displayed for shop search results.
As you might have guessed, each of these templates has access to different variables. For example, product.liquid has access to a product variable which contains the current product being displayed, blog.liquid has access to a blog variable, and index.liquid has access to all of them. If you’re interested in which variables you can use in which template, please review the Liquid documentation .
A Basic Skeleton to Get Started
The best thing about designing for Shopify is that you get to use all of the skills that you already have: HTML , CSS , JS, etc. The only roadblock in the process is becoming familiar with which Liquid variables are available in each template.
This is where Vision comes in.
Vision – Shopify in a Box
What is Vision?
Vision is a stand-alone application that allows you to create themes for Shopify stores on your local machine without having to sign up for a shop or setup a database or all that other geeky stuff.
What do I need to run Vision?
Vision comes complete with everything needed to run straight out of the box. If you’ve got a text editor and a web browser installed, you are ready to roll.
As if that wasn’t enough, Vision comes pre-loaded with Shopify’s ready-made themes. Shopify has allowed people to use these themes as building blocks, so you can start with one of these existing themes as a base and expand upon on it!
Summary
Shopify is a fast growing e-commerce platform already with thousands of sellers looking to show off their products. Using Vision , you can hit the ground running and begin developing in no time. The first ten templates posted to Themeforest’s Shopify category get an extra $100 . So get started!
If you need more information about designing with Shopify, they have extensive documentation on their wiki . Check out The Shopify Theme Guide , Using Liquid , and Getting Started with Vision .
The Best Shopify Templates from ThemeForest….So Far!
-
Drifter
“This sleek Shopify theme features clean lines and modern design accents that showcase your products. Custom jQuery lightboxes allow your products to be viewed in full detail.”
-
Fancy Pink
“A shopify theme with modern, fancy web 2.0 design.”
- Subscribe to the NETTUTS RSS Feed for more daily web development tuts and articles.
关联:
来源: http://net.tutsplus.com/tutorials/other/let%E2%80%99s-design-a-shopify-theme/


