- [ vulhub漏洞复现篇 ] solr 远程命令执行 (CVE-2017-12629-RCE)
_PowerShell
[靶场实战]vulhubvulhub漏洞复现ApacheSolr远程命令执行CVE-2017-12629渗透测试
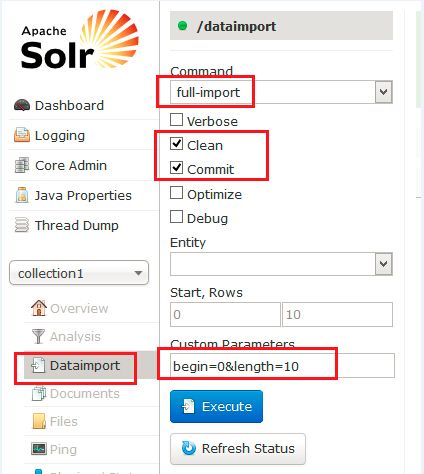
博主介绍博主介绍:大家好,我是_PowerShell,很高兴认识大家~✨主攻领域:【渗透领域】【数据通信】【通讯安全】【web安全】【面试分析】点赞➕评论➕收藏==养成习惯(一键三连)欢迎关注一起学习一起讨论⭐️一起进步文末有彩蛋作者水平有限,欢迎各位大佬指点,相互学习进步!文章目录博主介绍一、漏洞编号二、影响范围三、漏洞描述四、环境搭建1、进入CVE-2017-12629-RCE环境2、启动C
- Elasticsearch 相关面试题
一切顺势而行
elasticsearch
1.Elasticsearch基础Elasticsearch是什么?Elasticsearch是一个分布式搜索引擎,基于Lucene实现。Mapping是什么?ES中有哪些数据类型?Mapping:定义字段的类型和属性。数据类型:text、keyword、integer、float等。2.什么是全文检索?全文检索是一种基于文本内容的检索方式。3.ES支持哪些类型的查询?全文查询:match、que
- lucene java 庖丁解牛_Lucene整合"庖丁解牛"中文分詞 ----入門 2
rubyxr109
lucenejava庖丁解牛
packagecn.luanmad.lucene;importnet.paoding.analysis.analyzer.PaodingAnalyzer;importorg.apache.lucene.analysis.Analyzer;importorg.apache.lucene.analysis.Token;importorg.apache.lucene.analysis.TokenStre
- ELK技术栈:从入门到实践指南
点点喜欢
elk
一、ELK简介ELK是Elasticsearch、Logstash、Kibana三大开源工具的首字母缩写,现扩展为ElasticStack,新增轻量级数据采集器Beats。其核心价值在于提供一套完整的日志管理、搜索分析和可视化解决方案,广泛应用于实时数据处理、业务监控、安全分析等领域。二、核心组件详解Elasticsearch定位:分布式搜索与分析引擎,基于ApacheLucene构建。特性:实时
- ElasticSearch+Kibana通过Docker部署到Linux服务器中
易安杰
elasticsearch搜索引擎linux全文检索中文分词
1、ElasticSearch概念Elasticsearch是一个基于Lucene构建的开源搜索引擎,它提供了一个分布式、RESTful风格的搜索和数据分析引擎。Elasticsearch能够对大量数据进行快速全文搜索,并且具有非常好的水平扩展能力,这意味着当你需要处理更多数据时,可以通过增加更多的服务器来提升性能。文档和字段:elasticsearch是面向文档(Document)存储的,可以是
- Lucene总体架构
weixin_34332905
java
Lucene总的来说是:•一个高效的,可扩展的,全文检索库。•全部用Java实现,无须配置。•仅支持纯文本文件的索引(Indexing)和搜索(Search)。•不负责由其他格式的文件抽取纯文本文件,或从网络中抓取文件的过程。在Luceneinaction中,Lucene的构架和过程如下图说明Lucene是有索引和搜索的两个过程,包含索引创建,索引,搜索三个要点。让我们更细一些看Lucene的各组
- Lucene 架构
lyfmoheng
Lucenelucene文档search语言query磁盘
索引过程如下:创建一个IndexWriter用来写索引文件,它有几个参数,INDEX_DIR就是索引文件所存放的位置,Analyzer便是用来对文档进行词法分析和语言处理的。创建一个Document代表我们要索引的文档。将不同的Field加入到文档中。我们知道,一篇文档有多种信息,如题目,作者,修改时间,内容等。不同类型的信息用不同的Field来表示,在本例子中,一共有两类信息进行了索引,一个是文
- Elasticsearch详解
久梦歌行
elasticsearchjenkins大数据
Elasticsearch是什么Elasticsearch是使用Lucene为基础建立的开源可用全文搜索引擎,它可以快速地储存、搜索和分析海量数据Elasticsearch的特点和传统的关系数据库对比关系型数据库查询性能,数据量超过百万级千万级之后下降厉害,本质是索引的算法效率不行,B+树算法不如倒排索引算法高效。关系型数据库索引最左原则限制,查询条件字段不能任意组合,否则索引失效,相反Elast
- 在linux环境下启动es,linux上Elasticsearch 安装配置、网页访问
guo桀
在linux环境下启动es
一、ElasticSearch简述ElasticSearch是一个基于Lucene的搜索服务器。它提供了一个分布式多用户能力的全文搜索引擎,基于RESTfulweb接口。Elasticsearch是用Java开发的,并作为Apache许可条款下的开放源码发布,是当前流行的企业级搜索引擎。设计用于云计算中,能够达到实时搜索,稳定,可靠,快速,安装使用方便。我们建立一个网站或应用程序,并要添加搜索功能
- ELK架构基础
skyQAQLinux
linuxelk
ELK知识点一、Elasticsearch(一)基本概念分布式搜索引擎基于Lucene的分布式、RESTful风格的搜索和分析引擎,能快速存储、搜索和分析海量数据。索引(Index)类似于传统数据库中的数据库,是文档的集合。一个Elasticsearch集群可包含多个索引。类型(Type)在Elasticsearch6.x之前,一个索引可包含多个类型,类似数据库中的表。从7.x开始,类型被废弃,一
- 快速Elasticsearch向量评分插件安装与使用指南
缪阔孝Ruler
快速Elasticsearch向量评分插件安装与使用指南fast-elasticsearch-vector-scoringScoredocumentsusingembedding-vectorsdot-productorcosine-similaritywithESLuceneengine项目地址:https://gitcode.com/gh_mirrors/fa/fast-elasticsear
- 全文搜索引擎 Elasticsearch 入门教程
u010142437
elasticsearch大数据搜索引擎
全文搜索属于最常见的需求,开源的Elasticsearch(以下简称Elastic)是目前全文搜索引擎的首选。它可以快速地储存、搜索和分析海量数据。维基百科、StackOverflow、Github都采用它。Elastic的底层是开源库Lucene。但是,你没法直接用Lucene,必须自己写代码去调用它的接口。Elastic是Lucene的封装,提供了RESTAPI的操作接口,开箱即用。本文从零开
- Lucene搜索引擎原理与代码实例讲解
杭州大厂Java程序媛
计算机软件编程原理与应用实践javapythonjavascriptkotlingolang架构人工智能
Lucene搜索引擎原理与代码实例讲解关键词:搜索引擎,全文检索,倒排索引,查询优化,索引构建,分词,评分器1.背景介绍1.1问题由来在信息爆炸的互联网时代,如何高效地管理和搜索信息成为了一个严峻的挑战。传统的数据库系统尽管可以处理结构化数据,但在处理非结构化的文本信息时,效率和效果均不尽人意。搜索引擎作为帮助用户快速获取所需信息的重要工具,成为了当下解决信息管理问题的重要手段。Lucene是一个
- ElasticSearch优化
心勤则明
elasticsearchjenkins大数据
内存设置1.不要超过物理内存的50%Elasticsearch和Lucene依赖于操作系统的文件系统缓存来加速数据读取。因此,留出足够的内存用于操作系统的文件系统缓存是非常重要的。2.堆内存大小不要超过32GBJVM的指针压缩机制在堆内存不超过32GB时有效,可以节省内存和提高性能。3.Xms和Xmx设置相同设置初始堆内存(Xms)和最大堆内存(Xmx)为相同的值,确保堆内存大小固定,这样可以减少
- ElasticSearch性能优化
杰锋
数据库与缓存开源框架项目检索搜索Elasticsearch性能优化
硬件选择Elasticsearch的基础是Lucene,所有的索引和文档数据是存储在本地的磁盘中,具体的路径可在ES的配置文件../config/elasticsearch.yml中配置。磁盘在现代服务器上通常都是瓶颈。Elasticsearch重度使用磁盘,你的磁盘能处理的吞吐量越大,你的节点就越稳定。1、使用SSD。就像其他地方提过的,他们比机械磁盘优秀多了。2、使用RAID0。条带化RAID
- Elasticsearch基于Lucene的Java开发的分布式搜索和分析引擎
古龙飞扬
elasticsearchlucenejava
Elasticsearch是一个基于Lucene的Java开发的分布式搜索和分析引擎,它能够处理海量数据,提供高性能和可伸缩性,并且能够快速地搜索和聚合数据。以下是对Elasticsearch的深度理解:一、Elasticsearch的核心概念索引(Index):Elasticsearch存储数据的地方,可以理解为MySQL数据库中的database的概念。索引是映射类型的容器,它是一个非常大的文
- Elasticsearch集群架构:构建高效、可扩展的搜索平台
detayun
Elasticsearchelasticsearch架构大数据
在当今大数据和云计算的时代,高效、实时的数据检索能力成为了企业核心竞争力的重要组成部分。Elasticsearch,作为一款基于Lucene构建的开源搜索引擎,以其强大的全文搜索能力、灵活的扩展性和丰富的功能特性,成为了众多企业首选的数据搜索和分析平台。本文将深入探讨Elasticsearch集群的架构设计,帮助您更好地理解和构建高效、可扩展的搜索解决方案。一、Elasticsearch简介Ela
- solr 的admin.html 详细使用讲解
qq_37300675
solr
爱雨轩真正的爱情,就像花朵,开放的地方越贫瘠,越是美丽动人!目录视图摘要视图订阅征文|从高考,到程序员深度学习与TensorFlow入门一课搞定!每周荐书|Web扫描、HTML5、Python(评论送书)solr管理界面详解标签:solrsolr管理界面solrqueryanalysis2016-08-0210:425117人阅读评论(0)收藏举报本文章已收录于:分类:Solr(8)作者同类文章X
- 面试之Solr&Elasticsearch
字节全栈_vBr
面试solrelasticsearch
优点:1.Elasticsearch是分布式的。不需要其他组件,分发是实时的,被叫做”Pushreplication”。2.Elasticsearch完全支持ApacheLucene的接近实时的搜索。3.处理多租户(multitenancy)不需要特殊配置,而Solr则需要更多的高级设置。4.Elasticsearch采用Gateway的概念,使得完备份更加简单。5.各节点组成对等的网络结构,某些
- elasticsearch文档 Compound queries
songtaiwu
elasticsearch大数据搜索引擎
Booleanquery|ElasticsearchGuide[8.15]|ElasticBooleanquery布尔查询是用于匹配出和组合中的其他查询匹配的文档。bool查询映射到LuceneBooleanQuery。它由一个或更多的布尔子句组成,每个子句是一个类型化的事件。事件如下:must子句(查询)必须出现在匹配的文档中,并将有助于得分。filter子句(查询)必须出现在匹配的文档中。但和
- Hibenate错误汇总:java.lang.NoClassDefFoundError:
时间能证明一切
hibernate异常
有部分出自:http://www.reader8.cn/jiaocheng/20130911/2209649.html和http://blog.csdn.net/zmzsoftware/article/details/6835604。一、java.lang.NoClassDefFoundError:org.apache.lucene.index.CorruptIndexException因为缺少l
- lucene 查询是如何把倒排索引、BKD树 、fdt 的数据合并起来的
学会了没
lucene全文检索搜索引擎
在ApacheLucene中,查询过程涉及多个步骤和数据结构,包括倒排索引、BKD树(用于数值范围查询和地理空间查询)以及.fdt文件(存储文档的字段值)。下面是一个详细的解释,描述了Lucene如何在查询过程中将这些数据结构的结果合并起来。1.倒排索引倒排索引是Lucene的核心数据结构,用于快速查找包含特定词项(term)的文档。它的结构类似于一个词典,每个词项映射到一个包含该词项的文档列表。
- Lucene常用的字段类型&lucene检索打分原理
学会了没
全文检索lucene打分字段
在ApacheLucene中,Field类是文档中存储数据的基础。不同类型的Field用于存储不同类型的数据(如文本、数字、二进制数据等)。以下是一些常用的Field类型及其底层存储结构:TextField:用途:用于存储文本数据,并对其进行分词和索引。底层存储结构:文本数据会被分词器(Analyzer)处理,将文本分割成词项(terms)。每个词项会被存储在倒排索引(invertedindex)
- IndexSearcher
nickname_oo
搜索luceneIndexSearcher
一、关于lucene的IndexSearcher单市里,对于索引的实时搜索Lucene版本:3.0一般情况下,lucene的IndexSearcher都要写成单实例,因为每次创建IndexSearcher对象的时候,它都需要把索引文件加载进来,如果访问量比较大,而索引也比较大,那就很容易造成内存溢出!但是如果仅仅按照一般的单实例来写的话,如果更新了索引,那么在不重启服务的情况下,Searcher对
- 检索工具—IndexSearcher 类
千里兵峰
lucene2.4luceneApache应用服务器浏览器工作
IndexSearcher类继承自Searcher基类,是Lucene中最重要的一个检索用类。IndexSearcher类时最重要的就是要告诉它索引存放的路径,只有这样,检索工具才可以定位索引,从而完成查找的任务。以下是IndexSearcher的所有构造函数:publicIndexSearcher(Stringpath)throwsIOException{this(IndexReader.ope
- 基于centos6.5安装ElasticSearch
小码农叔叔
ElasticSearchlinux与容器实战ElasticSearchES安装
前面我们讲述了solr的安装搭建过程,今天讲讲ElasticSearch,ElasticSearch是另一款作为分词和搜索的服务器,相比solr,ElasticSearch在做大数据方面更有优势,因为其天然支持分布式,而且其强大的分词技术使得其在众多需要处理大数据量的业务中低位逐渐拔高,像大数据中做日志的提取和分析,使用ElasticSearch很适合,实际工作中,ElasticSearch主要是
- ELK日志分析系统
AWAKE-HU
服务器elk日志分布式
什么是ELK:Elasticsearch:基于lucene的开源分布式搜索服务器(类似于solr)特点:分布式,零配置,分片索引,restful风格,多数据源logStash收集日志,过滤分析,并存储Kibana用于展示日志和分析结果ELK原理多个服务器的情况下,各个服务器都会产生不同服务器下不同路径的log文件如果每一台服务器都有一个filebeat把路径下的日志传输给统一的logstash日志
- 网络爬虫相关软件以及论文检索与推荐网站调研
Q7318
网络爬虫网络爬虫搜索引擎
最近接到一个项目,需要做一个基于网络爬虫技术的论文检索与推荐的网站,所以打算先对市面上已有的基于此技术的软件进行一次统计和分析,以备后面查询使用。一.网络爬虫相关软件1.搜索引擎NutchNutch是一个开源Java实现的搜索引擎。它提供了我们运行自己的搜索引擎所需的全部工具。包括全文搜索和Web爬虫。Nutch的创始人是DougCutting,他同时也是Lucene、Hadoop和Avro开源项
- Elasticsearch的经典面试题及详细解答
codeBrute
elasticsearch大数据搜索引擎
以下是一些Elasticsearch的经典面试题及详细解答:一、基础概念与原理什么是Elasticsearch?回答:Elasticsearch是一个基于Lucene的分布式搜索引擎,提供了RESTfulAPI,支持多租户能力。它能够快速、近实时地存储、搜索和分析海量数据,每个字段都被索引并可被搜索。Elasticsearch广泛用于全文搜索、日志分析、实时监控等领域。解释Elasticsearc
- ElasticSearch技术解析与实战读书笔记
zhangyankun_csdn
搜索引擎elasticsearch
第一章Elasticsearch入门1.1Elasticsearch是什么1.2全文搜索Lucene倒排索引1.3基础知识1.3.1Elasticsearch术语及概念索引词term:能够被索引的精确值,索引词可以通过term查询进行准确搜索文本text:一段普通的非结构化文字,通常文本会被分析成一个个的索引词分析analysis:将文本转换为索引词的过程,依赖于分词器集群cluster:一个或多
- 面向对象面向过程
3213213333332132
java
面向对象:把要完成的一件事,通过对象间的协作实现。
面向过程:把要完成的一件事,通过循序依次调用各个模块实现。
我把大象装进冰箱这件事为例,用面向对象和面向过程实现,都是用java代码完成。
1、面向对象
package bigDemo.ObjectOriented;
/**
* 大象类
*
* @Description
* @author FuJian
- Java Hotspot: Remove the Permanent Generation
bookjovi
HotSpot
openjdk上关于hotspot将移除永久带的描述非常详细,http://openjdk.java.net/jeps/122
JEP 122: Remove the Permanent Generation
Author Jon Masamitsu
Organization Oracle
Created 2010/8/15
Updated 2011/
- 正则表达式向前查找向后查找,环绕或零宽断言
dcj3sjt126com
正则表达式
向前查找和向后查找
1. 向前查找:根据要匹配的字符序列后面存在一个特定的字符序列(肯定式向前查找)或不存在一个特定的序列(否定式向前查找)来决定是否匹配。.NET将向前查找称之为零宽度向前查找断言。
对于向前查找,出现在指定项之后的字符序列不会被正则表达式引擎返回。
2. 向后查找:一个要匹配的字符序列前面有或者没有指定的
- BaseDao
171815164
seda
import java.sql.Connection;
import java.sql.DriverManager;
import java.sql.SQLException;
import java.sql.PreparedStatement;
import java.sql.ResultSet;
public class BaseDao {
public Conn
- Ant标签详解--Java命令
g21121
Java命令
这一篇主要介绍与java相关标签的使用 终于开始重头戏了,Java部分是我们关注的重点也是项目中用处最多的部分。
1
- [简单]代码片段_电梯数字排列
53873039oycg
代码
今天看电梯数字排列是9 18 26这样呈倒N排列的,写了个类似的打印例子,如下:
import java.util.Arrays;
public class 电梯数字排列_S3_Test {
public static void main(S
- Hessian原理
云端月影
hessian原理
Hessian 原理分析
一. 远程通讯协议的基本原理
网络通信需要做的就是将流从一台计算机传输到另外一台计算机,基于传输协议和网络 IO 来实现,其中传输协议比较出名的有 http 、 tcp 、 udp 等等, http 、 tcp 、 udp 都是在基于 Socket 概念上为某类应用场景而扩展出的传输协
- 区分Activity的四种加载模式----以及Intent的setFlags
aijuans
android
在多Activity开发中,有可能是自己应用之间的Activity跳转,或者夹带其他应用的可复用Activity。可能会希望跳转到原来某个Activity实例,而不是产生大量重复的Activity。
这需要为Activity配置特定的加载模式,而不是使用默认的加载模式。 加载模式分类及在哪里配置
Activity有四种加载模式:
standard
singleTop
- hibernate几个核心API及其查询分析
antonyup_2006
html.netHibernatexml配置管理
(一) org.hibernate.cfg.Configuration类
读取配置文件并创建唯一的SessionFactory对象.(一般,程序初始化hibernate时创建.)
Configuration co
- PL/SQL的流程控制
百合不是茶
oraclePL/SQL编程循环控制
PL/SQL也是一门高级语言,所以流程控制是必须要有的,oracle数据库的pl/sql比sqlserver数据库要难,很多pl/sql中有的sqlserver里面没有
流程控制;
分支语句 if 条件 then 结果 else 结果 end if ;
条件语句 case when 条件 then 结果;
循环语句 loop
- 强大的Mockito测试框架
bijian1013
mockito单元测试
一.自动生成Mock类 在需要Mock的属性上标记@Mock注解,然后@RunWith中配置Mockito的TestRunner或者在setUp()方法中显示调用MockitoAnnotations.initMocks(this);生成Mock类即可。二.自动注入Mock类到被测试类 &nbs
- 精通Oracle10编程SQL(11)开发子程序
bijian1013
oracle数据库plsql
/*
*开发子程序
*/
--子程序目是指被命名的PL/SQL块,这种块可以带有参数,可以在不同应用程序中多次调用
--PL/SQL有两种类型的子程序:过程和函数
--开发过程
--建立过程:不带任何参数
CREATE OR REPLACE PROCEDURE out_time
IS
BEGIN
DBMS_OUTPUT.put_line(systimestamp);
E
- 【EhCache一】EhCache版Hello World
bit1129
Hello world
本篇是EhCache系列的第一篇,总体介绍使用EhCache缓存进行CRUD的API的基本使用,更细节的内容包括EhCache源代码和设计、实现原理在接下来的文章中进行介绍
环境准备
1.新建Maven项目
2.添加EhCache的Maven依赖
<dependency>
<groupId>ne
- 学习EJB3基础知识笔记
白糖_
beanHibernatejbosswebserviceejb
最近项目进入系统测试阶段,全赖袁大虾领导有力,保持一周零bug记录,这也让自己腾出不少时间补充知识。花了两天时间把“传智播客EJB3.0”看完了,EJB基本的知识也有些了解,在这记录下EJB的部分知识,以供自己以后复习使用。
EJB是sun的服务器端组件模型,最大的用处是部署分布式应用程序。EJB (Enterprise JavaBean)是J2EE的一部分,定义了一个用于开发基
- angular.bootstrap
boyitech
AngularJSAngularJS APIangular中文api
angular.bootstrap
描述:
手动初始化angular。
这个函数会自动检测创建的module有没有被加载多次,如果有则会在浏览器的控制台打出警告日志,并且不会再次加载。这样可以避免在程序运行过程中许多奇怪的问题发生。
使用方法: angular .
- java-谷歌面试题-给定一个固定长度的数组,将递增整数序列写入这个数组。当写到数组尾部时,返回数组开始重新写,并覆盖先前写过的数
bylijinnan
java
public class SearchInShiftedArray {
/**
* 题目:给定一个固定长度的数组,将递增整数序列写入这个数组。当写到数组尾部时,返回数组开始重新写,并覆盖先前写过的数。
* 请在这个特殊数组中找出给定的整数。
* 解答:
* 其实就是“旋转数组”。旋转数组的最小元素见http://bylijinnan.iteye.com/bl
- 天使还是魔鬼?都是我们制造
ducklsl
生活教育情感
----------------------------剧透请原谅,有兴趣的朋友可以自己看看电影,互相讨论哦!!!
从厦门回来的动车上,无意中瞟到了书中推荐的几部关于儿童的电影。当然,这几部电影可能会另大家失望,并不是类似小鬼当家的电影,而是关于“坏小孩”的电影!
自己挑了两部先看了看,但是发现看完之后,心里久久不能平
- [机器智能与生物]研究生物智能的问题
comsci
生物
我想,人的神经网络和苍蝇的神经网络,并没有本质的区别...就是大规模拓扑系统和中小规模拓扑分析的区别....
但是,如果去研究活体人类的神经网络和脑系统,可能会受到一些法律和道德方面的限制,而且研究结果也不一定可靠,那么希望从事生物神经网络研究的朋友,不如把
- 获取Android Device的信息
dai_lm
android
String phoneInfo = "PRODUCT: " + android.os.Build.PRODUCT;
phoneInfo += ", CPU_ABI: " + android.os.Build.CPU_ABI;
phoneInfo += ", TAGS: " + android.os.Build.TAGS;
ph
- 最佳字符串匹配算法(Damerau-Levenshtein距离算法)的Java实现
datamachine
java算法字符串匹配
原文:http://www.javacodegeeks.com/2013/11/java-implementation-of-optimal-string-alignment.html------------------------------------------------------------------------------------------------------------
- 小学5年级英语单词背诵第一课
dcj3sjt126com
englishword
long 长的
show 给...看,出示
mouth 口,嘴
write 写
use 用,使用
take 拿,带来
hand 手
clever 聪明的
often 经常
wash 洗
slow 慢的
house 房子
water 水
clean 清洁的
supper 晚餐
out 在外
face 脸,
- macvim的使用实战
dcj3sjt126com
macvim
macvim用的是mac里面的vim, 只不过是一个GUI的APP, 相当于一个壳
1. 下载macvim
https://code.google.com/p/macvim/
2. 了解macvim
:h vim的使用帮助信息
:h macvim
- java二分法查找
蕃薯耀
java二分法查找二分法java二分法
java二分法查找
>>>>>>>>>>>>>>>>>>>>>>>>>>>>>>>>>>>>>>
蕃薯耀 2015年6月23日 11:40:03 星期二
http:/
- Spring Cache注解+Memcached
hanqunfeng
springmemcached
Spring3.1 Cache注解
依赖jar包:
<!-- simple-spring-memcached -->
<dependency>
<groupId>com.google.code.simple-spring-memcached</groupId>
<artifactId>simple-s
- apache commons io包快速入门
jackyrong
apache commons
原文参考
http://www.javacodegeeks.com/2014/10/apache-commons-io-tutorial.html
Apache Commons IO 包绝对是好东西,地址在http://commons.apache.org/proper/commons-io/,下面用例子分别介绍:
1) 工具类
2
- 如何学习编程
lampcy
java编程C++c
首先,我想说一下学习思想.学编程其实跟网络游戏有着类似的效果.开始的时候,你会对那些代码,函数等产生很大的兴趣,尤其是刚接触编程的人,刚学习第一种语言的人.可是,当你一步步深入的时候,你会发现你没有了以前那种斗志.就好象你在玩韩国泡菜网游似的,玩到一定程度,每天就是练级练级,完全是一个想冲到高级别的意志力在支持着你.而学编程就更难了,学了两个月后,总是觉得你好象全都学会了,却又什么都做不了,又没有
- 架构师之spring-----spring3.0新特性的bean加载控制@DependsOn和@Lazy
nannan408
Spring3
1.前言。
如题。
2.描述。
@DependsOn用于强制初始化其他Bean。可以修饰Bean类或方法,使用该Annotation时可以指定一个字符串数组作为参数,每个数组元素对应于一个强制初始化的Bean。
@DependsOn({"steelAxe","abc"})
@Comp
- Spring4+quartz2的配置和代码方式调度
Everyday都不同
代码配置spring4quartz2.x定时任务
前言:这些天简直被quartz虐哭。。因为quartz 2.x版本相比quartz1.x版本的API改动太多,所以,只好自己去查阅底层API……
quartz定时任务必须搞清楚几个概念:
JobDetail——处理类
Trigger——触发器,指定触发时间,必须要有JobDetail属性,即触发对象
Scheduler——调度器,组织处理类和触发器,配置方式一般只需指定触发
- Hibernate入门
tntxia
Hibernate
前言
使用面向对象的语言和关系型的数据库,开发起来很繁琐,费时。由于现在流行的数据库都不面向对象。Hibernate 是一个Java的ORM(Object/Relational Mapping)解决方案。
Hibernte不仅关心把Java对象对应到数据库的表中,而且提供了请求和检索的方法。简化了手工进行JDBC操作的流程。
如
- Math类
xiaoxing598
Math
一、Java中的数字(Math)类是final类,不可继承。
1、常数 PI:double圆周率 E:double自然对数
2、截取(注意方法的返回类型) double ceil(double d) 返回不小于d的最小整数 double floor(double d) 返回不大于d的整最大数 int round(float f) 返回四舍五入后的整数 long round
