CentOS6.5使用yum快速搭建LAMP环境
由于这里采用yum方式安装,前提是我们必须配置好yum源。为了加快下载速度,建议使用网易的yum源。参考:CentOS配置网易163yum源 http://skypegnu1.blog.51cto.com/8991766/1424904
这种方式对于初学者来说,非常方便,但是可定制性不强,而且软件版本较低。一般用于实验和学习环境。
1、安装Apache
|
1
2
3
4
5
6
7
8
|
[root@localhost ~]
# yum -y install httpd
# 开机自启动
[root@localhost ~]
# chkconfig httpd on
# 启动httpd 服务
[root@localhost ~]
# service httpd start
### 安装apache 一些扩展
root@localhost ~]
# yum -y install httpd-manual mod_ssl mod_perl mod_auth_mysql
|
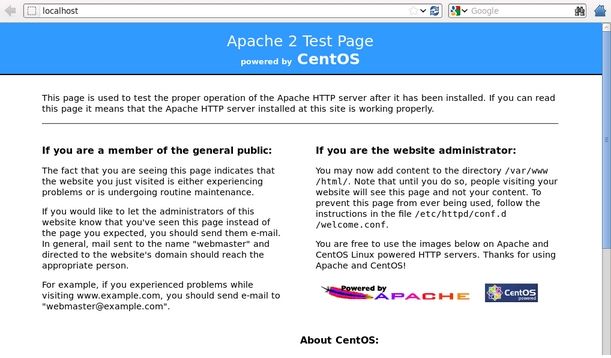
现在直接在浏览器键入http://localhost 或 http://本机IP ,应该会看到Apache的测试页面
这里需要注意iptables的设置哦。
2、安装配置MySQL
|
1
2
3
4
5
6
7
8
9
10
11
12
13
14
|
# mysql 客户端程序
# mysql-server 服务端程序
# mysql-devel 开发设计的库
[root@localhost ~]
# yum -y install mysql mysql-server mysql-devel
# 开机启动
[root@localhost ~]
# chkconfig mysqld on
# 启动mysqld服务
[root@localhost ~]
# service mysqld start
# 进行一些安全性配置
[root@localhost ~]
# /usr/bin/mysql_secure_installation
[root@localhost ~]
# netstat -tulpn | grep -i mysql
tcp 0 0 0.0.0.0:3306 0.0.0.0:* LISTEN 1723
/mysqld
|
OK, 我们看到mysqld已经启动,监听在3306端口上。
3、安装php
安装相关模块:为了让PHP支持MySQL,我们可以安装php-mysql软件包;也可使用以下命令搜索可用的php模块
|
1
2
3
4
5
6
7
|
[root@localhost ~]
# yum -y install php php-mysql
# 安装php常用扩展
[root@localhost ~]
# yum search php
[root@localhost ~]
# yum -y install gd php-gd gd-devel php-xml php-common php-mbstring php-ldap php-pear php-xmlrpc php-imap
### 重启httpd服务,这一步很重要
[root@localhost ~]
# service httpd restart
|
然后,我们提供php页面,测试
|
1
2
3
4
5
|
[root@localhost ~]
# cd /var/www/html/
[root@localhost html]
# vi index.php
<?php
phpinfo();
?>
|
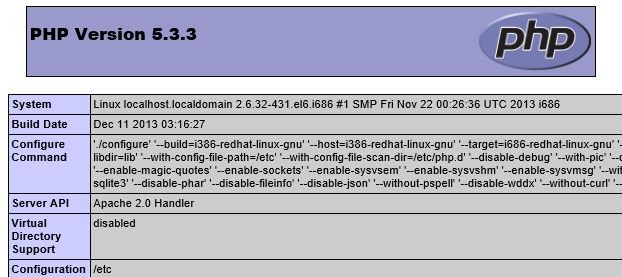
然后,我们再次在浏览器键入http://localhost 或 http://本机IP ,应该会看到如下页面
4、安装配置phpMyAdmin
安装好MySQL,Apache及PHP后,为了可视化的管理MySQL数据库,我们可以安装phpMyAdmin。到其官网下载最新版本:http://www.phpmyadmin.net/home_page/
在windows下,其实Navicat也是一个非常好用的MySQL可视化工具,推荐使用。
官方给出的安装步骤:
Quick Install
Choose an appropriate distribution kit from the phpmyadmin.net Downloads page. Some kits contain only the English messages, others contain all languages. We’ll assume you chose a kit whose name looks like phpMyAdmin-x.x.x -all-languages.tar.gz.
Untar or unzip the distribution (be sure to unzip the subdirectories): tar -xzvf phpMyAdmin_x.x.x-all-languages.tar.gz in your webserver’s document root. If you don’t have direct access to your document root, put the files in a directory on your local machine, and, after step 4, transfer the directory on your web server using, for example, ftp.
Ensure that all the scripts have the appropriate owner (if PHP is running in safe mode, having some scripts with an owner different from the owner of other scripts will be a problem). See 4.2 What’s the preferred way of making phpMyAdmin secure against evil access?and 1.26 I just installed phpMyAdmin in my document root of IIS but I get the error “No input file specified” when trying to run phpMyAdmin. for suggestions.
Now you must configure your installation. There are two methods that can be used. Traditionally, users have hand-edited a copy ofconfig.inc.php, but now a wizard-style setup script is provided for those who prefer a graphical installation. Creating a config.inc.php is still a quick way to get started and needed for some advanced features.
个人安装: yum -y install phpmyadmin
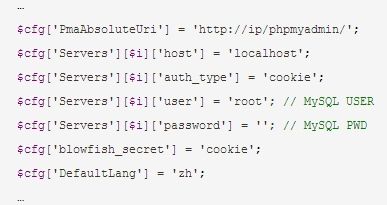
配置config.inc.php
进入/libraries目录,找到 config.default.php文件copy份到上级目录,并命名为config.inc.php ;
打开浏览器,输入http://ip/phpmyadmin/
|
1
2
3
4
5
6
7
8
9
10
11
12
13
14
15
|
[root@localhost ~]
# tar xf phpMyAdmin-4.2.6-all-languages.tar.gz
[root@localhost ~]
# mv phpMyAdmin-4.2.6-all-languages /var/www/html/phpmyadmin
[root@localhost ~]
# cd /var/www/html/phpmyadmin
[root@localhost ~]
# cp libraries/config.default.php config.inc.php
[root@localhost ~]
# vi cnfig.inc.php
$cfg[
'PmaAbsoluteUri'
] =
''
;这里填写 phpMyAdmin 的访问网址。
$cfg[
'Servers'
][$i][
'host'
] =
'localhost'
;
//
MySQL
hostname
or IP address
$cfg[
'Servers'
][$i][
'port'
] =
''
;
//
MySQL port - leave blank
for
default port
$cfg[
'Servers'
][$i][
'user'
] =
'root'
;
//
填写 MySQL 访问 phpMyAdmin 使用的 MySQL 用户名,默认为 root。
fg
[
'Servers'
][$i][
'password'
] =
''
;
//
填写对应上述 MySQL 用户名的密码。
# 然后重启,httpd服务
[root@localhost ~]
# service httpd restart
|
在浏览器键入http://localhost/phpmyadmin 即可访问。
如果遇到访问权限的问题:
phpMyAdmin.conf
Forbidden :You don't have permission to access /phpmyadmin on this server
解决办法:在phpMyAdmin.conf中添加如下的配置(路径和IP值要换成自己的)
<Directory /usr/share/phpMyAdmin/>
   #order deny,allow
   #deny from all
   allow from 192.168.1.54
   allow from 127.0.0.1
   allow from ::1
</Directory>
晕死,竟然报错了。Since phpMyAdmin-4.2.3, it enforces the minimum PHP (5.3) and MySQL (5.5) versions, but RHEL/CentOS 6 ships MySQL-5.1.x 所以,出了问题。
算了, 还是不要下载最新的版本吧,phpMyAdmin-4.1.14.2-all-languages
同上面的操作一样,删除原来的phpmyadmin目录,然后重新按照上述步骤操作一次。OK, 重新访问一次:


