I assume that there is an OpenStack deployment already up and running somewhere. I am going to use OpenStack CLI clients to manage VMs on the existing OpenStack setup.
Install OpenStack CLI Clients
The first step is to install necessary OpenStack command line clients.
On Debian, Ubuntu or Linux Mint:
$ sudo pip install python-novaclient python-keystoneclient python-neutronclient
On CentOS, Fedora or RHEL:
$ sudo pip install python-novaclient python-keystoneclient python-neutronclient
Set Environment Variables
In order to be able to use OpenStack CLI clients, you need to set up necessary environment variables. For this purpose, create a script named openrc.sh as follows.
export OS_USERNAME=dan
export OS_PASSWORD=my_password
export OS_TENANT_NAME=demo
export OS_AUTH_URL=http://192.168.10.10:5000/v2.0
In the above, OS_USERNAME/OS_PASSWORD are OpenStack user name and its password. OS_TENANT_NAME is the name of the project created. OS_AUTH_URL is the URL of the Keystone endpoint. Keystone is an OpenStack service responsible for authentication among different OpenStack components. You should replace 192.168.10.10 with the IP address of the host where OpenStack Keystone is running in your deployment.
Now, set the environment variables by running openrc.sh as follows.
At this point, you are ready to run OpenStack command line clients. Verify that you do not encounter any error when running:
It shows an empty result, it means everything is okay.
Create a Network
Now you are ready to create a network to connect your VMs to.
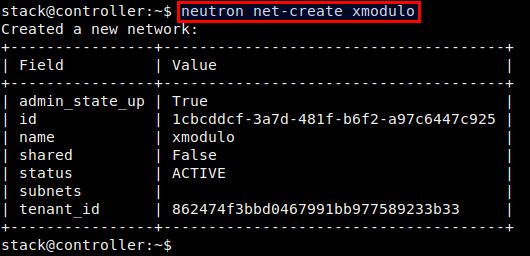
Create a new network named "xmodulo".
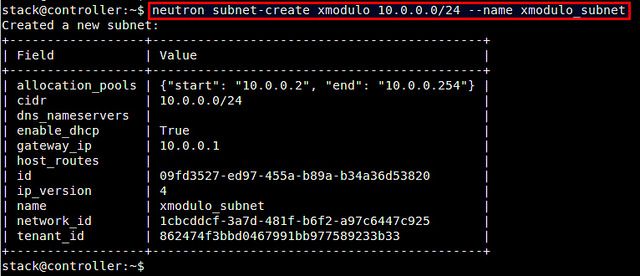
Create a new subnet named "xmodulo_subnet", and add it to the network just created.
Check a list of available networks to verify that the network has been created successfully.
In the output, make a note of the "id" of the network you created. This id will be used when you create a VM later.
Launch a VM
Before creating and launch a VM, you need to know a few pieces of information first.
Find out the type of VM that you want to create. For that, run the following command.
In this example, I am going to choose the smallest VM type "m1.nano", which has 64 MB, 1 vCPU and no disk. Make a note of this type name.
Next, choose the VM image to use for your VM. To get a list of all available VM images, use this command:
Make a note of the ID of the image that you want to use for your VM.
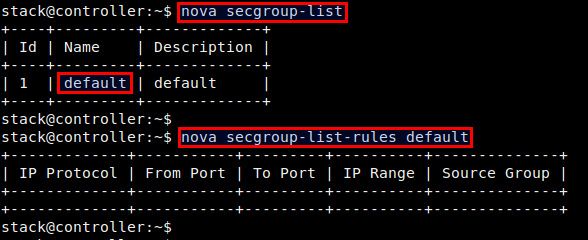
Next, choose the type of security group to use for your VM. A security group determines inbound access rules for your VM. To find out available security groups:
To check the access rules of the "default" security group, use this command:
In this example, I am going to choose a security group named "default" for the VM. This security group happens to have no rule in it.
Finally, let's create a VM using the information obtained thus far. Specify the VM type (--flavor), ID of VM image (--image), ID of a network (net-id=) that you have found out. Replace [vm-name] with the name of your VM, which needs to be unique.
To verify that the VM has been successfully created and launched, run this command:
Stop, Suspend or Purge a VM
When you stop a running VM, it gets shutdown completely. On the other hand, when you suspend a VM, it is temporarily frozen, and can be restarted from the suspende state any time. In both cases, the VM image still remains in OpenStack.
To stop a VM:
To suspend a VM:
If you want to purge the image of either stopped or suspended VM from OpenStack, use the command:


