RHEL5.3下搭建LAMP+Django环境(二)
PHP安装
1、为了让php服务支持网站常用的一些项目,安装php之前需要先安装依赖的软件包,确认yum源可用的情况下执行两条命令安装就可以:yum -y install lib* 和yum -y install freetype* 安装即可!
2、安装gd 2.0:
# tar zxvf gd-2.0.33.tar.tar
# cd gd-2.0.33
# ./configure
# make && make install
3、安装freetds,用于连接mysql数据库:
# tar zxvf freetds-stable0.64.tgz
# cd freetds-0.64
# ./configure --prefix=/usr/local/freetds --enable-msdblib --with-tdsver=8.0 --enable-dbmfix --with-gnu-ld --enable-shared --enable-static
# make && make install
4、安装php:
# tar zxvf php-5.2.5.tar.gz
#cd php-5.2.5
5、编译选项:
# ./configure --prefix=/usr/local/php --with-apxs2=/usr/local/apache/bin/apxs --with-mysql=/usr/local/mysql5/ --with-curl --with-libxml-dir --with-libexpat-dir --enable-soap --with-xsl --with-gd --with-jpeg-dir --with-zlib --with-png-dir --with-freetype-dir --enable-sockets --enable-pcntl --with-mssql=/usr/local/freetds --enable-mbstring
6、编译安装:
# make && make install
7、复制源码包中的配置文件模板:
# cp php.ini-dist /usr/local/php/lib/php.ini
8、修改apache配置文件,增加以下两行:
# sed -i '/AddType application\/x-gzip .gz .tgz/a \
AddType application/x-httpd-php .php\
AddType application/x-httpd-php-source .phps\
' /usr/local/apache/conf/httpd.conf
9、在/usr/local/apache/htdocs目录下建立test.php文件:
# echo –e “<?php phpinfo() ?>” > /usr/local/apache/htdocs/test.php
重启apache服务,在浏览器打开http://ip/test.php,如相关参数正常则php安装成功。

Django安装
1、解压缩软件包:
# tar zxvf Django-1.2.5.tar.gz
# cd Django-1.2.5
2、安装软件:
# python setup.py install
3、验证django是否安装成功:
# python
>>>import django
>>>
加载django模块,如果无错误提示说明安装成功。
4、创建项目例子:
项目名称:Hector
# django-admin.py startproject Hector
之后再当前目录下就会出来一个新的文件夹Hector
里面有4个文件:
__init__.py:会把项目目录变成一个python的 package(相关的python模块的集合),让我们可以用"."来指定项目中的某个部分。例如Hector.urls。
manage.py:是一个同这个Django项目一起工作的工具,可执行。
settings.py:包含了项目的默认设置。包括数据库信息、调试标记以及其他的一些重要变量。
urls.py:在Django里叫URLconf,它是一个将URL模式映射到应用程序上的配置文件。
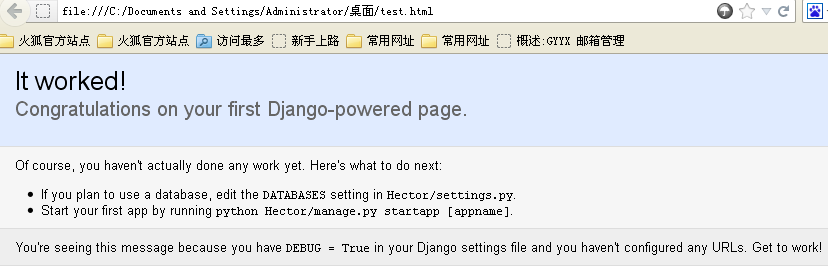
本地测试:
Hector>python manage.py runserver
出现以下信息
Validating models...
0 errors found
Django version 1.2, using settings 'Hector.settings'
Development server is running at http://127.0.0.1:8000/
Quit the server with CTRL-BREAK.
然后在命令行里执行curl http://127.0.0.1:8000/ 就可以看到结果了,结果不是很明显,也可以把显示的内容复制到文本文档中,然后将文本文档的后缀改为.html,在打开效果就很清晰了。
Mod_wsgi安装
为了让Apache支持Django,必须安装mod_wsgi。
1、解压缩软件包:
# tar zxvf mod_wsgi-3.3.tar.gz
# cd mod_wsgi-3.3
2、编译选项,指定apache和python的安装路径
# ./configure --with-apxs=/usr/local/apache/bin/apxs --with-python=/usr/local/bin/python
这个地方我遇到了一个问题,编译时提示找不到/usr/local/bin/python 程序,最后解决方法是which python 搜索python命令的位置,然后cp一份到/usr/local/bin/python
3、编译安装:
# make && make install
4、修改apache配置文件:
# sed -i '/libphp5.so/a LoadModule wsgi_module modules\/mod_wsgi.so' /usr/local/apache/conf/httpd.conf #使apache支持wsgi模块
5、检查安装是否成功:
在apache配置文件中加入以下一段:
WSGIScriptAlias /python "/usr/local/apache/htdocs/test.wsgi" #这条命令的意思是说访问/python 和访问/usr/local/apache/htdocs/test.wsgi 看到的效果是一样的,做了一个转换而已。
<Directory"/usr/local/apache/htdocs">
Order Deny,Allow
Allow from all
</Directory> #设置用户访问目录的权限,全部允许。
在/usr/local/apache/htdocs目录中创建test.wsgi,内容如下:
def application(environ, start_response):
status='200 OK'
output='Hello World!'
response_headers=[('Content-type','text/plain'), ('Content-Length',str(len(output)))]
start_response(status, response_headers)
return[output]
重新启动apache服务
访问http://ip/python,看到“Hello World!”说明安装成功。

搭建完毕,有什么不对的地方,还请大家指出,先谢了。