基于Centos6.2 X64系统下的邮件系统(二)
7、安装病毒扫描与垃圾邮件过滤
Amavisd-new 及 ClamAV 可从RPMForge软件仓库安装
首先,安装amavisd-new、clamav及spamassassin:
[root@mail ~]# yum install amavisd-new clamav clamav-devel clamd spamassassin –y
安装完毕后,三个新的服务应已被加进系统内:
[root@mail ~]# chkconfig --list | grep "amavisd\|clamd\|spamassassin"
amavisd 0:off 1:off 2:on 3:on 4:on 5:on 6:off
clamd 0:off 1:off 2:on 3:on 4:on 5:on 6:off
spamassassin 0:off 1:off 2:off 3:off 4:off 5:off 6:off
spamassassin 这个启动spamd的服务可以被停用,因为Amavisd-new不会应用spamassassin的常驻进程,而是直接载入spamassassin作为一个模块。
设定
事实上SpamAssassin并不须要特别的设定便可配合Amavisd-new,它可即装即用。这并不等于你无法通过/etc/mail/spamassassin/local.cf域该目录内的自订cf档来设定它。
ClamAV的设定存放在/etc/clamd.conf内,我们必须编辑/etc/clamd.conf让ClamAV知道Amavisd-new将会利用本地的UNIX通讯端而不是tcp端口来与它沟通,以及该通讯端在哪里。请如下编辑LocalSocket的设定并备注掉TCPSocket:
### /etc/clamd.conf
#
# 设定 clam 的 LocalSocket
# 它必须与 /etc/amavisd.conf �壬瓒ㄎ呛�
#
LocalSocket /var/run/clamav/clamd.sock
#
# 备注掉 TCPSocket 这个设定:
# TCPSocket 3310
Amavisd-new把它的配置文件放在/etc/amavisd.conf中。
首先,我们可以通过解除以下数行的注释来停止检查病毒域垃圾邮件(由于下面数行是被注释掉的,因此病毒及垃圾邮件在预设中是被启动的):
### /etc/amavisd.conf:
#
# To disable virus or spam checks, uncomment the following:
#
# @bypass_virus_checks_maps = (1); # controls running of anti-virus code
# @bypass_spam_checks_maps = (1); # controls running of anti-spam code
# $bypass_decode_parts = 1; # controls running of decoders & dearchivers
接着,请留意以下数行,纵使它们无须被修改:
$max_servers = 2; # num of pre-forked children (2..30 is common), -m
$daemon_user = "amavis"; # (no default; customary: vscan or amavis), -u
$daemon_group = "amavis"; # (no default; customary: vscan or amavis), -g
$inet_socket_port = 10024; # listen on this local TCP port(s)
# $notify_method = 'smtp:[127.0.0.1]:10025';
# $forward_method = 'smtp:[127.0.0.1]:10025'; # set to undef with milter!
$max_servers 设定同步执行的Amavisd-new进程数量,而且必须与/etc/postfix/master.cf内的amavisfeed服务的maxproc栏相吻合
$daemon_user及$daemon_group应该吻合用来执行Amavisd-new的用户及群组。
$inet_socket_port 定义Amavisd-new将会在哪一个tcp端口接纳来自Postfix的连接。
$notify_method及$forward_method定义Amavisd-new把邮件重新注入Postfix的途径。
以下设定必须被修改(涉及$mydomain和$myhostname时)及解除注释(移除行首的#):
$mydomain = 'example.com';
$MYHOME = '/var/amavis';
$helpers_home = "$MYHOME/var";
$lock_file = "$MYHOME/var/amavisd.lock";
$pid_file = "$MYHOME/var/amavisd.pid";
$myhostname = 'mail.example.com';
接着是一些SpamAssassin设定来置换预设的SpamAssassin设定:
$sa_tag_level_deflt = 2.0; # add spam info headers if at, or above that level
$sa_tag2_level_deflt = 6.2; # add 'spam detected' headers at that level
$sa_kill_level_deflt = 6.9; # triggers spam evasive actions (e.g. blocks mail)
$sa_dsn_cutoff_level = 10; # spam level beyond which a DSN is not sent
# $sa_quarantine_cutoff_level = 25; # spam level beyond which quarantine is off
$penpals_bonus_score = 8; # (no effect without a @storage_sql_dsn database)
$penpals_threshold_high = $sa_kill_level_deflt; # don't waste time on hi spam
$sa_mail_body_size_limit = 400*1024; # don't waste time on SA if mail is larger
$sa_local_tests_only = 0; # only tests which do not require internet access?
你不一定要修改它们,但是你值得知道它们的存在,因为这里是最方便修改垃圾邮件限制的地方。
$sa_tag_level_deflt 指定Amavisd-new由哪一个级别开始写入X-Spam-Flag、X-Spam-Score、X-Spam-Status等垃圾邮件资讯标头,假如你想为所有邮件加入资讯标头,请把此值设为 -999
$sa_tag2_level_deflt 指定由哪一个级别开始在垃圾邮件的标头上标签它们。
$sa_kill_level_deflt 指定Amavisd-new由哪一个级别开始拦截和扣留邮件。这个用途很大,因为SpamAssassin在预设情况下不会这样做。
$sa_dsn_cutoff_level 指定由哪一个级别开始寄件失败通告不会被发送给寄件人。由于多数垃圾邮件寄件者的地址都是伪造的,不为明显的垃圾邮件发送寄件失败通告是最合理的,要不然你只会加剧反向散寄的问题。
$sa_quarantine_cutoff_level 指定哪一个级别开始不必扣留垃圾邮件。这个选项预设是被注释掉的,意思是所有邮件都会被扣留。
接下来是发送通告的邮件地址:
$virus_admin = "virusalert\@$mydomain"; # notifications recip.
$mailfrom_notify_admin = "virusalert\@$mydomain"; # notifications sender
$mailfrom_notify_recip = "virusalert\@$mydomain"; # notifications sender
$mailfrom_notify_spamadmin = "spam.police\@$mydomain"; # notifications sender
你大概会将它们设定为postmaster\@$mydomain或其它你想收到垃圾邮件通告的邮箱。
最后,我们需要为ClamAV的部份解除注释:
### http://www.clamav.net/
['ClamAV-clamd',
\&ask_daemon, ["CONTSCAN {}\n", "/var/run/clamav/clamd.sock"],
qr/\bOK$/m, qr/\bFOUND$/m,
qr/^.*?: (?!Infected Archive)(.*) FOUND$/m ],
请留意/var/run/clamav/clamd.sock这个设定必须与我们先前在/etc/clamd.conf内输入的LocalSocket /var/run/clamav/clamd.sock设定相吻合。
Postfix的相关设定
然后我们需要设定Postfix内的服务(/etc/postfix/master.cf)好让邮件会被传给Amavisd-new进行过滤及再次注入Postfix。
打开/etc/postfix/master.cf加入以下名为amavisfeed的服务:
# ==========================================================================
# service type private unpriv chroot wakeup maxproc command + args
# (yes) (yes) (yes) (never) (100)
# ==========================================================================
#
amavisfeed unix - - n - 2 smtp
-o smtp_data_done_timeout=1200
-o smtp_send_xforward_command=yes
-o smtp_tls_note_starttls_offer=no
-o disable_dns_lookups=yes
-o max_use=20
请留意在maxproc栏内的数值(2)必须要与/etc/amavisd.conf内的$max_servers设定吻合。有关各选项的详细解释请参阅Amavisd-new的文档(/usr/share/doc/amavisd-new-2.6.6/README.postfix.html)。
然后我们定义一个专用的服务把邮件重新注入Postfix。我们为此在/etc/postfix/master.cf内加入一个在localhost(127.0.0.1)的tcp 10025端口(/etc/amavisd.conf的预设值)上监听的smtp服务:
# ==========================================================================
# service type private unpriv chroot wakeup maxproc command + args
# (yes) (yes) (yes) (never) (100)
# ==========================================================================
127.0.0.1:10025 inet n - n - - smtpd
-o content_filter=
-o smtpd_delay_reject=no
-o smtpd_client_restrictions=permit_mynetworks,reject
-o smtpd_helo_restrictions=
-o smtpd_sender_restrictions=
-o smtpd_recipient_restrictions=permit_mynetworks,reject
-o smtpd_data_restrictions=reject_unauth_pipelining
-o smtpd_end_of_data_restrictions=
-o smtpd_restriction_classes=
-o mynetworks=127.0.0.0/8
-o smtpd_error_sleep_time=0
-o smtpd_soft_error_limit=1001
-o smtpd_hard_error_limit=1000
-o smtpd_client_connection_count_limit=0
-o smtpd_client_connection_rate_limit=0
-o receive_override_options=no_header_body_checks,no_unknown_recipient_checks,no_milters,no_address_mappings
-o local_header_rewrite_clients=
-o smtpd_milters=
-o local_recipient_maps=
以上两项首行前面一定不能有空格,否则会出错
最后,在/etc/postfix/main.cf加入以下设定来启用邮件过滤:
content_filter = amavisfeed:[127.0.0.1]:10024
在/etc/postfix/master.cf作出改动后,我们必须重新加载postfix,好让这些改动能生效:
[root@mail ~]# postfix reload
测试
首先,启动clamd及amavisd服务:
[root@mail ~]# /etc/init.d/clamd start
[root@mail ~]# /etc/init.d/amavisd start
现在利用telnet测试amavisd这个服务正在127.0.0.1:10024上监听:
[root@mail ~]# telnet localhost 10024
Trying 127.0.0.1...
Connected to localhost.
Escape character is '^]'.
220 [127.0.0.1] ESMTP amavisd-new service ready
ehlo example.com
250-[127.0.0.1]
250-VRFY
250-PIPELINING
250-SIZE
250-ENHANCEDSTATUSCODES
250-8BITMIME
250-DSN
250 XFORWARD NAME ADDR PORT PROTO HELO SOURCE
接下来测试Postfix的smtpd正在127.0.0.1:10025上监听:
[root@mail ~]# telnet localhost 10025
Trying 127.0.0.1...
Connected to localhost.
Escape character is '^]'.
220 mail.example.com ESMTP Postfix
ehlo example.com
250-mail.example.com
250-PIPELINING
250-SIZE 20480000
250-VRFY
250-ETRN
250-AUTH PLAIN LOGIN CRAM-MD5
250-AUTH=PLAIN LOGIN CRAM-MD5
250-ENHANCEDSTATUSCODES
250-8BITMIME
250 DSN
进行垃圾邮件的测试:
[root@mail ~]# cd /usr/share/doc/spamassassin-3.3.1/
[root@mail spamassassin-3.3.1]# sendmail [email protected] < sample-spam.txt
查看/var/log/maillog的日志:
mail postfix/pickup[1789]: 686E51BE4: uid=0 from=<root>
mail postfix/cleanup[1927]: 686E51BE4: message-id=<[email protected]>
mail postfix/qmgr[1790]: 686E51BE4: from=<[email protected]>, size=935, nrcpt=1 (queue active)
mail amavis[1907]: (01907-01) Blocked SPAM, <[email protected]> -> <[email protected]>, quarantine: spam-r20R+dSob6NB.gz, Message-ID: <[email protected]>, mail_id: r20R+dSob6NB, Hits: 1005.07, size: 935, 580 ms
mail postfix/smtp[1931]: 686E51BE4: to=<[email protected]>, relay=127.0.0.1[127.0.0.1]:10024, delay=0.72, delays=0.1/0.02/0.02/0.57, dsn=2.5.0, status=sent (250 2.5.0 Ok, id=01907-01, DISCARD(bounce.suppressed))
mail postfix/qmgr[1790]: 686E51BE4: removed
8、安装Web Mail
下载Roundcubemail
地址:http://roundcube.net/download
安装php相关软件
Roundcubemail 是用php编写的一套系统,依赖php的一下包,因此我们把缺少的php包安装上。
[root@mail ~]# yum install -y php-xml
安装Roundcubemail
所谓“安装”也就是把Roundcubemail软件包解压缩到WEB服务器的DocumentRoot路径下:
[root@mail ~]# tar xvf roundcubemail-0.7.2.tar.gz
[root@mail ~]# mv roundcubemail-0.7.2/* /var/www/html/
配置Mysql数据库
建立roundcubemail数据库和Mysql用户
mysql> CREATE DATABASE roundcubemail;
mysql> GRANT ALL PRIVILEGES ON roundcubemail.* TO roundcubemail@localhost IDENTIFIED BY 'pa5swd';
初始化Mysql数据库
[root@mail ~]# mysql roundcubemail < /var/www/html/SQL/mysql.initial.sql
查看数据库:
mysql> use roundcubemail;
Reading table information for completion of table and column names
You can turn off this feature to get a quicker startup with -A
Database changed
mysql> show tables;
+-------------------------+
| Tables_in_roundcubemail |
+-------------------------+
| cache |
| cache_index |
| cache_messages |
| cache_thread |
| contactgroupmembers |
| contactgroups |
| contacts |
| dictionary |
| identities |
| searches |
| session |
| users |
+-------------------------+
12 rows in set (0.01 sec)
配置Roundcubemail
配置数据库配置文件
[root@mail ~]# cd /var/www/html/config/
[root@mail config]# cp db.inc.php.dist db.inc.php
修改/var/www/html/config/db.inc.php文件,做如下修改:
$rcmail_config['db_dsnw'] = 'mysql://roundcubemail:pa5swd@localhost/roundcubemail';
配置主配置文件
[root@mail config]# cp main.inc.php.dist main.inc.php
修改/var/www/roundcubemail/config/main.inc.php文件,做如下修改:
$rcmail_config['default_host'] = 'localhost';
$rcmail_config['username_domain'] = 'example.com';
$rcmail_config['mail_domain'] = 'example.com';
$rcmail_config['smtp_server'] = 'localhost';
$rcmail_config['product_name'] = 'Example Webmail';
重新启动httpd服务
[root@mail config]# /etc/init.d/httpd restart
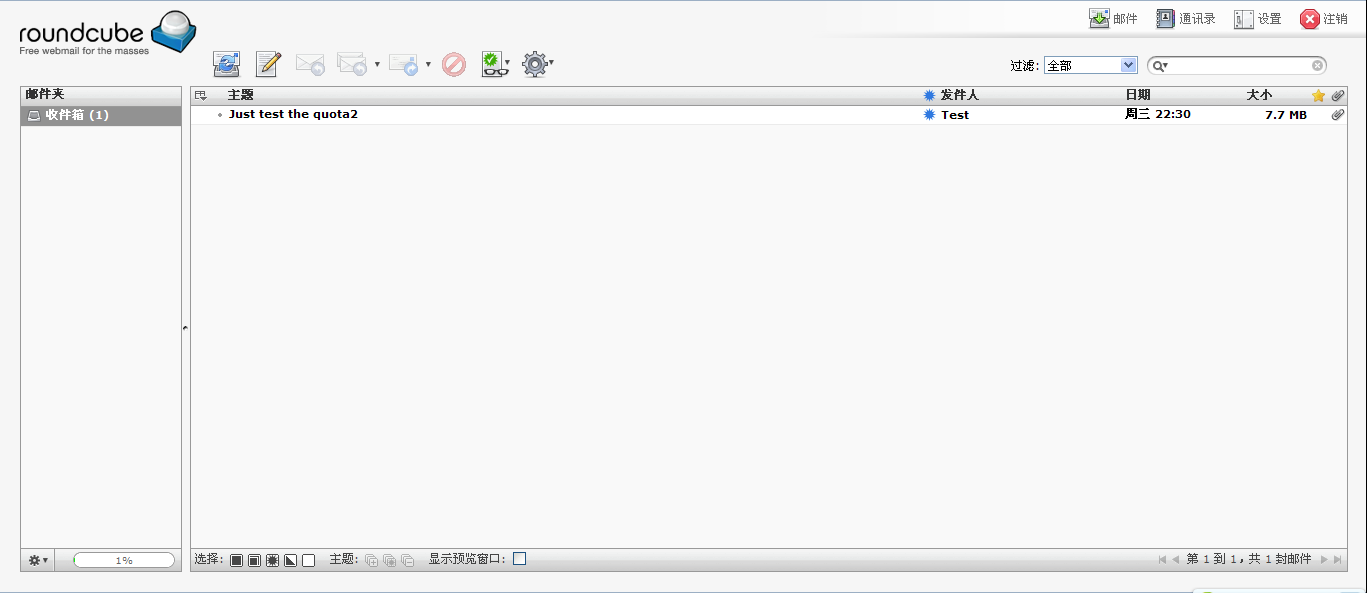
通过浏览器访问,如下图界面正常显示
配置managesieve插件
因为我公司需要用到邮件过滤和Vacation功能,所以要安装这个功能。
在Doevecot2.0之后的版本,如果需要做邮件过滤的功能需要dovecot-pigeonhole扩展包的支持。
[root@mail config]# yum install dovecot-pigeonhole –y
配置dovecot配置文件
修改/etc/dovecot/dovecot.conf文件,做如下修改:
protocols = pop3 imap sieve
修改/etc/dovecot/conf.d/15-lda.conf文件,做如下修改:
mail_plugins = quota sieve
重新启动dovecot
[root@mail ~]# /etc/init.d/dovecot restart
Dovecot监听4190端口:
[root@mail config]# netstat -tunlp | grep 4190
tcp 0 0 0.0.0.0:4190 0.0.0.0:* LISTEN 2188/dovecot
managesieve配置文件修改,将模板复制成config.inc.php,做如下修改:
[root@mail config]# cd /var/www/html/plugins/managesieve/
[root@mail managesieve]# cp config.inc.php.dist config.inc.php
[root@mail managesieve]# vim config.inc.php
$rcmail_config['managesieve_port'] = 4190;
使插件生效
修改/var/www/html/config/main.inc.php文件
$rcmail_config['plugins'] = array('managesieve');
测试插件
Managesieve界面

本人技术有限,如有误错请指正,谢谢