The Apache Open For Business Project 学习与安装
---------------------------------- 学习 ----------------------------------
OFBiz百度简介:
http://baike.baidu.com/view/638900.htm
Apache OFBiz官网:
http://ofbiz.apache.org/
---------------------------------- 下载OFBiz安装包 ----------------------------------
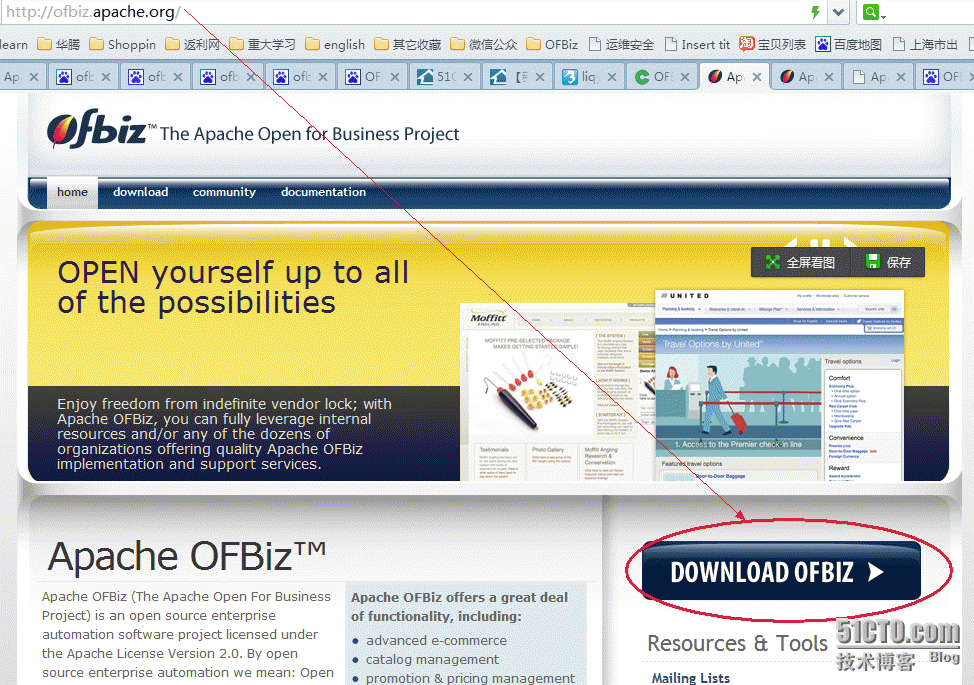
1、进入OFBiz官网,地址http://ofbiz.apache.org/,点击“DOWNLOAD OFBIZ”(如下图所示)进入下载界面;
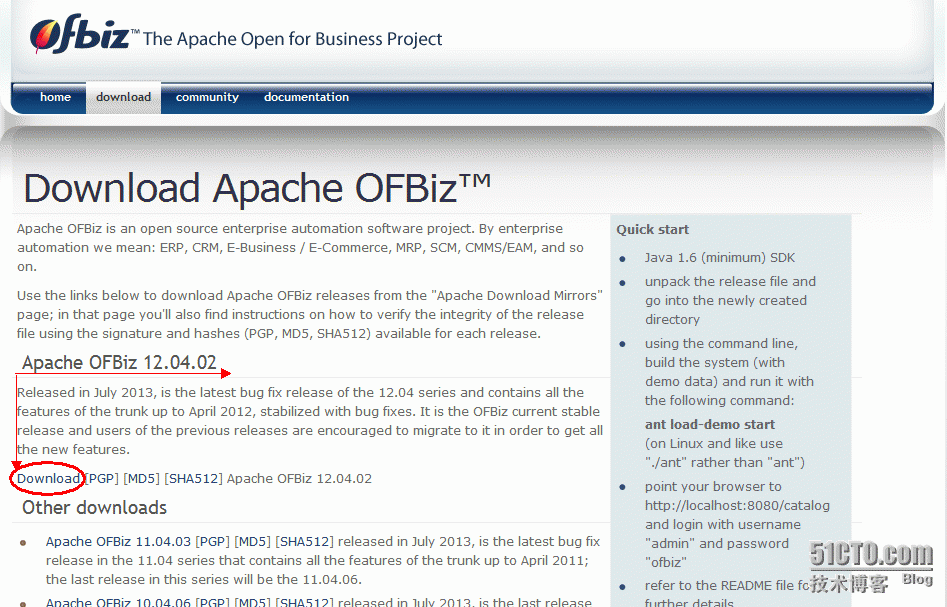
 2、选择最新版“Apache OFBiz 12.04.02”,点击“Download”(如下图所示)下载;

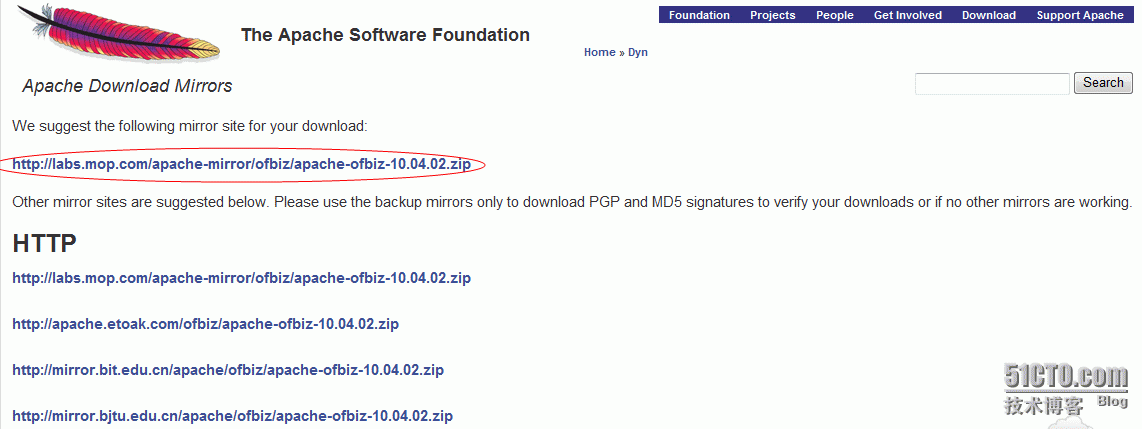
3:根据网站建议“We suggest the following mirror site for your download:”,点击连接(如下图所示)下载,保存即可;

---------------------------------- 安装 ----------------------------------
OFBiz的安装实际上很简单,如果只是简单的安装。
不需要结合mysql或者oracle之类的数据库,那么直接解压完了,分别按照说明里面的分两步运行就可以(如解压到E盘下面,路径为E:\apache-ofbiz-12.04.02):
①先cmd进入到命令行模式下(默认进入C盘),cd到你当前的OFBiz的工作环境
(输入命令“cd /d E:\apache-ofbiz-12.04.02”),速成${OFBIZ_HOME},也就是你的解压环境(E:\apache-ofbiz-12.04.02)。然后运行 ant load-demo(以往版本运行 ant run-install)或"java -jar ofbiz.jar install",大概要运行二十分钟左右。运行完成如下图所示:

②然后运行 startofbiz(即双击E:\apache-ofbiz-12.04.02\tools\startofbiz.bat) ,等五六分钟就可以访问了http://localhost:8080/ecommerce
但是要结合mysql安装还是要修改一下工程里面的文件的,下面是安装步骤。
一:安装mysql。
详细参照mysql的基本安装方法,主要是要在mysql里面建立OFBiz所需要的数据库名称和用户,我们可以利用Navicat连接mysql,并且新建立一个数据库ofbiz。新建一个用户ofbiz和密码ofbiz,并且赋予ofbiz全部权限。
二:修改配置文件。
① 拷贝mysql的jdbc驱动到${OFBIZ_HOME}/framework/entity/lib/jdbc下,否则会编译的时候报没有com.mysql.jdbc.Driver驱动类。
② 解压apache-ofbiz-10.04.zip到一个目录下面,我们取名${OFBIZ_HOME},到${OFBIZ_HOME}/framework/entity/config目录下,里面有个entityengine.xml,利用文本工具打开。因为默认的数据库为derby,所以要把localderby改成
<delegator name="default" entity-model-reader="main" entity-group-reader="main" entity-eca-reader="main" distributed-cache-clear-enabled="false">
<group-map group-name="org.ofbiz" datasource-name="localmysql"/>
<group-map group-name="org.ofbiz.olap" datasource-name="localmysql"/>
<group-map group-name="org.ofbiz.tenant" datasource-name="localmysql"/>
</delegator>
<delegator name="default-no-eca" entity-model-reader="main" entity-group-reader="main" entity-eca-reader="main" entity-eca-enabled="false" distributed-cache-clear-enabled="false">
<group-map group-name="org.ofbiz" datasource-name="localmysql"/>
<group-map group-name="org.ofbiz.olap" datasource-name="localmysql"/>
<group-map group-name="org.ofbiz.tenant" datasource-name="localmysql"/>
</delegator>
<!-- be sure that your default delegator (or the one you use) uses the same datasource for test. You must run "ant run-install" before running "ant run-tests" -->
<delegator name="test" entity-model-reader="main" entity-group-reader="main" entity-eca-reader="main">
<group-map group-name="org.ofbiz" datasource-name=" localmysql "/>
<group-map group-name="org.ofbiz.olap" datasource-name=" localmysql "/>
<group-map group-name="org.ofbiz.tenant" datasource-name=" localmysql "/>
</delegator>
③ 然后找到我们的mysql配置信息的地方,里面保存这基本的mysql配置信息。把这段修改成
<datasource name="localmysql"
helper-class="org.ofbiz.entity.datasource.GenericHelperDAO"
field-type-name="mysql"
check-on-start="true"
add-missing-on-start="true"
check-pks-on-start="false"
use-foreign-keys="true"
join-style="ansi-no-parenthesis"
alias-view-columns="false"
drop-fk-use-foreign-key-keyword="true"
engine="InnoDB" <!-- 现在mysql一般的引擎都是InnoDB,并且不再用table-type,改成engine -->
character-set="utf8" <!-- 为了支持国际化中文数据库字符编码要改成utf8,注意不要写成utf-8,这个比较容易出错 -->
collate="utf8_general_ci">
<read-data reader-name="seed"/>
<read-data reader-name="seed-initial"/>
<read-data reader-name="demo"/>
<read-data reader-name="ext"/>
<inline-jdbc
jdbc-driver="com.mysql.jdbc.Driver"
jdbc-uri="jdbc:mysql://127.0.0.1/ofbiz?autoReconnect=true"
jdbc-username="ofbiz"<!-- 这里都是数据库的基本配置信息,改成自己对应的基本不会有问题-->
jdbc-password="ofbiz"
isolation-level="ReadCommitted"
pool-minsize="2"
pool-maxsize="250"
time-between-eviction-runs-millis="600000"/><!-- Please note that at least one person has experienced a problem with this value with MySQL
and had to set it to -1 in order to avoid this issue.
For more look at http://markmail.org/thread/5sivpykv7xkl66px and http://commons.apache.org/dbcp/configuration.html-->
<!-- <jndi-jdbc jndi-server-name="localjndi" jndi-name="java:/MySqlDataSource" isolation-level="Serializable"/> -->
</datasource>
三:运行。
① 先cmd进入到命令行模式下,cd到你当前的OFBiz的工作环境,速成${OFBIZ_HOME},也就是你的解压环境。然后运行 ant run-install。大概要运行十来分钟,如果表都建好了说明安装已经成功了。
② 然后运行 startofbiz ,等五六分钟就可以访问了http://localhost:8080/ecommerce。