配置gitlab环境实现代码管理及Web Hook测试和ldap认证
前沿:
对于代码库感触有点多,用过redmine(差点忘了名字),还有就是gitweb,最后就是gitlab 。 gitlab是我用的很舒服的东西,在2012就接触了,当时开发水平见不得人,主要上传的还是常用安装配置脚本、简单的cs端,及ganglia插件之类的。
在以前的以前的公司,我也负责维护过gitlab,但是那边的很多需求,比如自动化测试,提供git-shell接口啥的,需要懂ruby,算了,玩不转。。so, 就把这个事给推了,让开发自己搞了。 据说部门直接招了一个rubu搞gitlab的二次开发 ! 来了新公司,这边的代码库用的实在是不习惯,这个星期自己配置了gitlab用来上传代码和管理。
申请了一个服务器,居然是ubuntu ! 是别的开发剩下的,算了,能用就挺好的。再跟他们扯皮,估计就直接给你一个kvm主机了。
基本的环境,你懂的!
sudo apt-get install -y build-essential zlib1g-dev libyaml-dev libssl-dev libgdbm-dev libreadline-dev libncurses5-dev libffi-dev curl git-core openssh-server redis-server checkinstall libxml2-dev libxslt-dev libcurl4-openssl-dev libicu-dev
配置ruby环境,其实个人建议直接apt-get install ruby 就好了,编译实在是墨迹!
mkdir /tmp/ruby && cd /tmp/ruby
curl --progress http://ftp.ruby-lang.org/pub/ruby/1.9/ruby-1.9.3-p392.tar.gz | tar xz
cd ruby-1.9.3-p392
./configure
make
sudo make install
安装配置 bundler
sudo gem install bundler

# 创建用户
sudo adduser --disabled-login --gecos 'GitLab' git

# 登录第三步创建的 git 用户,克隆 gitlab-shell
sudo su git
cd /home/git
git clone https://github.com/gitlabhq/gitlab-shell.git
cd gitlab-shell
cp config.yml.example config.yml
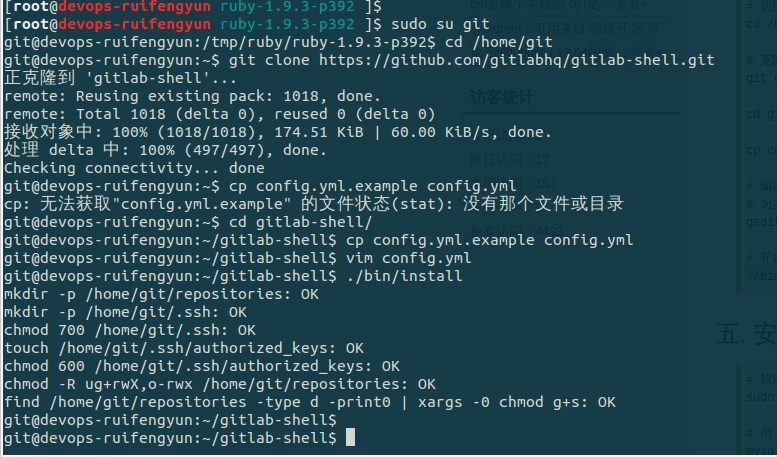
# 给主机域名.例如 'http://domain.com/',本地局域网安装的话默认localhost也可以本地的ip地址,我这边直接用localhost
vim config.yml
# 开始安装.(这里就等吧~ )
./bin/install
# 软件源安装 mysql 数据库,过程中会让你输入两次 mysql root 用户的密码,牢记!
sudo apt-get install -y mysql-server mysql-client libmysqlclient-dev
mysql -u root -p
CREATE USER 'gitlab'@'localhost' IDENTIFIED BY '123123';
# 创建 gitlabhq_production 数据库
mysql> CREATE DATABASE IF NOT EXISTS `gitlabhq_production` DEFAULT CHARACTER SET `utf8` COLLATE `utf8_unicode_ci`;
# 将 gitlabhq_production 数据库的增删改查 等权限赋予 gitlab 用户
mysql> GRANT SELECT, LOCK TABLES, INSERT, UPDATE, DELETE, CREATE, DROP, INDEX, ALTER ON `gitlabhq_production`.* TO 'gitlab'@'localhost';
# 退出 mysql 数据库
mysql> \q
# 尝试用 gitlab 用户连接 gitlabhq_production 数据库,登录成功(注:出现 mysql>)说明数据库配置完成.
sudo -u git -H mysql -u gitlab -p -D gitlabhq_production

(提示这个,是因为你的git用户的git命令没有在sudoers权限授权的原因。)
# gitlab 要安装到 git 用户的 home 目录下.
cd /home/git
# 克隆 gitlab 项目,并切换分支, 配置文件
sudo -u git -H git clone https://github.com/gitlabhq/gitlabhq.git gitlab
cd /home/git/gitlab
# 切换到 gitlab 的 5.3 分支.
sudo -u git -H git checkout 5-3-stable
cd /home/git/gitlab
# 复制 gitlab 的示例配置文件到指定目录
sudo -u git -H cp config/gitlab.yml.example config/gitlab.yml
# 如果用的不是本地服务器,更改 localhost 为 gitlab 的服务器域名
sudo -u git -H vim config/gitlab.yml
# 确保当前用户对 gitlab 的 log 和 tmp 文件有读写权限.
sudo chown -R git log/
sudo chown -R git tmp/
sudo chmod -R u+rwX  log/
sudo chmod -R u+rwX  tmp/
sudo -u git -H mkdir /home/git/gitlab-satellites
sudo -u git -H mkdir tmp/pids/
sudo -u git -H mkdir tmp/sockets/
sudo chmod -R u+rwX  tmp/pids/
sudo chmod -R u+rwX  tmp/sockets/
sudo -u git -H mkdir public/uploads
sudo chmod -R u+rwX  public/uploads
sudo -u git -H cp config/puma.rb.example config/puma.rb
# 找到其中有一行 # workers 2,去掉前面的 # 并将 2 改为 3.
sudo -u git -H vim config/puma.rb
# 配置 gitlab 的全局设置.
sudo -u git -H git config --global user.name "GitLab"
sudo -u git -H git config --global user.email "gitlab@localhost"
# 复制示例Mysql配置文件到指定目录
sudo -u git cp config/database.yml.mysql config/database.yml
# 修改里面的 root 为 gitlab, 密码为创建的 gitlab mysql 用户密码
sudo vim config/database.yml
cd /home/git/gitlab
sudo gem install charlock_holmes --version '0.6.9.4'
sudo -u git -H bundle install --deployment --without development test postgres
sudo -u git -H bundle exec rake gitlab:setup RAILS_ENV=production
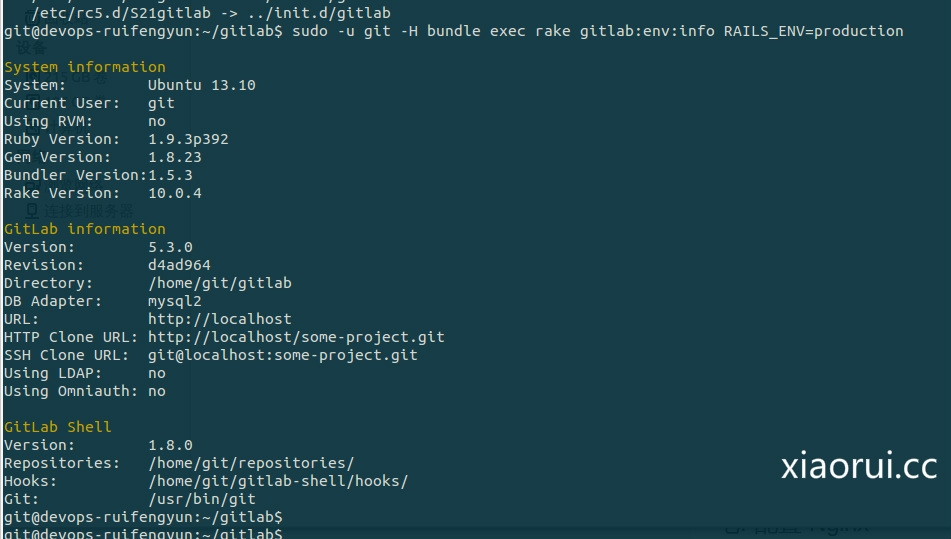
# 下载 gitlab 的 开始/停止 脚本,并且加入当前用户的可执行权限.
sudo cp lib/support/init.d/gitlab /etc/init.d/gitlab
sudo chmod +x /etc/init.d/gitlab
# 添加 gitlab 的开机启动
sudo update-rc.d gitlab defaults 21
# 检查 gitlab 的状态和环境配置是否正确.
sudo -u git -H bundle exec rake gitlab:env:info RAILS_ENV=production
# 启动 gitlab
sudo service gitlab start
# 或者
sudo /etc/init.d/gitlab restart
好了,这样gitlab的配置都算ok啦~ 咱们现在搞搞gitlab最主要的页面部分了!
安装配置nginx,你懂的~
(因为我这边的nginx有点复杂参杂着lua和uwsgi,所以折腾的时候费了不少时,其实很简单的问题,让我折腾复杂了。。。呵呵)
apt-get install nginx
sudo cp lib/support/nginx/gitlab /etc/nginx/sites-available/gitlab
sudo ln -s /etc/nginx/sites-available/gitlab /etc/nginx/sites-enabled/gitlab
nginx.conf的server块的配置 !
server {
  listen 80;        # e.g., listen 192.168.1.1:80; In most cases *:80 is a good idea
  server_name ceshi.xiaorui.cc;     # e.g., server_name source.example.com;
  server_tokens off;     # don't show the version number, a security best practice
  root /home/git/gitlab/public;
  # individual nginx logs for this gitlab vhost
  access_log  /var/log/nginx/gitlab_access.log;
  error_log   /var/log/nginx/gitlab_error.log;
  location / {
    # serve static files from defined root folder;.
    # @gitlab is a named location for the upstream fallback, see below
    try_files $uri $uri/index.html $uri.html @gitlab;
  }
  # if a file, which is not found in the root folder is requested,
  # then the proxy pass the request to the upsteam (gitlab unicorn)
  location @gitlab {
    proxy_read_timeout 300; # https://github.com/gitlabhq/gitlabhq/issues/694
    proxy_connect_timeout 300; # https://github.com/gitlabhq/gitlabhq/issues/694
    proxy_redirect     off;
    proxy_set_header   X-Forwarded-Proto $scheme;
    proxy_set_header   Host              $http_host;
    proxy_set_header   X-Real-IP         $remote_addr;
    proxy_pass http://gitlab;
  }
}
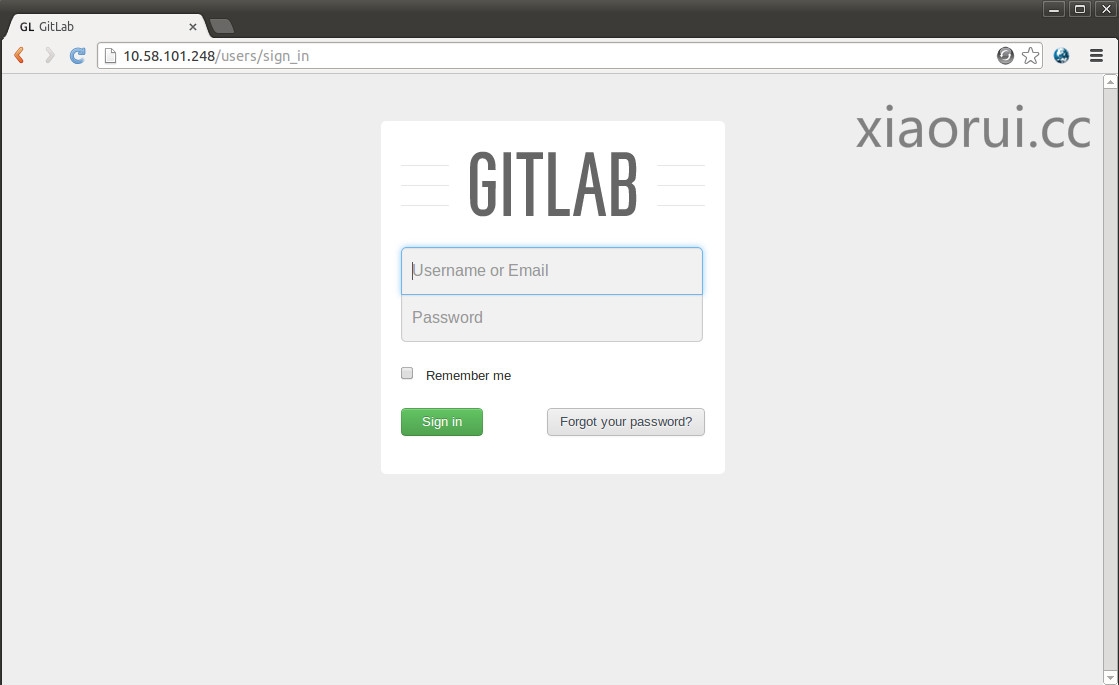
好了,咱们就可以登录了!
默认的帐号和密码是
[email protected]
5iveL!fe
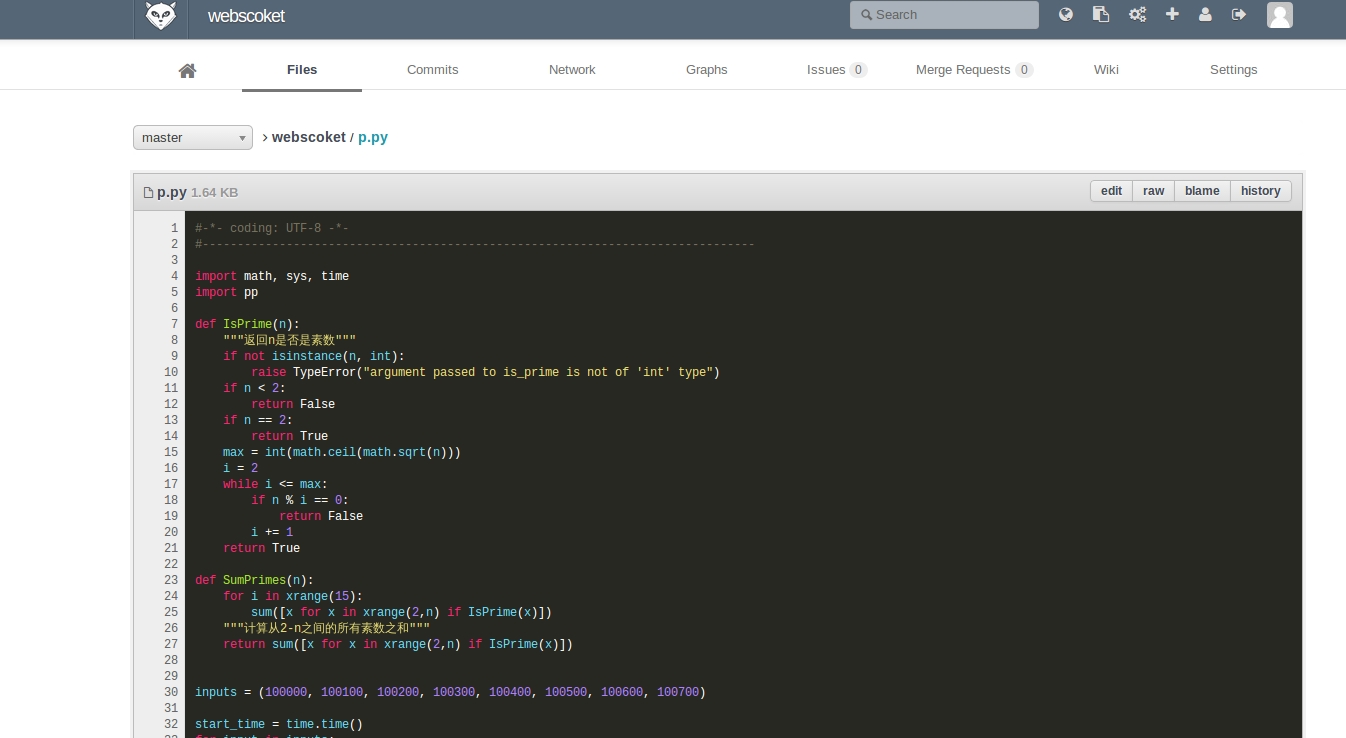
这是我刚才上传的代码,代码的样式主题还是很时尚的。

代码的高亮显示效果,还不错哈~
gitlab针对ldap的认证,很容易就可以实现,毕竟帐号管理自己做太麻烦啦,联合windows ad的话,就好办多啦。
vim /home/git/gitlab/config/gitlab.yml
## LDAP settings
ldap:
  enabled: true
  host: '10.58.1.33'
  base: '_ruifengyun'
  port: 636
  uid: 'sAMAccountName'
  method: 'ssl' # "ssl" or "plain"
  bind_dn: ''
  password: 'xxx'
我这边gitlab的邮件提醒不好用,咱们可以直接用smtp的方式!
cd /home/git/gitlab/
vi config/environments/production.rb
在# config.action_mailer.delivery_method = :sendmail下加入
config.action_mailer.delivery_method = :smtp
config.action_mailer.perform_deliveries = true
config.action_mailer.raise_delivery_errors = true
config.action_mailer.smtp_settings = {
 :address              => "smtp.gmail.com",
 :port                 => 587,
 :domain               => 'gmail.com',
 :user_name            => '[email protected]',
 :password             => 'password',
 :authentication       =>  :plain,
 :enable_starttls_auto => true
}
编辑config/gitlab.yml
vi config/gitlab.yml
对应修改一下配置
email:
  from: [email protected]
  protocol: http
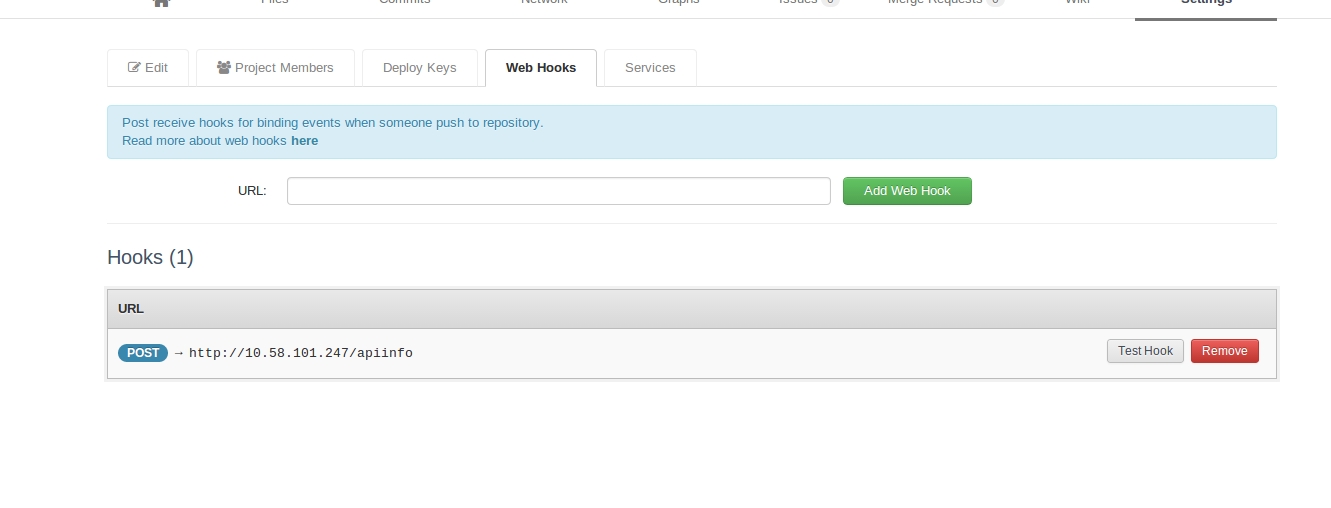
官方给了例子,POST过来的是一个json串,咱们在服务器端接收后,就可以做自己喜欢的事情了。
{
  "before": "95790bf891e76fee5e1747ab589903a6a1f80f22",
  "after": "da1560886d4f094c3e6c9ef40349f7d38b5d27d7",
  "ref": "refs/heads/master",
  "user_id": 4,
  "user_name": "John Smith",
  "repository": {
    "name": "Diaspora",
    "url": "git@localhost:diaspora.git",
    "description": "",
    "homepage": "http://localhost/diaspora",
  },
  "commits": [
    {
      "id": "b6568db1bc1dcd7f8b4d5a946b0b91f9dacd7327",
      "message": "Update Catalan translation to e38cb41.",
      "timestamp": "2011-12-12T14:27:31+02:00",
      "url": "http://localhost/diaspora/commits/b6568db1bc1dcd7f8b4d5a946b0b91f9dacd7327",
      "author": {
        "name": "Jordi Mallach",
        "email": "[email protected]",
      }
    },
    // ...
    {
      "id": "da1560886d4f094c3e6c9ef40349f7d38b5d27d7",
      "message": "fixed readme",
      "timestamp": "2012-01-03T23:36:29+02:00",
      "url": "http://localhost/diaspora/commits/da1560886d4f094c3e6c9ef40349f7d38b5d27d7",
      "author": {
        "name": "GitLab dev user",
        "email": "gitlabdev@dv6700.(none)",
      },
    },
  ],
  "total_commits_count": 4,
};
PHP端的一个接收实现:
<?php
$mirrordir='/srv/http/gitlabhooktest/gitmirror';
$gitdir=$mirrordir."/.git";
$json= file_get_contents('php://input');
#error_log($json);
$jsarr=json_decode($json,true);
#error_log(print_r($jsarr,true));
$branch=$jsarr["ref"];
if($branch=='refs/heads/master'){
 $cmd="git --work-tree=$mirrordir --git-dir=$gitdir pull";
 #error_log($cmd);
 exec($cmd);
}
我用python实现post的一个接口:
app.route('/apiinfo', methods = ['POST'])
def fortx():
    print request.data
    print request.form.keys()
    print request.form.values
    return "..."
原文:http://rfyiamcool.blog.51cto.com/1030776/1365521
我现在正在用gitlab的web hook的功能,类似与消息钩子,url回调的东西,你上传了代码这边可以把信息post到你指定的api上。
我们可以用gitlab 的 web hook功能做一个自动化测试,指定一台测试服务器跑测试,测试ok后,再回个邮件或者是真实的merge代码等等。
好了,就说道这里了,gitlab 搭建有点复杂,尤其是git clone gitlab的时候,经常会断,可以加个ssh代理后,再搞吧 ~
用ubuntu 安装配置gitlab遇到的问题总结小叙下:
push和pull的时候遇到的问题
Username for 'http://10.58.101.248:9000': root
Password for 'http://[email protected]:9000':
Counting objects: 230, done.
Delta compression using up to 4 threads.
Compressing objects: 100% (223/223), done.
error: RPC failed; result=22, HTTP code = 411
fatal: The remote end hung up unexpectedly
Writing objects: 100% (229/229), 3.43 MiB | 0 bytes/s, done.
Total 229 (delta 32), reused 0 (delta 0)
fatal: The remote end hung up unexpectedly
Everything up-to-date
需要在git端和nginx端配置nginx client_max_body_size的大小,不然在上传文件的时候会报错。
GitLab 的代码仓库支持 SSH 和 HTTPS 两种访问方式:
先说用SSH 访问,需要 ssh-keygen 生成密钥,把公钥(id_rsa.pub)添加到 GitLab 里面去。
但是有些人去pull和push的时候,会经常遇到提示 git@ip 的密码,[email protected]'s password:
这个时候很有可能是你的配置文件的权限有问题,或者是你的ssh配置文件,禁止了密码登陆,PasswordAuthentication no改为yes。
还有一个可能出现的问题先前的配置引起的。 --disabled-login不运行passwd设置密码,用户只有设置了密码才能使用他的账号。所以就出问题了,表现如题所述。
解决的方法是:
sudo adduser --disabled-password --gecos 'GitLab' git
--disabled-password同--disabled-login,但可以登录(如使用SSH RSA keys),但不能使用密码认证。
HTTPS 访问,每次连接服务器都要输入用户名(注册邮箱)和密码。可以作为在公用电脑上的临时访问方式。
如何配置https安全的访问,其实很简单,先生成证书,然后改改nginx.conf配置文件就欧了。 建议大家用https的方式,来访问gitlab。
server {
  listen 443;
  ssl                  on;
  ssl_certificate      /etc/nginx/sites-available/server.crt;
  ssl_certificate_key  /etc/nginx/sites-available/server.key;
因为咱们的证书是自生成的,git不认所以需要在git的环境里面配置不要检测https的证书。
export GIT_SSL_NO_VERIFY=1