LAMP平台实现之PHP加速,xcache
1、安装mysql-5.5.33-linux2.6-x86_64
#tar xf mysql-5.5.33-linux2.6-x86_64.tar.gz  �CC /usr/local/
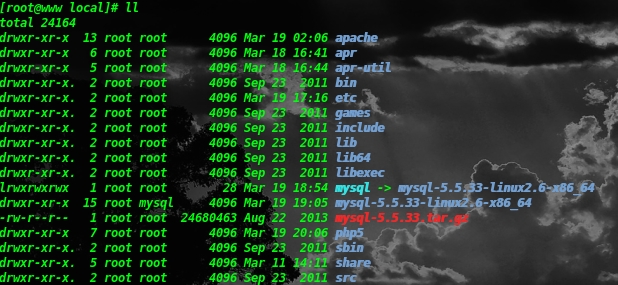
# ln -sv mysql-5.5.33-linux2.6-x86_64 mysql
# cd mysql
#mkdir /mydata
# cat INSTALL-BINARY | less
shell> groupadd mysql
shell> useradd -r -g mysql mysql
shell> cd /usr/local
shell> cd mysql
shell> chown -R mysql .
shell> chgrp -R mysql .
shell> scripts/mysql_install_db --user=mysql --datadir=/mydata
shell> chown -R root .
shell> chown -R mysql  /mydata
# Next command is optional
shell> cp support-files/my-medium.cnf /etc/my.cnf
shell> bin/mysqld_safe --user=mysql &
# Next command is optional
shell> cp support-files/mysql.server /etc/init.d/mysql.server


修改此文件中thread_concurrency的值为你的CPU个数乘以2,比如这里使用如下行:
# thread_concurrency = 2
另外还需要添加如下行指定mysql数据文件的存放位置:
datadir = /mydata

为mysql提供sysv服务脚本:并添加服务,还需要添加环境变量
# cd /usr/local/mysql
# cp support-files/mysql.server  /etc/rc.d/init.d/mysqld
# chmod +x /etc/rc.d/init.d/mysqld
# chkconfig --add mysqld
# chkconfig mysqld on
# vim /etc/profile.d/mysql.sh
# export PATH=/usr/local/mysql/bin:$PATH
# .  /etc/profile.d/mysql.sh
# echo $PATH

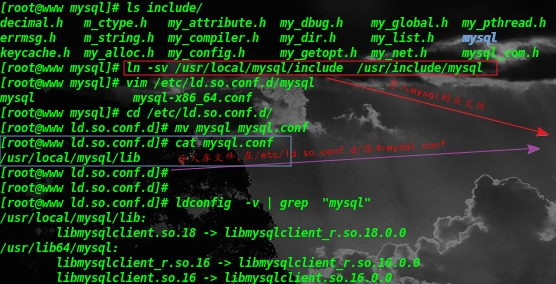
输出mysql的头文件至系统头文件路径/usr/include,并且输出库文件
# ln -sv /usr/local/mysql/include /usr/include/mysql
# echo '/usr/local/mysql/lib' > /etc/ld.so.conf.d/mysql.conf
# ldconfig

2、编译安装php-5.4.26
说明:
1、这里为了支持apache的worker或event这两个MPM,编译时使用了--enable-maintainer-zts选项。
2、如果使用PHP5.3以上版本,为了链接MySQL数据库,可以指定mysqlnd,这样在本机就不需要先安装MySQL或MySQL开发包了。mysqlnd从php 5.3开始可用,可以编译时绑定到它(而不用和具体的MySQL客户端库绑定形成依赖),但从PHP 5.4开始它就是默认设置了。
# ./configure --with-mysql=mysqlnd --with-pdo-mysql=mysqlnd --with-mysqli=mysqlnd
# yum -y groupinstall "Desktop Platform Development"
# yum -y install bzip2-devel libmcrypt-devel
# tar xf php-5.4.26.tar.bz2
# cd php-5.4.26
# ./configure --prefix=/usr/local/php --with-mysql=/usr/local/mysql --with-openssl --with-mysqli=/usr/local/mysql/bin/mysql_config --enable-mbstring --with-freetype-dir --with-jpeg-dir --with-png-dir --with-zlib --with-libxml-dir=/usr --enable-xml  --enable-sockets --with-apxs2=/usr/local/apache/bin/apxs --with-mcrypt  --with-config-file-path=/etc --with-config-file-scan-dir=/etc/php.d --with-bz2  --enable-maintainer-zts
# make
# make intall
# cp php.ini-production /etc/php.ini
# vim /etc/httpd/httpd.conf
# AddType application/x-httpd-php  .php
# AddType application/x-httpd-php-source  .phps
# DirectoryIndex  index.php  index.html

如上图所示:为php提供配置文件:
# cp php.ini-production /etc/php.ini


3、安装xcache,为php加速
安装
# tar xf xcache-3.0.1.tar.gz
# cd xcache-3.0.1
# /usr/local/php/bin/phpize
# ./configure --enable-xcache --with-php-config=/usr/local/php/bin/php-config
# make && make install
安装结束时,会出现类似如下行:
Installing shared extensions: /usr/local/php/lib/php/extensions/no-debug-zts-20100525/
2、编辑php.ini,整合php和xcache:
首先将xcache提供的样例配置导入php.ini
# mkdir /etc/php.d
# cp xcache.ini /etc/php.d
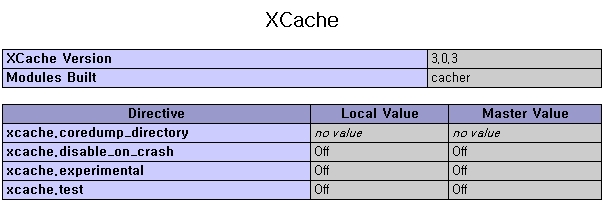
接下来编辑/etc/php.d/xcache.ini,找到zend_extension开头的行,修改为如下行:
zend_extension = /usr/local/php/lib/php/extensions/no-debug-zts-20100525/xcache.so
注意:如果php.ini文件中有多条zend_extension指令行,要确保此新增的行排在第一位。
